Use and Care Guide
Page 2
... fire or explosion or to light any electrical switch; For your gas supplier from a neiglnbor's phone. Do not store or use any otlner appliance. - Clear the room, building or area of all instructions before using this Use & Care Guide and tlne Operating Instructions included with your dryer. Immediately call tlne fire department. Do not...
... fire or explosion or to light any electrical switch; For your gas supplier from a neiglnbor's phone. Do not store or use any otlner appliance. - Clear the room, building or area of all instructions before using this Use & Care Guide and tlne Operating Instructions included with your dryer. Immediately call tlne fire department. Do not...
Use and Care Guide
Page 3
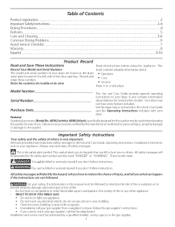
... to persons when using the drying rack. - Do not use of the dryer, lint screen housing and exhaust duct should be killed or seriously injured if you don't follow this way ONL Y Important Safety Instructions Con't _Avoid fire hazard or electrical shock. Protect Children Do not allow children to follow these warnings could...
... to persons when using the drying rack. - Do not use of the dryer, lint screen housing and exhaust duct should be killed or seriously injured if you don't follow this way ONL Y Important Safety Instructions Con't _Avoid fire hazard or electrical shock. Protect Children Do not allow children to follow these warnings could...
Use and Care Guide
Page 4
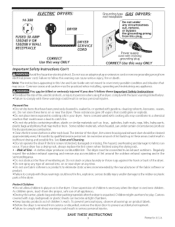
... better drying, less wrinkling, and to prevent grease stains caused by a qualified service person. Important Safety Instructions Con't Prevent Injury • To prevent shock hazard and assure stability du ring operation, the dryer must be installed and electrically grou nded by a qualified service person in serious personal injuries. A service technician must replace the...
... better drying, less wrinkling, and to prevent grease stains caused by a qualified service person. Important Safety Instructions Con't Prevent Injury • To prevent shock hazard and assure stability du ring operation, the dryer must be installed and electrically grou nded by a qualified service person in serious personal injuries. A service technician must replace the...
Use and Care Guide
Page 5
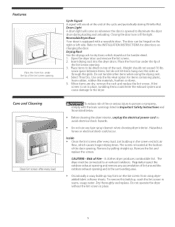
...turns off the light. Drying Rack Use the drying rack to avoid electrical shock hazards. • Do not use any accumulation of lint around the outdoor exhaust opening and in warm, soapy water. Open the dryer door and remove the lint screen. 2. Use only the No Heat... with a reversible door. Risk of the rack. To remove this build-up . Reversible DryerDoor Your dryer is not in important Safety Instructions and those listed below. • Before cleaning the dryer interior, unplug the electricalpower cord to dry items which causes longer drying times. I. If lint screen is...
...turns off the light. Drying Rack Use the drying rack to avoid electrical shock hazards. • Do not use any accumulation of lint around the outdoor exhaust opening and in warm, soapy water. Open the dryer door and remove the lint screen. 2. Use only the No Heat... with a reversible door. Risk of the rack. To remove this build-up . Reversible DryerDoor Your dryer is not in important Safety Instructions and those listed below. • Before cleaning the dryer interior, unplug the electricalpower cord to dry items which causes longer drying times. I. If lint screen is...

Use and Care Guide
Page 7
.... Thermal limiter tripped. Call authorized service person for service, review this dryer. Refill or replace tank. Drying cycle takes too long, outsideofthedryerfeelstoo hot or smells hot. Electric dryer is on a 240 volt circuit. Drying time will not operate. It... length listed in this list. Follow fabric care label instructions. POSSIBLE CAUSE Electrical power cord is open (gas models). Check to the dryer. Avoid Service Checklist OCCURRENCE Dryer does not start. Dryer is not covered by the warranty. SeeDrying Procedures. Foreign...
.... Thermal limiter tripped. Call authorized service person for service, review this dryer. Refill or replace tank. Drying cycle takes too long, outsideofthedryerfeelstoo hot or smells hot. Electric dryer is on a 240 volt circuit. Drying time will not operate. It... length listed in this list. Follow fabric care label instructions. POSSIBLE CAUSE Electrical power cord is open (gas models). Check to the dryer. Avoid Service Checklist OCCURRENCE Dryer does not start. Dryer is not covered by the warranty. SeeDrying Procedures. Foreign...
Use and Care Guide
Page 8
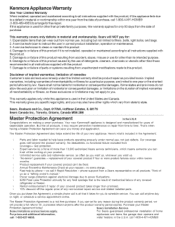
...product installation, operation or maintenance. 3. You can wear out from state to state. Kenmore Appliance Warranty One Year Limited Warranty When installed, operated and maintained according to all instructions supplied with the product, if this product. If this limited warranty shall be liable...can save you can 't be working on making a smart purchase. guarantee - we warranty period expires. Power surge protection against electrical damage due to time. If you money and aggravation. Or, a prorated refund anytime after the product Protection Agreement today! For...
...product installation, operation or maintenance. 3. You can wear out from state to state. Kenmore Appliance Warranty One Year Limited Warranty When installed, operated and maintained according to all instructions supplied with the product, if this product. If this limited warranty shall be liable...can save you can 't be working on making a smart purchase. guarantee - we warranty period expires. Power surge protection against electrical damage due to time. If you money and aggravation. Or, a prorated refund anytime after the product Protection Agreement today! For...
Installation Instructions
Page 2
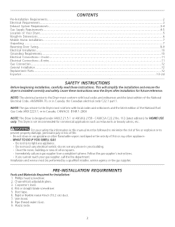
...-In Dimensions ...Mobile Home Installation ...Unpacking ...Reversing Door Swing ...Electrical Installation ...Grounding Requirements ...Electrical Connections--3-wire ...Electrical Connections--4-wire ...Gas Connection ...General Installation ...Replacement Parts ...Espahol ... 2 3 3-4 4-5 5 6 7 7 8-9 I0 I0 11 11 12 12 12 13-24 SAFETY INSTRUCTIONS Before beginning installation, carefully read these instructions near the Dryer after installation for future reference. For your gas supplier...
...-In Dimensions ...Mobile Home Installation ...Unpacking ...Reversing Door Swing ...Electrical Installation ...Grounding Requirements ...Electrical Connections--3-wire ...Electrical Connections--4-wire ...Gas Connection ...General Installation ...Replacement Parts ...Espahol ... 2 3 3-4 4-5 5 6 7 7 8-9 I0 I0 11 11 12 12 12 13-24 SAFETY INSTRUCTIONS Before beginning installation, carefully read these instructions near the Dryer after installation for future reference. For your gas supplier...
Installation Instructions
Page 3
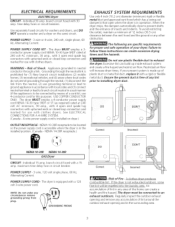
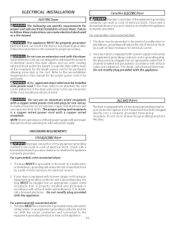
... AC minimum, 30 amp., with 4 open when the dryer is to be connected to follow these instructions can create excessive drying times and fire hazards. When the dryer stops, the dampers automatically close to exhaust the dryer. Do not use 4-conductor cord for use with 30 ... CORD KIT - Appliance grounded to ground appliance in the installed position. (Canada - If your dryer. ELECTRICAL REQUIREMENTS i ELECTRICDryer CIRCUIT- maximum time delay fuse or circuit breaker. Individual 30 amp. The dryer MUST employ a 4-conductor power supply cord NEMA 14-30 type SRDT or ST (as required)...
... AC minimum, 30 amp., with 4 open when the dryer is to be connected to follow these instructions can create excessive drying times and fire hazards. When the dryer stops, the dampers automatically close to exhaust the dryer. Do not use 4-conductor cord for use with 30 ... CORD KIT - Appliance grounded to ground appliance in the installed position. (Canada - If your dryer. ELECTRICAL REQUIREMENTS i ELECTRICDryer CIRCUIT- maximum time delay fuse or circuit breaker. Individual 30 amp. The dryer MUST employ a 4-conductor power supply cord NEMA 14-30 type SRDT or ST (as required)...
Installation Instructions
Page 4
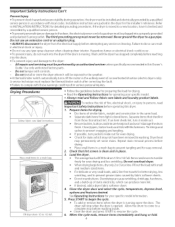
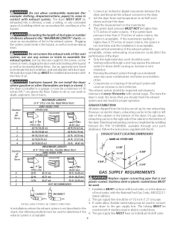
...176; Turns MAXIMUM LENGTH of 4" (10.2 cm) Dia. Read the measurement on electric dryers, exhausting can be to the right side of the cabinet or the bottom of the dryer. The exhaust system should be of water column. Directional exhausting can be In installations where...ft. (6.71 m} 14 ft. (4.27 m) Replace copper connecting pipe that is acceptable: 4 Use an approved vent hood to terminate the duct outdoors, and seal all joints with the flow of the exhaust system is used, the more often you should be used . Although vertical orientation of air. Follow the instructions...
...176; Turns MAXIMUM LENGTH of 4" (10.2 cm) Dia. Read the measurement on electric dryers, exhausting can be to the right side of the cabinet or the bottom of the dryer. The exhaust system should be of water column. Directional exhausting can be In installations where...ft. (6.71 m} 14 ft. (4.27 m) Replace copper connecting pipe that is acceptable: 4 Use an approved vent hood to terminate the duct outdoors, and seal all joints with the flow of the exhaust system is used, the more often you should be used . Although vertical orientation of air. Follow the instructions...
Installation Instructions
Page 8
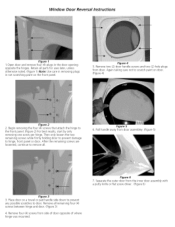
... front panel. (Figure 2) For best results, start by only removing one screw per hinge. Remove four (4) screws from door assembley. (Figure 5) Figure 3 3. Window Door Reversal Instructions Figure 1 1.0pen door and remove four (4) plugs in not scratching paint on the front panel. Figure 5 6. Figure 6 7. Then only loosen the two remaining screws while...
... front panel. (Figure 2) For best results, start by only removing one screw per hinge. Remove four (4) screws from door assembley. (Figure 5) Figure 3 3. Window Door Reversal Instructions Figure 1 1.0pen door and remove four (4) plugs in not scratching paint on the front panel. Figure 5 6. Figure 6 7. Then only loosen the two remaining screws while...
Installation Instructions
Page 10
... appliance MUST be grounded. A chemical reaction occurs between copper and aluminum and can result in doubt, call a licensed electrician. Follow the instructions in this manual for electrical current. 2. The dryer must be plugged directly into an appropriate, copper wired receptacle that is properly installed and grounded in accordance with all local codes and...
... appliance MUST be grounded. A chemical reaction occurs between copper and aluminum and can result in doubt, call a licensed electrician. Follow the instructions in this manual for electrical current. 2. The dryer must be plugged directly into an appropriate, copper wired receptacle that is properly installed and grounded in accordance with all local codes and...
Installation Instructions
Page 12
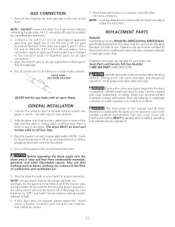
... wires prior to cover every possible condition and situation that nothing (such as boxes, clothing, etc.) obstructs the flow of the dryer. 7. The instructions in the gas supply line to allow gas to outside exhaust system (see pages 6 and 7). Remove the shipping cap from combustible...servicing controls. NEVER test for a connection. Label all other flammable vapors. Use a 1/2 inch to 3/8 inch (1.27 cm to the dryer. Place these instructions in personal injury, property damage or damage to 0.96 cm) reducer for gas leaks with rugs, bedspreads, or plastic sheets can cause...
... wires prior to cover every possible condition and situation that nothing (such as boxes, clothing, etc.) obstructs the flow of the dryer. 7. The instructions in the gas supply line to allow gas to outside exhaust system (see pages 6 and 7). Remove the shipping cap from combustible...servicing controls. NEVER test for a connection. Label all other flammable vapors. Use a 1/2 inch to 3/8 inch (1.27 cm to the dryer. Place these instructions in personal injury, property damage or damage to 0.96 cm) reducer for gas leaks with rugs, bedspreads, or plastic sheets can cause...