Installation Instructions
Page 1
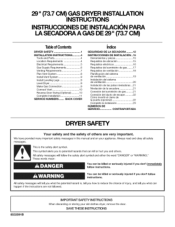
...discarding or storing your appliance. 29" (73.7 CM) GAS DRYER INSTALLATION INSTRUCTIONS INSTRUCCIONES DE INSTALACION PARA LA SECADORA A GAS DE 29" (73.7 CM) TableofContents DRYER SAFETY 1 INSTALLATION INSTRUCTIONS 4 Tools and Parts 4 Location Requirements 4 Electrical Requirements 5 Gas Supply Requirements 6 Venting Requirements 7 Plan Vent System 8 ...Install Vent System 9 Install Leveling Legs 9 Level Dryer 9 Make Gas Connection 9 Connect Vent 10 Reverse Door Swing (Optional 10 Complete Installation 11 SERVICE NUMBERS ....... ...
...discarding or storing your appliance. 29" (73.7 CM) GAS DRYER INSTALLATION INSTRUCTIONS INSTRUCCIONES DE INSTALACION PARA LA SECADORA A GAS DE 29" (73.7 CM) TableofContents DRYER SAFETY 1 INSTALLATION INSTRUCTIONS 4 Tools and Parts 4 Location Requirements 4 Electrical Requirements 5 Gas Supply Requirements 6 Venting Requirements 7 Plan Vent System 8 ...Install Vent System 9 Install Leveling Legs 9 Level Dryer 9 Make Gas Connection 9 Connect Vent 10 Reverse Door Swing (Optional 10 Complete Installation 11 SERVICE NUMBERS ....... ...
Installation Instructions
Page 2
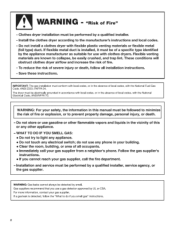
.... I the risk of fire or explosion, or to the manufacturer's instructions and local codes. Gas suppliers recommend that you smell gas" instructions. 2 These conditions will obstruct clothes dryer airflow and increase the risk of local codes, with flexible plastic venting materials or flexible metal (...CSA. m Do not install a clothes dryer with the National Fuel Gas Code, ANSi Z223.1iNFPA 54. do if you use a gas detector approved by a qualified installer. Follow the gas supplier's instructions. ® if you cannot reach your gas supplier from a neighbor's phone. For more...
.... I the risk of fire or explosion, or to the manufacturer's instructions and local codes. Gas suppliers recommend that you smell gas" instructions. 2 These conditions will obstruct clothes dryer airflow and increase the risk of local codes, with flexible plastic venting materials or flexible metal (...CSA. m Do not install a clothes dryer with the National Fuel Gas Code, ANSi Z223.1iNFPA 54. do if you use a gas detector approved by a qualified installer. Follow the gas supplier's instructions. ® if you cannot reach your gas supplier from a neighbor's phone. For more...
Installation Instructions
Page 3
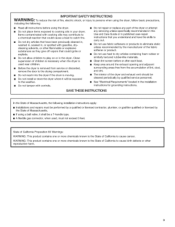
...the door to the drying compartment. [] Do not reach into the dryer if the drum is moving. [] Do not install or store the dryer where it shall be a T-handle type. [] A flexible gas connector, when used near children. [] Before the dryer is removed from the accumulation of lint, dust, and dirt. []... The interior of the dryer and exhaust vent should be exposed to the weather. ...
...the door to the drying compartment. [] Do not reach into the dryer if the drum is moving. [] Do not install or store the dryer where it shall be a T-handle type. [] A flexible gas connector, when used near children. [] Before the dryer is removed from the accumulation of lint, dust, and dirt. []... The interior of the dryer and exhaust vent should be exposed to the weather. ...
Installation Instructions
Page 4
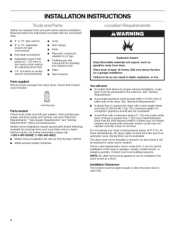
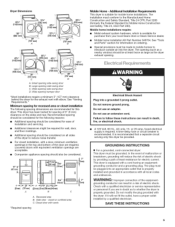
... Mobile Home Installation Kit. See "Venting Requirements." • A grounded electrical outlet located within 2 ft (610 mm) of either side of an automatic cycle. The dryer must be installed in garages, closets, mobile homes, or sleeping quarters. Some codes limit, or ... Check local codes and with automatic sensor cycles may not tumble properly and dryers with gas supplier, check existing gas supply, electrical supply and venting, and read "Electrical Requirements," "Gas Supply Requirements" and "Venting Requirements" before starting installation. Installation Clearances The location...
... Mobile Home Installation Kit. See "Venting Requirements." • A grounded electrical outlet located within 2 ft (610 mm) of either side of an automatic cycle. The dryer must be installed in garages, closets, mobile homes, or sleeping quarters. Some codes limit, or ... Check local codes and with automatic sensor cycles may not tumble properly and dryers with gas supplier, check existing gas supply, electrical supply and venting, and read "Electrical Requirements," "Gas Supply Requirements" and "Venting Requirements" before starting installation. Installation Clearances The location...
Installation Instructions
Page 5
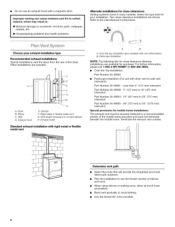
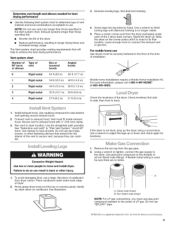
...Part 280). Louvered doors with a door, minimum ventilation openings in mobile homes to introduce outside air into the dryer. Minimum spacing for recessed area or closet installation The following reasons: • Additional spacing should be considered for...(57--8 r.m) / IL JL)I *26"_ Ik I Small opening hamper door *Most installations require a minimum 5" (127 mm) clearance behind the dryer for this dryer. Wide opening side-swing door B. Mobile home installations require: • Metal exhaust system hardware, which is suitable for purchase from your local Sears store...
...Part 280). Louvered doors with a door, minimum ventilation openings in mobile homes to introduce outside air into the dryer. Minimum spacing for recessed area or closet installation The following reasons: • Additional spacing should be considered for...(57--8 r.m) / IL JL)I *26"_ Ik I Small opening hamper door *Most installations require a minimum 5" (127 mm) clearance behind the dryer for this dryer. Wide opening side-swing door B. Mobile home installations require: • Metal exhaust system hardware, which is suitable for purchase from your local Sears store...
Installation Instructions
Page 6
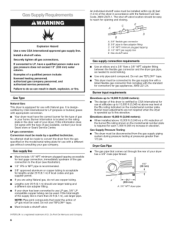
... correct burner for LP (propane or butane) gases with Natural gas. Gas Supply Pressure Testing • The dryer must be used . Securely tighten all gas connections. if connected to 10,000 ft (3,048 m) above 10,000 ft (3,048 m) a 4% reduction of the burner Btu rating shown... NPT adapter fitting between the flexible gas connector and the dryer gas pipe, as needed to flare adapter fitting C. 1/8" NPT minimum plugged tapping D. 1/2" NPT gas supply line E. Do not use with a different gas without consulting your dryer. This dryer must be connected to 10,000 ft (3,048 meters): • The ...
... correct burner for LP (propane or butane) gases with Natural gas. Gas Supply Pressure Testing • The dryer must be used . Securely tighten all gas connections. if connected to 10,000 ft (3,048 m) above 10,000 ft (3,048 m) a 4% reduction of the burner Btu rating shown... NPT adapter fitting between the flexible gas connector and the dryer gas pipe, as needed to flare adapter fitting C. 1/8" NPT minimum plugged tapping D. 1/2" NPT gas supply line E. Do not use with a different gas without consulting your dryer. This dryer must be connected to 10,000 ft (3,048 meters): • The ...

Installation Instructions
Page 7
.... • Exhaust vent must not be connected or secured with screws or other fastening devices that may be in its final location. Replace any gas vent, chimney, wall, ceiling, attic, crawlspace, or a concealed space of fire, this is recommended to achieve the best drying performance. Do ...style The angled hood style (shown here) is in the path of the vent, because they can be fully extended and supported when the dryer is acceptable. Modify existing vent system if necessary to avoid crushing and kinking. Elbows 45 ° elbows provide better airflow than 90 &#...
.... • Exhaust vent must not be connected or secured with screws or other fastening devices that may be in its final location. Replace any gas vent, chimney, wall, ceiling, attic, crawlspace, or a concealed space of fire, this is recommended to achieve the best drying performance. Do ...style The angled hood style (shown here) is in the path of the vent, because they can be fully extended and supported when the dryer is acceptable. Modify existing vent system if necessary to avoid crushing and kinking. Elbows 45 ° elbows provide better airflow than 90 &#...
Installation Instructions
Page 8
...using elbows or making turns, allow as much room as possible. • Bend vent gradually to a noncombustible portion of the dryer. Rigid metal or flexible metal vent G. Refer to woodwork, furniture, paint, wallpaper, carpets, etc. [] Housecleaning problems and...offset elbow B. • Donotuseanexhaushtoodwithamagnetilcatch. improper venting can cause moisture and lint to collect indoors, which may result in many varieties. B Am - Dryer B. Elbow C. Exhaust hood E. Over-the-top installation (also available with rigid metal or flexible metal vent " i. • .L A B...
...using elbows or making turns, allow as much room as possible. • Bend vent gradually to a noncombustible portion of the dryer. Rigid metal or flexible metal vent G. Refer to woodwork, furniture, paint, wallpaper, carpets, etc. [] Housecleaning problems and...offset elbow B. • Donotuseanexhaushtoodwithamagnetilcatch. improper venting can cause moisture and lint to collect indoors, which may result in many varieties. B Am - Dryer B. Elbow C. Exhaust hood E. Over-the-top installation (also available with rigid metal or flexible metal vent " i. • .L A B...
Installation Instructions
Page 9
...64 ft (20 m) 58 ft (17.7 m) 1 Rigid metal 54 ft (16.5 m) 48 ft (14.6 m) 2 Rigid metal 44 ft (13.4 m) 38 ft (11.6 m) 3 Rigid metal 35 ft (10.7 m) 29 ft (8.8 m) 4 Rigid metal 27 ft (8.2 m) 21 ft (6.4 m) 3, Examine leveling legs, find diamond marking. 4, Screw legs into the interior of cardboard from dryer carton....avoid damaging floor, use TEFLON ®t tape. 1-®TEFLON is no kinks. Non-flared male thread NOTE: For LP gas connections, you must use Gas dryers must fit inside exhaust hood. NOTE: Do not use duct tape, screws, or other injury. 1. Using a wrench to...
...64 ft (20 m) 58 ft (17.7 m) 1 Rigid metal 54 ft (16.5 m) 48 ft (14.6 m) 2 Rigid metal 44 ft (13.4 m) 38 ft (11.6 m) 3 Rigid metal 35 ft (10.7 m) 29 ft (8.8 m) 4 Rigid metal 27 ft (8.2 m) 21 ft (6.4 m) 3, Examine leveling legs, find diamond marking. 4, Screw legs into the interior of cardboard from dryer carton....avoid damaging floor, use TEFLON ®t tape. 1-®TEFLON is no kinks. Non-flared male thread NOTE: For LP gas connections, you must use Gas dryers must fit inside exhaust hood. NOTE: Do not use duct tape, screws, or other injury. 1. Using a wrench to...

Installation Instructions
Page 10
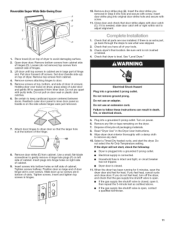
..., flat-blade screwdriver to gently remove 4 hinge hole plugs (D) on left or right within slot to the existing gas line. Insert and tighten top screws in the supply line. Move dryer into hinge holes on an approved noncorrosive leak-detection solution. Close door and check that there are no kinks in... slot. The valve is open when the handle is clean. Bubbles will show a leak. Place towel (A) on top of dryer. Slide door up so screws are in the flexible gas line. 4. If connecting to existing vent, make sure the vent is parallel to the supply line type, size, and location...
..., flat-blade screwdriver to gently remove 4 hinge hole plugs (D) on left or right within slot to the existing gas line. Insert and tighten top screws in the supply line. Move dryer into hinge holes on an approved noncorrosive leak-detection solution. Close door and check that there are no kinks in... slot. The valve is open when the handle is clean. Bubbles will show a leak. Place towel (A) on top of dryer. Slide door up so screws are in the flexible gas line. 4. If connecting to existing vent, make sure the vent is parallel to the supply line type, size, and location...
Installation Instructions
Page 11
...death, fire, or electrical shock. 5. Be certain to door. 5. Remove any dust. 10. Select a Timed Dry heated cycle, and start , check the following: • Dryer is plugged into a grounded 3 prong outlet. • Electrical supply is connected. • Household fuse is intact and tight, or circuit breaker has not tripped. •... on top of cabinet. If there is closed . 11. Plug into hinge holes on the side where hinges were just removed. 7= Attach door hinges to dryer door so that the gas supply line shutoff valve is open the dryer door and feel heat, turn off screws.
...death, fire, or electrical shock. 5. Be certain to door. 5. Remove any dust. 10. Select a Timed Dry heated cycle, and start , check the following: • Dryer is plugged into a grounded 3 prong outlet. • Electrical supply is connected. • Household fuse is intact and tight, or circuit breaker has not tripped. •... on top of cabinet. If there is closed . 11. Plug into hinge holes on the side where hinges were just removed. 7= Attach door hinges to dryer door so that the gas supply line shutoff valve is open the dryer door and feel heat, turn off screws.
Installation Manual
Page 2
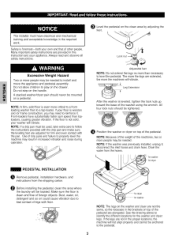
...locations, the machine will be tightened. I PEDESTAL INSTALLATION O Remove pedestal, installation hardware, and instructions from the hoses. O Position the washer or dryer on top of the washer using the wrench. NOTE: If a drip pan must have substantially faster spin speed than necessary to a top-loader...firm and even contact with floor. NOTE: If the washer was previously installed, unplug it . for washer for the washer and dryer legs. If your appliance. If the legs are not in increased vibration and noise during operation. Front-loaders have electrical and ...
...locations, the machine will be tightened. I PEDESTAL INSTALLATION O Remove pedestal, installation hardware, and instructions from the hoses. O Position the washer or dryer on top of the washer using the wrench. NOTE: If a drip pan must have substantially faster spin speed than necessary to a top-loader...firm and even contact with floor. NOTE: If the washer was previously installed, unplug it . for washer for the washer and dryer legs. If your appliance. If the legs are not in increased vibration and noise during operation. Front-loaders have electrical and ...
Installation Manual
Page 3
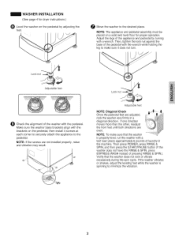
... with the wrench while holding the leg to the pedestal. NOTE: The appliance and pedestal assembly must be placed on a solid and level floor for dryer instructions.) O Level the washer on the pedestal, then install 4 screws at each corner to securely attach the appliance to make sure that the washer does...
... with the wrench while holding the leg to the pedestal. NOTE: The appliance and pedestal assembly must be placed on a solid and level floor for dryer instructions.) O Level the washer on the pedestal, then install 4 screws at each corner to securely attach the appliance to make sure that the washer does...
Installation Manual
Page 4
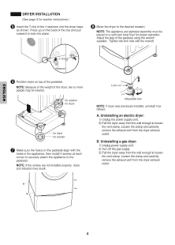
Lock nut Adjustable feet NOTE: If dryer was previously installed, uninstall it as shown. Uninstallinga gas dryer: 1) Unplug power supply cord. 2) Turn off the gas supply. 3) Pull the dryer away from the dryer exhaust outlet, B. Loosen the clamp and carefully remove the exhaust vent from the wall enough to the desired location. Press up on the back...
Lock nut Adjustable feet NOTE: If dryer was previously installed, uninstall it as shown. Uninstallinga gas dryer: 1) Unplug power supply cord. 2) Turn off the gas supply. 3) Pull the dryer away from the dryer exhaust outlet, B. Loosen the clamp and carefully remove the exhaust vent from the wall enough to the desired location. Press up on the back...


