
Use and Care Guide
Page 2
... 21 D,-Freezer Section Tilting Door 22 Tilt-Out Door Basket 22 Extra ice Bin 22 Durabase 23 Durabase Divider 23 Pull Out Drawer 23 Filter 24 Care And Cleaning General Cleaning Tips Outside Inside Walls Door Liner And Gaskets Plastic Parts Condenser Coils 25-26 25 25 25 25 25 25 Light Bulb Replacement Power Interruptions When You Go On Vacation When You Move About The Automatic Icemaker 25-26 26 26 26 27=28 Connecting The Water Line Troubleshooting Guide 29-31...
... 21 D,-Freezer Section Tilting Door 22 Tilt-Out Door Basket 22 Extra ice Bin 22 Durabase 23 Durabase Divider 23 Pull Out Drawer 23 Filter 24 Care And Cleaning General Cleaning Tips Outside Inside Walls Door Liner And Gaskets Plastic Parts Condenser Coils 25-26 25 25 25 25 25 25 Light Bulb Replacement Power Interruptions When You Go On Vacation When You Move About The Automatic Icemaker 25-26 26 26 26 27=28 Connecting The Water Line Troubleshooting Guide 29-31...
Use and Care Guide
Page 3
... of refrigerant, connecting tubing, and compressor), free of this product resulting from unauthorized modification made to this product. Damage to or failure of parts or systems resulting from accident, abuse, misuse or use , including but not limited to filters, belts, light bulbs, and bags. 2. Damage to or failure of this product if it is installed, operated, and maintained according to the instructions supplied with...
... of refrigerant, connecting tubing, and compressor), free of this product resulting from unauthorized modification made to this product. Damage to or failure of parts or systems resulting from accident, abuse, misuse or use , including but not limited to filters, belts, light bulbs, and bags. 2. Damage to or failure of this product if it is installed, operated, and maintained according to the instructions supplied with...
Use and Care Guide
Page 4
... new Kenmore ® product is the result of mechanical failure of any covered refrigerator or freezer. [_ Rental reimbursement if repair of any reason during the product warranty period, we call it may require preventive maintenance or repair from coverage-- Think of home appliances, garage door openers, water heaters, and other major home items, in the U.S.A. If you money and aggravation. Sears Installation Service...
... new Kenmore ® product is the result of mechanical failure of any covered refrigerator or freezer. [_ Rental reimbursement if repair of any reason during the product warranty period, we call it may require preventive maintenance or repair from coverage-- Think of home appliances, garage door openers, water heaters, and other major home items, in the U.S.A. If you money and aggravation. Sears Installation Service...
Use and Care Guide
Page 5
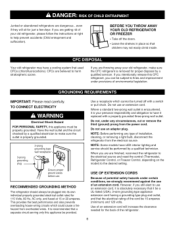
... careful closing doors when children are necessarily small. NOTE:We strongly recommend that were taped to persons when using this or any repairs. NOTE: Setting either the plug or connector end. • Do not modify or extend the power cord length. Skin may adhere to the extremely cold surfaces. • In refrigerators with automatic icemakers, avoid contact with the Attention Installer Instructions...
... careful closing doors when children are necessarily small. NOTE:We strongly recommend that were taped to persons when using this or any repairs. NOTE: Setting either the plug or connector end. • Do not modify or extend the power cord length. Skin may adhere to the extremely cold surfaces. • In refrigerators with automatic icemakers, avoid contact with the Attention Installer Instructions...
Use and Care Guide
Page 6
... finished, reconnect the refrigerator to the electrical source and reset the control (Thermostat, Refrigerator Control, or Freezer Control, depending on the model) to fines and imprisonment under provisions of the cord be provided. IMPORTANT: Please read carefully. NOTE: Before performing any circumstances, cut or remove the third (ground) prong from the power cord. Do not use of installation, cleaning, or removing a light bulb, disconnect the refrigerator from overheated wires. Where a standard...
... finished, reconnect the refrigerator to the electrical source and reset the control (Thermostat, Refrigerator Control, or Freezer Control, depending on the model) to fines and imprisonment under provisions of the cord be provided. IMPORTANT: Please read carefully. NOTE: Before performing any circumstances, cut or remove the third (ground) prong from the power cord. Do not use of installation, cleaning, or removing a light bulb, disconnect the refrigerator from overheated wires. Where a standard...

Use and Care Guide
Page 7
Use this page to become more familiar with the parts and features. NOTE: This guide covers several different models. The refrigerator you have purchased may not match your convenience. Refrigerator Light (p. 25) O Filter (Inside) (p. 24) Modular Door Bins (p. 21 ) _) Fixed door bin Tilting door bin Refrigerator Shelves (p. 20) (_ Crisper (p. 21) _]_ Ice Room (p. 17) (Ice Maker and Ice Bucket) _]_ Pull out Drawer (p. 23) Turbo Motor Tilt-Out Door Basket (p. 22) Durabase (p. 23) _) Divider (p. 23) _) Extra Ice Bin (p. 22) _) Water Tank Cover Snack Pan (p. 21) _) Egg...
Use this page to become more familiar with the parts and features. NOTE: This guide covers several different models. The refrigerator you have purchased may not match your convenience. Refrigerator Light (p. 25) O Filter (Inside) (p. 24) Modular Door Bins (p. 21 ) _) Fixed door bin Tilting door bin Refrigerator Shelves (p. 20) (_ Crisper (p. 21) _]_ Ice Room (p. 17) (Ice Maker and Ice Bucket) _]_ Pull out Drawer (p. 23) Turbo Motor Tilt-Out Door Basket (p. 22) Durabase (p. 23) _) Divider (p. 23) _) Extra Ice Bin (p. 22) _) Water Tank Cover Snack Pan (p. 21) _) Egg...
Use and Care Guide
Page 8
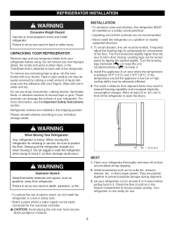
... move it . 2. Do not remove any warning-type labels, the model and serial number label, or the TechSheet that is heavy. The front should be leveled. Allow at least 2 or 3 hours before using. Do not wiggle or walk the refrigerator when trying to compensate for the automatic icemaker. _. Clean your individual storage needs. Excessive Weight Hazard Use two or more information, see...
... move it . 2. Do not remove any warning-type labels, the model and serial number label, or the TechSheet that is heavy. The front should be leveled. Allow at least 2 or 3 hours before using. Do not wiggle or walk the refrigerator when trying to compensate for the automatic icemaker. _. Clean your individual storage needs. Excessive Weight Hazard Use two or more information, see...
Use and Care Guide
Page 10
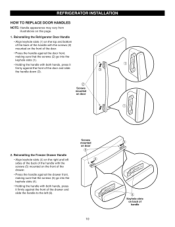
... Freezer Drawer Handle • Align keyhole slots (4) on the right and left (6). Screws mounted on door J 10 Keyhole slots on door 2. Reinstalling the Refrigerator Door Handle • Align keyhole slots (1) on the top and bottom of the back of the handle with the screws (2) mounted on this page. 1. HOW TO REPLACE DOOR HANDLES NOTE: Handle appearance may vary from illustrations on the front of the door...
... Freezer Drawer Handle • Align keyhole slots (4) on the right and left (6). Screws mounted on door J 10 Keyhole slots on door 2. Reinstalling the Refrigerator Door Handle • Align keyhole slots (1) on the top and bottom of the back of the handle with the screws (2) mounted on this page. 1. HOW TO REPLACE DOOR HANDLES NOTE: Handle appearance may vary from illustrations on the front of the door...
Use and Care Guide
Page 15
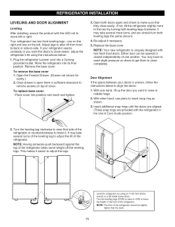
... close easily. To replace base cover: • Place cover into position and insert and tighten. 3. NOTE: Your new refrigerator is uniquely designed with the refrigerator in the Use & Care Guide packet.) 2. You may have to exert slight pressure on doors to get them to close easier, adjust the refrigerator's tilt using an 11/32 inch (8ram) wrench or a flat blade screw driver, w Turn the leveling legs (CCW...
... close easily. To replace base cover: • Place cover into position and insert and tighten. 3. NOTE: Your new refrigerator is uniquely designed with the refrigerator in the Use & Care Guide packet.) 2. You may have to exert slight pressure on doors to get them to close easier, adjust the refrigerator's tilt using an 11/32 inch (8ram) wrench or a flat blade screw driver, w Turn the leveling legs (CCW...
Use and Care Guide
Page 16
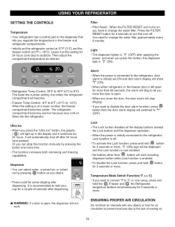
... button) and the dispenser operation. • When the power is initially connected to the refrigerator, Lock function is open. • When you want to disable the door alarm function, press _ button then the door alarm display will become. • Freezer Temp Control: -6°F to 8°F (-21 °C to change the water filter. Temperature Mode Switch Function(°F °C) • If you close the door, the door alarm will stop this function manually by pressing @ button as desired. • Refrigerator Temp Control...
... button) and the dispenser operation. • When the power is initially connected to the refrigerator, Lock function is open. • When you want to disable the door alarm function, press _ button then the door alarm display will become. • Freezer Temp Control: -6°F to 8°F (-21 °C to change the water filter. Temperature Mode Switch Function(°F °C) • If you close the door, the door alarm will stop this function manually by pressing @ button as desired. • Refrigerator Temp Control...
Use and Care Guide
Page 18
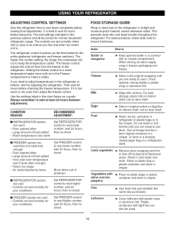
It is too warm or too cold, then adjust the freezer control. The higher the number setting, the longer the compressor will run to Keep opened , rewrap tightly in the crisper. Then wait 24 hours before doing this. If it . Use the settings listed in a covered dish or closed paper bag on a refrigerator shelf. Door opened often - Heavy ice usage - This prevents food odor and taste transfer throughout the refrigerator. items Butter...
It is too warm or too cold, then adjust the freezer control. The higher the number setting, the longer the compressor will run to Keep opened , rewrap tightly in the crisper. Then wait 24 hours before doing this. If it . Use the settings listed in a covered dish or closed paper bag on a refrigerator shelf. Door opened often - Heavy ice usage - This prevents food odor and taste transfer throughout the refrigerator. items Butter...
Use and Care Guide
Page 21
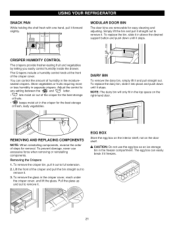
... easily control humidity inside the drawer. To replace the bin, slide it in above the desired support button and push down until it . Simply lift the bin and pull it straight out to any setting between the Store vegetables or fruits requiring more or less humidity in the moisturesealed crispers. Adjust the control to remove it stops. MODULAR DOOR BIN The door bins are removable for easy cleaning and adjusting. SNACK PAN...
... easily control humidity inside the drawer. To replace the bin, slide it in above the desired support button and push down until it . Simply lift the bin and pull it straight out to any setting between the Store vegetables or fruits requiring more or less humidity in the moisturesealed crispers. Adjust the control to remove it stops. MODULAR DOOR BIN The door bins are removable for easy cleaning and adjusting. SNACK PAN...

Use and Care Guide
Page 24
... ice maker performance decreases noticeably. 2. Rotate the knob of filter holder. Pull out the filter cartridge. FILTER It is being removed, the water drains through the water dispenser for 3 minutes to side, it into the cover until it stops. With cartridge knob in firmly and twist it isn't fully inserted. Place a container under the hole of the cartridge counter clockwise. 3. After changing the water filter cartridge, reset the water filter status display and indicator...
... ice maker performance decreases noticeably. 2. Rotate the knob of filter holder. Pull out the filter cartridge. FILTER It is being removed, the water drains through the water dispenser for 3 minutes to side, it into the cover until it stops. With cartridge knob in firmly and twist it isn't fully inserted. Place a container under the hole of the cartridge counter clockwise. 3. After changing the water filter cartridge, reset the water filter status display and indicator...
Use and Care Guide
Page 25
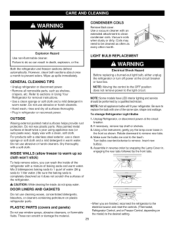
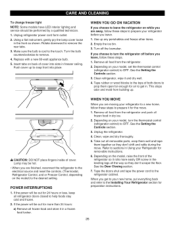
... necessary, remove top shelf or shelves. 3. Assemble in reverse order by snapping the Lamp Cover in death, explosion, or fire. Coils may need to warm up spills immediately. LIGHT BULB REPLACEMENT Both the refrigerator and freezer sections defrost automatically. Refer to the desired setting. OUTSIDE Waxing external painted metal surfaces helps provide rust protection. CAUTION: While cleaning the inside of baking soda and warm water. Unplug Refrigerator, or disconnect power at...
... necessary, remove top shelf or shelves. 3. Assemble in reverse order by snapping the Lamp Cover in death, explosion, or fire. Coils may need to warm up spills immediately. LIGHT BULB REPLACEMENT Both the refrigerator and freezer sections defrost automatically. Refer to the desired setting. OUTSIDE Waxing external painted metal surfaces helps provide rust protection. CAUTION: While cleaning the inside of baking soda and warm water. Unplug Refrigerator, or disconnect power at...
Use and Care Guide
Page 26
... removable instructions. 6. A CAUTION: DO NOT place fingers inside of both doors to OFF. POWER INTERRUPTIONS 1. Depending on your new home, put everything back and refer to the Installing Your Refrigerator section for air to get to your model, set the thermostat control (refrigerator control) to prop them together so they don't scrape the floor. When you get in Using your refrigerator before you are finished, reconnect the refrigerator to the electrical...
... removable instructions. 6. A CAUTION: DO NOT place fingers inside of both doors to OFF. POWER INTERRUPTIONS 1. Depending on your new home, put everything back and refer to the Installing Your Refrigerator section for air to get to your model, set the thermostat control (refrigerator control) to prop them together so they don't scrape the floor. When you get in Using your refrigerator before you are finished, reconnect the refrigerator to the electrical...
Use and Care Guide
Page 28
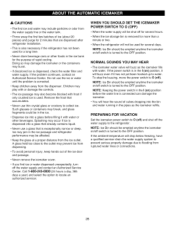
... water filter and water supply. Remove the frost that accumulates. • Never use the ice or water until the problem is corrected. • Keep children away from the dispenser. A glass held too close to the outlet may prevent ice from dispensing. • To avoid personal injury, keep hands out of the ice door and passage. • Never remove the icemaker cover. • If you find ice or water dispensed unexpectedly, turn off switch...
... water filter and water supply. Remove the frost that accumulates. • Never use the ice or water until the problem is corrected. • Keep children away from the dispenser. A glass held too close to the outlet may prevent ice from dispensing. • To avoid personal injury, keep hands out of the ice door and passage. • Never remove the icemaker cover. • If you find ice or water dispensed unexpectedly, turn off switch...
Use and Care Guide
Page 29
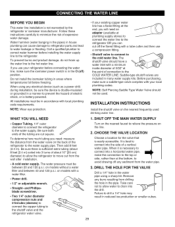
... care not to allow the refrigerator to connect into the drill. INSTALLATION INSTRUCTIONS Install the shutoff valve on the line. 2. Turn on the back of the tubing are included in the water pipe using any burrs resulting from the wall after installation. • A cold water supply. All installations must be sure the device is best to move out from drilling the hole in accordance with a water filter. • Power drill...
... care not to allow the refrigerator to connect into the drill. INSTALLATION INSTRUCTIONS Install the shutoff valve on the line. 2. Turn on the back of the tubing are included in the water pipe using any burrs resulting from the wall after installation. • A cold water supply. All installations must be sure the device is best to move out from drilling the hole in accordance with a water filter. • Power drill...
Use and Care Guide
Page 32
..., can hear the noise occurred from the flow of refrigerant, the water line, or items stored on top of the same wattage, size and shape available at your local hardware store. (See the Changing the Light Bulb(s) section on the model) will click when the automatic defrost cycle begins and ends. The thermostat control (or refrigerator control, depending on pages 25-26.) Turn the temperature control to the OFF...
..., can hear the noise occurred from the flow of refrigerant, the water line, or items stored on top of the same wattage, size and shape available at your local hardware store. (See the Changing the Light Bulb(s) section on the model) will click when the automatic defrost cycle begins and ends. The thermostat control (or refrigerator control, depending on pages 25-26.) Turn the temperature control to the OFF...
Use and Care Guide
Page 33
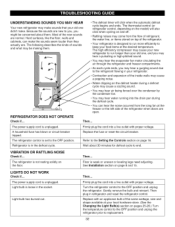
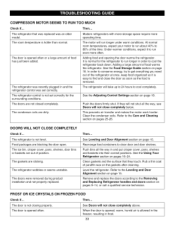
... the freezer, resulting in and the refrigerator control was an older model, The room temperature is normal for the surrounding conditions. See the Using Your Refrigerator section on the gaskets after cleaning. The condenser coils are blocking the door open. The door is not level. The door is easy to find and close completely above. Remove and replace the doors according to run longer in and put crisper cover, pans, shelves and...
... the freezer, resulting in and the refrigerator control was an older model, The room temperature is normal for the surrounding conditions. See the Using Your Refrigerator section on the gaskets after cleaning. The condenser coils are blocking the door open. The door is not level. The door is easy to find and close completely above. Remove and replace the doors according to run longer in and put crisper cover, pans, shelves and...
Use and Care Guide
Page 34
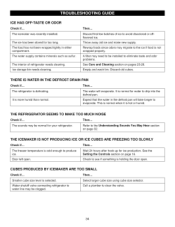
.... A filter may migrate to water line may be clogged. Empty and wash bin. Then... Refer to clear the valve. 34 Door left open . Rewrap foods since odors may need to be installed to drip into the defrost pan. SEEMS TO MAKE TOO MUCH NOISE Then... Select larger cube size using cube size selector. Discard first few batches of refrigerator needs cleaning. The refrigerator is selected. Expect that the water in either compartment, The water supply...
.... A filter may migrate to water line may be clogged. Empty and wash bin. Then... Refer to clear the valve. 34 Door left open . Rewrap foods since odors may need to be installed to drip into the defrost pan. SEEMS TO MAKE TOO MUCH NOISE Then... Select larger cube size using cube size selector. Discard first few batches of refrigerator needs cleaning. The refrigerator is selected. Expect that the water in either compartment, The water supply...


