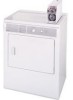
Kenmore 7418 - 5.7 cu. Ft. Coin Operated Gas Dryer Support and Manuals
Get Help and Manuals for this Kenmore item
View All Support Options Below
Free Kenmore 7418 manuals!
Problems with Kenmore 7418?
Ask a Question
Free Kenmore 7418 manuals!
Problems with Kenmore 7418?
Ask a Question
Most Recent Kenmore 7418 Questions

How Old Is Our Kenmore 74181 Refrigerator?
We are having trouble with our Kenmore 74181 refridgerator/freezer, and would like to know how old o...
We are having trouble with our Kenmore 74181 refridgerator/freezer, and would like to know how old o...
(Posted by hwold 10 years ago)
Popular Kenmore 7418 Manual Pages
Use and Care Guide - Page 2
... 5
Reversing Door Swing
5
Location of Your Dryer 6
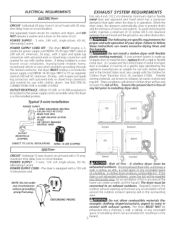
Electrical Installation
7
Grounding Requirements 7 Electrical Connections--3-wire 8
Electrical Connections--4-wire 8
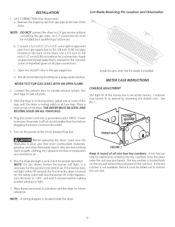
Installation
9
Lint Blade Retaining Pin Location 9
Metercase instructions 9-12
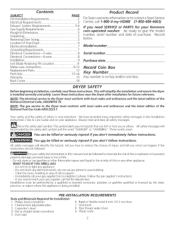
If you need SERVICE or PARTS for your Kenmore coin-operated washer: be ready to give the model number, serial number and date of...
Use and Care Guide - Page 3
... PRONG
Correct
_-
A clothes dryer must be of a building which can accumulate lint, resulting in any concealed space of a specific type identified by the appliance manufacturer as required) rated at...install a dothes dryer with the Outline for proper and safe operation of 12 inches (30.5 cm) clearance between the vent hood and the ground or any lint prior to follow these instructions...
Use and Care Guide - Page 4
... lint in the exhaust system. Follow the instructions supplied with the National Fuel Gas Code, ANSI Z223.1
(latest edition).
2. Do not screen the exhaust ends of the vent
system, nor use any screws, rivets or other flammables are set up for proper operation. If the dryer is not Stainless steel or plastic-coated brass...
Use and Care Guide - Page 5
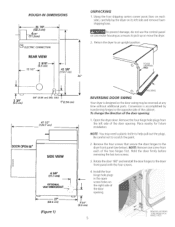
...
4 318" (11.1 cm)
OPTIONAL --_
VENTKNOCKOUT
,e_
27'
(68.6 cm)
(Figure 1)
NOTE: You may be reversed at any time without additional parts. Return the dryer to the dryer front panel with the four screws.
, Install the four hinge hole plugs in the open screw holes on each of the door opening. Be careful not to...
Use and Care Guide - Page 6
...or anything that will obstruct the flow of combustion and ventilation air.
3.
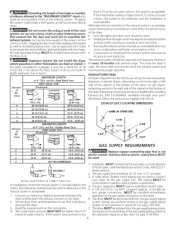
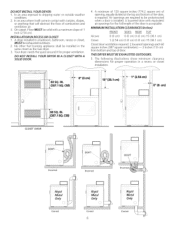
No other fuel burning appliance shall be unobstructed when a door is acceptable. MINIMUM INSTALLATION CLEARANCES (inches)
FRONT SIDES REAR TOP
Alcove Closet
0 (0 cm) 0 (0 cm) 0...from bottom and top of the door is installed. Your dryer needs the space around it will come in contact with equivalent air openings for the full ...
Use and Care Guide - Page 7
... cord to follow these instructions can cause
I
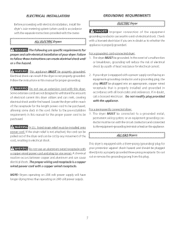
ALL 6AS Dryers
I with a licensed electrician if you are not designed to whether the appliance is equipped with the appliance.
If in doubt as to withstand the amounts of the dryer and can melt, creating electrical shock and/or fire hazard. This appliance MUST be installed onto
to the equipment...
Use and Care Guide - Page 8
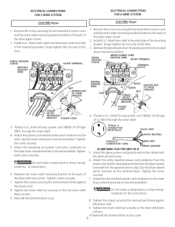
... hole of the mounting bracket. GREEN GROUND SCREW
NEUTRAL GROUND WIRE
SILVER TERMINAL
1. ELECTRICALCONNECTIONS FOR 3-WIRE SYSTEM
ELECTR/CDryer
ELECTRICALCONNECTIONS FOR 4-WIRE SYSTEM
I[
ELECTR/C Dryer
]
1. Install a U.L. REI_ _ELIEF
;/J-BLACK
_/ _ listed strain relief into the power cord entry hole of the mounting
bracket. Remove the screws securing the terminal block access...
Use and Care Guide - Page 9
... water solution. Install the pins after the lint blade is clear and free from gas supply line to be replaced by brushing on the back of the dryer. Testall connections ...installed by loosening the slotted nuts.
Placethese instructions in the gas supply line. c. Place a level on the key and behind the end panel of the dryer.
Connect the exhaust duct to L.R gas service...
Use and Care Guide - Page 10
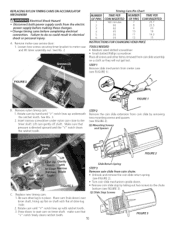
... timer bracket to the timer shaft. Lift cam gently off shaft. Remove meter-case service door: 1. FIGURE 2
FIGURE 1
B.
C, Replace new timing cam: 1. Pressdown to the chute
bottom (see FIGURE2).
• Turn...8 9 10 11 12
TIME PER
COIN INSERTED 25.7 22.5 20 18 16.3 15
INSTRUCTIONS FOR CHANGING VEND PRICE
TOOLS NEEDED • Medium sized slotted screwdriver
• Small slotted ...
Use and Care Guide - Page 11
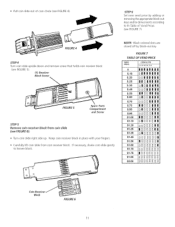
... upside down and remove screw that holds coin receiver block (see FIGURE 5).
(1) Receiver
Block Screw
FIGURE 5
\
Spare Parts
Compartment and Screw
STEP5 Remove coin receiver block from coin receiver block.
If necessary, shake coin slide gently to th Table...inserts according to loosen block. * Pull coin slide out of Vend Prices (see FIGURE7). STEP 6 Set new vend price by block-out key.
Use and Care Guide - Page 12
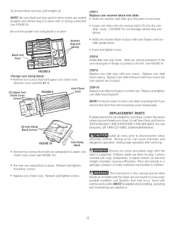
... chute. Forcoin box parts, call Sears Parts and Service Toll FreeNumber 1-800-4-MY-HOME (1-800-469-4663).
Wiring errors can only be easier to insert coin slide mounting bolt if you purchased your fingers and turn slide upside down. Replace coin chute cover. The instructions in place with two screws.
Block Screws
REPLACEMENT PARTS
If replacement parts are not meant...
Use and Care Guide - Page 13
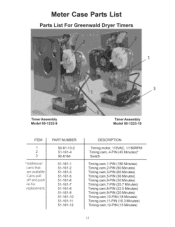
eter Case Parts List
Parts List For Greenwald Dryer Timers
3
Timer Assembly Model 50-1232=9
Timer Assembly Model 50-1223-10
ITEM
1 2 3
*Additional cams that are available. PART NUMBER
50-61-13-2 51-16!-4 00-6164
51-161-1 51-161-2 51-161-3 51-161-5 51-161-6 51-161-7 51-... Minutes) Timing cam,11-PIN (16.3 Minutes) Timing cam,12-PIN (15 Minutes)
13 Cams pull off and push on for replacement.
Use and Care Guide - Page 14
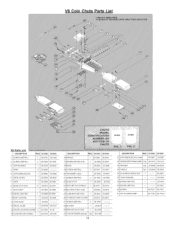
...
_1204oo2q40000 24 BLOCKOUT KEY varies
18 DECALCASTING
_£1o9o90959j0008 25 SLIDE RATCHET DOG
11 BODY CASTING
_1 2030220q_3000 26 STORAGE COMP. V8 Coin Chute Parts List
V8 Parts List
DESCRIPTION
___o.3o2o__20_300_0_DESCRIPTION
REQ. 20-3020 120-3000
I SCREW (METRIC) 2 SCREW (METRIC) 3 TOP HOUSING 4 SHIM 5 COIN SIZING BLOCK 6 GATE COVER 7 GATE
16 SPRING...
Use and Care Guide - Page 15
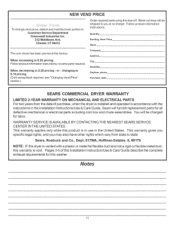
...Zip Daytime phone Purchase date
SEARS COMMERCIAL DRYER WARRANTY
LIMITED 2=YEAR WARRANTY ON MECHANICAL AND ELECTRICAL PARTS For two years from the date of this Installation Instruction/Use & Care Guide describe the complete exhaust requirements for all defective mechanical or electrical parts including coin box and chute assemblies.
WARRANTY SERVICE IS AVAILABLE BY CONTACTING THE NEAREST SEARS...
Use and Care Guide - Page 16

For the replacement parts, accessories and owner's manuals that you need to do-it ! and Canada)
www.sears.com
www.sears.ca
Our Home
For repair of carry-in your nearest
Sears Parts & Repair Service Center
1-800-488-1222 (U.S.A.) 1-800-469-4663 (Canada)
www.sears.com
www.sears.ca
To purchase a protection agreement on a product serviced by Sears:
1-800...
Kenmore 7418 Reviews
We have not received any reviews for Kenmore yet.