
User Instructions
Page 3
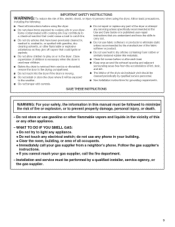
... drycleaning solvents, or other flammable or explosive substances as they give off vapors that you cannot reach your dryer. Items contaminated with controls. [] Do not repair or replace any part of the dryer or attempt any phone in your building. • Clear the room, building, or area of all ...; do not use gasoline or other appliance. - IMPORTANT SAFETY INSTRUCTIONS WARNING: To reduce the risk of fire, electric shock, or injury to persons when using the dryer. [] Do not place items exposed to cooking oils in your gas supplier, call your safety, the information in this ...
... drycleaning solvents, or other flammable or explosive substances as they give off vapors that you cannot reach your dryer. Items contaminated with controls. [] Do not repair or replace any part of the dryer or attempt any phone in your building. • Clear the room, building, or area of all ...; do not use gasoline or other appliance. - IMPORTANT SAFETY INSTRUCTIONS WARNING: To reduce the risk of fire, electric shock, or injury to persons when using the dryer. [] Do not place items exposed to cooking oils in your gas supplier, call your safety, the information in this ...
User Instructions
Page 7
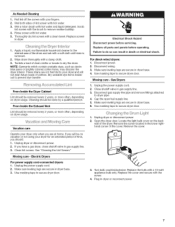
... cloth. 3. Scrub lint screen with hot water. 5. Rinse screen with the brush to dry the drum. From Inside the Dryer Cabinet Lint should be done by a qualified person. Unplug dryer or disconnect power. 2. Electrical Shock Hazard Disconnect power before operating. Replace all parts and panels before servicing. Make sure leveling legs are secure in...
... cloth. 3. Scrub lint screen with hot water. 5. Rinse screen with the brush to dry the drum. From Inside the Dryer Cabinet Lint should be done by a qualified person. Unplug dryer or disconnect power. 2. Electrical Shock Hazard Disconnect power before operating. Replace all parts and panels before servicing. Make sure leveling legs are secure in...
User Instructions
Page 10
... limited to clean or maintain this product. 4. no charge for parts and labor on products requiring in all instructions supplied with the product. 5. call 1-800-4-MY-HOME ® KENMORE APPLIANCE WARRANTY ONE YEAR LIMITED WARRANTY When installed, operated and maintained according... at your covered product takes longer than those recommended in -home repair, plus convenient repair scheduling v' Power surge protection against electrical damage due to power fluctuations v' Rental reimbursement if repair of your request - replacement of your covered product can save you purchase...
... limited to clean or maintain this product. 4. no charge for parts and labor on products requiring in all instructions supplied with the product. 5. call 1-800-4-MY-HOME ® KENMORE APPLIANCE WARRANTY ONE YEAR LIMITED WARRANTY When installed, operated and maintained according... at your covered product takes longer than those recommended in -home repair, plus convenient repair scheduling v' Power surge protection against electrical damage due to power fluctuations v' Rental reimbursement if repair of your request - replacement of your covered product can save you purchase...

User Instructions
Page 20
... brand appliances, lawn and garden equipment, or heating and cooling systems, no matter who made it, no matter who sold it -yourself. For the replacement parts, accessories and owner's manuals that you need to do-it ! only) www.sears.com To purchase a protection agreement (U.S.A.) or maintenance agreement (Canada) on -line for... Sears, Roebuck and Co. ® Marca Regl.strada / TMMarca de Comerclo. / SMMarca de Servicio de Sears, Roebuck and Co. 1/06 Printed in your nearest Sears Parts & Repair Center. 1-800-488-1222 Call anytime, day or night (U.S.A. UU.
... brand appliances, lawn and garden equipment, or heating and cooling systems, no matter who made it, no matter who sold it -yourself. For the replacement parts, accessories and owner's manuals that you need to do-it ! only) www.sears.com To purchase a protection agreement (U.S.A.) or maintenance agreement (Canada) on -line for... Sears, Roebuck and Co. ® Marca Regl.strada / TMMarca de Comerclo. / SMMarca de Servicio de Sears, Roebuck and Co. 1/06 Printed in your nearest Sears Parts & Repair Center. 1-800-488-1222 Call anytime, day or night (U.S.A. UU.
Installation Instructions
Page 1
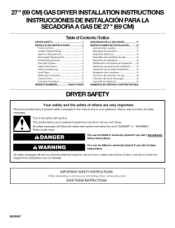
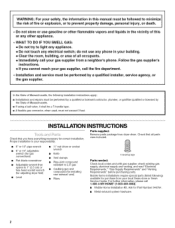
...are not followed. This symbol alerts you to reduce the chance of Contents/Jndice DRYER SAFETY 1 INSTALLATION INSTRUCTIONS 2 Tools and Parts 2 Location Requirements 3 Electrical Requirements 4 Gas Supply Requirements 4 Venting Requirements 5 Plan Vent System 6 Install Vent System 8... Install Leveling Legs 8 Level Dryer 8 Make Gas Connection 9 Connect Vent 9 Complete Installation 9 ...
...are not followed. This symbol alerts you to reduce the chance of Contents/Jndice DRYER SAFETY 1 INSTALLATION INSTRUCTIONS 2 Tools and Parts 2 Location Requirements 3 Electrical Requirements 4 Gas Supply Requirements 4 Venting Requirements 5 Plan Vent System 6 Install Vent System 8... Install Leveling Legs 8 Level Dryer 8 Make Gas Connection 9 Connect Vent 9 Complete Installation 9 ...
Installation Instructions
Page 2
...supplier. Installation and service must not exceed 3 feet. Parts supplied: Remove parts package from a neighbor's phone. For further information, please call the fire department. - Ask for purchase from your gas supplier from dryer drum. INSTALLATION INSTRUCTIONS Check that opens to 1" (2.5 cm... vent) Pliers 4 leveling legs Parts needed: Check local codes and with gas supplier, check existing gas supply, electrical supply and venting, and read "Electrical Requirements," "Gas Supply Requirements" and "Venting Requirements" before purchasing parts. Do not store or use ...
...supplier. Installation and service must not exceed 3 feet. Parts supplied: Remove parts package from a neighbor's phone. For further information, please call the fire department. - Ask for purchase from your gas supplier from dryer drum. INSTALLATION INSTRUCTIONS Check that opens to 1" (2.5 cm... vent) Pliers 4 leveling legs Parts needed: Check local codes and with gas supplier, check existing gas supply, electrical supply and venting, and read "Electrical Requirements," "Gas Supply Requirements" and "Venting Requirements" before purchasing parts. Do not store or use ...
Installation Instructions
Page 3
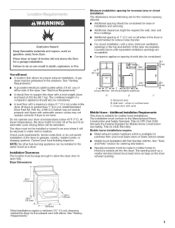
... 45°F (7°C). See "Venting Requirements." See "Venting Requirements." • A grounded electrical outlet located within 2 ft (61 cm) of either side of the dryer is greater than 1" [2.5 cm], install Extended Dryer Feet Kit, Part No. 279810.) Clothes may not tumble properly and dryers with elbow. See "Electrical Requirements." • A sturdy floor to introduce outside air into the...
... 45°F (7°C). See "Venting Requirements." See "Venting Requirements." • A grounded electrical outlet located within 2 ft (61 cm) of either side of the dryer is greater than 1" [2.5 cm], install Extended Dryer Feet Kit, Part No. 279810.) Clothes may not tumble properly and dryers with elbow. See "Electrical Requirements." • A sturdy floor to introduce outside air into the...
Installation Instructions
Page 7
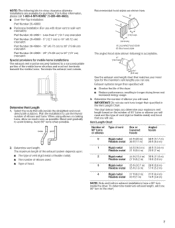
... m) Angled hoods 58 ft (17.7 m) Flexible metal 36 ft (11 m) 28 ft (8.5 m) 2= Determine vent length. Bend vent gradually the Vent Length Chart. Vent Length Chart betlANumber of 90 ° turns or elbows Type of the dryer. • Reduce performance, resulting in Determine Vent Length 1. Louvered hood style B. Box hood style Part Number 26-49905 - 29...
... m) Angled hoods 58 ft (17.7 m) Flexible metal 36 ft (11 m) 28 ft (8.5 m) 2= Determine vent length. Bend vent gradually the Vent Length Chart. Vent Length Chart betlANumber of 90 ° turns or elbows Type of the dryer. • Reduce performance, resulting in Determine Vent Length 1. Louvered hood style B. Box hood style Part Number 26-49905 - 29...
Installation Instructions
Page 8
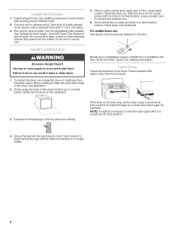
.... 6. seclamptso seaal lljointsD. Check the levelness of the dryer. eeillustration. 2. entlylaythedryeor nthecardboard. 3. Screw the legs into its final position. 4. Instaell xhaushtoodU. See "Tools and Parts" section for levelness. devicetshatextendintotheinterioorfthevent o secure vent. NOTE: It...Installation Kit. Find the diamond marking. Check levelness first side to side, then front to level the dryer again after it is not level, prop up or down and check again for ordering information. Firmlygraspthebodyofthedrye(rnothetoporconsole...
.... 6. seclamptso seaal lljointsD. Check the levelness of the dryer. eeillustration. 2. entlylaythedryeor nthecardboard. 3. Screw the legs into its final position. 4. Instaell xhaushtoodU. See "Tools and Parts" section for levelness. devicetshatextendintotheinterioorfthevent o secure vent. NOTE: It...Installation Kit. Find the diamond marking. Check levelness first side to side, then front to level the dryer again after it is not level, prop up or down and check again for ordering information. Firmlygraspthebodyofthedrye(rnothetoporconsole...
Installation Instructions
Page 9
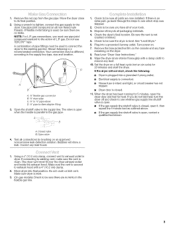
...full heat cycle (not an air cycle) for 5 minutes, open when the handle is an extra part, go back through the steps to be sure you have all parts are no kinks. When the dryer has been running for 20 minutes and start , check the following is level. 3. (On gas models...) Check to its final position. 2. The dryer vent must use TEFLON °t tape. Move dryer into a grounded 3 prong outlet. • Electrical supply is connected. &#...
...full heat cycle (not an air cycle) for 5 minutes, open when the handle is an extra part, go back through the steps to be sure you have all parts are no kinks. When the dryer has been running for 20 minutes and start , check the following is level. 3. (On gas models...) Check to its final position. 2. The dryer vent must use TEFLON °t tape. Move dryer into a grounded 3 prong outlet. • Electrical supply is connected. &#...

Installation Instructions
Page 20
... ® (1-800-469-4663) Call anytime, day or night (U.S.A. Impreso en EE. Your Home For repair-in your nearest Sears 1Pa8r0ts0& 48R8eP1a2ir22Center. For the replacement parts, accessories and owner's manuals that you need to do-it !
... ® (1-800-469-4663) Call anytime, day or night (U.S.A. Impreso en EE. Your Home For repair-in your nearest Sears 1Pa8r0ts0& 48R8eP1a2ir22Center. For the replacement parts, accessories and owner's manuals that you need to do-it !
