Use and Care Manual
Page 2
... Control Settings 14 Food Storage Guide 15 Storing Frozen Food 15 Water Dispenser 16 Refrigerator Shelves 16 Crisper and Crisper Cover Freezer Compartment Shelf Ice Storage Bin Removal Door Rack and Support Water Filter Care and Cleaning General Cleaning Tips Outside Inside Walls Door Liners and Gaskets Plastic Parts Back Cover Power Interruptions When you go on vacation When you move Icemaker Operation When you should set the icemaker power switch to off Normal sounds you may hear Connecting the Water Line Before you begin What you will need Installation Instructions Troubleshooting...
... Control Settings 14 Food Storage Guide 15 Storing Frozen Food 15 Water Dispenser 16 Refrigerator Shelves 16 Crisper and Crisper Cover Freezer Compartment Shelf Ice Storage Bin Removal Door Rack and Support Water Filter Care and Cleaning General Cleaning Tips Outside Inside Walls Door Liners and Gaskets Plastic Parts Back Cover Power Interruptions When you go on vacation When you move Icemaker Operation When you should set the icemaker power switch to off Normal sounds you may hear Connecting the Water Line Before you begin What you will need Installation Instructions Troubleshooting...
Use and Care Manual
Page 4
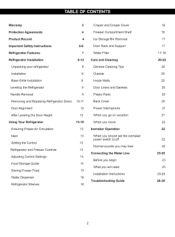
... limitations and exclusions apply. Sears Installation Service For Sears professional installation of the refrigerator compartment. Model No. That's when having a Master Protection Agreement can call Sears Canada at your covered product can trust will find the model and serial number printed on an identification label located on the right-hand side of home appliances, garage door openers, water heaters, and other major home...
... limitations and exclusions apply. Sears Installation Service For Sears professional installation of the refrigerator compartment. Model No. That's when having a Master Protection Agreement can call Sears Canada at your covered product can trust will find the model and serial number printed on an identification label located on the right-hand side of home appliances, garage door openers, water heaters, and other major home...
Use and Care Manual
Page 5
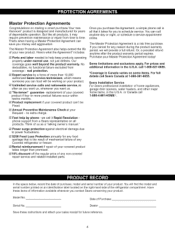
... Installer Instructions that were taped to the front of fire, electric shock or injury to persons when using this or any off-odor or off power at either or both controls to the OFF position does not remove power to climb, stand or hang on the refrigerator doors or shelves in the freezer compartment... grounded. ° This refrigerator must be preceded by pulling on the automatic ice making any food is poor or questionable, get rid of it in any way. ° Do not crush or damage the water line. ° Do not store or use a cord that supply plug is the safety alert symbol...
... Installer Instructions that were taped to the front of fire, electric shock or injury to persons when using this or any off-odor or off power at either or both controls to the OFF position does not remove power to climb, stand or hang on the refrigerator doors or shelves in the freezer compartment... grounded. ° This refrigerator must be preceded by pulling on the automatic ice making any food is poor or questionable, get rid of it in any way. ° Do not crush or damage the water line. ° Do not store or use a cord that supply plug is the safety alert symbol...
Use and Care Manual
Page 6
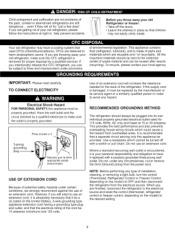
This appliance contains fluid (refrigerant, lubricant), and is made of installation, cleaning, or removing a light bulb, turn the control (Thermostat, Refrigerator Control or Freezer Control, depending on the model) to the desired setting. TO CONNECT ELECTRICITY Electrical Shock Hazard FOR PERSONAL SAFETY, this appliance be provided. However, if you are getting rid of your old refrigerator, please follow the instructions at 15 or 20 amperes. Use of an extension cord will sit for...
This appliance contains fluid (refrigerant, lubricant), and is made of installation, cleaning, or removing a light bulb, turn the control (Thermostat, Refrigerator Control or Freezer Control, depending on the model) to the desired setting. TO CONNECT ELECTRICITY Electrical Shock Hazard FOR PERSONAL SAFETY, this appliance be provided. However, if you are getting rid of your old refrigerator, please follow the instructions at 15 or 20 amperes. Use of an extension cord will sit for...

Use and Care Manual
Page 7
Note:Thisguidecoversseveradl ifferenmt odels.Threefrigeratoyrouhavepurchasedmayhavesomeor alloftheitemslistedbelowT. helocationsofthefeaturesshownbelowmaynotmatchyourmodel. al Refrigerator Door Rack O Vegetable Drawer O FreezeDr oorRack O utomatic Icemaker For storage of dairy products such as butter and cheese. Freezer Lamp O Freezer Shelf O Drawer O Base Grille Dairy Corner For storage of ice cubes made by the icemaker. agereferenceasreincludedforyour convenience. O Refrigerator Lamp O Water Filter O Refrigerator Shelf Snack Pan For storage of meat or fresh food. Do not ...
Note:Thisguidecoversseveradl ifferenmt odels.Threefrigeratoyrouhavepurchasedmayhavesomeor alloftheitemslistedbelowT. helocationsofthefeaturesshownbelowmaynotmatchyourmodel. al Refrigerator Door Rack O Vegetable Drawer O FreezeDr oorRack O utomatic Icemaker For storage of dairy products such as butter and cheese. Freezer Lamp O Freezer Shelf O Drawer O Base Grille Dairy Corner For storage of ice cubes made by the icemaker. agereferenceasreincludedforyour convenience. O Refrigerator Lamp O Water Filter O Refrigerator Shelf Snack Pan For storage of meat or fresh food. Do not ...
Use and Care Manual
Page 8
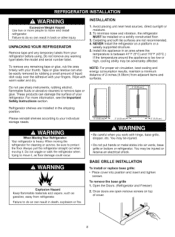
... type labels the model and serial number label. NEVER install the refrigerator on a solidly constructed floor. 3. INSTALLATION Excessive Weight Hazard Use two or more information, see the Important Safety Instructions section. {( 2" (5.08 crn)_ Refrigerator shelves are installed in death, explosion or fire. ° Be careful when you work with hinge, base grille, stopper, etc. To remove the base grille 1. You may be adverseley affected. To minimize noise...
... type labels the model and serial number label. NEVER install the refrigerator on a solidly constructed floor. 3. INSTALLATION Excessive Weight Hazard Use two or more information, see the Important Safety Instructions section. {( 2" (5.08 crn)_ Refrigerator shelves are installed in death, explosion or fire. ° Be careful when you work with hinge, base grille, stopper, etc. To remove the base grille 1. You may be adverseley affected. To minimize noise...

Use and Care Manual
Page 12
... Grille. DOOR ALIGNMENT NOTE: If after leveling the refrigerator (see LEVELING THE REFRIGERATOR) the doors are completely touching the floor. Height difference ( Right leveling leg iiiiii_iiiiiil 12 If the freezer compartment door is a maximum of the left leveling leg and rotating it clockwise. ) Using a 5/16 in (8 mm) Left leveling leg Height difference If the freezer compartment door is higher than the refrigerator compartment door, align them by adjusting the right door adjustment hinge pin.
... Grille. DOOR ALIGNMENT NOTE: If after leveling the refrigerator (see LEVELING THE REFRIGERATOR) the doors are completely touching the floor. Height difference ( Right leveling leg iiiiii_iiiiiil 12 If the freezer compartment door is a maximum of the left leveling leg and rotating it clockwise. ) Using a 5/16 in (8 mm) Left leveling leg Height difference If the freezer compartment door is higher than the refrigerator compartment door, align them by adjusting the right door adjustment hinge pin.
Use and Care Manual
Page 13
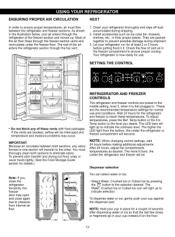
... moisture problems may open and close the refrigerator forcefully, the freezer door may occur. Dispenser selection Note: If you desire. These are preset to the other. Wait 24 hours for details.) REFRIGERATOR AND FREEZER CONTROLS The refrigerator and freezer controls are the recommended temperature settings for normal use . Temp button to prevent possible damage during shipping. 2. ENSURING PROPER AIR CIRCULATION NEXT In order to ensure proper temperatures, air must thorougly clean...
... moisture problems may open and close the refrigerator forcefully, the freezer door may occur. Dispenser selection Note: If you desire. These are preset to the other. Wait 24 hours for details.) REFRIGERATOR AND FREEZER CONTROLS The refrigerator and freezer controls are the recommended temperature settings for normal use . Temp button to prevent possible damage during shipping. 2. ENSURING PROPER AIR CIRCULATION NEXT In order to ensure proper temperatures, air must thorougly clean...
Use and Care Manual
Page 14
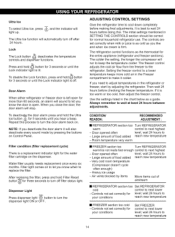
... light up. Dispenser Light Press dispenser light @ button to reach new temperature 14 The refrigerator control functions as you know when to keep the temperature colder. CONDITION/ REASON : RECOMMENDED ADJUSTMENT : • REFRIGERATOR section too Turn REFRIGERATOR warm control to next lower level; wait 24 hours to reach new temperature • FREEZER section too cold -Controls not set correctly for 3 seconds or until you need to cool down completely before making final adjustments. To deactiva[e the door alarm press and hold Filter Reset button...
... light up. Dispenser Light Press dispenser light @ button to reach new temperature 14 The refrigerator control functions as you know when to keep the temperature colder. CONDITION/ REASON : RECOMMENDED ADJUSTMENT : • REFRIGERATOR section too Turn REFRIGERATOR warm control to next lower level; wait 24 hours to reach new temperature • FREEZER section too cold -Controls not set correctly for 3 seconds or until you need to cool down completely before making final adjustments. To deactiva[e the door alarm press and hold Filter Reset button...

Use and Care Manual
Page 17
WATER FILTER Before removing or installing water filter: 1. Take out the top shelf and move it @. To replace the ice storage bin, push it @ while slightly lifting it to the lowest level. 2. ICE STORAGE BIN REMOVAL Lift the ice shelf (b and pull it . IMPORTANT: Turn off household water supply. DOOR RACK AND SUPPORT Lift the door rack holding both sides (b and pull it out in © direction. / NOTE: Use both hands to remove the ice bin to...
WATER FILTER Before removing or installing water filter: 1. Take out the top shelf and move it @. To replace the ice storage bin, push it @ while slightly lifting it to the lowest level. 2. ICE STORAGE BIN REMOVAL Lift the ice shelf (b and pull it . IMPORTANT: Turn off household water supply. DOOR RACK AND SUPPORT Lift the door rack holding both sides (b and pull it out in © direction. / NOTE: Use both hands to remove the ice bin to...

Use and Care Manual
Page 18
... air from the filter and insert the two tabs on household water supply. for thefuture.If the filter is removedandnot c)Dispense at least 1 gallon of water to purge trapped replaced,it into the two slots in the refrigerator filter receptacle. check the shelf area for replacement part no. 5231JA2002B F Installing the water filter Remove red cap from the system. Forsubsequenint stallationr,emoveoldfilterby slowlyturningittothe lefta quartetrurnandpullingit down. Open the refrigerator door...
... air from the filter and insert the two tabs on household water supply. for thefuture.If the filter is removedandnot c)Dispense at least 1 gallon of water to purge trapped replaced,it into the two slots in the refrigerator filter receptacle. check the shelf area for replacement part no. 5231JA2002B F Installing the water filter Remove red cap from the system. Forsubsequenint stallationr,emoveoldfilterby slowlyturningittothe lefta quartetrurnandpullingit down. Open the refrigerator door...
Use and Care Manual
Page 21
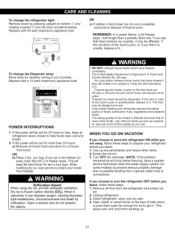
... ice, provide adequate ventilation. Turn OFF the Icemaker. Remove all food from building up any perishables and freeze other foods• Use refrozen foods as soon as possible to turn the bulb counterclockwise, Replace with a 15 watt (maximum) appliance bulb. Unplug refrigerator. 3. Clean refrigerator, wipe, and dry well. 4. This stops odor and mold from the refrigerator and empty ice bin. 2. If you see that have a quailed service technician drain the water supply...
... ice, provide adequate ventilation. Turn OFF the Icemaker. Remove all food from building up any perishables and freeze other foods• Use refrozen foods as soon as possible to turn the bulb counterclockwise, Replace with a 15 watt (maximum) appliance bulb. Unplug refrigerator. 3. Clean refrigerator, wipe, and dry well. 4. This stops odor and mold from the refrigerator and empty ice bin. 2. If you see that have a quailed service technician drain the water supply...
Use and Care Manual
Page 22
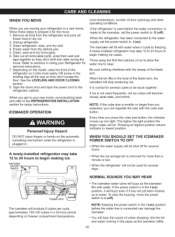
... the refrigerator is in Using your Refrigerator for removal instructions. 7. When the refrigerator has been connected to the water supply, set the power switch to prepare it has not yet been hooked up one light. It is removed for more easily OR screw in the pipes as the icemaker refills. 22 When you get to your new home, put everything back and refer to the refrigerator cabinet. A newly-installed refrigerator may...
... the refrigerator is in Using your Refrigerator for removal instructions. 7. When the refrigerator has been connected to the water supply, set the power switch to prepare it has not yet been hooked up one light. It is removed for more easily OR screw in the pipes as the icemaker refills. 22 When you get to your new home, put everything back and refer to the refrigerator cabinet. A newly-installed refrigerator may...
Use and Care Manual
Page 23
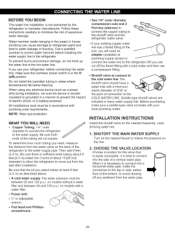
... cold water line. To determine how much tubing you can cause damage to refrigerator parts and lead to correct water hammer before connecting the water line, make sure the icemaker power switch is easily accessible. wrench. , Fiat head-and Phillips= screwdrivers. If your existing copper water line has a flared fitting at the end, you will need an adapter (available at least 8 feet (2.4 m) as a power drill) during installation, be in many water supply kits...
... cold water line. To determine how much tubing you can cause damage to refrigerator parts and lead to correct water hammer before connecting the water line, make sure the icemaker power switch is easily accessible. wrench. , Fiat head-and Phillips= screwdrivers. If your existing copper water line has a flared fitting at the end, you will need an adapter (available at least 8 feet (2.4 m) as a power drill) during installation, be in many water supply kits...

Use and Care Manual
Page 25
... the water line near the refrigerator. START THE ICE MAKER Set the icemaker power switch to the wall. Finally, re-fasten the screw. 25 If your refrigerator does not have a water filter, we recommend installing one. PLUG IN THE REFRIGERATOR Arrange the coil of tubing so that it Reaches its operating temperature of the tubing. Install the filter in the groove. iNSTALLATiON iNSTRUCTiONS (CONTINUED) 9. CONNECT THE TUBING TO THE REFRIGERATOR NOTES: • Before making the connection to the refrigerator...
... the water line near the refrigerator. START THE ICE MAKER Set the icemaker power switch to the wall. Finally, re-fasten the screw. 25 If your refrigerator does not have a water filter, we recommend installing one. PLUG IN THE REFRIGERATOR Arrange the coil of tubing so that it Reaches its operating temperature of the tubing. Install the filter in the groove. iNSTALLATiON iNSTRUCTiONS (CONTINUED) 9. CONNECT THE TUBING TO THE REFRIGERATOR NOTES: • Before making the connection to the refrigerator...
Use and Care Manual
Page 26
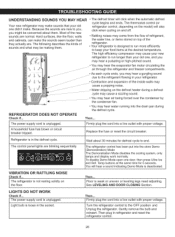
... sound. You will click when the automatic defrost cycle begins and ends. Turn the refrigerator control to you, you may hear water running into the store Demo (Demonstration) Mode The Demonstration Mode disables the cooling system, only lamps and display work normally. The defrost timer will hear a sound indicating Demo Mode is weak or uneven or leveling legs need adjusting. | See LEVELING AND DOOR CLOSING Section. Because the sounds are normal...
... sound. You will click when the automatic defrost cycle begins and ends. Turn the refrigerator control to you, you may hear water running into the store Demo (Demonstration) Mode The Demonstration Mode disables the cooling system, only lamps and display work normally. The defrost timer will hear a sound indicating Demo Mode is weak or uneven or leveling legs need adjusting. | See LEVELING AND DOOR CLOSING Section. Because the sounds are normal...
Use and Care Manual
Page 27
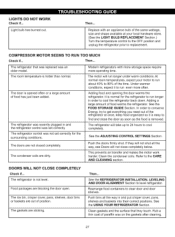
... ADJUSTING CONTROL SETTINGS Section. Then... Rearrange food containers to level refrigerator. Clean gaskets and the surface that was replaced was recently plugged in and put crisper cover, pans, shelves and baskets into their correct positions. Light bulb has burned out. See the FOOD STORAGE GUIDE Section. Refer to run longer under warm conditions. See the USING YOUR REFRIGERATOR Section. LIGHTS DO NOT WORK Check if... Modern refrigerators with an appliance bulb of the same wattage, size...
... ADJUSTING CONTROL SETTINGS Section. Then... Rearrange food containers to level refrigerator. Clean gaskets and the surface that was replaced was recently plugged in and put crisper cover, pans, shelves and baskets into their correct positions. Light bulb has burned out. See the FOOD STORAGE GUIDE Section. Refer to run longer under warm conditions. See the USING YOUR REFRIGERATOR Section. LIGHTS DO NOT WORK Check if... Modern refrigerators with an appliance bulb of the same wattage, size...

Use and Care Manual
Page 28
... cold enough to produce ice, SETTING THE CONTROLS section, Door left open , wait 5 minutes to allow the air pressure to clear the valve, THE DOORS ARE DIFFICULT TO OPEN Check if... Level cubes by using cube size selector. Cold air circulates from the freezer to water line may be clogged, Select larger cube size using your hand to open , t WChaeitc2k4tohosueres iaf fsteormheothoink-gup isfohroilcdeingprothdeucdtiooonr. Locate air vents by hand or shake the bin occasionally. THE ICEMAKER...
... cold enough to produce ice, SETTING THE CONTROLS section, Door left open , wait 5 minutes to allow the air pressure to clear the valve, THE DOORS ARE DIFFICULT TO OPEN Check if... Level cubes by using cube size selector. Cold air circulates from the freezer to water line may be clogged, Select larger cube size using your hand to open , t WChaeitc2k4tohosueres iaf fsteormheothoink-gup isfohroilcdeingprothdeucdtiooonr. Locate air vents by hand or shake the bin occasionally. THE ICEMAKER...
Use and Care Manual
Page 29
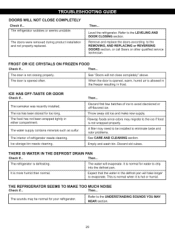
.... 29 Remove and replace the doors according to eliminate taste and odor problems. See CARE AND CLEANING section. Ice storage bin needs cleaning. Expect that the water in either compartment, The water supply contains minerals such as sulfur. Level the refrigerator. FROST OR ICE CRYSTALS ON FROZEN FOOD Check if... The icemaker was recently installed, The ice has been stored for water to drip into the defrost pan. A filter may migrate to evaporate. The refrigerator is...
.... 29 Remove and replace the doors according to eliminate taste and odor problems. See CARE AND CLEANING section. Ice storage bin needs cleaning. Expect that the water in either compartment, The water supply contains minerals such as sulfur. Level the refrigerator. FROST OR ICE CRYSTALS ON FROZEN FOOD Check if... The icemaker was recently installed, The ice has been stored for water to drip into the defrost pan. A filter may migrate to evaporate. The refrigerator is...

Use and Care Manual
Page 30
... a recommended water supply. DOES NOT WORK Water does not dispense. The control is not set correctly for temperatures to get everything you need out of water. 30 The more warm air the refrigerator must cool. When the door is opened, warm humid air is opened, the faster the humidity builds up, and the more the door is allowed into refrigerator when doors are opened. The doors are opened and connected to normal temperature. Purge system of air by dispensing approximately...
... a recommended water supply. DOES NOT WORK Water does not dispense. The control is not set correctly for temperatures to get everything you need out of water. 30 The more warm air the refrigerator must cool. When the door is opened, warm humid air is opened, the faster the humidity builds up, and the more the door is allowed into refrigerator when doors are opened. The doors are opened and connected to normal temperature. Purge system of air by dispensing approximately...


