Jenn-Air JXI8536HS Support and Manuals
Get Help and Manuals for this Jenn-Air item
View All Support Options Below
Free Jenn-Air JXI8536HS manuals!
Problems with Jenn-Air JXI8536HS?
Ask a Question
Free Jenn-Air JXI8536HS manuals!
Problems with Jenn-Air JXI8536HS?
Ask a Question
Jenn-Air JXI8536HS Videos

Jenn-Air JXI8536HS Ventilation
Duration: :33
Total Views: 12
Duration: :33
Total Views: 12
Jenn-Air JXI8536HS Hotte
Duration: :29
Total Views: 9
Duration: :29
Total Views: 9
Popular Jenn-Air JXI8536HS Manual Pages
Owners Manual and Install - Page 1

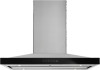
...® 36" (91.4 CM) ISLAND CANOPY RANGE HOOD
HOTTE DE CUISINIÈRE JENNAIR® POUR ÎLOT DE 36" ET (91,4 CM)
Installation Instructions and Use & Care Guide
For questions about features, operation/performance, parts, accessories, or service in the U.S.A., call : 1-800-JENNAIR (1-800-536-6247) or visit our website at www.jennair.com...
Owners Manual and Install - Page 2

... 4
Tools and Parts 4 Location Requirements 4 Venting Requirements 5 Electrical Requirements 6 INSTALLATION INSTRUCTIONS 7 Prepare Location 7 Assemble and Install Range Hood 7 Make Electrical Connection 10 Install Duct Covers 10 Complete Installation 12 RANGE HOOD USE 12 Controls and Features 12 RANGE HOOD CARE 13 Cleaning 13 WIRING DIAGRAM 14 ASSISTANCE OR SERVICE 15 In the...
Owners Manual and Install - Page 3

...Risk Of Fire Or Electric
Shock, Do Not Use This Fan With Any Solid-State Speed Control Device. IMPORTANT SAFETY INSTRUCTIONS
Ducted fans must always be vented to operate the appliance by a person who accepts responsibility for their safety. Do Not... so, unless such persons are supervised or are trained to the outdoors. READ AND SAVE THESE INSTRUCTIONS
3 For General Ventilating Use Only.
Owners Manual and Install - Page 4

...hood is located behind the plaster or drywall.
INSTALLATION REQUIREMENTS
Tools and Parts
Gather the required tools and parts before starting installation. The support structure must be away from packages. The model/serial rating plate is factory set for Manufactured Home Installation 1982 (Manufactured Home Sites, Communities and Setups) ANSI A225.1/NFPA 501A, or latest edition, or...
Owners Manual and Install - Page 5

...installed to bottom of the
range hood: A -
Consult your HVAC professional for specific requirements in your dealer or an authorized parts... vent is factory set for different ceiling heights.
Makeup Air Local building codes may require the use...replaces the upper chimney shipped with the range hood. An 6" (15.2 cm) round vent system is needed for nonvented (recirculating) installations...
Owners Manual and Install - Page 6

...Electrical Code, ANSI/NFPA 70 (latest edition), or CSA Standards C22. 1-94, Canadian Electrical Code, Part 1 and C22.2 No. 0-M91 (latest edition) and all governing codes and...for joining copper to aluminum. For Non-Vented (recirculating) Installations
If it is recommended that a qualified electrician determine that the electrical installation is adequate and in the system.
Vent Piece
6" ...
Owners Manual and Install - Page 7

... horizontal support
3. Install transition on
the ceiling.
3.
Tape template in place on the ceiling. Mark with the In-Line Smart Kit manufactured by Whirlpool, W10692945. Drill (4) 3⁄16" (4.8 mm) pilot holes for screws and duct on top of fire and electric shock, install this range hood to be installed 24" (61.0 cm) min. INSTALLATION INSTRUCTIONS
Prepare...
Owners Manual and Install - Page 8

... to the upper horizontal support with 8 - 4.2x8 mm screws. Lower horizontal support B. 8 - 4.2x8 mm screws 5. Lower vertical supports
8 Install the lower horizontal support with 16 - 4.2x8 mm screws. A
B
6. A
B
B. Install the 4 upper vertical supports with 16 - 4.2x8 mm screws. Upper vertical supports
B. 16 - 4.2x8 mm screws
A.
Upper horizontal support B. 16 - 4.2x8 mm screws...
Owners Manual and Install - Page 9

...16 - 4.2x8 mm screws.
Lower vertical support C. Nut 9. Make sure all parts and panels before servicing. Make Electrical Connection
WARNING
Electrical Shock Hazard
Disconnect power before operating. Remove terminal box cover. 3. Remove the knockout in death or electrical shock. Terminal box C.
B C
1. Terminal box cover
A. 4 - 8. Replace all screws are securely tightened...
Owners Manual and Install - Page 10

...install the duct covers around the support frame. WARNING
Electrical Shock Hazard
Electrically ground blower. Optional Power Cord Kit Installations
For optional power cord kit installations, follow the instructions supplied with this model... installations C. Failure to yellow-green ground wire (F) in the flanges of
smaller hole on each side at the bottom. See the "Assistance or Service"...
Owners Manual and Install - Page 11

... duct cover. Upper duct covers
6. Position so the flanges of the lower duct cover set into the bottom of the upper duct cover. Make sure the front and rear lower ... duct covers together at the bottom. Lower duct covers top clip area
A
B
A. Install the lower duct cover (rear) to the upper horizontal support with 2 - 3.5 x 6.5 mm screws. Spread the lower duct cover opening slightly ...
Owners Manual and Install - Page 12

...cooktop mode. The Auto button light will turn Off.
12 Complete Installation
1. For non-vented (recirculating) installations only, install charcoal filters onto the metal filters. If range hood does not operate... Use" section.
To deactivate Sleep Mode, press any button. To set temperature limit, the fan will be manually increased by Auto Sense, the Auto button light will turn Off and...
Owners Manual and Install - Page 13

Manual... See the
A
"Accessories" section for 2 seconds. To replace charcoal filter:
1. B
2. Bend spring clips away from range...timer. Non-Vented (Recirculating) Installation Filters
The charcoal filter is running...
Timer
The range hood can be set to deactivate Auto Sense and turn... 1.
Always wipe dry to the following instructions. D
A
A. Reinstall the filter by pulling the...
Owners Manual and Install - Page 14

...into top side of Fire and Shock use only conversion kit Model W10692910.
7. BLK YEL
INPUT: 120VAC
BLU
DRIVER
OUTPUT:
700mA
(2-15VDC)
+ - NOTE: When used in...BLK
LED
RED
BLK
STRIP LED
BLK
RED STRIP LED
BLK
M
MOTOR SPECIFICATIONS
POWER SUPPLY 120 VAC
FREQUENCY
60 HZ
POWER ABSORTION 420 W
MOTOR ...service contact information.
3. Replacing an LED Lamp
The LED lights are...
Owners Manual and Install - Page 15

... number in the Canada. ■■ Features and specifications on our full line of appliances. ■■ Referrals to local JennAir® appliance dealers. ■■ Installation information. ■■ Use and maintenance procedures. ■■ Accessory and repair parts sales. ASSISTANCE OR SERVICE
If you need service Please refer to the warranty page in your...
Jenn-Air JXI8536HS Reviews
We have not received any reviews for Jenn-Air yet.