Jenn-Air JJD3024HM1 Support and Manuals
Get Help and Manuals for this Jenn-Air item

View All Support Options Below
Free Jenn-Air JJD3024HM1 manuals!
Problems with Jenn-Air JJD3024HM1?
Ask a Question
Free Jenn-Air JJD3024HM1 manuals!
Problems with Jenn-Air JJD3024HM1?
Ask a Question
Popular Jenn-Air JJD3024HM1 Manual Pages
Owners Manual - Page 2
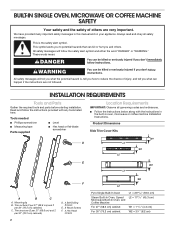
... don't immediately follow instructions. WARNING
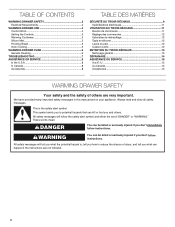
You can kill...instructions. TABLE OF CONTENTS
WARMING DRAWER SAFETY 2 Electrical Requirements 4
WARMING DRAWER USE 4 Control Knob 4 Setting the Controls 5 Warming Cookware 5 Silicon Mat 5 Proofing Bread 5 Slow Cooking 5
WARMING DRAWER CARE 6 General Cleaning 6
TROUBLESHOOTING 7 ASSISTANCE OR SERVICE...14 ASSISTANCE OU SERVICE 15
Aux &#...
Owners Manual - Page 3
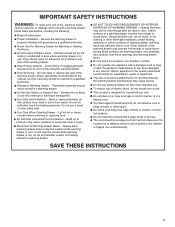
... appliance malfunctions or has been damaged in any part of the warming drawer unless specifically recommended in color. Do not use warming drawer for household use .
User Servicing -
Always place warming drawer racks in desired location while warming drawer is in injury.
Do not repair or replace any manner. Smother fire or flame or use...
Owners Manual - Page 4
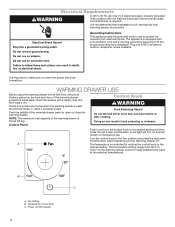
... setting ranges from electrical shock. It is equipped with a 3-conductor cord and a 3-prong grounding-type plug to fit the proper grounding-type receptacle.
Grounding Instructions
...supply, properly grounded in accordance with the National Electrical Code and local codes and ordinances, is controlled by rotating the control knob to the
desired setting. B
C
A. A
The temperature is required....
Owners Manual - Page 7
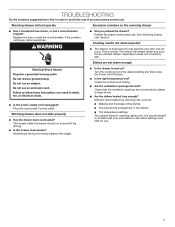
...setting.
■■ Are the ventilation openings blocked? Check that the ventilation openings are not warm enough
■■ Is the power supply cord unplugged? If the problem...settings work best for warming dishes vary. Warming drawer will remain tender and juicy. Replace...an unnecessary service call ...settings. It is normal. Plug into a grounded 3 prong outlet.
TROUBLESHOOTING...
Installation Instructions - Page 2
...'t immediately follow the instructions provided with the instructions in
the built-in this manual and on your appliance.
Read and follow instructions. Product Dimensions
Side Trim Cover Kits
W1
D
L1
W1 L2
E
W2
L1
F
A
B
C
A. Mounting jig
B. INSTALLATION REQUIREMENTS
Tools and Parts
Gather the required tools and parts before starting installation.
Trim surface (2 per...
Installation Instructions - Page 6

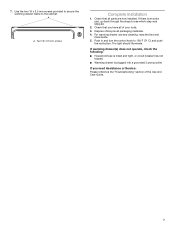
...Installation
1. Secure the coffee system to "Complete Installation" section.
Power supply cord clip B.
Failure to move and install the built-in Step 4.
6.
Install....
Using 2 or more people to follow these instructions can result in death, fire, or electrical shock...part, go back through the clip on the top of the cabinet.
5. Pull runners all of the Use and Care Guide...
Installation Instructions 1 - Page 3
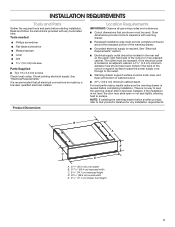
... screws Check local codes. For best performance results make sure the warming drawer is not level, the door may slide open or not seal tightly, allowing heat to the outlet.
■■ Warming drawer support surface must be solid, level, and flush with any installation requirements. Read and follow the instructions provided with bottom...
Installation Instructions 1 - Page 5
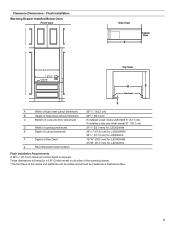
... (minimum)
2311/16" (60.2 cm)
B
Height of flush inset cutout (minimum)
233/4" (60.3 cm)
C
Bottom of cutout to floor (minimum)
If installed under model JMC6224 5" (12.7 cm) If installed under any other model 31" (78.7 cm)
D
Width of opening (minimum)
215/8" (55.0 mm) for JJD3024HM
E
Depth of the cleats and platforms will be visible...
Installation Instructions 1 - Page 6
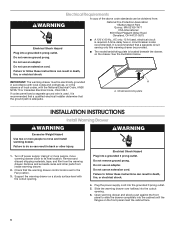
... in accordance with local codes and ordinances, or in back or other parts from :
WARNING
National ...instructions can result in death, fire, or electrical shock.
4.
If codes permit and a separate ground wire is used, it is recommended that a qualified electrical installer determine that the ground path is required. A A. Model/serial/rating plate
INSTALLATION INSTRUCTIONS
Install...
Installation Instructions 1 - Page 7
... light should illuminate. 7. Two 19 x 3.5 mm screws
Complete Installation
1. If there is plugged into a grounded 3 prong outlet. If you have all of your tools. 3. Dispose of the Use and Care Guide.
7
Check that you need Assistance or Service: Please reference the "Troubleshooting" section of /recycle all parts are now installed. Check that all packaging materials. 4. A
A.
Warranty - Page 1
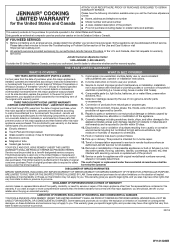
... parts (i.e. Removal or reinstallation of inaccessible appliances or built-in remote locations where an authorized JennAir servicer is installed, operated and maintained according to instructions attached to or furnished with electrical or plumbing codes or correction of purchase, when this major appliance is reported to JennAir within 30 days.
10.
This warranty gives you specific...
Dimension Guide - Page 1
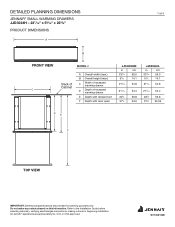
...DRAWERS JJD3024H - 23M/zn" x 5>/zn" x 22C/,"
PRODUCT DIMENSIONS
A
B
FRONT VIEW
C
MODEL #
Back of Cabinet
A Overall width (max.)
B Overall height (max.)
C
Width of recessed...: Dimensional specifications are appropriately UL, CUL or CSA approved. Refer to the Installation Guide before selecting cabinetry, verifying electrical/gas connections, making cutouts or beginning installation. Do...
Dimension Guide - Page 2
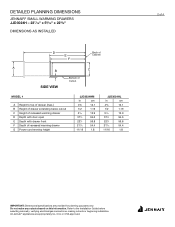
... AS INSTALLED
D E F
Back of Cabinet
A
B
C
SIDE VIEW
Bottom of Cutout
MODEL #
A Height to the Installation Guide before selecting cabinetry, verifying electrical/gas connections, making cutouts or beginning installation. Do...16
1.8
2 of 4
IMPORTANT: Dimensional specifications are appropriately UL, CUL or CSA approved. All JennAir® appliances are provided for planning ...
Dimension Guide - Page 3

... VIEW
IMPORTANT: Dimensional specifications are appropriately UL, CUL or CSA approved. Do not make any cutouts based on this information. Refer to the Installation Guide before selecting cabinetry, verifying electrical/gas connections, making cutouts or beginning installation. STANDARD INSTALLATION JJD3024H - 23M/zn" x 5>/zn" x 22C/,"
OPENING/CLEARANCE DIMENSIONS
A
MODEL # A Width of cabinet...
Dimension Guide - Page 4
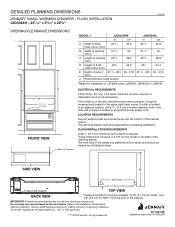
...required. All rights reserved.
W11308123B Installation Instruction W11260097 If the outlet is ...Support Surface*
e
FRONT VIEW
Back of Cabinet
MODEL #
JJD3024HM
JJD3024HL
in
cm
in the side wall or support surface to the Installation Guide before completing installation. FLUSH INSTALLATION...as a finished surface. IMPORTANT: Dimensional specifications are appropriately UL, CUL or CSA...
Jenn-Air JJD3024HM1 Reviews
We have not received any reviews for Jenn-Air yet.