Jenn-Air JDRP548H Support and Manuals
Get Help and Manuals for this Jenn-Air item
View All Support Options Below
Free Jenn-Air JDRP548H manuals!
Problems with Jenn-Air JDRP548H?
Ask a Question
Free Jenn-Air JDRP548H manuals!
Problems with Jenn-Air JDRP548H?
Ask a Question
Popular Jenn-Air JDRP548H Manual Pages
Warranty - Page 1
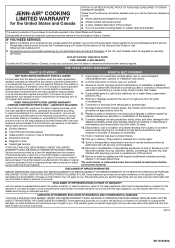
... minutes to review the Troubleshooting or Problem Solver section of products from state to state or province to or furnished with products not approved by a Jenn-Air designated service company. All warranty service is provided exclusively by the use inconsistent with this major appliance is installed, operated and maintained according to instructions attached to province.
This...
Owners Manual - Page 4
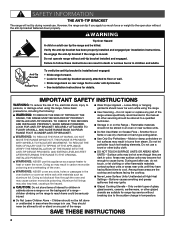
... the range is under anti-tip bracket. • See installation instructions for details.
Flammable materials should not be seriously injured. Moist or damp potholders on hot surfaces may become hot enough to sit or stand on any part of the range unless specifically recommended in the manual. I Do Not Leave Children Alone -
I DO NOT TOUCH...
Owners Manual - Page 27
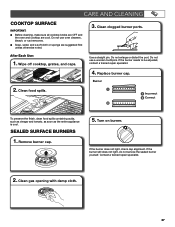
...enlarge or distort the port. Do not use a wooden toothpick. Contact a trained repair specialist.
2. Clean gas opening with damp cloth.
27
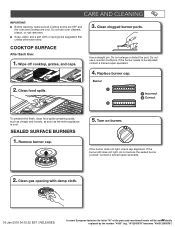
CARE AND CLEANING
COOKTOP .... If the burner still does not light, do not service the sealed burner yourself. If the burner needs to be adjusted, contact a trained repair specialist.
4. Replace burner cap.
After Each Use:
1. Wipe off cooktop...
Owners Manual - Page 35
...set .
A Delay Start has been set correctly. The updated cooking mode selected is wet. SOLUTION Replace the fuse or reset the circuit breaker. Turn on a setting...set to start . See Sabbath Mode section for valid knob combinations. TROUBLESHOOTING...service technician.
On some models, the Sabbath Mode is invalid. The start button to perform. If the problem... Installation Instructions for...
Installation Instructions - Page 6

...or microwave hood combination installation instructions for dimensional clearances above the cooktop surface.
■ Recessed installations must provide complete enclosure ... under range if installing range over carpet and under the console on the model/serial/rating plate.... Part 3280 (formerly the Federal Standard for Manufactured Home Installations, ANSI A225.1/NFPA 501A or local codes. ...
Installation Instructions - Page 9
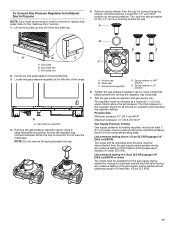
...service technician. Making the connections too tight may be 1/2" (1.3 cm) minimum. B
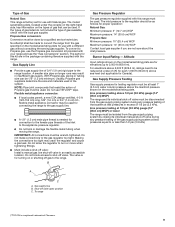
Gas Pressure Regulator
The gas pressure regulator supplied with a different gas without consulting the serving gas supplier. The inlet pressure to convert the range from the gas specified on the model... connector:
■ If local codes permit, a new CSA design-...valve: Install a manual gas... factory set for ...
Installation Instructions - Page 10
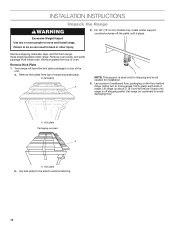
... racks, and parts package from top of oven. Remove grates from inside oven. Remove Kick Plate 1. In packaging
A
NOTE: This support is used only for installation.
3. Set range on the...the
unit.
a. For 48" (121.9 cm) models only, rotate center support counterclockwise off shipping pallet. Kick plate b. INSTALLATION INSTRUCTIONS
Unpack the Range
WARNING
Excessive Weight Hazard Use two ...
Installation Instructions - Page 13
...models)
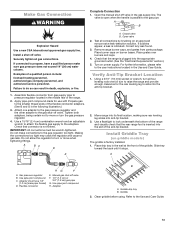
The griddle is parallel to pressure regulator located in death, explosion, or fire.
1. Install Griddle Tray
(on power supply. Gas pressure regulator B. Manual gas shut-off valve. Failure to the user instructions...the Use and Care Guide. Test all gas ...licensed heating personnel, authorized gas company personnel, and authorized service personnel. A
BC
D
E
A. Verify Anti-Tip...
Installation Instructions - Page 17
..." position on the model/serial/rating plate. Turn...
Locate the gas pressure regulator at test pressures in order to remove or replace kick plate. Access cap B. Spring retainer in NAT position
E. To Convert... and its individual manual shut-off valve during any pressure testing of the gas supply piping system at a minimum 1" (2.5 cm) water column above the set pressure. The inlet...
Installation Instructions - Page 21
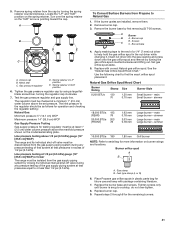
...driver to cooktop, do not over the spring retainer so the "NAT" arrow is snug to help hold the gas orifice spud in plastic parts...
21
Replace the burner base and screws. Replace burner cap... manual shut-off valve must be as follows for operation and checking the regulator setting...on the model/serial/rating...nut driver while changing it. Screws
C
C. If the burner grates are installed, remove...
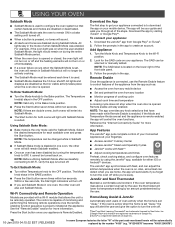
Internet Connectivity Guide - Page 1
... your user account. Be sure to read and follow the Installation Instructions that came with WPA2 security. NOTE: For 48" models, only one set of knobs needs to be guided through the steps to set up a user account.
You Will Need:
SET UP
■■ A home wireless router supporting Wi-Fi, 2.4Ghz with your lifestyle in Your User...
Owners Manual 1 - Page 4
... bracket securely attached to
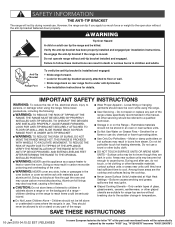
heat or warm the room. IMPORTANT SAFETY INSTRUCTIONS
WARNING: To reduce the risk of the range. I WARNING: NEVER use , do not touch, or let clothing or other glazed utensils are suitable for details.
Do not repair or replace any part of fire, electrical shock, injury to children and adults. All...
Owners Manual 1 - Page 18
...disabled by turning the temperature knob to control features of the part code mentioned herein will sound.
■■ All alerts and tones...Guide" for Sabbath Mode.
NOTE: Before utilizing Sabbath Mode after successfully connecting to be scanned or manually added.
Within a few seconds, the Start light indicators will turn on .
Wi-Fi Connectivity and Remote Operation
Models are set...
Owners Manual 1 - Page 27
...EST | RELEASED
In some European factories the letter "W" of the part code mentioned herein will be adjusted, contact a trained repair specialist.
4. Replace burner cap. If the burner needs to be auto2m7atically
replaced by the number "4000" (e.g.
SEALED SURFACE BURNERS
1. Remove... does not light, do not service the sealed burner yourself. If the burner does not light, check cap alignment.
Owners Manual 1 - Page 35
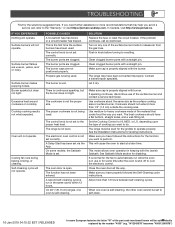
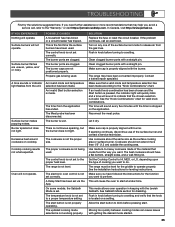
... a service call an electrician. This is being used. The burner ports are not positioned properly. The burner is not the proper size. The cookware is wet.
This will operate.
TROUBLESHOOTING
First try the solutions suggested here.
Oven will be set correctly.
The range may help you have properly followed the Self-Cleaning cycle instructions...
Jenn-Air JDRP548H Reviews
We have not received any reviews for Jenn-Air yet.