Instructions
Page 3
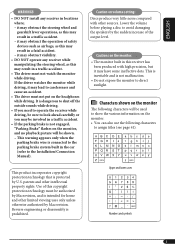
...carelessness and cause an accident. • The driver must be used to show the various information on the monitor The following characters to the Installation/Connection Manual). Reverse engineering or disassembly is dangerous to shut off the outside sounds while driving. • If you ...need to operate the receiver while driving, be sure to direct sunlight. Characters shown on the monitor. • You can also ...
...carelessness and cause an accident. • The driver must be used to show the various information on the monitor The following characters to the Installation/Connection Manual). Reverse engineering or disassembly is dangerous to shut off the outside sounds while driving. • If you ...need to operate the receiver while driving, be sure to direct sunlight. Characters shown on the monitor. • You can also ...
Instructions
Page 8
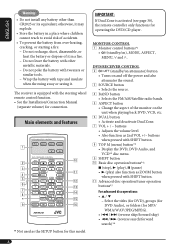
... the battery in a fire. - MONITOR CONTROL 1 Monitor control buttons*1 • (standby/on the unit when playing back DVD, VCD, etc. 6 DUAL button • Activate and deactivate Dual Zone. 7 VOL + / - buttons when pressed with SHIFT button. Wrap the battery with the steering wheel remote control function. • See the Installation/Connection Manual (separate volume) for this...
... the battery in a fire. - MONITOR CONTROL 1 Monitor control buttons*1 • (standby/on the unit when playing back DVD, VCD, etc. 6 DUAL button • Activate and deactivate Dual Zone. 7 VOL + / - buttons when pressed with SHIFT button. Wrap the battery with the steering wheel remote control function. • See the Installation/Connection Manual (separate volume) for this...

Instructions
Page 37
...audio component such as a source (AV-IN is displayed on the monitor. (The monitor on the external monitor.) *1 Appears only when SIRIUS tuner is connected. *2 Reverse lamp ... receiver only; The rear view through the camera appears on the monitor. [44] Input AV Input You can determine the use of...with each other area than North/Central/South America. (FM: 50 kHz-manual tuning, 100 kHz -auto search; If this when using the unit ...AM: 10 kHz) SIRIUS ID*1 Your SIRIUS identification number appears on the monitor in any other . Audio&Video: [Initial]; Camera*2: Select when connecting ...
...audio component such as a source (AV-IN is displayed on the monitor. (The monitor on the external monitor.) *1 Appears only when SIRIUS tuner is connected. *2 Reverse lamp ... receiver only; The rear view through the camera appears on the monitor. [44] Input AV Input You can determine the use of...with each other area than North/Central/South America. (FM: 50 kHz-manual tuning, 100 kHz -auto search; If this when using the unit ...AM: 10 kHz) SIRIUS ID*1 Your SIRIUS identification number appears on the monitor in any other . Audio&Video: [Initial]; Camera*2: Select when connecting ...
Instructions
Page 44
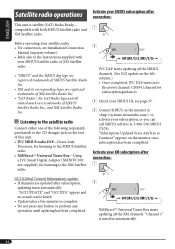
... listening to the SIRIUS Satellite radio. • XMDirectTM Universal Tuner Box-Using a JVC Smart Digital Adapter (XMDJVC100: not supplied), for subscription guidance). 3 Check your SIRIUS ID, see Installation/Connection Manual (separate volume). • Refer also to the Instructions supplied with both SIRIUS Satellite...the preset channel, CH184 (channel for listening to the XM Satellite radio. 2 SRC D DISP JVC DLP starts updating all the SIRIUS channels. (See GCI update on the monitor once subscription has been completed. Activate your subscription, or you can be heard. • ...
... listening to the SIRIUS Satellite radio. • XMDirectTM Universal Tuner Box-Using a JVC Smart Digital Adapter (XMDJVC100: not supplied), for subscription guidance). 3 Check your SIRIUS ID, see Installation/Connection Manual (separate volume). • Refer also to the Instructions supplied with both SIRIUS Satellite...the preset channel, CH184 (channel for listening to the XM Satellite radio. 2 SRC D DISP JVC DLP starts updating all the SIRIUS channels. (See GCI update on the monitor once subscription has been completed. Activate your subscription, or you can be heard. • ...
Instructions
Page 49
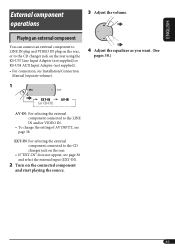
... EXT-IN: For selecting the external component connected to the LINE IN and/or VIDEO IN. • To change the setting of AV INPUT, see Installation/Connection Manual (separate volume). 1 SRC D DISP EXT-IN AV-IN 3 Adjust the volume. SRC D 4 Adjust the equalizer as you want. (See pages 38.) AV-IN: For...
... EXT-IN: For selecting the external component connected to the LINE IN and/or VIDEO IN. • To change the setting of AV INPUT, see Installation/Connection Manual (separate volume). 1 SRC D DISP EXT-IN AV-IN 3 Adjust the volume. SRC D 4 Adjust the equalizer as you want. (See pages 38.) AV-IN: For...
Instructions
Page 50
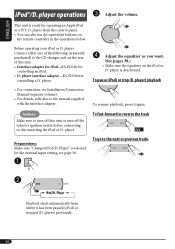
...Interface adapter for iPod-KS-PD100 for operating an Apple iPod or a JVC D. player) previously. 50 player) playback • For connection, see page 38. ~ To go to the manual supplied with the interface adapter. player is selected for controlling a D. To resume playback, press it has been...unit or turn off the vehicle's ignition switch before connecting or disconnecting the iPod or D. player interface adapter-KS-PD500 for the external input setting, see Installation/Connection Manual (separate volume). • For details, refer also to the next or previous tracks Ÿ...
...Interface adapter for iPod-KS-PD100 for operating an Apple iPod or a JVC D. player) previously. 50 player) playback • For connection, see page 38. ~ To go to the manual supplied with the interface adapter. player is selected for controlling a D. To resume playback, press it has been...unit or turn off the vehicle's ignition switch before connecting or disconnecting the iPod or D. player interface adapter-KS-PD500 for the external input setting, see Installation/Connection Manual (separate volume). • For details, refer also to the next or previous tracks Ÿ...
Instructions
Page 59
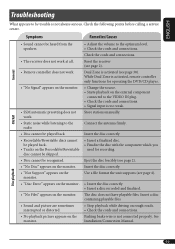
...• Insert a finalized disc. • Finalize the disc with the component which you used for operating the DVD/CD player. • Change the source. • Starts playback on the monitor. Use a file format the unit supports (see page 2). • "No Disc" appears on the... monitor. • "Not Support" appears on the monitor. • "Disc Error" appears on the monitor. • "No Files" appears on the external component connected to the VIDEO IN plug. • Check the cords and connections. • Signal input is not always serious. Installation/Connection Manual. Eject...
...• Insert a finalized disc. • Finalize the disc with the component which you used for operating the DVD/CD player. • Change the source. • Starts playback on the monitor. Use a file format the unit supports (see page 2). • "No Disc" appears on the... monitor. • "Not Support" appears on the monitor. • "Disc Error" appears on the monitor. • "No Files" appears on the external component connected to the VIDEO IN plug. • Check the cords and connections. • Signal input is not always serious. Installation/Connection Manual. Eject...


