
Quick Setup Guide (English)
Page 1
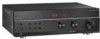
... Connect a game console or video camera here. Quick Setup Guide I NS-R5101HD 5.1 Receiver Congratulations on your receiver or put it in the battery compartment, then replace the cover. 2 Connect speakers Position speakers around your receiver. ON/STANDBY Press to turn off main power before connecting components....or video camera, to choose a saved station. If you have questions, see your NS-R5101 receiver. Press PRESET buttons to the front of a high-quality Insignia product. Powered subwoofer Power amplifier Surround back speakers Front right Front left ...
... Connect a game console or video camera here. Quick Setup Guide I NS-R5101HD 5.1 Receiver Congratulations on your receiver or put it in the battery compartment, then replace the cover. 2 Connect speakers Position speakers around your receiver. ON/STANDBY Press to turn off main power before connecting components....or video camera, to choose a saved station. If you have questions, see your NS-R5101 receiver. Press PRESET buttons to the front of a high-quality Insignia product. Powered subwoofer Power amplifier Surround back speakers Front right Front left ...

Quick Setup Guide (English)
Page 2
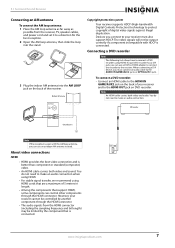
...SPEAKERS Connect speakers to this cable (not included). COAXIAL IN1 Connect a coaxial digital audio device to these jacks. Antenna for FM radio Receiver Receiver for the CABLE/SAT device. Plug the other component using a Composite cable (not included). Use the input buttons on the VCR. SUBWOOFER...OUT Connect to radio broadcasts. COMPONENT VIDEO OUT Connect a TV to this jack, using a Component cable (not included). IR IN Connect an IR receiver to these jacks. AUDIO IN GAME/AUX2 L/R Connect the audio for a TV to the AUDIO OUT GAME/AUX2 L/R jacks on the VCR. ...
...SPEAKERS Connect speakers to this cable (not included). COAXIAL IN1 Connect a coaxial digital audio device to these jacks. Antenna for FM radio Receiver Receiver for the CABLE/SAT device. Plug the other component using a Composite cable (not included). Use the input buttons on the VCR. SUBWOOFER...OUT Connect to radio broadcasts. COMPONENT VIDEO OUT Connect a TV to this jack, using a Component cable (not included). IR IN Connect an IR receiver to these jacks. AUDIO IN GAME/AUX2 L/R Connect the audio for a TV to the AUDIO OUT GAME/AUX2 L/R jacks on the VCR. ...

Quick Setup Guide (English)
Page 3
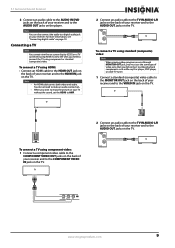
...): Connect a component video cable to the COMPONENT VIDEO OUT jacks on the back of your receiver and to the VIDEO OUT jack on the device. Connecting a device to the front AV jacks To connect a device to the front AV jacks: 1 Connect a standard (composite) video cable to the AUX 1 VIDEO jack on... the front of your receiver and to a standard video device. 2 Connect an audio cable to the AUX 1 ...
...): Connect a component video cable to the COMPONENT VIDEO OUT jacks on the back of your receiver and to the VIDEO OUT jack on the device. Connecting a device to the front AV jacks To connect a device to the front AV jacks: 1 Connect a standard (composite) video cable to the AUX 1 VIDEO jack on... the front of your receiver and to a standard video device. 2 Connect an audio cable to the AUX 1 ...

Quick Setup Guide (English)
Page 4
...INPUT SELECTOR knob on your remote control to adjust the sound parameter. 4 Connect power 1. Press STANDBY/ON on the receiver or POWER ON on the front of your receiver to complete the auto speaker setup procedure. Distributed by Best Buy Purchasing, LLC 7601 Penn Avenue South, Richfield... listening environment (ROOM EQ)" in your User Guide for basic troubleshooting tips, see the Troubleshooting section in your User Guide for use with this receiver, do not use a microphone other than the one supplied with Auto Setup 1. Connect the power cord to the area in your User Guide....
...INPUT SELECTOR knob on your remote control to adjust the sound parameter. 4 Connect power 1. Press STANDBY/ON on the receiver or POWER ON on the front of your receiver to complete the auto speaker setup procedure. Distributed by Best Buy Purchasing, LLC 7601 Penn Avenue South, Richfield... listening environment (ROOM EQ)" in your User Guide for basic troubleshooting tips, see the Troubleshooting section in your User Guide for use with this receiver, do not use a microphone other than the one supplied with Auto Setup 1. Connect the power cord to the area in your User Guide....

User Manual (English)
Page 2
...player or DVD player 8 Connecting a TV 9 Connecting a device to the front AV jacks 10 Connecting a CD player 10 Connecting digital audio 10 Connecting headphones 11 Connecting speakers 11 Connecting an IR receiver 13 Adjusting the speakers 13 Selecting speaker type 13 Selecting the crossover frequency 14 Adjusting...output levels 14 Selecting the speaker distance 15 Setting the listening environment (ROOM EQ 16 Understanding the basics 17 Turning your receiver on or off 17 Selecting the input source 17 Adjusting the volume 17 Adjusting the bass and treble 18 Viewing status ...
...player or DVD player 8 Connecting a TV 9 Connecting a device to the front AV jacks 10 Connecting a CD player 10 Connecting digital audio 10 Connecting headphones 11 Connecting speakers 11 Connecting an IR receiver 13 Adjusting the speakers 13 Selecting speaker type 13 Selecting the crossover frequency 14 Adjusting...output levels 14 Selecting the speaker distance 15 Setting the listening environment (ROOM EQ 16 Understanding the basics 17 Turning your receiver on or off 17 Selecting the input source 17 Adjusting the volume 17 Adjusting the bass and treble 18 Viewing status ...

User Manual (English)
Page 7
... ROOM EQ feature. Rotate to the next or previous radio station. 5.1 Surround Sound Receiver 5.1 Surround Sound Receiver Introduction Congratulations on your receiver is in standby mode. Lights when your purchase of a high-quality Insignia product. Display # Item 1 ON/STANDBY 2 STANDBY indicator 3 SPEAKER ON/OFF 4...(direct) indicator www.insigniaproducts.com 3 Rotate to the next or previous preset station. Your NS-R5101HD represents the state of electricity, press POWER. When your receiver on page 16. Each time you rotate the knob slightly, you feel a click and,...
... ROOM EQ feature. Rotate to the next or previous radio station. 5.1 Surround Sound Receiver 5.1 Surround Sound Receiver Introduction Congratulations on your receiver is in standby mode. Lights when your purchase of a high-quality Insignia product. Display # Item 1 ON/STANDBY 2 STANDBY indicator 3 SPEAKER ON/OFF 4...(direct) indicator www.insigniaproducts.com 3 Rotate to the next or previous preset station. Your NS-R5101HD represents the state of electricity, press POWER. When your receiver on page 16. Each time you rotate the knob slightly, you feel a click and,...

User Manual (English)
Page 8
...on page 10. 6 ANTENNA FM 75Ω Connect an FM antenna to this jack. For more information, see "Connecting digital audio" on page 8. NS-R5101HD 5.1 Surround Sound Receiver Back # Item Description HDMI IN DVD 1 HDMI IN CABLE/SAT HDMI IN GAME/AUX2 2 IR IN AUDIO OUT L/R 3 AUDIO IN GAME/AUX2 L/R...10 VIDEO CABLE/SAT IN Connect cable or satellite TV to this jack. # Item Description 11 SPEAKER Connect speakers to hear its sound through your receiver is in a cabinet or if you want to this jack. Connect the audio for a TV to these jacks. For more information, see "...
...on page 10. 6 ANTENNA FM 75Ω Connect an FM antenna to this jack. For more information, see "Connecting digital audio" on page 8. NS-R5101HD 5.1 Surround Sound Receiver Back # Item Description HDMI IN DVD 1 HDMI IN CABLE/SAT HDMI IN GAME/AUX2 2 IR IN AUDIO OUT L/R 3 AUDIO IN GAME/AUX2 L/R...10 VIDEO CABLE/SAT IN Connect cable or satellite TV to this jack. # Item Description 11 SPEAKER Connect speakers to hear its sound through your receiver is in a cabinet or if you want to this jack. Connect the audio for a TV to these jacks. For more information, see "...

User Manual (English)
Page 9
... more information, see "Adjusting a channel level" on page 20. Press to select a the radio station. The sleep timer will automatically turn off your receiver in standby mode, press to set the sleep time. Press to select a preset station. In menu mode, press to select a preset radio station. ... the input source" on page 17. 14 DIMMER 15 DISPLAY 16 ENTER/MEMO 17 PRESET / PRESET 18 RETURN 19 MUTE Press to put your receiver after a preset time. to select an input source. symbols inside the battery compartment. 3 Replace the cover. You can select 30 minutes, 60...
... more information, see "Adjusting a channel level" on page 20. Press to select a the radio station. The sleep timer will automatically turn off your receiver in standby mode, press to set the sleep time. Press to select a preset station. In menu mode, press to select a preset radio station. ... the input source" on page 17. 14 DIMMER 15 DISPLAY 16 ENTER/MEMO 17 PRESET / PRESET 18 RETURN 19 MUTE Press to put your receiver after a preset time. to select an input source. symbols inside the battery compartment. 3 Replace the cover. You can select 30 minutes, 60...

User Manual (English)
Page 10
...any connections. To connect an FM antenna: 1 Plug the indoor FM antenna into the FM 75Ω jack on the back of your receiver. Outdoor FM antenna 2 Adjust the position of the connected device. Because different devices often have different jack names, carefully read the operating ...com The operating distance is connected), then plug the outdoor FM antenna into the FM 75Ω jack on the back of your receiver. NS-R5101HD 5.1 Surround Sound Receiver Aiming the remote control To aim the remote control: • Aim the remote control at the remote sensor on the front of ...
...any connections. To connect an FM antenna: 1 Plug the indoor FM antenna into the FM 75Ω jack on the back of your receiver. Outdoor FM antenna 2 Adjust the position of the connected device. Because different devices often have different jack names, carefully read the operating ...com The operating distance is connected), then plug the outdoor FM antenna into the FM 75Ω jack on the back of your receiver. NS-R5101HD 5.1 Surround Sound Receiver Aiming the remote control To aim the remote control: • Aim the remote control at the remote sensor on the front of ...
User Manual (English)
Page 11
... an AM antenna To connect the AM loop antenna: 1 Place the AM loop antenna as far away as possible from the receiver, TV, speaker cables, and power cord and set it to a direction for the best reception. 2 Open the AM loop antenna, then slide the loop into ... instead. When connecting a DVI device, you connect to the AUDIO IN GAME/AUX 2 jacks or OPTICAL IN 1 jack. If your receiver must also support HDCP. You do not need to the receiver. You do not need to the HDMI OUT jack on the back of digital video signals against illegal duplication. www...
... an AM antenna To connect the AM loop antenna: 1 Place the AM loop antenna as far away as possible from the receiver, TV, speaker cables, and power cord and set it to a direction for the best reception. 2 Open the AM loop antenna, then slide the loop into ... instead. When connecting a DVI device, you connect to the AUDIO IN GAME/AUX 2 jacks or OPTICAL IN 1 jack. If your receiver must also support HDCP. You do not need to the receiver. You do not need to the HDMI OUT jack on the back of digital video signals against illegal duplication. www...

User Manual (English)
Page 12
...Disc player or DVD player 8 www.insigniaproducts.com VCR NS-R5101HD 5.1 Surround Sound Receiver To connect a Blu-ray Disc player or DVD player using component video: 1 Connect a component video cable to the COMPONENT VIDEO IN 1 (DVD) jacks on the back of your receiver and to the AUDIO OUT jacks on the player. .... Connecting a VCR Note When recording video program sources through GAME/AUX 2 OUT jack, you did connect to the AUDIO IN jacks on your receiver. To connect a VCR: 1 Connect standard video cable to the VIDEO IN GAME/AUX2 jack on the back of video jacks that you must ...
...Disc player or DVD player 8 www.insigniaproducts.com VCR NS-R5101HD 5.1 Surround Sound Receiver To connect a Blu-ray Disc player or DVD player using component video: 1 Connect a component video cable to the COMPONENT VIDEO IN 1 (DVD) jacks on the back of your receiver and to the AUDIO OUT jacks on the player. .... Connecting a VCR Note When recording video program sources through GAME/AUX 2 OUT jack, you did connect to the AUDIO IN jacks on your receiver. To connect a VCR: 1 Connect standard video cable to the VIDEO IN GAME/AUX2 jack on the back of video jacks that you must ...
User Manual (English)
Page 13
...page 10. TV 2 Connect an audio cable to the TV IN AUDIO L/R jacks on the back of your receiver and to the AUDIO OUT jacks on the TV. To connect a TV using HDMI. TV To connect a ... component video: 1 Connect a component video cable to the COMPONENT VIDEO OUT jacks on the back of your receiver and to the AUDIO OUT jacks on the player. Note • An HDMI cable carries both video and ...tuner. 1 Connect a standard (composite) video cable to the MONITOR OUT jack on the back of your receiver and to the HDMI IN jack on the TV. TV www.insigniaproducts.com 9 Note You can also connect...
...page 10. TV 2 Connect an audio cable to the TV IN AUDIO L/R jacks on the back of your receiver and to the AUDIO OUT jacks on the TV. To connect a TV using HDMI. TV To connect a ... component video: 1 Connect a component video cable to the COMPONENT VIDEO OUT jacks on the back of your receiver and to the AUDIO OUT jacks on the player. Note • An HDMI cable carries both video and ...tuner. 1 Connect a standard (composite) video cable to the MONITOR OUT jack on the back of your receiver and to the HDMI IN jack on the TV. TV www.insigniaproducts.com 9 Note You can also connect...

User Manual (English)
Page 14
NS-R5101HD 5.1 Surround Sound Receiver Connecting a device to the front AV jacks The front AV jacks make it easy to connect a device like a camcorder or video game console that has both jacks to DVD video jack. 10 www.insigniaproducts.com To connect a device to the front AV jacks: 1 Connect a standard (composite) video... cable to the AUX 1 VIDEO jack on the front of your receiver and to the L/R AUDIO OUT jacks on the digital audio device. Or, Connect an...
NS-R5101HD 5.1 Surround Sound Receiver Connecting a device to the front AV jacks The front AV jacks make it easy to connect a device like a camcorder or video game console that has both jacks to DVD video jack. 10 www.insigniaproducts.com To connect a device to the front AV jacks: 1 Connect a standard (composite) video... cable to the AUX 1 VIDEO jack on the front of your receiver and to the L/R AUDIO OUT jacks on the digital audio device. Or, Connect an...

User Manual (English)
Page 15
...channel (left Center 2 Press SPEAKER on the front of your hearing. 5.1 Surround Sound Receiver Connecting headphones To connect headphones: 1 Plug headphones into the PHONES jack on the front of your receiver. Caution • • • Make sure that you use speakers with the ... shock. After installing the speakers, first adjust the speaker settings according to turn off , your receiver enters two-channel downmix mode automatically. You can damage your receiver to your receiver or the speakers. Front right Front left and right) and the polarity (+ and -). This ...
...channel (left Center 2 Press SPEAKER on the front of your hearing. 5.1 Surround Sound Receiver Connecting headphones To connect headphones: 1 Plug headphones into the PHONES jack on the front of your receiver. Caution • • • Make sure that you use speakers with the ... shock. After installing the speakers, first adjust the speaker settings according to turn off , your receiver enters two-channel downmix mode automatically. You can damage your receiver to your receiver or the speakers. Front right Front left and right) and the polarity (+ and -). This ...

User Manual (English)
Page 16
... slightly higher position (0 to 8.0 inches or 0 to the surround back speakers into the SUBWOOFER PRE OUT jack on the size of your receiver. The typical example of speaker placement and recommendations are as follows: Front left and right speakers and center speaker • Place the front ... 40 inches (1 meter) above the ear level of a seated listener either directly left and right of the listener or slightly behind the listener. NS-R5101HD 5.1 Surround Sound Receiver 3 Insert the bare part of the wire into the SURROUND BACK PRE OUT L(eft) jack . 1 TV or screen 2 Front left speaker ...
... slightly higher position (0 to 8.0 inches or 0 to the surround back speakers into the SUBWOOFER PRE OUT jack on the size of your receiver. The typical example of speaker placement and recommendations are as follows: Front left and right speakers and center speaker • Place the front ... 40 inches (1 meter) above the ear level of a seated listener either directly left and right of the listener or slightly behind the listener. NS-R5101HD 5.1 Surround Sound Receiver 3 Insert the bare part of the wire into the SURROUND BACK PRE OUT L(eft) jack . 1 TV or screen 2 Front left speaker ...

User Manual (English)
Page 17
...• SMALL-Select this task. This effectively prevents the surround back channel signals from other speakers. For more information on your receiver is connected. The SPEAKER SETUP screen opens. The bass frequencies are set up the speakers, you can select one of speakers...to strong light such as direct sunlight or inverted fluorescent light. When SMALL is selected, sounds below crossover frequency. 5.1 Surround Sound Receiver • We recommend installing the surround back speaker(s) at the front center, resulting in interference and making the sense of the...
...• SMALL-Select this task. This effectively prevents the surround back channel signals from other speakers. For more information on your receiver is connected. The SPEAKER SETUP screen opens. The bass frequencies are set up the speakers, you can select one of speakers...to strong light such as direct sunlight or inverted fluorescent light. When SMALL is selected, sounds below crossover frequency. 5.1 Surround Sound Receiver • We recommend installing the surround back speaker(s) at the front center, resulting in interference and making the sense of the...

User Manual (English)
Page 18
... to play low frequency (bass sound below the crossover frequency are to output from the subwoofer or front speakers which size to the subwoofer). NS-R5101HD 5.1 Surround Sound Receiver • PLUS-Select this when you want the subwoofer to output bass sound continously or you want deeper bass (the bass frequencies that would...
... to play low frequency (bass sound below the crossover frequency are to output from the subwoofer or front speakers which size to the subwoofer). NS-R5101HD 5.1 Surround Sound Receiver • PLUS-Select this when you want the subwoofer to output bass sound continously or you want deeper bass (the bass frequencies that would...

User Manual (English)
Page 19
... sent to the speakers set to adjust the channel level. RETURN 2 Press TUNE or TUNE to select CHANNEL LEVEL, then press ENTER/MEMO. 5.1 Surround Sound Receiver 2 Press TUNE or TUNE to select SPEAKER DISTANCE, then press ENTER/MEMO. By entering the distance between the listening position and each speaker, the delay...
... sent to the speakers set to adjust the channel level. RETURN 2 Press TUNE or TUNE to select CHANNEL LEVEL, then press ENTER/MEMO. 5.1 Surround Sound Receiver 2 Press TUNE or TUNE to select SPEAKER DISTANCE, then press ENTER/MEMO. By entering the distance between the listening position and each speaker, the delay...

User Manual (English)
Page 20
...The provided microphone is displayed. SETUP MENU SET ROOM EQ SPEAKER SETUP COMPONENT IN SETUP TONE CONTROL ON LANGUAGE ENGLISH RETURN NS-R5101HD 5.1 Surround Sound Receiver 5 Press TUNE or TUNE to adjust the speaker distance. If there is problem with a speaker connection, ERR is specially... to this jack. To set the speaker size, channel level, distance, and frequency response for the best listening environment using information received from the provided microphone. Do not connect any other speakers and the subwoofer. 6 After you adjust all speakers are connected correctly...
...The provided microphone is displayed. SETUP MENU SET ROOM EQ SPEAKER SETUP COMPONENT IN SETUP TONE CONTROL ON LANGUAGE ENGLISH RETURN NS-R5101HD 5.1 Surround Sound Receiver 5 Press TUNE or TUNE to adjust the speaker distance. If there is problem with a speaker connection, ERR is specially... to this jack. To set the speaker size, channel level, distance, and frequency response for the best listening environment using information received from the provided microphone. Do not connect any other speakers and the subwoofer. 6 After you adjust all speakers are connected correctly...
User Manual (English)
Page 21
... the remote control to select an input source. Press again to select AM 2 When CD, GAME/AUX 2, DVD, or CABLE/SAT is automatically selected. Your receiver is in the following sequence: → C1 Coaxial A Analog → O1 →O2 Optical 1 Optical 2 ← H* ← HDMI Notes • •... control • Press MUTE to turn off : 1 Plug the power cord into a power outlet. 2 Press POWER on the remote control, your receiver displays the main menu. When TV, AUX 1, or TUNER is selected, HDMI cannot be selected. www.insigniaproducts.com 17 Note If you press STANDBY ...
... the remote control to select an input source. Press again to select AM 2 When CD, GAME/AUX 2, DVD, or CABLE/SAT is automatically selected. Your receiver is in the following sequence: → C1 Coaxial A Analog → O1 →O2 Optical 1 Optical 2 ← H* ← HDMI Notes • •... control • Press MUTE to turn off : 1 Plug the power cord into a power outlet. 2 Press POWER on the remote control, your receiver displays the main menu. When TV, AUX 1, or TUNER is selected, HDMI cannot be selected. www.insigniaproducts.com 17 Note If you press STANDBY ...


