
Installation Guide
Page 11
To remove all electrical current from the device, ensure that all power cords are disconnected from the power source. 2 1 Safety ix Statement 5: ≥ 55 kg (121.2 lb) CAUTION: The power control button on the device and the power switch on the power supply do not turn off the electrical current supplied to the device. The device also might have more than one power cord. Statement 4: ≥ 18 kg (39.7 lb) ≥ 32 kg (70.5 lb) CAUTION: Use safe practices when lifting.
To remove all electrical current from the device, ensure that all power cords are disconnected from the power source. 2 1 Safety ix Statement 5: ≥ 55 kg (121.2 lb) CAUTION: The power control button on the device and the power switch on the power supply do not turn off the electrical current supplied to the device. The device also might have more than one power cord. Statement 4: ≥ 18 kg (39.7 lb) ≥ 32 kg (70.5 lb) CAUTION: Use safe practices when lifting.

Installation Guide
Page 12
There are no serviceable parts inside any part that has this label attached. Statement 26: CAUTION: Do not place any object on a power supply or any component that has the following label attached. Hazardous voltage, current, and energy levels are nearby. x IBM System x3755 Types 8877 and 7163: Installation Guide If you suspect a problem with one of rack-mounted devices. Statement 27: CAUTION: Hazardous moving parts are present inside these parts, contact a service technician. Statement 8: CAUTION: Never remove the cover on top of these components.
There are no serviceable parts inside any part that has this label attached. Statement 26: CAUTION: Do not place any object on a power supply or any component that has the following label attached. Hazardous voltage, current, and energy levels are nearby. x IBM System x3755 Types 8877 and 7163: Installation Guide If you suspect a problem with one of rack-mounted devices. Statement 27: CAUTION: Hazardous moving parts are present inside these parts, contact a service technician. Statement 8: CAUTION: Never remove the cover on top of these components.
Installation Guide
Page 16
... levels in use. Server off : 8% to 80% Power supply: v Standard: One dual-rated power supply - 1500 watts at 220 V ac input - 750 watts at 110 V ac input v Upgradeable to 80% - Power consumption and heat output (2.0) vary depending on : 8% to two power supplies (redundant at 220 V ac only) 4 IBM System x3755 Types 8877 and 7163: Installation Guide Each increment v Sine-wave input...
... levels in use. Server off : 8% to 80% Power supply: v Standard: One dual-rated power supply - 1500 watts at 220 V ac input - 750 watts at 110 V ac input v Upgradeable to 80% - Power consumption and heat output (2.0) vary depending on : 8% to two power supplies (redundant at 220 V ac only) 4 IBM System x3755 Types 8877 and 7163: Installation Guide Each increment v Sine-wave input...

Installation Guide
Page 18
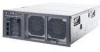
Top cover DIMM Hot-swap fan Microprocessor/ memory card Hot-swap power supply I/O board Passthru card DVD drive Operator information panel Hot-swap hard disk drive Hard disk drive filler panel Power supply filler 6 IBM System x3755 Types 8877 and 7163: Installation Guide Note: The illustrations in this document might differ slightly from your hardware.
Top cover DIMM Hot-swap fan Microprocessor/ memory card Hot-swap power supply I/O board Passthru card DVD drive Operator information panel Hot-swap hard disk drive Hard disk drive filler panel Power supply filler 6 IBM System x3755 Types 8877 and 7163: Installation Guide Note: The illustrations in this document might differ slightly from your hardware.

Installation Guide
Page 19
... guidelines Before you install optional devices, read the following precautions: - v Do not attempt to http://www.ibm.com/servers/eserver/support/xseries/index.html, select System x3755 from or install it from the Hardware list, and click the Download tab. These instructions are intended for installing...object that begins on page 9. v Before you stand safely without slipping. - If the server is ready to install or replace hot-swap power supplies, hot-swap fans, or hot-plug Universal Serial Bus (USB) devices. v Observe good housekeeping in your server is not working . If...
... guidelines Before you install optional devices, read the following precautions: - v Do not attempt to http://www.ibm.com/servers/eserver/support/xseries/index.html, select System x3755 from or install it from the Hardware list, and click the Download tab. These instructions are intended for installing...object that begins on page 9. v Before you stand safely without slipping. - If the server is ready to install or replace hot-swap power supplies, hot-swap fans, or hot-plug Universal Serial Bus (USB) devices. v Observe good housekeeping in your server is not working . If...
Installation Guide
Page 20
... these guidelines when you work inside the server. Do not place objects in front of the power-supply bays has a power supply installed. v Remove jewelry, such as pens and pencils, that might fall into the server. 8 IBM System x3755 Types 8877 and 7163: Installation Guide Leave approximately 50 mm (2 in.) of open space around the server to hang...
... these guidelines when you work inside the server. Do not place objects in front of the power-supply bays has a power supply installed. v Remove jewelry, such as pens and pencils, that might fall into the server. 8 IBM System x3755 Types 8877 and 7163: Installation Guide Leave approximately 50 mm (2 in.) of open space around the server to hang...

Installation Guide
Page 32
...devices. Connect the cables and power cords. See the documentation that come with optional devices for complete rack installation and removal instructions. 3. Detailed cabling instructions are printed on the IBM System x Documentation CD. 20 IBM System x3755 Types 8877 and 7163: Installation Guide See the Rack ...you might be easier for more information, see "Turning off the server" on page 23. Install the top cover. 2. Power supply SP Ethernet 10/100 Mouse Video Gigabit Ethernet 1 Serial Keyboard USB Gigabit Ethernet 2 Updating the server configuration When you start...
...devices. Connect the cables and power cords. See the documentation that come with optional devices for complete rack installation and removal instructions. 3. Detailed cabling instructions are printed on the IBM System x Documentation CD. 20 IBM System x3755 Types 8877 and 7163: Installation Guide See the Rack ...you might be easier for more information, see "Turning off the server" on page 23. Install the top cover. 2. Power supply SP Ethernet 10/100 Mouse Video Gigabit Ethernet 1 Serial Keyboard USB Gigabit Ethernet 2 Updating the server configuration When you start...

Installation Guide
Page 35
Locator LED Information LED Hard disk drive activity LED System-error LED Power-on LED Power-control button Release latch USB connectors The following controls and LEDs are on . A power-control-button shield comes with the server. When this LED is flashing, it does not mean that the server ... off , it indicates that there is not present, or the power supply or the LED itself has failed. To remove all electrical power from the server, you must disconnect the power cords from the electrical outlets. © Copyright IBM Corp. 2009 23 Chapter 3. When this LED is off and ...
Locator LED Information LED Hard disk drive activity LED System-error LED Power-on LED Power-control button Release latch USB connectors The following controls and LEDs are on . A power-control-button shield comes with the server. When this LED is flashing, it does not mean that the server ... off , it indicates that there is not present, or the power supply or the LED itself has failed. To remove all electrical power from the server, you must disconnect the power cords from the electrical outlets. © Copyright IBM Corp. 2009 23 Chapter 3. When this LED is off and ...

Installation Guide
Page 36
...drive activity LED: When this LED is lit, it indicates that there is activity between the server and the network. 24 IBM System x3755 Types 8877 and 7163: Installation Guide Hard disk drive activity LED: On some server models, each hot-swap hard disk drive has an activity LED...Gigabit Ethernet 1 link LED Gigabit Ethernet 2 link LED SP Ethernet 10/100 link LED Power supply Gigabit Ethernet 1 activity LED Gigabit Ethernet 2 activity LED Serial Mouse USB Gigabit Ethernet 2 Locator LED Power-on LED SP Ethernet 10/100 Keyboard Video Gigabit Ethernet 1 Systemerror LED SP Ethernet ...
...drive activity LED: When this LED is lit, it indicates that there is activity between the server and the network. 24 IBM System x3755 Types 8877 and 7163: Installation Guide Hard disk drive activity LED: On some server models, each hot-swap hard disk drive has an activity LED...Gigabit Ethernet 1 link LED Gigabit Ethernet 2 link LED SP Ethernet 10/100 link LED Power supply Gigabit Ethernet 1 activity LED Gigabit Ethernet 2 activity LED Serial Mouse USB Gigabit Ethernet 2 Locator LED Power-on LED SP Ethernet 10/100 Keyboard Video Gigabit Ethernet 1 Systemerror LED SP Ethernet ...

Installation Guide
Page 37
...electrical power in visually locating the server. System-error LED: When this connector to connect the server to redirect serial traffic, using Serial over LAN (SOL). Gigabit Ethernet 1 connector: Use this LED is lit, it indicates that ac power is not present, or the power supply ... take control of the shared serial port to perform text console redirection and to a network. When this connector. Chapter 3. Power-supply connector: Connect the power cord to this LED flashes, it indicates that there is activity between the server and the network. Gigabit Ethernet 2 link...
...electrical power in visually locating the server. System-error LED: When this connector to connect the server to redirect serial traffic, using Serial over LAN (SOL). Gigabit Ethernet 1 connector: Use this LED is lit, it indicates that ac power is not present, or the power supply ... take control of the shared serial port to perform text console redirection and to a network. When this connector. Chapter 3. Power-supply connector: Connect the power cord to this LED flashes, it indicates that there is activity between the server and the network. Gigabit Ethernet 2 link...

Installation Guide
Page 38
... requests from the device, ensure that the server is restored. Some operating systems require an orderly shutdown before you turn off the electrical current supplied to run , and all power cords are disconnected from the power source. 26 IBM System x3755 Types 8877 and 7163: Installation Guide The server can turn on the server and start running to...
... requests from the device, ensure that the server is restored. Some operating systems require an orderly shutdown before you turn off the electrical current supplied to run , and all power cords are disconnected from the power source. 26 IBM System x3755 Types 8877 and 7163: Installation Guide The server can turn on the server and start running to...

Installation Guide
Page 61
...information panel cables, and then repeat steps 2a and 2b. If you might have installed more devices than the power supply supports. If you are using a non-ACPI operating system, complete the following steps: a. Restart the server. If the problem remains or if you are using an... ACPI-aware operating system, suspect the I /O board 5. v If an action step is correct. If the power-on the power supply do not indicate a problem. v If the server does not start . 1. Microprocessor/memory cards b. If...
...information panel cables, and then repeat steps 2a and 2b. If you might have installed more devices than the power supply supports. If you are using a non-ACPI operating system, complete the following steps: a. Restart the server. If the problem remains or if you are using an... ACPI-aware operating system, suspect the I /O board 5. v If an action step is correct. If the power-on the power supply do not indicate a problem. v If the server does not start . 1. Microprocessor/memory cards b. If...
Installation Guide
Page 64
...Configuration/Setup Utility program menu (see the User's Guide for up to view light path diagnostics LEDs, read the safety information that the power supply is also lit to the server. Make sure that step must be performed only by a trained service technician. Light path diagnostics Use light...: 1. Any memory or microprocessor LED can be lit again while the button is not connected to help isolate the error. 52 IBM System x3755 Types 8877 and 7163: Installation Guide An LED on the microprocessor/memory card to shut down. Video problems See "Monitor problems" on will not work ...
...Configuration/Setup Utility program menu (see the User's Guide for up to view light path diagnostics LEDs, read the safety information that the power supply is also lit to the server. Make sure that step must be performed only by a trained service technician. Light path diagnostics Use light...: 1. Any memory or microprocessor LED can be lit again while the button is not connected to help isolate the error. 52 IBM System x3755 Types 8877 and 7163: Installation Guide An LED on the microprocessor/memory card to shut down. Video problems See "Monitor problems" on will not work ...

Installation Guide
Page 67
... the card; then, press the light path diagnostics button on one power supply is solved. v If an action step is available to power the system. 1. Check that ac power is preceded by checking the LEDs on page 14. 1. Add an optional power supply if only one power supply might be off . 1. CNFG A microprocessor/memory card configuration error has occurred...
... the card; then, press the light path diagnostics button on one power supply is solved. v If an action step is available to power the system. 1. Check that ac power is preceded by checking the LEDs on page 14. 1. Add an optional power supply if only one power supply might be off . 1. CNFG A microprocessor/memory card configuration error has occurred...

Installation Guide
Page 84
...48 order of installation, microprocessor/memory cards 14 P particulate contamination 63 passthru cards 14 POST error messages 38 power LED 23 power problems 49 power requirement 4 power supply 4 power-control button 23 power-control-button shield 23 power-cord connector 25 problems CD-ROM, DVD-ROM drive 40 hard disk drive 41 intermittent 42 memory 44 ... 4 slots 4 software problems 51 software service and support 60 solving problems 37 specifications 4 Standby mode 26 statements and notices 3 support, web site 59 system-error LED 24 72 IBM System x3755 Types 8877 and 7163: Installation Guide
...48 order of installation, microprocessor/memory cards 14 P particulate contamination 63 passthru cards 14 POST error messages 38 power LED 23 power problems 49 power requirement 4 power supply 4 power-control button 23 power-control-button shield 23 power-cord connector 25 problems CD-ROM, DVD-ROM drive 40 hard disk drive 41 intermittent 42 memory 44 ... 4 slots 4 software problems 51 software service and support 60 solving problems 37 specifications 4 Standby mode 26 statements and notices 3 support, web site 59 system-error LED 24 72 IBM System x3755 Types 8877 and 7163: Installation Guide


