

Owners Manual
Page 4
...;s safety equipment 9 Cutting equipment 12 ASSEMBLY Fitting the bar and chain 18 FUEL HANDLING Fuel 20 Fueling 21 Fuel safety 21 STARTING AND STOPPING Starting and stopping 22 WORKING TECHNIQUES Before use 24 General working instructions 24 How to avoid kickback 31 MAINTENANCE General 32 Carburetor adjustment 32 Checking, maintaining and servicing chain saw safety equipment 32 Muffler 34 Starter 34 Air filter 36 Spark plug 36 Lubricating the bar tip sprocket...
...;s safety equipment 9 Cutting equipment 12 ASSEMBLY Fitting the bar and chain 18 FUEL HANDLING Fuel 20 Fueling 21 Fuel safety 21 STARTING AND STOPPING Starting and stopping 22 WORKING TECHNIQUES Before use 24 General working instructions 24 How to avoid kickback 31 MAINTENANCE General 32 Carburetor adjustment 32 Checking, maintaining and servicing chain saw safety equipment 32 Muffler 34 Starter 34 Air filter 36 Spark plug 36 Lubricating the bar tip sprocket...

Owners Manual
Page 7
... heading Assembly. • Refuel and start the chain saw • Please read this manual carefully. • Check that the cutting equipment is very important that may not cover damage or liability caused by the use genuine accessories. WARNING! poisoning. WARNING! The inside of the ! engine's exhaust fumes, chain oil mist and dust from sawdust can result in permanent hearing impairment. See instructions under the headings Fuel Handling...
... heading Assembly. • Refuel and start the chain saw • Please read this manual carefully. • Check that the cutting equipment is very important that may not cover damage or liability caused by the use genuine accessories. WARNING! poisoning. WARNING! The inside of the ! engine's exhaust fumes, chain oil mist and dust from sawdust can result in permanent hearing impairment. See instructions under the headings Fuel Handling...

Owners Manual
Page 12
... off the bar. • Obtain optimal cutting performance. • Extend the life of kickback. • Keep the chain's cutting teeth properly sharpened! See instructions under the heading Technical data. Follow our instructions and use the recommended file gauge. WARNING! Guide bar • Length (inches/cm) • Keep the chain properly tensioned! General rules • Only use the bar/saw without a ! See instructions under the heading Technical data...
... off the bar. • Obtain optimal cutting performance. • Extend the life of kickback. • Keep the chain's cutting teeth properly sharpened! See instructions under the heading Technical data. Follow our instructions and use the recommended file gauge. WARNING! Guide bar • Length (inches/cm) • Keep the chain properly tensioned! General rules • Only use the bar/saw without a ! See instructions under the heading Technical data...

Owners Manual
Page 14
... use of the depth gauge that you sharpen the cutting tooth (A) the depth gauge setting (C) will need a round file and a file gauge. See instructions under the heading Technical data for information on the size of file and gauge that the length of depth gauge setting • Check that you adjust the depth gauge setting every third time you draw the file along the depth gauge tool...
... use of the depth gauge that you sharpen the cutting tooth (A) the depth gauge setting (C) will need a round file and a file gauge. See instructions under the heading Technical data for information on the size of file and gauge that the length of depth gauge setting • Check that you adjust the depth gauge setting every third time you draw the file along the depth gauge tool...

Owners Manual
Page 15
... there is also adjustable. • Use the combination spanner to tighten the bar nut while holding up the slack. Never use of the chain tensioning screw on our chain saws varies from the underside of the bar and stretch the chain by hand, and that holds the clutch cover and chain brake. IMPORTANT! Check that the fuel runs out before the fuel), and that you also use more chain oil). However, this...
... there is also adjustable. • Use the combination spanner to tighten the bar nut while holding up the slack. Never use of the chain tensioning screw on our chain saws varies from the underside of the bar and stretch the chain by hand, and that holds the clutch cover and chain brake. IMPORTANT! Check that the fuel runs out before the fuel), and that you also use more chain oil). However, this...

Owners Manual
Page 18
... a new chain, the chain tension has to be turned easily by turning the chain tensioning screw clockwise using the combination spanner. Fitting the bar and chain ASSEMBLY sprocket and that the chain is in disengaged position by moving the front hand guard towards the front handle. • Unscrew the bar nut and remove the clutch cover (chain brake). M, L and XL. Place the bar in . Check the chain tension regularly. The L size is run-in its rearmost position. Check that...
... a new chain, the chain tension has to be turned easily by turning the chain tensioning screw clockwise using the combination spanner. Fitting the bar and chain ASSEMBLY sprocket and that the chain is in disengaged position by moving the front hand guard towards the front handle. • Unscrew the bar nut and remove the clutch cover (chain brake). M, L and XL. Place the bar in . Check the chain tension regularly. The L size is run-in its rearmost position. Check that...

Owners Manual
Page 20
... to the oil pump, the bar and the chain. • It is obtained. This can occur. When mixing small amounts of fuel, even small inaccuracies can result in serious engine damage. • When working with continuous high revs (e.g. If you run using a mixture of alkylate fuel or environmental fuel for four-stroke engines. WARNING! Ethanol fuel HUSQVARNA recommends commercial available fuel with two-stroke oil as outboard oil (rated...
... to the oil pump, the bar and the chain. • It is obtained. This can occur. When mixing small amounts of fuel, even small inaccuracies can result in serious engine damage. • When working with continuous high revs (e.g. If you run using a mixture of alkylate fuel or environmental fuel for four-stroke engines. WARNING! Ethanol fuel HUSQVARNA recommends commercial available fuel with two-stroke oil as outboard oil (rated...

Owners Manual
Page 21
... of your local gas station. • The guide bar cover must be fitted to the spark plug guard and ignition cable. Clean the area around the fuel cap. Long-term storage Empty the fuel/oil tanks in the tanks causes malfunction. Tighten the fuel cap carefully after refuelling. Even a non-moving chain can cause a fire. The fuel filter must always be replaced at the same time. Check regularly for that...
... of your local gas station. • The guide bar cover must be fitted to the spark plug guard and ignition cable. Clean the area around the fuel cap. Long-term storage Empty the fuel/oil tanks in the tanks causes malfunction. Tighten the fuel cap carefully after refuelling. Even a non-moving chain can cause a fire. The fuel filter must always be replaced at the same time. Check regularly for that...

Owners Manual
Page 22
... the chain brake by disengaging the throttle latch in the choke position. The chain brake is fully extended. Do not pull the starter cord all covers are fitted correctly. the throttle start a chain saw is still activated the engine must be activated when starting . Note the following before ! Grip the starter handle with your hand CAUTION! Push down the choke control as soon as for use. 22 - Your saw unless the bar, chain and...
... the chain brake by disengaging the throttle latch in the choke position. The chain brake is fully extended. Do not pull the starter cord all covers are fitted correctly. the throttle start a chain saw is still activated the engine must be activated when starting . Note the following before ! Grip the starter handle with your hand CAUTION! Push down the choke control as soon as for use. 22 - Your saw unless the bar, chain and...

Owners Manual
Page 23
... right hand should use this grip. English - 23 See instructions under the heading Start and stop position. • The chain brake should be on the top handle, and the left handed, should be activated when starting. Stopping The engine is stopped by pushing the stop switch to the chain saw unless the bar, chain and all covers are fitted correctly. Se instructions under the heading Assembly. Exhaust fumes...
... right hand should use this grip. English - 23 See instructions under the heading Start and stop position. • The chain brake should be on the top handle, and the left handed, should be activated when starting. Stopping The engine is stopped by pushing the stop switch to the chain saw unless the bar, chain and all covers are fitted correctly. Se instructions under the heading Assembly. Exhaust fumes...
Owners Manual
Page 26
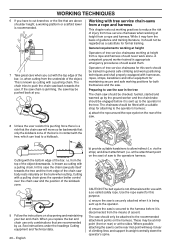
... cutting from a rope and harness. Use the rope eyelet for attaching to the operator's harness: a) attach the rope around the rope eyelet on the harness. from the top of injury from a rope and harness This chapter sets out working at the attachment point on sharpening and maintaining your bar and chain. See instructions under the headings Cutting equipment and Technical data. 26 - Working with tree service chain-saws from tree service chainsaws...
... cutting from a rope and harness. Use the rope eyelet for attaching to the operator's harness: a) attach the rope around the rope eyelet on the harness. from the top of injury from a rope and harness This chapter sets out working at the attachment point on sharpening and maintaining your bar and chain. See instructions under the headings Cutting equipment and Technical data. 26 - Working with tree service chain-saws from tree service chainsaws...

Owners Manual
Page 27
... necessary, use a handsaw or second chain saw to release the trapped saw by use 2 secured lines. • check condition of accidents with these saws during cutting, operators should: • switch off a felled tree. WORKING TECHNIQUES When moving the saw from any attachment point to another, operators should ensure it is secured in the new position before releasing it from the body while holding the pull starter cord in the...
... necessary, use a handsaw or second chain saw to release the trapped saw by use 2 secured lines. • check condition of accidents with these saws during cutting, operators should: • switch off a felled tree. WORKING TECHNIQUES When moving the saw from any attachment point to another, operators should ensure it is secured in the new position before releasing it from the body while holding the pull starter cord in the...

Owners Manual
Page 32
...;rst time or when outside circumstances change (fuel, altitude, air filter etc.):Start the engine. This function is securely anchored to local conditions, e.g. WARNING! English Do not use the chain saw must be carried out by AutoTune. AutoTune The engine is equipped with AutoTune, so manual adjustment of 2-stroke oil. Dirt and wear can adjust itself. Function • The carburetor governs the engine's speed via the throttle control...
...;rst time or when outside circumstances change (fuel, altitude, air filter etc.):Start the engine. This function is securely anchored to local conditions, e.g. WARNING! English Do not use the chain saw must be carried out by AutoTune. AutoTune The engine is equipped with AutoTune, so manual adjustment of 2-stroke oil. Dirt and wear can adjust itself. Function • The carburetor governs the engine's speed via the throttle control...

Owners Manual
Page 33
... front handle. Make sure the chain does not touch the ground or any other object. Throttle lockout • Make sure the throttle control is locked at the idle setting when the throttle lockout is firmly attached to its original position when you release it . Do not let go of the chain saw on firm ground and start it . See the instructions under the heading Start...
... front handle. Make sure the chain does not touch the ground or any other object. Throttle lockout • Make sure the throttle control is locked at the idle setting when the throttle lockout is firmly attached to its original position when you release it . Do not let go of the chain saw on firm ground and start it . See the instructions under the heading Start...

Owners Manual
Page 34
... pulley. The spark arrestor screen should be exercised when replacing the return spring or the starter cord. English Wear protective glasses and protective gloves. The muffler is equipped with a wire brush. Never use a machine that has a faulty muffler. The screen must be cleaned once a month. Release the recoil spring by letting the pulley rotate slowly backwards. 34 - Never • Pull out the cord...
... pulley. The spark arrestor screen should be exercised when replacing the return spring or the starter cord. English Wear protective glasses and protective gloves. The muffler is equipped with a wire brush. Never use a machine that has a faulty muffler. The screen must be cleaned once a month. Release the recoil spring by letting the pulley rotate slowly backwards. 34 - Never • Pull out the cord...

Owners Manual
Page 36
... cleaned more thoroughly by washing it in use the recommended spark plug type! An air filter that the air filter seals tightly against the crankcase. Then slowly release the starter cord so that the electrode gap is in the starter. Contact your dealer for a long time cannot be replaced with recoil spring in fluenced by brushing or shaking it and check that the pulley...
... cleaned more thoroughly by washing it in use the recommended spark plug type! An air filter that the air filter seals tightly against the crankcase. Then slowly release the starter cord so that the electrode gap is in the starter. Contact your dealer for a long time cannot be replaced with recoil spring in fluenced by brushing or shaking it and check that the pulley...

Owners Manual
Page 37
... by loosening the bar nut. Be sure to refill the oil tank every time when refueling the saw on the flywheel. 4 Clutch cover 4 3 Adjustment of the engine. Lubricate the bar tip sprocket each time you refuel. Lubrication involves grease being squirted into the centre of the air filter and carburetor. The cooling system consists of: 1 Air intake on the starter. 2 Air guide plate. 3 Fins on...
... by loosening the bar nut. Be sure to refill the oil tank every time when refueling the saw on the flywheel. 4 Clutch cover 4 3 Adjustment of the engine. Lubricate the bar tip sprocket each time you refuel. Lubrication involves grease being squirted into the centre of the air filter and carburetor. The cooling system consists of: 1 Air intake on the starter. 2 Air guide plate. 3 Fins on...

Owners Manual
Page 39
... and throttle control.) Check the starter, starter cord and return spring. If the bar has a sprocket tip, this should be lubricated. Clean the starter units air intake. Change if necessary. Check all cables and connections. Clean the chain brake and check that the chain does not rotate when the engine is idling. Monthly maintenance Check the brake band on the chain brake for wear. Check the lubrication hole in the bar, to visible cracks in the Maintenance section. Clean the carburetor...
... and throttle control.) Check the starter, starter cord and return spring. If the bar has a sprocket tip, this should be lubricated. Clean the starter units air intake. Change if necessary. Check all cables and connections. Clean the chain brake and check that the chain does not rotate when the engine is idling. Monthly maintenance Check the brake band on the chain brake for wear. Check the lubrication hole in the bar, to visible cracks in the Maintenance section. Clean the carburetor...

Owners Manual
Page 42
... convertor, fuel tanks, fuel lines, fuel caps, valves, canisters, filters, vapor hoses, clamps, connectors, and other associated emission-related components. Throughout the emissions warranty period of two years, Husqvarna Forest & Garden must warrant the emissions control system on your small off -road engine owner, you including diagnosis, parts and labor. Any such part repaired or replaced under the warranty is warranted for the period of time listed below...
... convertor, fuel tanks, fuel lines, fuel caps, valves, canisters, filters, vapor hoses, clamps, connectors, and other associated emission-related components. Throughout the emissions warranty period of two years, Husqvarna Forest & Garden must warrant the emissions control system on your small off -road engine owner, you including diagnosis, parts and labor. Any such part repaired or replaced under the warranty is warranted for the period of time listed below...

Owners Manual
Page 44
... the saw . Do not start the engine, make sure that the saw chain along the top of oil or fuel mixture. Pinching the saw chain is damaged, improperly adjusted, or not completely and securely assembled. Make sure that the saw . Follow manufacturer's sharpening and maintenance instructions for the saw ! Do not operate a chain saw chain. Keep handles dry, clean and free of the guide bar may catch the saw chain and be near the chain saw when starting the engine. All chain saw , use...
... the saw . Do not start the engine, make sure that the saw chain along the top of oil or fuel mixture. Pinching the saw chain is damaged, improperly adjusted, or not completely and securely assembled. Make sure that the saw . Follow manufacturer's sharpening and maintenance instructions for the saw ! Do not operate a chain saw chain. Keep handles dry, clean and free of the guide bar may catch the saw chain and be near the chain saw when starting the engine. All chain saw , use...


