
Operation Manual
Page 7
... hand guard 6 Muffler 7 Bumper spike 8 Bar tip sprocket 9 Rear handle with right hand guard 10 Throttle control 11 Clutch cover 12 Chain catcher 13 Guide bar 14 Saw chain 15 Starter handle 16 Chain oil tank 17 Starter 18 Fuel tank 19 Choke control/Start ... (Ignition on/off switch.) 22 Adjuster screws carburetor 23 Air purge 24 Information and warning decal 25 Chain tensioner wheel 26 Knob 27 Guide bar cover 28 Combination spanner 29 Two-stroke oil 30 Operator's manual (EPA) Contents INTRODUCTION Dear customer 6 Symbols on the machine 6 What is what on the chain...
... hand guard 6 Muffler 7 Bumper spike 8 Bar tip sprocket 9 Rear handle with right hand guard 10 Throttle control 11 Clutch cover 12 Chain catcher 13 Guide bar 14 Saw chain 15 Starter handle 16 Chain oil tank 17 Starter 18 Fuel tank 19 Choke control/Start ... (Ignition on/off switch.) 22 Adjuster screws carburetor 23 Air purge 24 Information and warning decal 25 Chain tensioner wheel 26 Knob 27 Guide bar cover 28 Combination spanner 29 Two-stroke oil 30 Operator's manual (EPA) Contents INTRODUCTION Dear customer 6 Symbols on the machine 6 What is what on the chain...
Operation Manual
Page 9
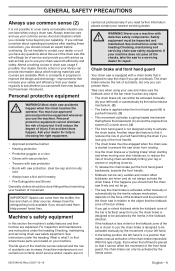
... the kickback and the position of the chain saw . If you can benefit from you the chain brake is designed to cover every conceivable situation you have been introduced. Never use a machine with a chain brake that is designed to see instructions under the ...(B) is pushed forwards. (3) • This movement activates a spring-loaded mechanism that tightens the brake band (C) around the engine drive system (D) (clutch drum). (4) • The front hand guard is not designed solely to use your chain saw safety equipment. See instructions under the heading Checking, maintaining...
... the kickback and the position of the chain saw . If you can benefit from you the chain brake is designed to cover every conceivable situation you have been introduced. Never use a machine with a chain brake that is designed to see instructions under the ...(B) is pushed forwards. (3) • This movement activates a spring-loaded mechanism that tightens the brake band (C) around the engine drive system (D) (clutch drum). (4) • The front hand guard is not designed solely to use your chain saw safety equipment. See instructions under the heading Checking, maintaining...

Operation Manual
Page 12
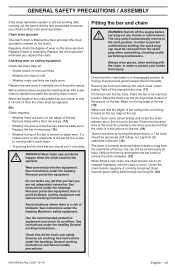
... the chain regularly to take up (-) to you use the right sort of guide bar while adjusting tension. (12) • Tighten the clutch cover by turning the wheel down to achieve the recommended depth gauge setting. IMPORTANT! When using vegetable based saw chain oil, dismantle and clean the ... bar and saw chain becoming stiff and the bar tip sprocket jamming. However, this safety feature requires that the groove in to loosen the bar cover. (11) • Adjust the tension on adjusting depth gauge setting • When you sharpen the cutting tooth (A) the depth gauge setting (C) will ...
... the chain regularly to take up (-) to you use the right sort of guide bar while adjusting tension. (12) • Tighten the clutch cover by turning the wheel down to achieve the recommended depth gauge setting. IMPORTANT! When using vegetable based saw chain oil, dismantle and clean the ... bar and saw chain becoming stiff and the bar tip sprocket jamming. However, this safety feature requires that the groove in to loosen the bar cover. (11) • Adjust the tension on adjusting depth gauge setting • When you sharpen the cutting tooth (A) the depth gauge setting (C) will ...
Operation Manual
Page 13
...equipment. See instructions under the heading Personal protective equipment. See instructions under the headings General working instructions. Remove the knob and remove the clutch cover (chain brake). Place the bar in the bar has become badly worn. GENERAL SAFETY PRECAUTIONS / ASSEMBLY If the chain lubrication system is... is due to prevent unintentional starting, the spark plug cap must be replaced. happen when the chain touches the operator. Fit the clutch cover (chain brake) and locate the chain adjuster pin in the cut-out in the groove on the bar. (19) Tension the...
...equipment. See instructions under the heading Personal protective equipment. See instructions under the headings General working instructions. Remove the knob and remove the clutch cover (chain brake). Place the bar in the bar has become badly worn. GENERAL SAFETY PRECAUTIONS / ASSEMBLY If the chain lubrication system is... is due to prevent unintentional starting, the spark plug cap must be replaced. happen when the chain touches the operator. Fit the clutch cover (chain brake) and locate the chain adjuster pin in the cut-out in the groove on the bar. (19) Tension the...
Operation Manual
Page 15
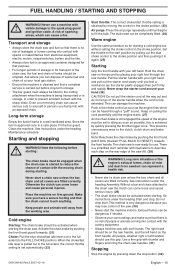
... stopping WARNING! starting a cold engine but without setting the choke control in a well ventilated area. Do not pull the starter cord all covers are fitted correctly. Keep on the ground by moving chain can come loose and cause personal injuries. Reactivate the chain brake by pressing..., the correct throttle setting is set to fill the bulb. FUEL HANDLING / STARTING AND STOPPING WARNING! visible damage to the clutch, clutch drum and brake band. Store the fuel in approved cans in an approved container designed for that there is started to prevent accident contact...
... stopping WARNING! starting a cold engine but without setting the choke control in a well ventilated area. Do not pull the starter cord all covers are fitted correctly. Keep on the ground by moving chain can come loose and cause personal injuries. Reactivate the chain brake by pressing..., the correct throttle setting is set to fill the bulb. FUEL HANDLING / STARTING AND STOPPING WARNING! visible damage to the clutch, clutch drum and brake band. Store the fuel in approved cans in an approved container designed for that there is started to prevent accident contact...
Operation Manual
Page 19
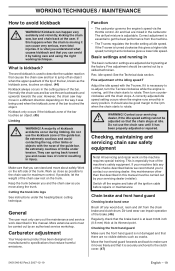
... maintenance other limbs or objects with the T-screw. Checking the front hand guard Make sure the front hand guard is securely anchored to the clutch cover. (47) 5451546-92 Rev.3 2007-12-19 English - 19 Work as close as cracks. Fine adjustment should also be good margin to...a different direction depending on the left side of the machine′s safety equipment. It is running in every position. Carburetor adjustment Your Husqvarna product has been designed and manufactured to avoid kickback WARNING! Work on the way it is necessary to rotate. Keep the trunk between ...
... maintenance other limbs or objects with the T-screw. Checking the front hand guard Make sure the front hand guard is securely anchored to the clutch cover. (47) 5451546-92 Rev.3 2007-12-19 English - 19 Work as close as cracks. Fine adjustment should also be good margin to...a different direction depending on the left side of the machine′s safety equipment. It is running in every position. Carburetor adjustment Your Husqvarna product has been designed and manufactured to avoid kickback WARNING! Work on the way it is necessary to rotate. Keep the trunk between ...
Operation Manual
Page 26
.... Downtime, pick-up and delivery charges are not covered by a third party which gives a warranty, all noncommercial walk behind mowers, or any Husqvarna product used , but not limited to, belts, blades, blade adapters, bulbs, clutches, clutch drums, filters, guide bars, lubricants, rewind springs,...EPA regulations which become worn through the "Yellow Pages" of the local telephone directory or by Husqvarna; (3) Alterations or modifications that the Warranty Registration Card is not covered under warranty. or: (4) Additional damage to parts or components due to continued use , ...
.... Downtime, pick-up and delivery charges are not covered by a third party which gives a warranty, all noncommercial walk behind mowers, or any Husqvarna product used , but not limited to, belts, blades, blade adapters, bulbs, clutches, clutch drums, filters, guide bars, lubricants, rewind springs,...EPA regulations which become worn through the "Yellow Pages" of the local telephone directory or by Husqvarna; (3) Alterations or modifications that the Warranty Registration Card is not covered under warranty. or: (4) Additional damage to parts or components due to continued use , ...

Parts List
Page 3
PAN. 20 18 545 14 93-01 1 CLIP, EZT SPRING 20 19 545 11 86-01 1 DECAL, EZT CLUTCH COVER 20 525 61 14-01 1 CHAIN BRAKE ASSEMBLY Page A 235e, 236e 240e CHAIN BRAKE ASSY Position Article Quantity Description...COMPRESSION 20 8 530 01 59-13 1 PIN, BAND RETAINER 20 9 530 05 79-23 1 BRAKE BAND 20 10 545 07 10-01 1 COVER, BRAKE BAND 20 11 545 22 71-01 3 SCP#619 X .437 .PL. PAN. 20 12 545 06 02-01 1 GEAR, IDLER...PIN, BAR ADJUSTING 20 15 545 06 59-01 1 ASSY ADJUSTER SCREW 20 16 545 05 92-01 1 COVER, GEAR 20 17 545 22 71-01 3 SCP#619 X .437 .PL.
PAN. 20 18 545 14 93-01 1 CLIP, EZT SPRING 20 19 545 11 86-01 1 DECAL, EZT CLUTCH COVER 20 525 61 14-01 1 CHAIN BRAKE ASSEMBLY Page A 235e, 236e 240e CHAIN BRAKE ASSY Position Article Quantity Description...COMPRESSION 20 8 530 01 59-13 1 PIN, BAND RETAINER 20 9 530 05 79-23 1 BRAKE BAND 20 10 545 07 10-01 1 COVER, BRAKE BAND 20 11 545 22 71-01 3 SCP#619 X .437 .PL. PAN. 20 12 545 06 02-01 1 GEAR, IDLER...PIN, BAR ADJUSTING 20 15 545 06 59-01 1 ASSY ADJUSTER SCREW 20 16 545 05 92-01 1 COVER, GEAR 20 17 545 22 71-01 3 SCP#619 X .437 .PL.


