Owners Manual
Page 4
... machine's emission is extremely important that can turn it into a dangerous tool that you read the operator's manual carefully and make sure you understand the instructions before using the machine. Wear sturdy, non-slip boots. Symbols on the battery charger: Please read the operator's manual carefully and make sure you understand the instructions before using the machine. Direct current. Please read...
... machine's emission is extremely important that can turn it into a dangerous tool that you read the operator's manual carefully and make sure you understand the instructions before using the machine. Wear sturdy, non-slip boots. Symbols on the battery charger: Please read the operator's manual carefully and make sure you understand the instructions before using the machine. Direct current. Please read...
Owners Manual
Page 5
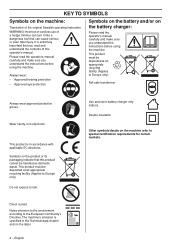
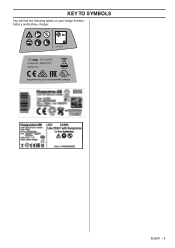
KEY TO SYMBOLS You will find the following labels on your hedge trimmer, battery and battery charger: English - 5
KEY TO SYMBOLS You will find the following labels on your hedge trimmer, battery and battery charger: English - 5
Owners Manual
Page 6
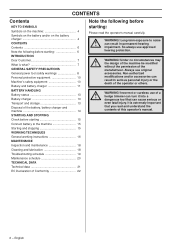
... this operator's manual. 6 - the design of the machine be modified without the permission of a ! It is what 7 GENERAL SAFETY PRECAUTIONS General power tool safety warnings 8 Personal protective equipment 10 Machine′s safety equipment 10 Battery and battery charger 11 BATTERY HANDLING Battery status 13 Battery charger 13 Transport and storage 13 Disposal of the battery, battery charger and machine 14 STARTING...
... this operator's manual. 6 - the design of the machine be modified without the permission of a ! It is what 7 GENERAL SAFETY PRECAUTIONS General power tool safety warnings 8 Personal protective equipment 10 Machine′s safety equipment 10 Battery and battery charger 11 BATTERY HANDLING Battery status 13 Battery charger 13 Transport and storage 13 Disposal of the battery, battery charger and machine 14 STARTING...

Owners Manual
Page 7
... Customer, Congratulations on your companion for a long time. In 1956, the first motor driven lawn mowers appeared, followed by chain saws in 1959, and it will be your choice to professional help with repairs and service whenever this operator′s manual as for using a Husqvarna product. Husqvarna′s aim is passed on and warning indicator 19 Battery release buttons English - 7 During the more...
... Customer, Congratulations on your companion for a long time. In 1956, the first motor driven lawn mowers appeared, followed by chain saws in 1959, and it will be your choice to professional help with repairs and service whenever this operator′s manual as for using a Husqvarna product. Husqvarna′s aim is passed on and warning indicator 19 Battery release buttons English - 7 During the more...

Owners Manual
Page 8
... your mains-operated (corded) power tool or battery-operated (cordless) power tool. This enables better control of electric shock. Use the correct power tool for which it was designed. • Do not use a residual current device (RCD) protected supply. Never modify the plug in the OFF-position before turning the power tool on pages 2-3. There is in any adapter plugs with the switch is unaviodable, use the power tool if the switch does not turn it...
... your mains-operated (corded) power tool or battery-operated (cordless) power tool. This enables better control of electric shock. Use the correct power tool for which it was designed. • Do not use a residual current device (RCD) protected supply. Never modify the plug in the OFF-position before turning the power tool on pages 2-3. There is in any adapter plugs with the switch is unaviodable, use the power tool if the switch does not turn it...
Owners Manual
Page 9
... affect the power tool´s operation. avoid contact. Service • Have your power tool serviced by poorly maintained power tools. • Keep cutting tools sharp and clean. Blades coast after turn off when clearing jammed material. Always remove the battery before any adjustments, changing accessories, or storing power tools. Never use a machine that may create a risk of untrained users. • Maintain power tools. English - 9 If liquid contacts eyes, additionally seek medical help. Hedge trimmer safety...
... affect the power tool´s operation. avoid contact. Service • Have your power tool serviced by poorly maintained power tools. • Keep cutting tools sharp and clean. Blades coast after turn off when clearing jammed material. Always remove the battery before any adjustments, changing accessories, or storing power tools. Never use a machine that may create a risk of untrained users. • Maintain power tools. English - 9 If liquid contacts eyes, additionally seek medical help. Hedge trimmer safety...
Owners Manual
Page 10
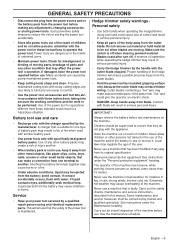
... the USA or EN 166 in the blades. • the machine is overloaded due to start it is not carried out correctly and if service and/or repairs are wearing hearing protection. Therefore disconnect the battery when the machine is active. WARNING! If you use the machine. when fitting cutting attachments. • Wear sturdy, non-slip boots...
... the USA or EN 166 in the blades. • the machine is overloaded due to start it is not carried out correctly and if service and/or repairs are wearing hearing protection. Therefore disconnect the battery when the machine is active. WARNING! If you use the machine. when fitting cutting attachments. • Wear sturdy, non-slip boots...
Owners Manual
Page 11
... power. (Figure 7) Release the power trigger on the machine. Only use Chargers, Husqvarna QC, for charging the Husqvarna replacement batteries, BLi. (Figure 3) WARNING! English - 11 It is undamaged. This arrangement means that the blade guard is automatically locked at least 15 minutes. Press the power trigger on the front handle. (Figure 6) Then press the power trigger on the rear handle up to their original positions. Hand guard The hand guard...
... power. (Figure 7) Release the power trigger on the machine. Only use Chargers, Husqvarna QC, for charging the Husqvarna replacement batteries, BLi. (Figure 3) WARNING! English - 11 It is undamaged. This arrangement means that the blade guard is automatically locked at least 15 minutes. Press the power trigger on the front handle. (Figure 6) Then press the power trigger on the rear handle up to their original positions. Hand guard The hand guard...

Owners Manual
Page 12
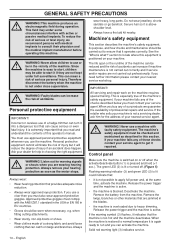
... Regularly check that there are no cracks in it can cause the charger to corrosive or flammable materials. Otherwise it . • Never carry the battery charger using the cord and never pull out the plug by pulling the cord. • Keep all cables and ...rechargeable batteries in the battery charger or use the battery ! Use the battery charger only when the surrounding temperature is intact and that the battery charger connection wire is between 5 °C and 40 °C. English Inspect extensions cords periodically and replace if damaged. Do not cover the battery charger....
... Regularly check that there are no cracks in it can cause the charger to corrosive or flammable materials. Otherwise it . • Never carry the battery charger using the cord and never pull out the plug by pulling the cord. • Keep all cables and ...rechargeable batteries in the battery charger or use the battery ! Use the battery charger only when the surrounding temperature is intact and that the battery charger connection wire is between 5 °C and 40 °C. English Inspect extensions cords periodically and replace if damaged. Do not cover the battery charger....

Owners Manual
Page 13
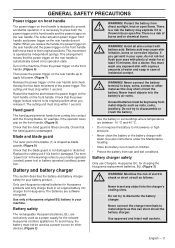
... packing. • Always remove the battery for hazardous material is between 5 °C and 45 °C and never in direct sunlight. • Store the battery charger only in any problems with the battery. short circuiting. Replace cable if it is out of reach of electric shock and ! See also instructions under the Maintenance heading. The battery is lit when an error has occurred (2). LED...
... packing. • Always remove the battery for hazardous material is between 5 °C and 45 °C and never in direct sunlight. • Store the battery charger only in any problems with the battery. short circuiting. Replace cable if it is out of reach of electric shock and ! See also instructions under the Maintenance heading. The battery is lit when an error has occurred (2). LED...

Owners Manual
Page 14
... purchased the product. 14 - English BATTERY HANDLING Disposal of the battery, battery charger and machine Symbols on the product or its packaging indicate that can help to an appropriate recycling station for the recovery of electrical and electronic equipment. For more detailed... information about recycling this product, contact your municipality, your domestic waste service...
... purchased the product. 14 - English BATTERY HANDLING Disposal of the battery, battery charger and machine Symbols on the product or its packaging indicate that can help to an appropriate recycling station for the recovery of electrical and electronic equipment. For more detailed... information about recycling this product, contact your municipality, your domestic waste service...

Owners Manual
Page 15
.... • All covers must be thrown out. • Check the cutting attachment. Make sure the battery is in good working order. Press and hold the start the machine. Always remove the battery to use the machine for the purpose it is a risk of serious personal injury. Make sure no unauthorised ! Starting • Turn on the machine. Check that the handle and safety features...
.... • All covers must be thrown out. • Check the cutting attachment. Make sure the battery is in good working order. Press and hold the start the machine. Always remove the battery to use the machine for the purpose it is a risk of serious personal injury. Make sure no unauthorised ! Starting • Turn on the machine. Check that the handle and safety features...
Owners Manual
Page 16
... not in use the machine in contact with the cutting equipment when it has stopped completely before cleaning the blades. Remove the battery from the machine. • Never leave the machine unsupervised with the motor running. The green LED and the machine will light to hold the machine. Safety instructions while working instructions IMPORTANT! serious personal injury. tool without turning it off...
... not in use the machine in contact with the cutting equipment when it has stopped completely before cleaning the blades. Remove the battery from the machine. • Never leave the machine unsupervised with the motor running. The green LED and the machine will light to hold the machine. Safety instructions while working instructions IMPORTANT! serious personal injury. tool without turning it off...

Owners Manual
Page 17
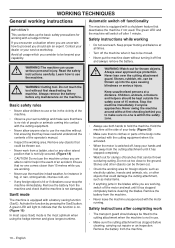
...• Work with a swinging action from the bottom upwards when trimming sides. (Figure 21) • When trimming a hedge the motor should always face away from the hedge. • Hold the machine as close to your body as possible to get the best balance....work, but work steadily until all the branches have been cut back cleanly. WORKING TECHNIQUES • Always wear heavy-duty gloves when repairing the cutting attachment. English - 17 The blades are very sharp and can easily cause cuts. • Store the machine out of reach of children. • Use only original spare parts for repairs.
...• Work with a swinging action from the bottom upwards when trimming sides. (Figure 21) • When trimming a hedge the motor should always face away from the hedge. • Hold the machine as close to your body as possible to get the best balance....work, but work steadily until all the branches have been cut back cleanly. WORKING TECHNIQUES • Always wear heavy-duty gloves when repairing the cutting attachment. English - 17 The blades are very sharp and can easily cause cuts. • Store the machine out of reach of children. • Use only original spare parts for repairs.

Owners Manual
Page 18
...) (Figure 25) Cleaning Clean the machine after using cleaning agent before any burrs. Lubricate the blade with special oil before the battery is especially true of storage. (Figure 23) 18 - Cleaning and lubrication Clean any resin and plant residue from the blades using the machine. When you must contact your nearest service agent. Check that the blades move freely. File away any maintenance on the machine...
...) (Figure 25) Cleaning Clean the machine after using cleaning agent before any burrs. Lubricate the blade with special oil before the battery is especially true of storage. (Figure 23) 18 - Cleaning and lubrication Clean any resin and plant residue from the blades using the machine. When you must contact your nearest service agent. Check that the blades move freely. File away any maintenance on the machine...

Owners Manual
Page 19
.... Temperature deviation. The power trigger and the activate button are between 10 °C and 40 °C. Service Contact your service agent. Possible action Charge the battery. Keypad Warning indicator flashing. Battery and battery charger Troubleshooting the battery and/or the battery charger during charging. The machine does not start Warning indicator lit. Possible faults Overload. Release the cutting attachment. Check that the mains...
.... Temperature deviation. The power trigger and the activate button are between 10 °C and 40 °C. Service Contact your service agent. Possible action Charge the battery. Keypad Warning indicator flashing. Battery and battery charger Troubleshooting the battery and/or the battery charger during charging. The machine does not start Warning indicator lit. Possible faults Overload. Release the cutting attachment. Check that the mains...
Owners Manual
Page 20
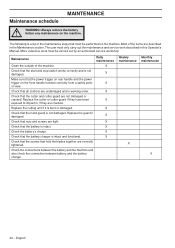
... battery's charge. The user must only carry out the maintenance and service work must be carried out by an authorized service workshop. Replace the guard if damaged. Weekly maintenance X Monthly maintenance X 20 - X Make sure that the cutter and cutter guard are tight. X Check that nuts and screws are not damaged or cracked. Replace the cutting unit if it is not damaged. Always remove the battery ! X Check that the power trigger...
... battery's charge. The user must only carry out the maintenance and service work must be carried out by an authorized service workshop. Replace the guard if damaged. Weekly maintenance X Monthly maintenance X 20 - X Make sure that the cutter and cutter guard are tight. X Check that nuts and screws are not damaged or cracked. Replace the cutting unit if it is not damaged. Always remove the battery ! X Check that the power trigger...
Owners Manual
Page 21
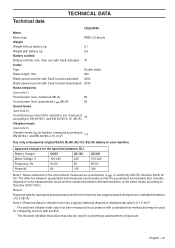
... be used for the specified batteries, BLi. TECHNICAL DATA Technical data 136LiHD45 Motor Motor type PMDC (2-brush) Weight Weight without battery, kg 3,1 Weight with battery, kg 3,9 Battery runtime Battery runtime, min, (free run) with SavE activated 70 Cutter Type Double sided Blade length, mm 450 Blade speed cuts/min with SavE function activated 2300 Blade speed cuts/min with SavE function deactivated 2700 Noise emissions (see note 1) Sound power level, measured...
... be used for the specified batteries, BLi. TECHNICAL DATA Technical data 136LiHD45 Motor Motor type PMDC (2-brush) Weight Weight without battery, kg 3,1 Weight with battery, kg 3,9 Battery runtime Battery runtime, min, (free run) with SavE activated 70 Cutter Type Double sided Blade length, mm 450 Blade speed cuts/min with SavE function activated 2300 Blade speed cuts/min with SavE function deactivated 2700 Noise emissions (see note 1) Sound power level, measured...

Owners Manual
Page 22
... under sole responsibility that the hedge trimmers Husqvarna 136LiHD45 from 2014's serial numbers and onwards (the year is clearly stated in plain text on batteries and accumulators and waste batteries and accumulators" 2006/66/EC. Huskvarna, 18 November 2014 Tom Söberg, Development manager (Authorized representative for Husqvarna AB and responsible for use within certain voltage limits" 2006/95...
... under sole responsibility that the hedge trimmers Husqvarna 136LiHD45 from 2014's serial numbers and onwards (the year is clearly stated in plain text on batteries and accumulators and waste batteries and accumulators" 2006/66/EC. Huskvarna, 18 November 2014 Tom Söberg, Development manager (Authorized representative for Husqvarna AB and responsible for use within certain voltage limits" 2006/95...


