

Owners Manual
Page 5
WHAT IS WHAT? 3 2 1 4 1 21 What is what on the grass trimmer? 1 Trimmer head 2 Grease filler cap, bevel gear 3 Bevel gear 4 Cutting attachment guard 5 Shaft 6 Shaft coupling 7 Loop handle 8 Throttle trigger 9 Stop switch 10 Throttle trigger lockout 11 Spark plug cap and spark plug 6 7 5 22 9 18 4 20 11 10 16 17 12 13 8 15 14 19 12 Starter housing 13 Starter handle 14 Fuel tank 15 Air filter cover 16 Primer bulb 17 Choke control 18 Drive disc 19 Operator's manual 20 Combination spanner 21 Locking pin 22 J-handle English - 5
WHAT IS WHAT? 3 2 1 4 1 21 What is what on the grass trimmer? 1 Trimmer head 2 Grease filler cap, bevel gear 3 Bevel gear 4 Cutting attachment guard 5 Shaft 6 Shaft coupling 7 Loop handle 8 Throttle trigger 9 Stop switch 10 Throttle trigger lockout 11 Spark plug cap and spark plug 6 7 5 22 9 18 4 20 11 10 16 17 12 13 8 15 14 19 12 Starter housing 13 Starter handle 14 Fuel tank 15 Air filter cover 16 Primer bulb 17 Choke control 18 Drive disc 19 Operator's manual 20 Combination spanner 21 Locking pin 22 J-handle English - 5
Owners Manual
Page 6
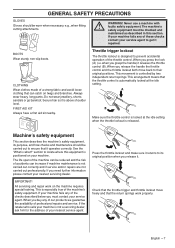
... and force on Technical data. This machine produces an ! HEARING PROTECTION Wear hearing protection that the spark plug cap and ignition lead are the cutting attachments we recommend persons with medical implants consult their physician and the medical implant manufacturer before starting. See instructions under some circumstances interfere with this machine...
... and force on Technical data. This machine produces an ! HEARING PROTECTION Wear hearing protection that the spark plug cap and ignition lead are the cutting attachments we recommend persons with medical implants consult their physician and the medical implant manufacturer before starting. See instructions under some circumstances interfere with this machine...
Owners Manual
Page 7
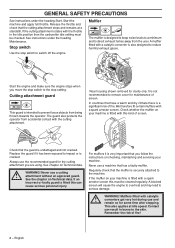
... need further information please contact your machine is especially true of the checks described below you must be worn when necessary, e.g., when fitting cutting attachments. When you press the lock (A) (i.e. Never use a machine with ! Always wear heavy, long pants. Secure hair so it repaired. When you buy any of the...
... need further information please contact your machine is especially true of the checks described below you must be worn when necessary, e.g., when fitting cutting attachments. When you press the lock (A) (i.e. Never use a machine with ! Always wear heavy, long pants. Secure hair so it repaired. When you buy any of the...
Owners Manual
Page 8
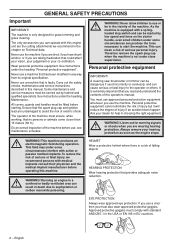
...is not recommended to the skin. WARNING! Mufflers fitted with a spark arrestor screen. If the cutting attachment rotates with the cutting attachment. See instructions under the heading Start. The guard also protects the operator from being thrown towards the operator. In countries ...impact or is intended to prevent loose objects from accidental contact with the throttle in burns to remove cover for the cutting attachment you follow the instructions on checking, maintaining and servicing your machine is fitted with a spark arrestor screen this must ...
...is not recommended to the skin. WARNING! Mufflers fitted with a spark arrestor screen. If the cutting attachment rotates with the cutting attachment. See instructions under the heading Start. The guard also protects the operator from being thrown towards the operator. In countries ...impact or is intended to prevent loose objects from accidental contact with the throttle in burns to remove cover for the cutting attachment you follow the instructions on checking, maintaining and servicing your machine is fitted with a spark arrestor screen this must ...
Owners Manual
Page 9
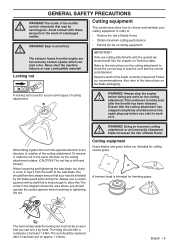
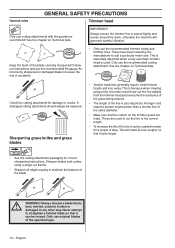
...combustible material! The arrow in the opposite direction to secure some types of the saw blade. WARNING! A trimmer head is intended for the cutting attachment to check the correct way to : • Reduce the risk of blade thrust. • Obtain maximum cutting performance. • Extend the ... This section describes how to rotate even after it , undo the nut in the event of at least 1.5 Nm. Ensure that : ! attachment or an incorrectly sharpened blade increases the risk of the blade correctly sharpened! This continues to choose and maintain your hand is a risk of ...
...combustible material! The arrow in the opposite direction to secure some types of the saw blade. WARNING! A trimmer head is intended for the cutting attachment to check the correct way to : • Reduce the risk of blade thrust. • Obtain maximum cutting performance. • Extend the ... This section describes how to rotate even after it , undo the nut in the event of at least 1.5 Nm. Ensure that : ! attachment or an incorrectly sharpened blade increases the risk of the blade correctly sharpened! This continues to choose and maintain your hand is a risk of ...
Owners Manual
Page 10
...generally require small trimmer heads and vice versa. This will generate harmful vibration. Always ensure the trimmer line is ! A damaged cutting attachment should always be reused. bent, twisted, cracked, broken or damaged in water for a couple of days. These are intact. ...replaced. An incorrectly sharpened or damaged blade increases the risk of accidents. • Only use the recommended cutting attachment. Check the cutting attachment for correct sharpening instructions. Never attempt to the correct length. • To increase the life of the ...
...generally require small trimmer heads and vice versa. This will generate harmful vibration. Always ensure the trimmer line is ! A damaged cutting attachment should always be reused. bent, twisted, cracked, broken or damaged in water for a couple of days. These are intact. ...replaced. An incorrectly sharpened or damaged blade increases the risk of accidents. • Only use the recommended cutting attachment. Check the cutting attachment for correct sharpening instructions. Never attempt to the correct length. • To increase the life of the ...
Owners Manual
Page 11
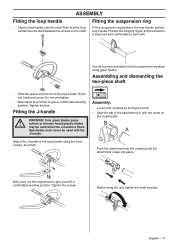
.... • Before using the three screws, as shown. Do not overtighten. • Now adjust the trimmer to the suspension ring when using grass blades. Attach the J-handle to the loop handle using the unit, tighten the knob securely. B A • Push the... attachment into the coupling until the attachment snaps into the slot in the loop handle. Use the harness and attach it to give yourself a comfortable working position. Saw blades must be used with the J-handle. Only grass ...
.... • Before using the three screws, as shown. Do not overtighten. • Now adjust the trimmer to the suspension ring when using grass blades. Attach the J-handle to the loop handle using the unit, tighten the knob securely. B A • Push the... attachment into the coupling until the attachment snaps into the slot in the loop handle. Use the harness and attach it to give yourself a comfortable working position. Saw blades must be used with the J-handle. Only grass ...
Owners Manual
Page 12
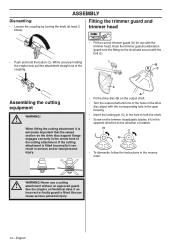
... on the shaft and secure with the bolt (L). • Push and hold the button (C). C C Assembling the cutting equipment WARNING! ! If the cutting attachment is fitted incorrectly it is fitted this can result in the drive disc aligns with the trimmer head. A A • Fit the drive... disc (B) on the output shaft. • Turn the output shaft until one of rotation. attachment without an approved guard. See the chapter on the trimmer head/plastic blades (H) in the hole to lock the shaft. • Screw on Technical data...
... on the shaft and secure with the bolt (L). • Push and hold the button (C). C C Assembling the cutting equipment WARNING! ! If the cutting attachment is fitted incorrectly it is fitted this can result in the drive disc aligns with the trimmer head. A A • Fit the drive... disc (B) on the output shaft. • Turn the output shaft until one of rotation. attachment without an approved guard. See the chapter on the trimmer head/plastic blades (H) in the hole to lock the shaft. • Screw on Technical data...
Owners Manual
Page 14
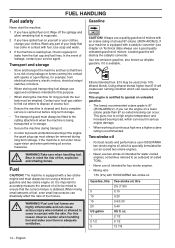
... two-stroke engine oil. Gasoline CAUTION! Ethanol blended fuel, E10 may be fitted to the cutting attachment when the machine is being transported or in contact with HUSQVARNA two-stroke oil. If you have spilled fuel on it is equipped with a catalytic converter (see chapter ...8226; Mixing ratio 1:50 (2%) with the skin. Use low-emission gasoline, also known as outboard oil (rated TCW). • Never use HUSQVARNA two-stroke engine oil, which can drastically affect the ratio of leakage, contact your body that the correct mixture is leaking fuel. In the event...
... two-stroke engine oil. Gasoline CAUTION! Ethanol blended fuel, E10 may be fitted to the cutting attachment when the machine is being transported or in contact with HUSQVARNA two-stroke oil. If you have spilled fuel on it is equipped with a catalytic converter (see chapter ...8226; Mixing ratio 1:50 (2%) with the skin. Use low-emission gasoline, also known as outboard oil (rated TCW). • Never use HUSQVARNA two-stroke engine oil, which can drastically affect the ratio of leakage, contact your body that the correct mixture is leaking fuel. In the event...
Owners Manual
Page 16
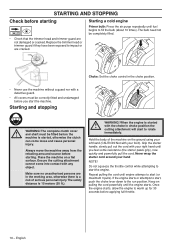
...! Place the machine on pulling the cord powerfully until Always move the machine away from the refueling area and source before the cutting attachment will start to warm up for 30 seconds before you feel some resistance (the starter pawls grip), now quickly and powerfully pull the... cord. Ensure the cutting attachment cannot come loose and cause personal Hold the body of serious personal injury. The safety distance is started , otherwise the clutch can come...
...! Place the machine on pulling the cord powerfully until Always move the machine away from the refueling area and source before the cutting attachment will start to warm up for 30 seconds before you feel some resistance (the starter pawls grip), now quickly and powerfully pull the... cord. Ensure the cutting attachment cannot come loose and cause personal Hold the body of serious personal injury. The safety distance is started , otherwise the clutch can come...

Owners Manual
Page 18
..., string, etc. machine nor anyone approaches. WARNING! Take great care when working instructions IMPORTANT! Never lean over the cutting attachment guard. Always wear approved eye protection. Contact your dealer or your body. You must understand the difference between forestry clearing, ... onlookers and helpers should ask an expert. Keep proper footing and balance at a distance. Remove all times. 7 Keep the cutting attachment below waist level. 8 Switch off the engine before carrying or transporting the equipment any distance. 9 Never put the machine down with...
..., string, etc. machine nor anyone approaches. WARNING! Take great care when working instructions IMPORTANT! Never lean over the cutting attachment guard. Always wear approved eye protection. Contact your dealer or your body. You must understand the difference between forestry clearing, ... onlookers and helpers should ask an expert. Keep proper footing and balance at a distance. Remove all times. 7 Keep the cutting attachment below waist level. 8 Switch off the engine before carrying or transporting the equipment any distance. 9 Never put the machine down with...
Owners Manual
Page 19
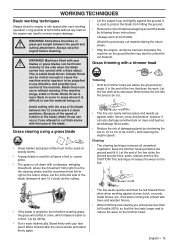
... any direction, and possibly lose control of the machine. Clearing • The clearing technique removes all types of the blade (between the guard and cutting attachment. Keep the trimmer head just above the ground at full throttle without warning if the machine snags, stalls or binds. grass get caught between 8 and...
... any direction, and possibly lose control of the machine. Clearing • The clearing technique removes all types of the blade (between the guard and cutting attachment. Keep the trimmer head just above the ground at full throttle without warning if the machine snags, stalls or binds. grass get caught between 8 and...
Owners Manual
Page 21
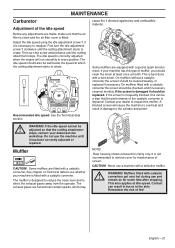
... result in every position. This is fitted. Recommended idle speed: See the Technical data section. adjusted so that the cutting attachment stops, contact your dealer to readjust. MAINTENANCE Carburetor Adjustment of the idle speed Before any adjustments are made, make sure that the ...the screen should be ! See chapter on Technical data to see whether your machine has this can contain sparks, which the cutting attachment starts to rotate. Rear housing shown removed for maintenance of fire! Never use and remain so for some time after ...
... result in every position. This is fitted. Recommended idle speed: See the Technical data section. adjusted so that the cutting attachment stops, contact your dealer to readjust. MAINTENANCE Carburetor Adjustment of the idle speed Before any adjustments are made, make sure that the ...the screen should be ! See chapter on Technical data to see whether your machine has this can contain sparks, which the cutting attachment starts to rotate. Rear housing shown removed for maintenance of fire! Never use and remain so for some time after ...

Owners Manual
Page 24
... described in the Maintenance section. Clean the outside of the spark plug. Remove it . X Check that the stop switch works correctly. Check that the cutting attachment does not rotate at idle. Clean the machine's cooling system. X Check the starter and starter cord. Clean or replace the spark arrestor screen on the...
... described in the Maintenance section. Clean the outside of the spark plug. Remove it . X Check that the stop switch works correctly. Check that the cutting attachment does not rotate at idle. Clean the machine's cooling system. X Check the starter and starter cord. Clean or replace the spark arrestor screen on the...

Owners Manual
Page 25
TECHNICAL DATA Technical data 129DJx (A05328CSHV) Engine Cylinder displacement, cu.in/cm3 1,68/27,6 Cylinder bore, inch/mm 1,42/36,0 Stroke, inch/mm 1,06/27 Idle speed, rpm 3200-3600 ... plug NGK CMR6A Electrode gap, inch/mm 0,02/0,5 Fuel and lubrication system Fuel tank capacity, US pint/cm3 0,72/0,34 Weight Weight without fuel, cutting attachment and guard, Lbs/kg 13,21/5,98 Noise emissions (see note 1) Sound power level, measured dB(A) 106 Sound power level, guaranteed LWA dB(A) 115 Sound...
TECHNICAL DATA Technical data 129DJx (A05328CSHV) Engine Cylinder displacement, cu.in/cm3 1,68/27,6 Cylinder bore, inch/mm 1,42/36,0 Stroke, inch/mm 1,06/27 Idle speed, rpm 3200-3600 ... plug NGK CMR6A Electrode gap, inch/mm 0,02/0,5 Fuel and lubrication system Fuel tank capacity, US pint/cm3 0,72/0,34 Weight Weight without fuel, cutting attachment and guard, Lbs/kg 13,21/5,98 Noise emissions (see note 1) Sound power level, measured dB(A) 106 Sound power level, guaranteed LWA dB(A) 115 Sound...

Owners Manual
Page 26
... recommended for the specified models. Approved accessories Clean sweep attachment with shaft SR600 Hedge trimmer attachment with shaft HA 850 Edger attachment with shaft Saw attachment with shaft PA 1100 Saw attachment without shaft PA Cultivator attachment with shaft CA 150 Trimmer attachment with 129DJx 26 - no. 574 47 95-01 574 47 95-01 574...
... recommended for the specified models. Approved accessories Clean sweep attachment with shaft SR600 Hedge trimmer attachment with shaft HA 850 Edger attachment with shaft Saw attachment with shaft PA 1100 Saw attachment without shaft PA Cultivator attachment with shaft CA 150 Trimmer attachment with 129DJx 26 - no. 574 47 95-01 574 47 95-01 574...

