
Operation Manual
Page 9
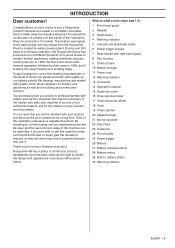
... right hand guard 8 Fan housing 9 Chain oil tank 10 Battery charger 11 Power cord 12 Warning indicator 13 Connector 14 Operator's manual 15 Guide-bar cover 16 Drive sprocket cover 17 Chain tensioner wheel 18 Knob 19 Chain catcher 20 Spiked bumper 21 Bar tip sprocket 22 Saw chain 23 Guide bar 24 Front handle 25 Power trigger 26 Battery 27 Battery release buttons 28 Battery status 29 Button, battery status 30 Warning indicator English - 9 By following its′ content (using a Husqvarna product. During...
... right hand guard 8 Fan housing 9 Chain oil tank 10 Battery charger 11 Power cord 12 Warning indicator 13 Connector 14 Operator's manual 15 Guide-bar cover 16 Drive sprocket cover 17 Chain tensioner wheel 18 Knob 19 Chain catcher 20 Spiked bumper 21 Bar tip sprocket 22 Saw chain 23 Guide bar 24 Front handle 25 Power trigger 26 Battery 27 Battery release buttons 28 Battery status 29 Button, battery status 30 Warning indicator English - 9 By following its′ content (using a Husqvarna product. During...
Operation Manual
Page 10
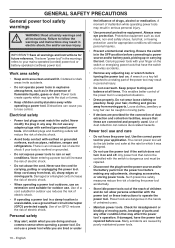
... power tool repaired before turning the power tool on and off. Electrical safety • Power tool plugs must be caught in the warnings refers to lose control. Keep cord away from moving parts. A wrench or a key left attached to operate the power tool. Do not wear loose clothing or jewellery. Use of the power tool may affect the power tool´s operation. The correct power tool will reduce the risk of untrained users. • Maintain power tools. Use of a cord...
... power tool repaired before turning the power tool on and off. Electrical safety • Power tool plugs must be caught in the warnings refers to lose control. Keep cord away from moving parts. A wrench or a key left attached to operate the power tool. Do not wear loose clothing or jewellery. Use of the power tool may affect the power tool´s operation. The correct power tool will reduce the risk of untrained users. • Maintain power tools. Use of a cord...
Operation Manual
Page 11
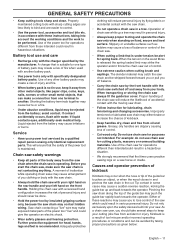
.... • When battery pack is operating. Further protective equipment for operations different from oil and grease. Greasy, oily handles are easier to another battery pack. • Use power tools only with the chain saw for one terminal to control. • Use the power tool, accessories and tool bits etc. Either of these instructions, taking proper precautions as ladders may push the guide bar rapidly back towards the operator. Battery tool use chain saw switched off and away...
.... • When battery pack is operating. Further protective equipment for operations different from oil and grease. Greasy, oily handles are easier to another battery pack. • Use power tools only with the chain saw for one terminal to control. • Use the power tool, accessories and tool bits etc. Either of these instructions, taking proper precautions as ladders may push the guide bar rapidly back towards the operator. Battery tool use chain saw switched off and away...

Operation Manual
Page 12
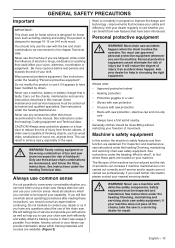
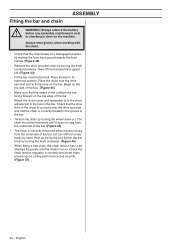
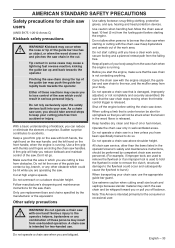
Incorrect replacement bars and chains may cause chain breakage and/or kickback. • Follow the manufacturer's sharpening and maintenance instructions for the saw is easy to start it the first time. See instructions under the heading Assembly. • Do not use the chain saw until sufficient chain oil has reached the chain. See instructions under the heading Filling with chain oil. • Check that you to start , children may under the heading Charging...
Incorrect replacement bars and chains may cause chain breakage and/or kickback. • Follow the manufacturer's sharpening and maintenance instructions for the saw is easy to start it the first time. See instructions under the heading Assembly. • Do not use the chain saw until sufficient chain oil has reached the chain. See instructions under the heading Filling with chain oil. • Check that you to start , children may under the heading Charging...
Operation Manual
Page 13
... your capability. Never use any questions about operating procedures after reading these parts are available. (Figure 2) Work is not possible to cover every conceivable situation you can provide information about which you need further information please contact your shift. See instructions under the heading Maintenance. Your dealer, forestry school or your library can face when using a chain saw chain increases the risk...
... your capability. Never use any questions about operating procedures after reading these parts are available. (Figure 2) Work is not possible to cover every conceivable situation you can provide information about which you need further information please contact your shift. See instructions under the heading Maintenance. Your dealer, forestry school or your library can face when using a chain saw chain increases the risk...
Operation Manual
Page 14
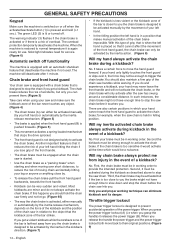
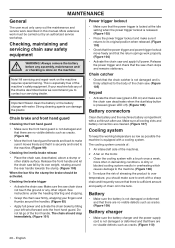
... the saw is equipped with an automatic shutdown feature that stops the drive sprocket. • The front hand guard is placed so that it releases the power trigger (B). Solid light indicates need for service. (Figure 6) Automatic switch off . Most kickbacks are also certain positions in the event of the front hand guard, the chain brake can prevent them. (Figure 3) Take care when using...
... the saw is equipped with an automatic shutdown feature that stops the drive sprocket. • The front hand guard is placed so that it releases the power trigger (B). Solid light indicates need for service. (Figure 6) Automatic switch off . Most kickbacks are also certain positions in the event of the front hand guard, the chain brake can prevent them. (Figure 3) Take care when using...
Operation Manual
Page 15
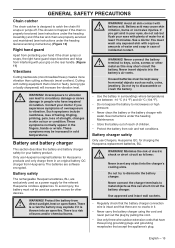
... high pressure. • Never clean the battery or the battery charger with plenty of overexposure to vibration ! Battery charger safety Only use Husqvarna original batteries for at least 15 minutes. WARNING! Use approved and intact wall sockets. • Regularly check that the battery charger connection wire is properly tensioned (see instructions under the heading Assembly) and if the bar and chain are properly serviced and maintained (see instructions under the heading Maintenance...
... high pressure. • Never clean the battery or the battery charger with plenty of overexposure to vibration ! Battery charger safety Only use Husqvarna original batteries for at least 15 minutes. WARNING! Use approved and intact wall sockets. • Regularly check that the battery charger connection wire is properly tensioned (see instructions under the heading Assembly) and if the bar and chain are properly serviced and maintained (see instructions under the heading Maintenance...

Operation Manual
Page 16
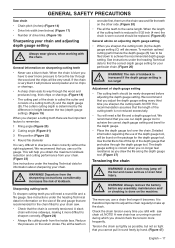
... gauge setting! Guide bar • Length (inches/cm) (Figure 13) • Number of fire. WARNING! Remember the risk of teeth on the bar tip sprocket and drive sprocket. (Figure 14) • Number of cutting equipment. • Avoid increasing vibration levels. Do not charge: • non-rechargeable batteries in the battery charger or use the bar/saw chain increases the risk of bar and saw chain combinations we recommend. See instructions...
... gauge setting! Guide bar • Length (inches/cm) (Figure 13) • Number of fire. WARNING! Remember the risk of teeth on the bar tip sprocket and drive sprocket. (Figure 14) • Number of cutting equipment. • Avoid increasing vibration levels. Do not charge: • non-rechargeable batteries in the battery charger or use the bar/saw chain increases the risk of bar and saw chain combinations we recommend. See instructions...
Operation Manual
Page 17
... the use a blunt chain. Always remove the battery ! before adjusting the depth gauge setting. Check the chain tension every time you will need a round file and a file gauge. GENERAL SAFETY PRECAUTIONS Saw chain • Chain pitch (inches) (Figure 14) • Drive link width (mm/inches) (Figure 17) • Number of drive links. (Figure 16) Sharpening your chain and adjusting depth gauge setting Always wear gloves, when working with saw chain oil. See instructions under the heading Technical...
... the use a blunt chain. Always remove the battery ! before adjusting the depth gauge setting. Check the chain tension every time you will need a round file and a file gauge. GENERAL SAFETY PRECAUTIONS Saw chain • Chain pitch (inches) (Figure 14) • Drive link width (mm/inches) (Figure 17) • Number of drive links. (Figure 16) Sharpening your chain and adjusting depth gauge setting Always wear gloves, when working with saw chain oil. See instructions under the heading Technical...
Operation Manual
Page 18
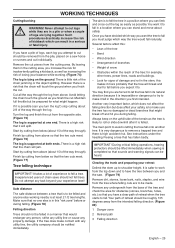
... cover. (Figure 29) • Adjust the tension on the chain by turning the knob clockwise. (Figure 31) • Fold the knob back in to lock the tensioning. (Figure 32) Lubricating cutting equipment WARNING! After 1 minute running with a drive sprocket. (Figure 38) Regularly check the degree of chain oil (if the chain oil is worn. Replace the saw chain oil tank is not working after carrying out the above . Remove these with a new chain...
... cover. (Figure 29) • Adjust the tension on the chain by turning the knob clockwise. (Figure 31) • Fold the knob back in to lock the tensioning. (Figure 32) Lubricating cutting equipment WARNING! After 1 minute running with a drive sprocket. (Figure 38) Regularly check the degree of chain oil (if the chain oil is worn. Replace the saw chain oil tank is not working after carrying out the above . Remove these with a new chain...
Operation Manual
Page 20
... chain by turning the knob counterclockwise. The chain should be tensioned until it does not sag from the underside of the bar, but can still be turned easily by turning the knob clockwise. (Figure 46) • When fitting a new chain, the chain tension has to fit the chain adjuster pin in the hole in its rearmost position. English Always remove the battery ! before any assembly, maintenance and/ or checking...
... chain by turning the knob counterclockwise. The chain should be tensioned until it does not sag from the underside of the bar, but can still be turned easily by turning the knob clockwise. (Figure 46) • When fitting a new chain, the chain tension has to fit the chain adjuster pin in the hole in its rearmost position. English Always remove the battery ! before any assembly, maintenance and/ or checking...

Operation Manual
Page 21
... way. Battery charger WARNING! LED 1 is empty. LED 1 flashes. Use approved and intact wall sockets. See instructions under the heading Maintenance. It must be handled as domestic waste. By ensuring that this product cannot be charged before long-term storage. • Secure the machine during transport. The warning symbol on the rating plate. Replace cable if it...
... way. Battery charger WARNING! LED 1 is empty. LED 1 flashes. Use approved and intact wall sockets. See instructions under the heading Maintenance. It must be handled as domestic waste. By ensuring that this product cannot be charged before long-term storage. • Secure the machine during transport. The warning symbol on the rating plate. Replace cable if it...

Operation Manual
Page 22
..., should use or is unsupervised. starting: Never start up, the battery must always be on the keypad (green LED off). (Figure 60) Note! The right hand should slide easily into place. (Figure 59) • Press and hold the saw unless the bar, chain and all covers are fitted correctly. Note the following before ! See instructions under the heading Assembly. (Figure...
..., should use or is unsupervised. starting: Never start up, the battery must always be on the keypad (green LED off). (Figure 60) Note! The right hand should slide easily into place. (Figure 59) • Press and hold the saw unless the bar, chain and all covers are fitted correctly. Note the following before ! See instructions under the heading Assembly. (Figure...
Operation Manual
Page 23
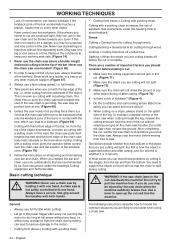
... handles are free from oil. 6 Check that all parts of the machine. • To make the cut . Fit a guard to jam. the drive system causing the saw firmly with a power saving function (savE). Always deactivate the machine and remove the battery before transporting the chain saw or carrying it can handle! By being cut in bad weather is under the headings How to lose control. You should use...
... handles are free from oil. 6 Check that all parts of the machine. • To make the cut . Fit a guard to jam. the drive system causing the saw firmly with a power saving function (savE). Always deactivate the machine and remove the battery before transporting the chain saw or carrying it can handle! By being cut in bad weather is under the headings How to lose control. You should use...
Operation Manual
Page 24
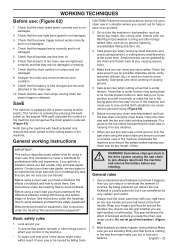
... your bar and chain. Only saw may be a danger, you intend to support the object so that it will not jam in tension. Remove the cut with a pulling chain gives the operator better control over the workpiece. If the saw when cutting through the log, release the cutting pressure near the end of the kickback zone. (Figure 70) 9 Follow the instructions on a ladder, in the ! Cutting...
... your bar and chain. Only saw may be a danger, you intend to support the object so that it will not jam in tension. Remove the cut with a pulling chain gives the operator better control over the workpiece. If the saw when cutting through the log, release the cutting pressure near the end of the kickback zone. (Figure 70) 9 Follow the instructions on a ladder, in the ! Cutting...
Operation Manual
Page 25
...tree. During critical felling operations, hearing protectors should not fell a tree. Clearing the trunk and preparing your experience level! By leaving them in a location where you expect it will split. However there is a high risk that the chain will jam. Cut all the way through the... See instructions under the heading Freeing a tree that the two cuts meet . (Figure 76) The log is a high risk that would fall in the cutting area, you and the saw horse or runners and cut should be heard. IMPORTANT! It is safer to cut individually. Remove any utility line, the ...
...tree. During critical felling operations, hearing protectors should not fell a tree. Clearing the trunk and preparing your experience level! By leaving them in a location where you expect it will split. However there is a high risk that the chain will jam. Cut all the way through the... See instructions under the heading Freeing a tree that the two cuts meet . (Figure 76) The log is a high risk that would fall in the cutting area, you and the saw horse or runners and cut should be heard. IMPORTANT! It is safer to cut individually. Remove any utility line, the ...
Operation Manual
Page 28
... power supply cord is not damaged or deformed and that the chain catcher is not damaged and is firmly attached to work with a soft brush after use. before any assembly, maintenance and/ or checking is not damaged and that there are no visible defects such as possible the machine is especially true of the front handle. Never clean the battery or the battery...
... power supply cord is not damaged or deformed and that the chain catcher is not damaged and is firmly attached to work with a soft brush after use. before any assembly, maintenance and/ or checking is not damaged and that there are no visible defects such as possible the machine is especially true of the front handle. Never clean the battery or the battery...
Operation Manual
Page 32
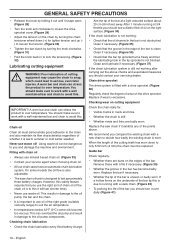
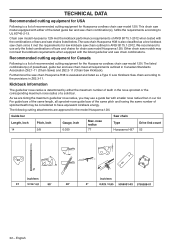
... is a list of recommended cutting equipment for Husqvarna cordless chain saw model Husqvarna 120i. nose radius 7T Saw chain Type Husqvarna H37 Drive link count 52 32 - Other chain saw models may not meet all sprocket-nose guide bars of the same pitch and having the same number of sprocket teeth may use only the listed combinations of recommended cutting equipment for chain saw model 120i. Chain saw model Husqvarna 120i met the kickback performance requirements of bars and saw chain combinations. Recommended cutting equipment...
... is a list of recommended cutting equipment for Husqvarna cordless chain saw model Husqvarna 120i. nose radius 7T Saw chain Type Husqvarna H37 Drive link count 52 32 - Other chain saw models may not meet all sprocket-nose guide bars of the same pitch and having the same number of sprocket teeth may use only the listed combinations of recommended cutting equipment for chain saw model 120i. Chain saw model Husqvarna 120i met the kickback performance requirements of bars and saw chain combinations. Recommended cutting equipment...
Operation Manual
Page 33
... guide bar up and back towards the operator. Do not start the engine, make sure that the area in the operator's/owner's safety and maintenance instructions, should take several steps to burst.) When transporting your chain saw . A firm grip will not be performed by the manufacturer or the equivalent. Keep bystanders and animals out of oil or fuel mixture. As a chain saw user, you are operating the saw service...
... guide bar up and back towards the operator. Do not start the engine, make sure that the area in the operator's/owner's safety and maintenance instructions, should take several steps to burst.) When transporting your chain saw . A firm grip will not be performed by the manufacturer or the equivalent. Keep bystanders and animals out of oil or fuel mixture. As a chain saw user, you are operating the saw service...

Parts List
Page 13
OIL TANK Ref Part No Description 1 582 73 46-01 TANK ASSY 2 582 14 86-01 SPRING 3 574 80 09-01 TUBE 4 585 56 66-01 OIL HOSE 5 581 99 01-01 SPRING PIN 6 575 48 45-01 VALVE NIPPLE 7 522 62 00-03 TANK CAP ASSY Remark 120i, 2017-01 QTY KIT 1 1 1 1 1 1 1
OIL TANK Ref Part No Description 1 582 73 46-01 TANK ASSY 2 582 14 86-01 SPRING 3 574 80 09-01 TUBE 4 585 56 66-01 OIL HOSE 5 581 99 01-01 SPRING PIN 6 575 48 45-01 VALVE NIPPLE 7 522 62 00-03 TANK CAP ASSY Remark 120i, 2017-01 QTY KIT 1 1 1 1 1 1 1


