Owner's Manual
Page 1
Electronic/Mechanical Thermostat installation and operation manual Model 40135 1 44017-01 04-01-2008
Electronic/Mechanical Thermostat installation and operation manual Model 40135 1 44017-01 04-01-2008
Owner's Manual
Page 4
Your new Hunter thermostat will provide years of reliable service and year-round energy savings. Thank you for complete operation instructions. 4 Electronic/Mechanical Thermostat Model 40135 Congratulations! Please read this manual before beginning installation and save this booklet for choosing a Hunter thermostat.
Your new Hunter thermostat will provide years of reliable service and year-round energy savings. Thank you for complete operation instructions. 4 Electronic/Mechanical Thermostat Model 40135 Congratulations! Please read this manual before beginning installation and save this booklet for choosing a Hunter thermostat.
Owner's Manual
Page 9
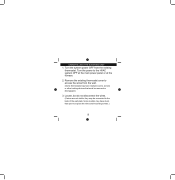
uninstalling the existing unit 1. Remove the existing thermostat cover to the back of the wall plate. Turn the power to expose the wires and mounting screws.) 9 Locate, but do not disconnect the wires. (If wires are not visible, they may be removed or disengaged.) 3. Some models may have doors that must be connected to access the wires from the existing thermostat. Turn the system power OFF from the wall. (Some thermostats may have multiple covers, screws or other locking devices that open to the HVAC system OFF at the main power panel or at the furnace. 2.
uninstalling the existing unit 1. Remove the existing thermostat cover to the back of the wall plate. Turn the power to expose the wires and mounting screws.) 9 Locate, but do not disconnect the wires. (If wires are not visible, they may be removed or disengaged.) 3. Some models may have doors that must be connected to access the wires from the existing thermostat. Turn the system power OFF from the wall. (Some thermostats may have multiple covers, screws or other locking devices that open to the HVAC system OFF at the main power panel or at the furnace. 2.
Owner's Manual
Page 9
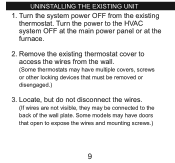
uninstalling the existing unit 1. Turn the system power OFF from the wall. (Some thermostats may have doors that must be connected to expose the wires and mounting screws.) 9 Locate, but do not disconnect the wires. (If wires are not visible, they may have multiple covers, screws or other locking devices that open to the back of the wall plate. Some models may be removed or disengaged.) 3. Turn the power to access the wires from the existing thermostat. Remove the existing thermostat cover to the HVAC system OFF at the main power panel or at the furnace. 2.
uninstalling the existing unit 1. Turn the system power OFF from the wall. (Some thermostats may have doors that must be connected to expose the wires and mounting screws.) 9 Locate, but do not disconnect the wires. (If wires are not visible, they may have multiple covers, screws or other locking devices that open to the back of the wall plate. Some models may be removed or disengaged.) 3. Turn the power to access the wires from the existing thermostat. Remove the existing thermostat cover to the HVAC system OFF at the main power panel or at the furnace. 2.


