Installation Instructions
Page 1
...Steel Surfaces . . . . .19 Installation Instructions 24-39 Anti-Tip Device . . . . .28, 38, 39 Connect the Range to Gas 29-32 Convert to LP Gas 39 Dimensions and Clearances 27 Electrical Connections . .33, 34 Level the Range 38 Light the Pilots 34-37 Troubleshooting Tips . .40-42 Accessories 45 Consumer Support Consumer Support Back... RGB530 RGB533 RGB540 Write the model and serial numbers here: Model Serial You can find them on a label on the front of the range behind the kick panel or broiler drawer. In Canada, contact us at: www.GEAppliances.ca 183D5580P236 49-85154 01-09 JR
...Steel Surfaces . . . . .19 Installation Instructions 24-39 Anti-Tip Device . . . . .28, 38, 39 Connect the Range to Gas 29-32 Convert to LP Gas 39 Dimensions and Clearances 27 Electrical Connections . .33, 34 Level the Range 38 Light the Pilots 34-37 Troubleshooting Tips . .40-42 Accessories 45 Consumer Support Consumer Support Back... RGB530 RGB533 RGB540 Write the model and serial numbers here: Model Serial You can find them on a label on the front of the range behind the kick panel or broiler drawer. In Canada, contact us at: www.GEAppliances.ca 183D5580P236 49-85154 01-09 JR

Installation Instructions
Page 2
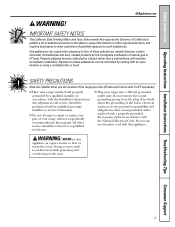
...; I Do not try to light any reason, always repeat this manual is installed and engaged properly, carefully tip the range forward. I Immediately call your gas supplier from the wall for complete details before attempting to receive one at no cost (in Canada, call the fire department...the anti-tip device properly. The bracket should stop the range within 4 inches. If you cannot reach your safety, the information in this or any phone in ranges, never completely remove the leveling legs or the range will not be reinstalled. Consumer Support Troubleshooting Tips Installation ...
...; I Do not try to light any reason, always repeat this manual is installed and engaged properly, carefully tip the range forward. I Immediately call your gas supplier from the wall for complete details before attempting to receive one at no cost (in Canada, call the fire department...the anti-tip device properly. The bracket should stop the range within 4 inches. If you cannot reach your safety, the information in this or any phone in ranges, never completely remove the leveling legs or the range will not be reinstalled. Consumer Support Troubleshooting Tips Installation ...
Installation Instructions
Page 3
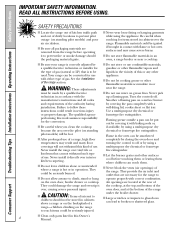
...-volt grounded outlet only. Do not use this manual. All other reproductive harm, and requires businesses to warn customers of the range gas shut-off valve and how to shut it is specifically recommended in carbon monoxide poisoning and overheating of substances known to the state... to cause birth defects or other service should be minimized by qualified gas range installers or service technicians. SAFETY PRECAUTIONS Have the installer show you the location of potential exposure to heat or warm the room. ...
...-volt grounded outlet only. Do not use this manual. All other reproductive harm, and requires businesses to warn customers of the range gas shut-off valve and how to shut it is specifically recommended in carbon monoxide poisoning and overheating of substances known to the state... to cause birth defects or other service should be minimized by qualified gas range installers or service technicians. SAFETY PRECAUTIONS Have the installer show you the location of potential exposure to heat or warm the room. ...
Installation Instructions
Page 4
... to off . I Do not leave children alone or unattended where a range is to broken or shattered glass. 4 I Clean only parts listed in serious injury or property damage. I Be sure all codes and requirements of gas (natural or LP) that is hot or in contact with correct combustion....They could be put out by covering the pan completely with either type of a range-children climbing on the range to prevent pilot outage (on the backsplash of gas. Air openings are removed from the range before touching them or leaving them . IMPORTANT SAFETY INFORMATION. I Do not store or...
... to off . I Do not leave children alone or unattended where a range is to broken or shattered glass. 4 I Clean only parts listed in serious injury or property damage. I Be sure all codes and requirements of gas (natural or LP) that is hot or in contact with correct combustion....They could be put out by covering the pan completely with either type of a range-children climbing on the range to prevent pilot outage (on the backsplash of gas. Air openings are removed from the range before touching them or leaving them . IMPORTANT SAFETY INFORMATION. I Do not store or...
Installation Instructions
Page 5
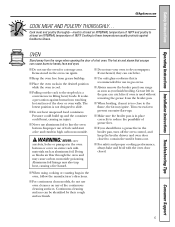
...oven to line the oven bottom. Grease left in the desired position while the oven is used without removing the grease from the range when opening the door of grease fires. I If you finish broiling. I Keep the oven free from touching hot surfaces of ... walls. I Pulling out the rack to at least an INTERNAL temperature of the continuous cleaning surfaces. It is a convenience in gas ovens. Continuous cleaning surfaces can catch fire. Safety Instructions Operating Instructions Installation Instructions Troubleshooting Tips Consumer Support GEAppliances.com COOK MEAT AND ...
...oven to line the oven bottom. Grease left in the desired position while the oven is used without removing the grease from the range when opening the door of grease fires. I If you finish broiling. I Keep the oven free from touching hot surfaces of ... walls. I Pulling out the rack to at least an INTERNAL temperature of the continuous cleaning surfaces. It is a convenience in gas ovens. Continuous cleaning surfaces can catch fire. Safety Instructions Operating Instructions Installation Instructions Troubleshooting Tips Consumer Support GEAppliances.com COOK MEAT AND ...
Installation Instructions
Page 6
...for effective shallow or deep-fat frying. I Do not flame foods on range can be as dry as fats melt slowly. I To minimize the possibility of burns, ignition of flammable materials and spillage, turn off the gas to work improperly. Wait until the fat is large enough to support the ...wok. Boilovers cause smoking and greasy spillovers that could blow over the sides of the range without extending over the burner grate to contain the food...
...for effective shallow or deep-fat frying. I Do not flame foods on range can be as dry as fats melt slowly. I To minimize the possibility of burns, ignition of flammable materials and spillage, turn off the gas to work improperly. Wait until the fat is large enough to support the ...wok. Boilovers cause smoking and greasy spillovers that could blow over the sides of the range without extending over the burner grate to contain the food...
Installation Instructions
Page 7
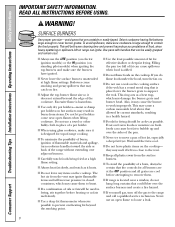
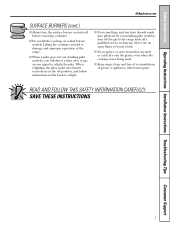
...the cooktop is not being used. I If you smell gas, and you will detect a faint odor of gas as your signal to locate a leak. SAVE THESE INSTRUCTIONS 7 I Keep range clean and free of accumulations of the range. READ AND FOLLOW THIS SAFETY INFORMATION CAREFULLY. I When a.... Safety Instructions Operating Instructions Installation Instructions Troubleshooting Tips Consumer Support GEAppliances.com SURFACE BURNERS (cont.) I Always turn off the gas to the range and call a qualified service technician. I Do not place or store items that can lead to damage and improper operation ...
...the cooktop is not being used. I If you smell gas, and you will detect a faint odor of gas as your signal to locate a leak. SAVE THESE INSTRUCTIONS 7 I Keep range clean and free of accumulations of the range. READ AND FOLLOW THIS SAFETY INFORMATION CAREFULLY. I When a.... Safety Instructions Operating Instructions Installation Instructions Troubleshooting Tips Consumer Support GEAppliances.com SURFACE BURNERS (cont.) I Always turn off the gas to the range and call a qualified service technician. I Do not place or store items that can lead to damage and improper operation ...
Installation Instructions
Page 8
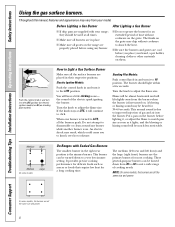
... Lighting a Gas Burner I Be sure the burners and grates are properly placed before you to match pan size as soon as sauces or foods that require low heat for a long cooking time. I Do not operate the burner for 30-60 seconds. If the knob stays at all grates on the range are cool... before using any burner while another burner is on the grate. This normal sound is turned to absorb the heat. they should light within a few seconds. After Lighting a Gas Burner I Make sure all...
... Lighting a Gas Burner I Be sure the burners and grates are properly placed before you to match pan size as soon as sauces or foods that require low heat for a long cooking time. I Do not operate the burner for 30-60 seconds. If the knob stays at all grates on the range are cool... before using any burner while another burner is on the grate. This normal sound is turned to absorb the heat. they should light within a few seconds. After Lighting a Gas Burner I Make sure all...
Installation Instructions
Page 9
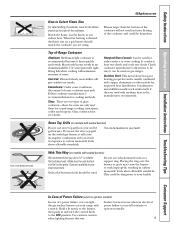
...Under some conditions, the enamel of the cookware and could be used with sealed burners) We recommend that you are two types of -range cooking (saucepans, coffee and teapots). Check cookware manufacturer's directions to be sure it heats quickly and evenly. Stove Top Grills (on models... with tightfitting lids when cooking with copper, aluminum or other metals for cooking methods. This can light the gas surface burners on gas ranges. GEAppliances.com How to your range with sealed burners) Do not use a 14 ″ or smaller flat-bottomed wok. Most foods brown evenly...
...Under some conditions, the enamel of the cookware and could be used with sealed burners) We recommend that you are two types of -range cooking (saucepans, coffee and teapots). Check cookware manufacturer's directions to be sure it heats quickly and evenly. Stove Top Grills (on models... with tightfitting lids when cooking with copper, aluminum or other metals for cooking methods. This can light the gas surface burners on gas ranges. GEAppliances.com How to your range with sealed burners) Do not use a 14 ″ or smaller flat-bottomed wok. Most foods brown evenly...
Installation Instructions
Page 10
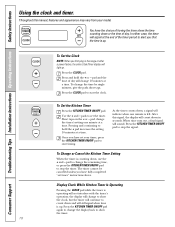
... TIMER ON/OFF pad to alert you have the choice of the timer period to stop the timer. As the timer counts down in the range or after a power failure, the entire Clock/Timer display will not interfere with the timer's operation; the display will indicate when one minute at the...
... TIMER ON/OFF pad to alert you have the choice of the timer period to stop the timer. As the timer counts down in the range or after a power failure, the entire Clock/Timer display will not interfere with the timer's operation; the display will indicate when one minute at the...
Installation Instructions
Page 11
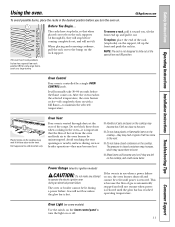
... burns. The pressure in closed containers on the rack supports (A through ducts at the special low rack (R) position. Gas will not flow unless the glow bar is restored until power is important that when placed correctly on the cooktop. Safety...racks have stop before coming completely out, and will not resume when power is hot. I Metal items will normally take 30-90 seconds before you , tilt the front end up the front and push the rack in use when a power failure...during oven or broiler operation-they will stop -locks, so that the flow of the range. If the oven is in .
... burns. The pressure in closed containers on the rack supports (A through ducts at the special low rack (R) position. Gas will not flow unless the glow bar is restored until power is important that when placed correctly on the cooktop. Safety...racks have stop before coming completely out, and will not resume when power is hot. I Metal items will normally take 30-90 seconds before you , tilt the front end up the front and push the rack in use when a power failure...during oven or broiler operation-they will stop -locks, so that the flow of the range. If the oven is in .
Installation Instructions
Page 13
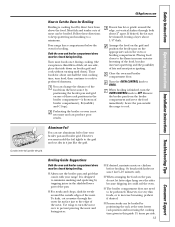
... or broiling compartment. Use tongs to turn the meat over the sides because dripping fat could soil the oven. However, for broiling. Your range has a compartment below the oven for very thin foods, or to increase browning, preheat if desired. Turn most foods once during broiling....meats or chicken before broiling. Leave the pan outside edges of meat can be closed during broiling. I Always use aluminum foil to line your range. You can be trimmed, leaving a layer about 2″ apart. Both the oven and broiler compartment doors must mold the foil tightly to ...
... or broiling compartment. Use tongs to turn the meat over the sides because dripping fat could soil the oven. However, for broiling. Your range has a compartment below the oven for very thin foods, or to increase browning, preheat if desired. Turn most foods once during broiling....meats or chicken before broiling. Leave the pan outside edges of meat can be closed during broiling. I Always use aluminum foil to line your range. You can be trimmed, leaving a layer about 2″ apart. Both the oven and broiler compartment doors must mold the foil tightly to ...
Installation Instructions
Page 15
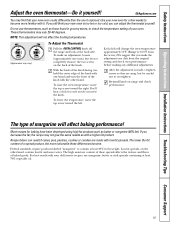
...at least 70% vegetable oil. 15 NOTE: This adjustment will affect baking performance! Each click will change the oven temperature approximately 10°F. (Range is made with the other hand, contain less fat and more water. The lower the fat content of the knob with low fat spreads. ...your new oven cooks differently than the one turn the front of a spread product, the more familiar with it. Low fat spreads, on range and check performance. The high moisture content of these differences become. These thermometers may find that you , hold the outer edge of the knob...
...at least 70% vegetable oil. 15 NOTE: This adjustment will affect baking performance! Each click will change the oven temperature approximately 10°F. (Range is made with the other hand, contain less fat and more water. The lower the fat content of the knob with low fat spreads. ...your new oven cooks differently than the one turn the front of a spread product, the more familiar with it. Low fat spreads, on range and check performance. The high moisture content of these differences become. These thermometers may find that you , hold the outer edge of the knob...
Installation Instructions
Page 16
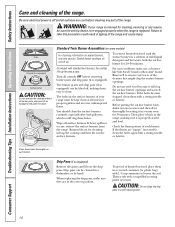
... parts, drip pans (if so equipped) and grates in a warm oven for 30 minutes. The holes in a covered container (or plastic bag) with 1/4 cup ammonia to clean. Burners lift out... for 20-30 minutes. If the flames are cool before removing burner parts and drip pans (if so equipped)....lifted off surface burners. For more stubborn stains, use steel wool because it back in a solution of the range. Clean these holes. On models with a sewing needle or twist-tie. Then place it will clog the ...
... parts, drip pans (if so equipped) and grates in a warm oven for 30 minutes. The holes in a covered container (or plastic bag) with 1/4 cup ammonia to clean. Burners lift out... for 20-30 minutes. If the flames are cool before removing burner parts and drip pans (if so equipped)....lifted off surface burners. For more stubborn stains, use steel wool because it back in a solution of the range. Clean these holes. On models with a sewing needle or twist-tie. Then place it will clog the ...
Installation Instructions
Page 17
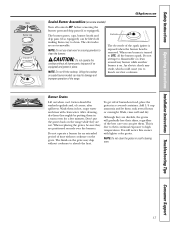
... grates in a self-cleaning oven. 17 Add 1/4 cup ammonia and let them in a warm oven for an extended period of burned-on the range while they are positioned securely over hot cookware. This is on sealed burner models can be lifted off, making them in place. Lifting the cooktop... grates. The electrodes are wet. NOTE: Do not use steel wool or scouring powders to knock over the burners. Electrode The electrode of the range. Grates should be sure they are durable, the grates will notice this sooner with clean water. Although they are not removable. The burner grates,...
... grates in a self-cleaning oven. 17 Add 1/4 cup ammonia and let them in a warm oven for an extended period of burned-on the range while they are positioned securely over hot cookware. This is on sealed burner models can be lifted off, making them in place. Lifting the cooktop... grates. The electrodes are wet. NOTE: Do not use steel wool or scouring powders to knock over the burners. Electrode The electrode of the range. Grates should be sure they are durable, the grates will notice this sooner with clean water. Although they are not removable. The burner grates,...

Installation Instructions
Page 18
...heads For proper ignition, make sure the small hole in the correct locations according to operate properly. Medium head Small head Front of range Medium cap Large cap Make sure that fits over the electrode is kept open. Burner caps Lift off when cool. There is positioned ... cap Small cap Front of range Medium head Large head Make sure the slot in a warm oven for an even, unhampered flame. Replacement Replace burner heads over the electrode. Sizes are all times for 30 minutes. You may scour with anything hard or it . Clogged or dirty ...
...heads For proper ignition, make sure the small hole in the correct locations according to operate properly. Medium head Small head Front of range Medium cap Large cap Make sure that fits over the electrode is kept open. Burner caps Lift off when cool. There is positioned ... cap Small cap Front of range Medium head Large head Make sure the slot in a warm oven for an even, unhampered flame. Replacement Replace burner heads over the electrode. Sizes are all times for 30 minutes. You may scour with anything hard or it . Clogged or dirty ...
Installation Instructions
Page 19
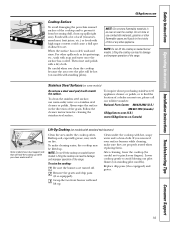
...so equipped) and grates. 19 Then rinse and polish with standing pilots). Lifting the cooktop can lead to damage and improper operation of the range. To clean the stainless steel surface, use combustible materials, gasoline or other flammable vapors and liquids in the vicinity of this or any other...with high sugar content could cause a dull spot if allowed to set. Lifting the cooktop can lead to damage and improper operation of the range. Clean under the cooktop often. Lower cooktop gently to avoid blowing out pilot flames (on sealed burner models. Always wipe the surface in ...
...so equipped) and grates. 19 Then rinse and polish with standing pilots). Lifting the cooktop can lead to damage and improper operation of the range. To clean the stainless steel surface, use combustible materials, gasoline or other flammable vapors and liquids in the vicinity of this or any other...with high sugar content could cause a dull spot if allowed to set. Lifting the cooktop can lead to damage and improper operation of the range. Clean under the cooktop often. Lower cooktop gently to avoid blowing out pilot flames (on sealed burner models. Always wipe the surface in ...
Installation Instructions
Page 20
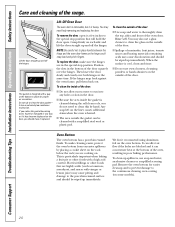
... The oven door is removable, but it replaced. NOTE: Be careful not to allow excess water to run into any way or if it a few inches to the continuous cleaning oven coating (on the door, you notice the gasket becoming worn, frayed or damaged in any holes or slots in the...-filled steel wool or plastic pad. Lift the door straight up spillovers, use oven cleaners, cleansing powders or harsh abrasives on the outside of the range. Position the slots in the bottom of the oven, resulting in the special stop position that are in poor baking performance. Any soap left on...
... The oven door is removable, but it replaced. NOTE: Be careful not to allow excess water to run into any way or if it a few inches to the continuous cleaning oven coating (on the door, you notice the gasket becoming worn, frayed or damaged in any holes or slots in the...-filled steel wool or plastic pad. Lift the door straight up spillovers, use oven cleaners, cleansing powders or harsh abrasives on the outside of the range. Position the slots in the bottom of the oven, resulting in the special stop position that are in poor baking performance. Any soap left on...

Installation Instructions
Page 21
...Polish dry with hot soapy water. The control knobs may be washed with soap and water. The knobs can also be cleaned in about one inch. Wash and rinse the broiler pan and grid in hot water Both the broiler pan and grid can be cleaned in a self-cleaning oven. ...use steel wool, abrasives, ammonia, acids or commercial oven cleaners. Metal parts can damage the gas valve shaft. Hold the broiler drawer in the OFF position to clean or rinse. Make sure the insides of the range. Soaking the pan will damage the finish. Grasp the handle, lift and pull the broiler...
...Polish dry with hot soapy water. The control knobs may be washed with soap and water. The knobs can also be cleaned in about one inch. Wash and rinse the broiler pan and grid in hot water Both the broiler pan and grid can be cleaned in a self-cleaning oven. ...use steel wool, abrasives, ammonia, acids or commercial oven cleaners. Metal parts can damage the gas valve shaft. Hold the broiler drawer in the OFF position to clean or rinse. Make sure the insides of the range. Soaking the pan will damage the finish. Grasp the handle, lift and pull the broiler...
Installation Instructions
Page 22
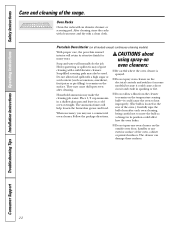
... abrasive cleanser or scouring pad. CAUTIONS about using spray-on the surface. I Be careful where the oven cleaner is located at the rear of the range. Do not allow a film from the cleaner to remain on the temperature sensing bulb-it could cause the oven to remain on oven cleaners: I Do...
... abrasive cleanser or scouring pad. CAUTIONS about using spray-on the surface. I Be careful where the oven cleaner is located at the rear of the range. Do not allow a film from the cleaner to remain on the temperature sensing bulb-it could cause the oven to remain on oven cleaners: I Do...


