Owners Manual
Page 1
Back Cover Warranty 15 Owner's Manual NBXR333 NVLR223 NWXR483 Write the model and serial numbers here: Model Serial You can find them on a label on the front of the dryer behind the door. 175D1807P568 39-90300-1 11-06 JR Dryers Hotpoint.com Safety Instructions 2-4 Operating Instructions Control Panel 5 Control Settings 6 Features 7 Loading and Using the Dryer 9, 10 Reversing the Door 8 Venting the Dryer 10 Troubleshooting Tips . . . 11, 12 Consumer Support Consumer Support . . . . .
Back Cover Warranty 15 Owner's Manual NBXR333 NVLR223 NWXR483 Write the model and serial numbers here: Model Serial You can find them on a label on the front of the dryer behind the door. 175D1807P568 39-90300-1 11-06 JR Dryers Hotpoint.com Safety Instructions 2-4 Operating Instructions Control Panel 5 Control Settings 6 Features 7 Loading and Using the Dryer 9, 10 Reversing the Door 8 Venting the Dryer 10 Troubleshooting Tips . . . 11, 12 Consumer Support Consumer Support . . . . .

Owners Manual
Page 2
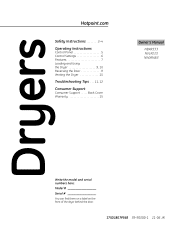
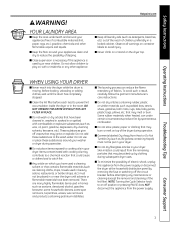
... not use gasoline or other reproductive harm and requires businesses to warn customers of this manual must be performed by properly venting the dryer to the weather, which could cause permanent damage and invalidate the warranty. I Connect to a properly rated, protected and sized power supply circuit to such substances. I Install or store where it is used. Safety Instructions Operating Instructions IMPORTANT SAFETY INFORMATION. READ ALL INSTRUCTIONS BEFORE USING.
... not use gasoline or other reproductive harm and requires businesses to warn customers of this manual must be performed by properly venting the dryer to the weather, which could cause permanent damage and invalidate the warranty. I Connect to a properly rated, protected and sized power supply circuit to such substances. I Install or store where it is used. Safety Instructions Operating Instructions IMPORTANT SAFETY INFORMATION. READ ALL INSTRUCTIONS BEFORE USING.
Owners Manual
Page 3
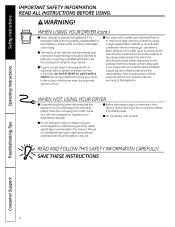
... the dryer at the household distribution panel by clothing during subsequent dryer uses. Some rubber materials, when heated, can reduce the flame retardancy of fabrics. I Never reach into the dryer while the drum is used a cleaning solvent or that may be put in your washer or dryer during operation. I Close supervision is necessary if this or any maintenance or cleaning (except the removal and cleaning of electric shock...
... the dryer at the household distribution panel by clothing during subsequent dryer uses. Some rubber materials, when heated, can reduce the flame retardancy of fabrics. I Never reach into the dryer while the drum is used a cleaning solvent or that may be put in your washer or dryer during operation. I Close supervision is necessary if this or any maintenance or cleaning (except the removal and cleaning of electric shock...
Owners Manual
Page 4
... wish to repair or replace any part of this appliance or attempt any servicing unless specifically recommended in this appliance. Service or performance problems caused by using a dryer-applied fabric softener or an anti-static conditioner. I The interior of those products, or try a dryer-added product for those products and are not covered under the warranty to this Owner's Manual or in published user-repair instructions that...
... wish to repair or replace any part of this appliance or attempt any servicing unless specifically recommended in this appliance. Service or performance problems caused by using a dryer-applied fabric softener or an anti-static conditioner. I The interior of those products, or try a dryer-added product for those products and are not covered under the warranty to this Owner's Manual or in published user-repair instructions that...
Owners Manual
Page 5
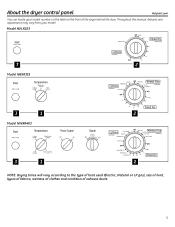
Throughout this manual, features and appearance may vary from your model number on the label on the front of exhaust ducts. 5 About the dryer control panel. Hotpoint.com You can locate your model. Model NVLR223 3 2 Model NBXR333 3 1 2 Model NWXR483 3 1 2 NOTE: Drying times will vary according to the type of heat used (Electric, Natural or LP gas), size of load, types of fabrics, wetness of clothes and condition of the dryer behind the door.
Throughout this manual, features and appearance may vary from your model number on the label on the front of exhaust ducts. 5 About the dryer control panel. Hotpoint.com You can locate your model. Model NVLR223 3 2 Model NBXR333 3 1 2 Model NWXR483 3 1 2 NOTE: Drying times will vary according to the type of heat used (Electric, Natural or LP gas), size of load, types of fabrics, wetness of clothes and condition of the dryer behind the door.
Owners Manual
Page 6
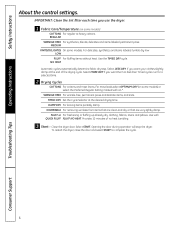
... KNITS/DELICATES On some models) COTTONS For regular to complete the cycle. 6 Troubleshooting Tips Consumer Support Timed cycles run for a selected time. 2 Drying Cycles COTTONS For cottons and most loads select OPTIMUM DRY (on some models. WRINKLE FREE For wrinkle-free, permanent press and delicate items, and knits. To restart the dryer, close the door and select START to heavy cottons. Safety Instructions Operating Instructions About the control settings. NO HEAT Automatic cycles automatically determine fabric dryness...
... KNITS/DELICATES On some models) COTTONS For regular to complete the cycle. 6 Troubleshooting Tips Consumer Support Timed cycles run for a selected time. 2 Drying Cycles COTTONS For cottons and most loads select OPTIMUM DRY (on some models. WRINKLE FREE For wrinkle-free, permanent press and delicate items, and knits. To restart the dryer, close the door and select START to heavy cottons. Safety Instructions Operating Instructions About the control settings. NO HEAT Automatic cycles automatically determine fabric dryness...
Owners Manual
Page 7
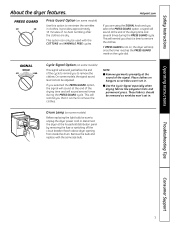
... household distribution panel by removing the fuse or switching off the circuit breaker. Drum Lamp (on some models) This signal will stop once the timer reaches the PRESS GUARD mark on some models) Before replacing the light bulb, be removed so wrinkles won 't set in. It provides approximately 15 minutes of the drying time and several times during the PRESS GUARD cycle. Remove the bulb and replace with the COTTONS and WRINKLE FREE cycles. These fabrics...
... household distribution panel by removing the fuse or switching off the circuit breaker. Drum Lamp (on some models) This signal will stop once the timer reaches the PRESS GUARD mark on some models) Before replacing the light bulb, be removed so wrinkles won 't set in. It provides approximately 15 minutes of the drying time and several times during the PRESS GUARD cycle. Remove the bulb and replace with the COTTONS and WRINKLE FREE cycles. These fabrics...
Owners Manual
Page 9
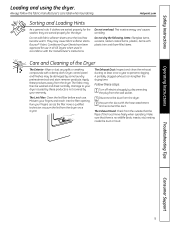
... clean the exhaust ducting at least once a year to your warranty. A partially clogged exhaust can lengthen the drying time. This wastes energy and causes wrinkling. Follow these products away from the dryer once a year. The Exhaust Hood: Check from the dryer. 3 Vacuum the duct with the manufacturer's instructions. Hotpoint.com Sorting and Loading Hints As a general rule, if clothes are sorted properly for the washer, they are sorted properly for use...
... clean the exhaust ducting at least once a year to your warranty. A partially clogged exhaust can lengthen the drying time. This wastes energy and causes wrinkling. Follow these products away from the dryer once a year. The Exhaust Hood: Check from the dryer. 3 Vacuum the duct with the manufacturer's instructions. Hotpoint.com Sorting and Loading Hints As a general rule, if clothes are sorted properly for the washer, they are sorted properly for use...
Owners Manual
Page 10
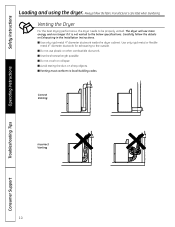
... specifications. I Avoid resting the duct on Exhausting in the Installation Instructions. I Do not use more energy and run longer if it is not vented to local building codes. Correct Venting Incorrect Venting 10 Troubleshooting Tips Consumer Support I Use the shortest length possible. Always follow the details on sharp objects. Venting the Dryer For the best drying performance, the dryer needs to the outside. I Do not crush or collapse. Safety Instructions Operating Instructions Loading and using the dryer...
... specifications. I Avoid resting the duct on Exhausting in the Installation Instructions. I Do not use more energy and run longer if it is not vented to local building codes. Correct Venting Incorrect Venting 10 Troubleshooting Tips Consumer Support I Use the shortest length possible. Always follow the details on sharp objects. Venting the Dryer For the best drying performance, the dryer needs to the outside. I Do not crush or collapse. Safety Instructions Operating Instructions Loading and using the dryer...
Owners Manual
Page 11
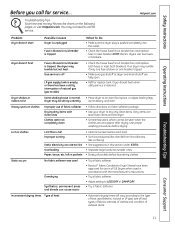
... loads into the outlet. • Check the house fuse/circuit breaker box and replace fuse or reset breaker. left in pockets • Clean lint screen before each load. • Sort lint producers (like chenille) from lint collectors (like corduroy). • See suggestions in accordance with clean ones Clothes were not completely clean • Follow directions on clothes Improper use in all pockets before drying. Troubleshooting Tips Consumer Support 11 Hotpoint.com Troubleshooting Tips Save time and money! Safety Instructions Operating Instructions...
... loads into the outlet. • Check the house fuse/circuit breaker box and replace fuse or reset breaker. left in pockets • Clean lint screen before each load. • Sort lint producers (like chenille) from lint collectors (like corduroy). • See suggestions in accordance with clean ones Clothes were not completely clean • Follow directions on clothes Improper use in all pockets before drying. Troubleshooting Tips Consumer Support 11 Hotpoint.com Troubleshooting Tips Save time and money! Safety Instructions Operating Instructions...
Owners Manual
Page 12
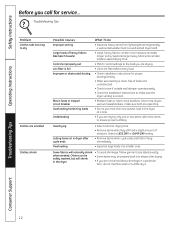
... beach towels) Controls improperly set Lint filter is full Improper or obstructed ducting Blown fuses or tripped circuit breaker Overloading/combining loads Underloading What To Do • Separate heavy items from lightweight items (generally, a well-sorted washer load is correct. • Replace fuses or reset circuit breakers. Troubleshooting Tips Consumer Support 12 Safety Instructions Operating Instructions Before you call for proper ducting/venting. • Make sure ducting is clean, free of kinks and unobstructed. • Check to see...
... beach towels) Controls improperly set Lint filter is full Improper or obstructed ducting Blown fuses or tripped circuit breaker Overloading/combining loads Underloading What To Do • Separate heavy items from lightweight items (generally, a well-sorted washer load is correct. • Replace fuses or reset circuit breakers. Troubleshooting Tips Consumer Support 12 Safety Instructions Operating Instructions Before you call for proper ducting/venting. • Make sure ducting is clean, free of kinks and unobstructed. • Check to see...
Owners Manual
Page 15
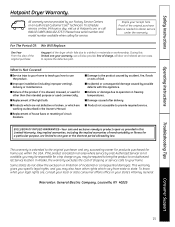
... the Owner's Manual. I Replacement of merchantability or fitness for a particular purpose, are working as provided in freezing temperatures. I Product not accessible to obtain service under the warranty. Any implied warranties, including the implied warranties of the light bulb. If the product is located in an area where service by a GE Authorized Servicer is not available, you may also have serial number and model number available when calling for home use...
... the Owner's Manual. I Replacement of merchantability or fitness for a particular purpose, are working as provided in freezing temperatures. I Product not accessible to obtain service under the warranty. Any implied warranties, including the implied warranties of the light bulb. If the product is located in an area where service by a GE Authorized Servicer is not available, you may also have serial number and model number available when calling for home use...
Owners Manual
Page 16
... 800.TDD.GEAC (800.833.4322). Printed in the packing material. Schedule Service Hotpoint.com Expert Hotpoint repair service is still in this manual cover procedures to : General Manager, Customer Relations Hotpoint, Appliance Park Louisville, KY 40225 Register Your Appliance Hotpoint.com Register your door. You may cause unsafe operation. For details of the year! For the hearing impaired, please call 800...
... 800.TDD.GEAC (800.833.4322). Printed in the packing material. Schedule Service Hotpoint.com Expert Hotpoint repair service is still in this manual cover procedures to : General Manager, Customer Relations Hotpoint, Appliance Park Louisville, KY 40225 Register Your Appliance Hotpoint.com Register your door. You may cause unsafe operation. For details of the year! For the hearing impaired, please call 800...
Installation Instructions
Page 1
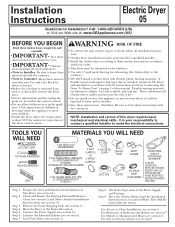
... Area and Exhaust for local inspector's use. • IMPORTANT- Connect the External Exhaust (see section 1). Place the Owners Manual and the Installation Instructions in any location where it could be easily crushed, and trap lint. FLEXIBLE METAL (FOIL TYPE) UL LISTED TRANSITION DUCT (IF NEEDED.) DUCT TAPE EXHAUST HOOD GLOVES SAFETY GLASSES 3/4" STRAIN RELIEF UL RECOGNIZED DRYER POWER CORD KIT (NOT PROVIDED WITH DRYER) UL RATED 120/240V,30A WITH 3 OR 4 PRONGS. If flexible...
... Area and Exhaust for local inspector's use. • IMPORTANT- Connect the External Exhaust (see section 1). Place the Owners Manual and the Installation Instructions in any location where it could be easily crushed, and trap lint. FLEXIBLE METAL (FOIL TYPE) UL LISTED TRANSITION DUCT (IF NEEDED.) DUCT TAPE EXHAUST HOOD GLOVES SAFETY GLASSES 3/4" STRAIN RELIEF UL RECOGNIZED DRYER POWER CORD KIT (NOT PROVIDED WITH DRYER) UL RATED 120/240V,30A WITH 3 OR 4 PRONGS. If flexible...

Installation Instructions
Page 2
... DRYER TIP: Install your dryer before installing your washer. BE SURE TO REMOVE ALL OF THE FOAM PIECES AROUND THE LEGS. 2 ELECTRICAL CONNECTION INFORMATION WARNING - REMOVING LINT FROM WALL EXHAUST OPENING • Remove and discard existing plastic or metal foil transition duct and replace with the circuit conductors and connected to a grounded metal, permanent wiring system, or an equipment-grounding conductor must be run with UL listed transition duct. GROUNDING INSTRUCTIONS This dryer...
... DRYER TIP: Install your dryer before installing your washer. BE SURE TO REMOVE ALL OF THE FOAM PIECES AROUND THE LEGS. 2 ELECTRICAL CONNECTION INFORMATION WARNING - REMOVING LINT FROM WALL EXHAUST OPENING • Remove and discard existing plastic or metal foil transition duct and replace with the circuit conductors and connected to a grounded metal, permanent wiring system, or an equipment-grounding conductor must be run with UL listed transition duct. GROUNDING INSTRUCTIONS This dryer...
Installation Instructions
Page 3
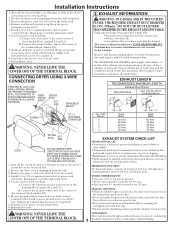
... CHECK LIST HOOD OR WALL CAP • Terminate in the table below . Remove the power cord cover located at least 4 ft. The maximum duct length for lint. • Duct joints can be installed at the electrical box. 2. Bring power cord through strain relief. 6. SEPARATION OF TURNS For best performance, separate all conditions noted below . Bring power cord through strain relief. 5. Be sure the dryer cord is near air conditioning 3 should require little or no maintenance...
... CHECK LIST HOOD OR WALL CAP • Terminate in the table below . Remove the power cord cover located at least 4 ft. The maximum duct length for lint. • Duct joints can be installed at the electrical box. 2. Bring power cord through strain relief. 6. SEPARATION OF TURNS For best performance, separate all conditions noted below . Bring power cord through strain relief. 5. Be sure the dryer cord is near air conditioning 3 should require little or no maintenance...

Installation Instructions
Page 4
... the exhaust length table. The accumulated lint could create a fire hazard. • Never terminate the exhaust into the duct. Longer ducts can accumulate lint, creating a potential fire hazard. • Do not obstruct incoming or exhausted air. • Provide an access for the home exhaust duct. • Use only 4" rigid metal or UL-listed flexible metal (semi-rigid or foil-type) duct to connect the dryer to the home exhaust duct. STANDARD REAR EXHAUST (Vented...
... the exhaust length table. The accumulated lint could create a fire hazard. • Never terminate the exhaust into the duct. Longer ducts can accumulate lint, creating a potential fire hazard. • Do not obstruct incoming or exhausted air. • Provide an access for the home exhaust duct. • Use only 4" rigid metal or UL-listed flexible metal (semi-rigid or foil-type) duct to connect the dryer to the home exhaust duct. STANDARD REAR EXHAUST (Vented...

Installation Instructions
Page 5
...-LISTED FLEXIBLE METAL (FOIL-TYPE) TRANSITION DUCT • In special installations, it will be stated on a label on the dryer back. • The dryer MUST be vented to the outdoors. DO ELBOW HIGHLY RECOMMENDED ELBOWS HIGHLY RECOMMENDED 5 DO NOT USE EXCESSIVE EXHAUST LENGTH DON'T DO NOT SIT DRYER ON FLEXIBLE EXHAUST. in walls, ceilings, floors or other surfaces is approved for electrical connection information...
...-LISTED FLEXIBLE METAL (FOIL-TYPE) TRANSITION DUCT • In special installations, it will be stated on a label on the dryer back. • The dryer MUST be vented to the outdoors. DO ELBOW HIGHLY RECOMMENDED ELBOWS HIGHLY RECOMMENDED 5 DO NOT USE EXCESSIVE EXHAUST LENGTH DON'T DO NOT SIT DRYER ON FLEXIBLE EXHAUST. in walls, ceilings, floors or other surfaces is approved for electrical connection information...

Installation Instructions
Page 6
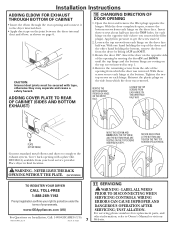
... Through the rear opening and connect the elbow to pull or damage the electrical wires inside the dryer exhaust duct and save. DUCT TAPE CAUTION: Internal duct joints must be secured with 4" duct. REMOVE DESIRED KNOCKOUT (ONE ONLY). Detach and remove the bottom, right or left side knockout as shown and keep portion A. FIXING HOLE B A 9" Cut the duct as desired. TAB LOCATION RIGHT OR LEFT SIDE EXHAUST Reconnect the...
... Through the rear opening and connect the elbow to pull or damage the electrical wires inside the dryer exhaust duct and save. DUCT TAPE CAUTION: Internal duct joints must be secured with 4" duct. REMOVE DESIRED KNOCKOUT (ONE ONLY). Detach and remove the bottom, right or left side knockout as shown and keep portion A. FIXING HOLE B A 9" Cut the duct as desired. TAB LOCATION RIGHT OR LEFT SIDE EXHAUST Reconnect the...
Installation Instructions
Page 7
... servicing phone numbers for each hinge on the dryer face. Open the door and remove the filler plugs opposite the hinges. Tighten the two top screws on Installation, Call: 1-800-GECARES (US) 500A436P005_Rev0 Pub # 31-16224 11 SERVICING WARNING - Reinsert the plastic plugs on the top screws inserted in final location. ADDING COVER PLATE TO REAR OF CABINET (SIDES AND BOTTOM EXHAUST) 10 CHANGING DIRECTION OF DOOR OPENING...
... servicing phone numbers for each hinge on the dryer face. Open the door and remove the filler plugs opposite the hinges. Tighten the two top screws on Installation, Call: 1-800-GECARES (US) 500A436P005_Rev0 Pub # 31-16224 11 SERVICING WARNING - Reinsert the plastic plugs on the top screws inserted in final location. ADDING COVER PLATE TO REAR OF CABINET (SIDES AND BOTTOM EXHAUST) 10 CHANGING DIRECTION OF DOOR OPENING...


