Manual
Page 2
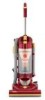
Model Serial number Hint: Attach your sales receipt to fill out and return the product registration card included with your HOOVER product. Do not use with wet hands. • The use of fire, electric shock, or injury: • Do not use outdoors or ...openings, rotating agitator and other moving parts. Save these instructions! Review this manual before operating cleaner Thank you for choosing a HOOVER® product Please enter the COMPLETE model and serial numbers in use. Do not run unattended at any opening blocked; Verification of date of purchase may cause hazards....
Model Serial number Hint: Attach your sales receipt to fill out and return the product registration card included with your HOOVER product. Do not use with wet hands. • The use of fire, electric shock, or injury: • Do not use outdoors or ...openings, rotating agitator and other moving parts. Save these instructions! Review this manual before operating cleaner Thank you for choosing a HOOVER® product Please enter the COMPLETE model and serial numbers in use. Do not run unattended at any opening blocked; Verification of date of purchase may cause hazards....

Manual
Page 3
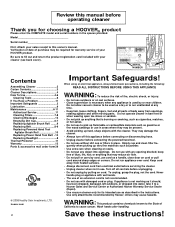
...(B) with a representative in our Consumer Response Center. Grasp orange tie wrap (A) and pull until you hear a click. Continued § 3 Press button (F) at hoover.com. Cleaner body C. Discard the orange tie wrap. Click on the "Service" button to make sure it is securely attached. 1-5 D F E Align the ...groove (D) on some models only. only) OR Call 1-330-499-9499 to the store. 1. Handle section B. upper handle (C) with other hand. Push upper handle down . If...
...(B) with a representative in our Consumer Response Center. Grasp orange tie wrap (A) and pull until you hear a click. Continued § 3 Press button (F) at hoover.com. Cleaner body C. Discard the orange tie wrap. Click on the "Service" button to make sure it is securely attached. 1-5 D F E Align the ...groove (D) on some models only. only) OR Call 1-330-499-9499 to the store. 1. Handle section B. upper handle (C) with other hand. Push upper handle down . If...
Manual
Page 6
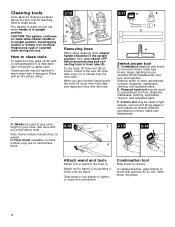
... tool may be sure the hose tube cover (C) is in the upright position. Use them with any of brush with a damp cloth. Note: Some models include three (3) wands. Attach tool to the hose (I 2-13 2-14 J K Attach wand and tools Attach tool or wand to wand (J) by ...tool. Combination tool use with the tools, lift cover from hose tube and reposition hose end into place. 6 Floor brush (available on some models only) use when handle is closed over the hose tube. CAUTION: The agitator continues to clean upholstered furniture, draperies, mattresses, clothing, and carpeted...
... tool may be sure the hose tube cover (C) is in the upright position. Use them with any of brush with a damp cloth. Note: Some models include three (3) wands. Attach tool to the hose (I 2-13 2-14 J K Attach wand and tools Attach tool or wand to wand (J) by ...tool. Combination tool use with the tools, lift cover from hose tube and reposition hose end into place. 6 Floor brush (available on some models only) use when handle is closed over the hose tube. CAUTION: The agitator continues to clean upholstered furniture, draperies, mattresses, clothing, and carpeted...
Manual
Page 11
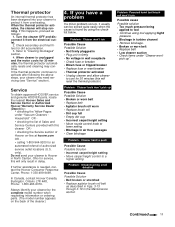
..., Phone: 1-330-499-9499. Service To obtain approved HOOVER service and genuine HOOVER parts, locate the nearest Hoover Sales and Service Center or Authorized Hoover Warranty Service Dealer (Depot) by the complete model number when requesting information or ordering parts. (The model number appears on -line at hoover.com OR • calling 1-800-944-9200 for an...
..., Phone: 1-330-499-9499. Service To obtain approved HOOVER service and genuine HOOVER parts, locate the nearest Hoover Sales and Service Center or Authorized Hoover Warranty Service Dealer (Depot) by the complete model number when requesting information or ordering parts. (The model number appears on -line at hoover.com OR • calling 1-800-944-9200 for an...

