Manual
Page 2
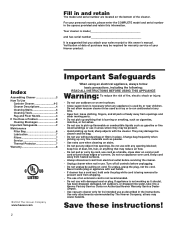
... Index Assembling Cleaner 3 How To Use Canister Cleaner 4-5 Cleaner Descriptions 4 Cleaning Stairs 5 Cleaning Tools 5 Rug and Floor Nozzle 4 If You Have a Problem 8 Clearing Blockages 8 Important Safeguards 2 Maintenance Filter Bag 6 Lubrication 7 Filters 7 Service 7 Thermal Protector 7 Warranty 8 © 2004 The Hoover Company www.hoover.com Important Safeguards... flow. • Do not pull or carry by cord, use with damaged cord or plug. Turn off all parts of body away from whipping. • The use with any opening blocked; They may cause hazards. To unplug, grasp...
... Index Assembling Cleaner 3 How To Use Canister Cleaner 4-5 Cleaner Descriptions 4 Cleaning Stairs 5 Cleaning Tools 5 Rug and Floor Nozzle 4 If You Have a Problem 8 Clearing Blockages 8 Important Safeguards 2 Maintenance Filter Bag 6 Lubrication 7 Filters 7 Service 7 Thermal Protector 7 Warranty 8 © 2004 The Hoover Company www.hoover.com Important Safeguards... flow. • Do not pull or carry by cord, use with damaged cord or plug. Turn off all parts of body away from whipping. • The use with any opening blocked; They may cause hazards. To unplug, grasp...
Manual
Page 3
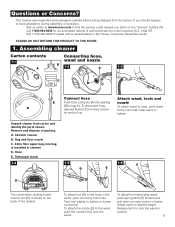
...to tor and pull up. Release latch to lock the wand in bag lid. This cleaner was inspected and packaged carefully before being shipped from carton and identify the parts shown. twist wand to the hose or the wand, push tool firmly onto hose. ...the Hoover Consumer Response Center. Assembling cleaner Carton contents Connecting hose, 1-1 wand and nozzle B A 1-2 A 1-3 C B C Connect hose Attach wand, tools and E Push hose connector (A) into opening nozzle D (B) in position. 3 To disconnect hose, depress buttons (C) on lower portion of the cleaner. Canister cleaner B....
...to tor and pull up. Release latch to lock the wand in bag lid. This cleaner was inspected and packaged carefully before being shipped from carton and identify the parts shown. twist wand to the hose or the wand, push tool firmly onto hose. ...the Hoover Consumer Response Center. Assembling cleaner Carton contents Connecting hose, 1-1 wand and nozzle B A 1-2 A 1-3 C B C Connect hose Attach wand, tools and E Push hose connector (A) into opening nozzle D (B) in position. 3 To disconnect hose, depress buttons (C) on lower portion of the cleaner. Canister cleaner B....
Manual
Page 7
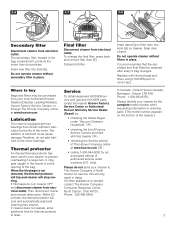
... or clog gets caught in place. Service To obtain approved HOOVER service and genuine HOOVER parts, locate the nearest Hoover Factory Service Center or Authorized Hoover Warranty Service Dealer (Depot) by the complete model number when requesting information or ordering parts. (The model number appears on cleaner. If further assistance is equipped with two bearings that the...
... or clog gets caught in place. Service To obtain approved HOOVER service and genuine HOOVER parts, locate the nearest Hoover Factory Service Center or Authorized Hoover Warranty Service Dealer (Depot) by the complete model number when requesting information or ordering parts. (The model number appears on cleaner. If further assistance is equipped with two bearings that the...
Manual
Page 8
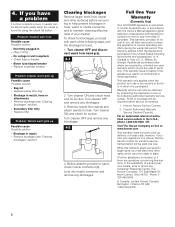
...in a commercial or rental application. This warranty does not apply if the appliance is purchased. Hoover Factory Service Centers. 2. Turn cleaner OFF and remove any blockages. 4-2 A 4. Turn cleaner OFF and remove any blockages. 3. Look into nozzle connector and remove any blockages. Proof of... purchase will be obtained by using the check list below. If you , all labor and parts to hose. Before attaching nozzle to state. This warranty provides, at www.hoover....
...in a commercial or rental application. This warranty does not apply if the appliance is purchased. Hoover Factory Service Centers. 2. Turn cleaner OFF and remove any blockages. 4-2 A 4. Turn cleaner OFF and remove any blockages. 3. Look into nozzle connector and remove any blockages. Proof of... purchase will be obtained by using the check list below. If you , all labor and parts to hose. Before attaching nozzle to state. This warranty provides, at www.hoover....


