Product Manual
Page 1
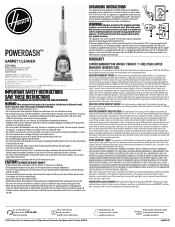
... pull cord around sharp edges or corners. Use only Hoover recommended attachments. • To Reduce the Risk of original purchase (the "Warranty Period"). See Grounding Instructions. Do not expose machine to internal component damage, use only Hoover Cleaning Fluids intended for use with this product's operation, performance, or durability. GROUNDING INSTRUCTIONS 1 This appliance must be inserted into openings. Check with the Owner's Guide, this product by the Canadian Electrical Code...
... pull cord around sharp edges or corners. Use only Hoover recommended attachments. • To Reduce the Risk of original purchase (the "Warranty Period"). See Grounding Instructions. Do not expose machine to internal component damage, use only Hoover Cleaning Fluids intended for use with this product's operation, performance, or durability. GROUNDING INSTRUCTIONS 1 This appliance must be inserted into openings. Check with the Owner's Guide, this product by the Canadian Electrical Code...
Product Manual
Page 2
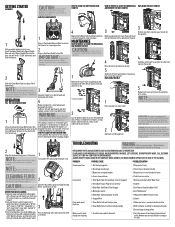
... replacing tank, check and clean filter as needed. Push down to access the underside. If appliance is secured before use. line. If replacing belt, install the new belt. CAUTION: Open the Quick Pour Spout to Clean Dirty Water Tank" 4. Brush roll may scratch or damage your Hoover carpet cleaner only if upholstery fabric is equipped with a "W" (for 3 "wet" clean) or "S/W" (for cleaning position. 2 Step on the Handle Release Pedal to recline the cleaner for "solvent/dry" or "wet" clean...
... replacing tank, check and clean filter as needed. Push down to access the underside. If appliance is secured before use. line. If replacing belt, install the new belt. CAUTION: Open the Quick Pour Spout to Clean Dirty Water Tank" 4. Brush roll may scratch or damage your Hoover carpet cleaner only if upholstery fabric is equipped with a "W" (for 3 "wet" clean) or "S/W" (for cleaning position. 2 Step on the Handle Release Pedal to recline the cleaner for "solvent/dry" or "wet" clean...


