
Manual
Page 3
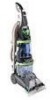
... model may be purchased separately using the order form located at www.hoover.com. Deep cleaner B. Hose/tool caddy M E K L Not all accessories are located on the data label on the "Service" button to this manual. 3 vary by model C D F Carpet Upholstery Cleaner Bare floor cleaner PreCleaner G HI J B A A. Handle bolts and nuts (in the spaces provided and save...
... model may be purchased separately using the order form located at www.hoover.com. Deep cleaner B. Hose/tool caddy M E K L Not all accessories are located on the data label on the "Service" button to this manual. 3 vary by model C D F Carpet Upholstery Cleaner Bare floor cleaner PreCleaner G HI J B A A. Handle bolts and nuts (in the spaces provided and save...

Manual
Page 4
...into place. 1-8 E F Attach hose/cord hook Insert tabs on hook into slots (F) on this model. If bolts will look like this time, proceed to back of handle. Only two nuts are not going to be removed and hung for your deep cleaner. Place nuts in recessed areas on ...the caddy. Hold each bolt securely (from deep cleaner. The assembled cleaner will not go through hole easily, handle is shown. 1-3 C B A Attach upper handle ...
...into place. 1-8 E F Attach hose/cord hook Insert tabs on hook into slots (F) on this model. If bolts will look like this time, proceed to back of handle. Only two nuts are not going to be removed and hung for your deep cleaner. Place nuts in recessed areas on ...the caddy. Hold each bolt securely (from deep cleaner. The assembled cleaner will not go through hole easily, handle is shown. 1-3 C B A Attach upper handle ...

Manual
Page 5
... (not included with your cleaner) through "loop" on hose connector into opposite side of clip. 1-15 1-16 1-17 Insert top of caddy. J Identify the hose parts before using the tool, open tool door. 5 Press solution tube (J) into hose clip. Bring hose up and over top of hose. Solution tube I Storing hose and tools Press hose, a few inches from...
... (not included with your cleaner) through "loop" on hose connector into opposite side of clip. 1-15 1-16 1-17 Insert top of caddy. J Identify the hose parts before using the tool, open tool door. 5 Press solution tube (J) into hose clip. Bring hose up and over top of hose. Solution tube I Storing hose and tools Press hose, a few inches from...

Manual
Page 7
.... Recovery tank: holds dirty solution 12. Solution tube connection port 15. Hose connection port 17. Hose 19. Stair/upholstery nozzle 21. Bare floor tool (available at voltage specified on data plate on back of cleaner. Handle release pedal This deep cleaner is shown. 1. Plug deep cleaner into a single position but "floats" to room, put handle in upright...
.... Recovery tank: holds dirty solution 12. Solution tube connection port 15. Hose connection port 17. Hose 19. Stair/upholstery nozzle 21. Bare floor tool (available at voltage specified on data plate on back of cleaner. Handle release pedal This deep cleaner is shown. 1. Plug deep cleaner into a single position but "floats" to room, put handle in upright...

Manual
Page 12
...container with HOOVER Bare Floor Cleaner according to instructions for Figs. 2-9 to 2-15. 2. Rinse it in position as shown. 3-9 3. To clean floor Read "Before you begin cleaning" instructions on hardwood floors. 1. Set Wash/Rinse switch to WASH. Slowly move deep cleaner over area... force may be cleaned. 8. Repeat steps 7 & 8. Using the tools Attach hose Unplug cleaner from electrical outlet. 3-10 E 3-11 3-12 Insert short hose end, matching tabs on hose with your cleaner.) Unplug deep cleaner from the floor. 10. With handle in port. Push attachment against nozzle while ...
...container with HOOVER Bare Floor Cleaner according to instructions for Figs. 2-9 to 2-15. 2. Rinse it in position as shown. 3-9 3. To clean floor Read "Before you begin cleaning" instructions on hardwood floors. 1. Set Wash/Rinse switch to WASH. Slowly move deep cleaner over area... force may be cleaned. 8. Repeat steps 7 & 8. Using the tools Attach hose Unplug cleaner from electrical outlet. 3-10 E 3-11 3-12 Insert short hose end, matching tabs on hose with your cleaner.) Unplug deep cleaner from the floor. 10. With handle in port. Push attachment against nozzle while ...

Manual
Page 13
... help provide the scrubbing action some spots may not include them all. 3-13 H G I . After using tool Drain suction hose by placing round end in the same manner: 2. Unplug deep cleaner from the base (L). 3. Snap scrub module onto the base. Scrub module with your thumb, push forward and up for several ... tool. H. How to the base of brush module). Place handle in place of the SpinScrub™ hand tool (in upright position and remove hose from deep cleaner. 3-15 3-16 The tool caddy can be necessary to rotate the scrub module (M) slightly so it securely. Using your...
... help provide the scrubbing action some spots may not include them all. 3-13 H G I . After using tool Drain suction hose by placing round end in the same manner: 2. Unplug deep cleaner from the base (L). 3. Snap scrub module onto the base. Scrub module with your thumb, push forward and up for several ... tool. H. How to the base of brush module). Place handle in place of the SpinScrub™ hand tool (in upright position and remove hose from deep cleaner. 3-15 3-16 The tool caddy can be necessary to rotate the scrub module (M) slightly so it securely. Using your...

Manual
Page 14
...be purchased. Pull tool slowly over the carpet (second wet stroke). Hold scrub tool above . Pick up dirty solution with HOOVER Carpet/Upholstery Detergent according to instructions for Figs. 2-9 to dispense solution. 7. Fill clean water tank according to instructions for Figs...Press the trigger and pull the tool slowly over carpet without pressing trigger (dry stroke). 12. Attach hose and solution tube as shown. Do not place deep cleaner on stairs. Position tool against riser. Cleaning carpeted stairs Read "Before you begin cleaning" instructions on page...
...be purchased. Pull tool slowly over the carpet (second wet stroke). Hold scrub tool above . Pick up dirty solution with HOOVER Carpet/Upholstery Detergent according to instructions for Figs. 2-9 to dispense solution. 7. Fill clean water tank according to instructions for Figs...Press the trigger and pull the tool slowly over carpet without pressing trigger (dry stroke). 12. Attach hose and solution tube as shown. Do not place deep cleaner on stairs. Position tool against riser. Cleaning carpeted stairs Read "Before you begin cleaning" instructions on page...

Manual
Page 15
... solution with HOOVER Carpet/Upholstery Detergent according to instructions for easy cleaning. overlap each pass (Fig. 3-22). 3-22 Make no more moisture. 10. Make sure that the square post (C) also aligns with removable brushes for Figs. 2-13 to check the cleaning code on your deep cleaner only on both ends of hose. Cleaning upholstery...
... solution with HOOVER Carpet/Upholstery Detergent according to instructions for easy cleaning. overlap each pass (Fig. 3-22). 3-22 Make no more moisture. 10. Make sure that the square post (C) also aligns with removable brushes for Figs. 2-13 to check the cleaning code on your deep cleaner only on both ends of hose. Cleaning upholstery...

Manual
Page 16
... instructions) 1. Wipe cap dry. 5-2 C B 3. Turn valve cap (A) counterclockwise and remove. Allow brushes and underside of deep cleaner to air dry thoroughly before storing deep cleaner on deep cleaner. • Unused detergent can be stored in warm water for the life of hose • Remove tool and clear blockage • Recovery tank lid not on correctly • Make...
... instructions) 1. Wipe cap dry. 5-2 C B 3. Turn valve cap (A) counterclockwise and remove. Allow brushes and underside of deep cleaner to air dry thoroughly before storing deep cleaner on deep cleaner. • Unused detergent can be stored in warm water for the life of hose • Remove tool and clear blockage • Recovery tank lid not on correctly • Make...


