
Owner's Manual
Page 1
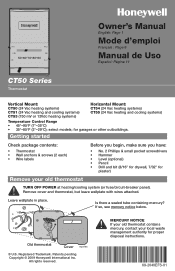
...) • Pencil • Drill and bit (3/16" for drywall, 7/32" for garages or other outbuildings. Old thermostat Cover M23786 ® U.S. All rights reserved. Leave wallplate in place. Copyright © 2009 Honeywell International Inc. Remove cover and thermostat, but leave wallplate with wires attached. If so, see mercury notice below. Is there a sealed tube...
...) • Pencil • Drill and bit (3/16" for drywall, 7/32" for garages or other outbuildings. Old thermostat Cover M23786 ® U.S. All rights reserved. Leave wallplate in place. Copyright © 2009 Honeywell International Inc. Remove cover and thermostat, but leave wallplate with wires attached. If so, see mercury notice below. Is there a sealed tube...
Owner's Manual
Page 2
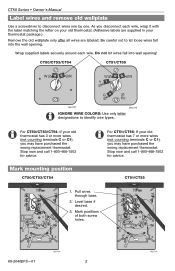
...• Owner's Manual Label wires and remove old wallplate Use a screwdriver to identify wire types. As you may have purchased the wrong replacement thermostat. Level base if desired. 3. Be careful not to let loose wires fall into the wall opening ! Mark positions of both screw holes. Wrap...wire, wrap it with the label matching the letter on your old thermostat. (Adhesive labels are labeled. For CT50/CT53/CT54: If your thermostat package.) Remove the old wallplate only after all wires are supplied in your old thermostat has 3 or more wires (not counting terminals C or C1), you...
...• Owner's Manual Label wires and remove old wallplate Use a screwdriver to identify wire types. As you may have purchased the wrong replacement thermostat. Level base if desired. 3. Be careful not to let loose wires fall into the wall opening ! Mark positions of both screw holes. Wrap...wire, wrap it with the label matching the letter on your old thermostat. (Adhesive labels are labeled. For CT50/CT53/CT54: If your thermostat package.) Remove the old wallplate only after all wires are supplied in your old thermostat has 3 or more wires (not counting terminals C or C1), you...
Owner's Manual
Page 3
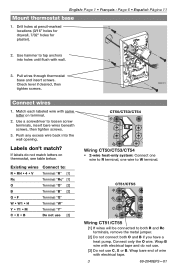
...If wires will be connected to loosen screw terminals, insert bare wires beneath screws, then tighten screws. 3. Wrap B wire with same letter on thermostat, see table below. If labels do not use. [3] Do not use [3] CT50/CT53/CT54 Wiring CT50/CT53/CT54 • 2-wire heat...wire. Push any excess wire back into holes until flush with electrical tape. 3 69-2040EFS-01 Existing wires Connect to W terminal. Pull wires through thermostat base and insert screws. Use a screwdriver to both R and Rc terminals, remove the metal jumper. [2] Do not connect both O and B ...
...If wires will be connected to loosen screw terminals, insert bare wires beneath screws, then tighten screws. 3. Wrap B wire with same letter on thermostat, see table below. If labels do not use. [3] Do not use [3] CT50/CT53/CT54 Wiring CT50/CT53/CT54 • 2-wire heat...wire. Push any excess wire back into holes until flush with electrical tape. 3 69-2040EFS-01 Existing wires Connect to W terminal. Pull wires through thermostat base and insert screws. Use a screwdriver to both R and Rc terminals, remove the metal jumper. [2] Do not connect both O and B ...
Owner's Manual
Page 4
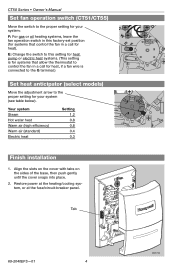
E: Change the switch to this setting for heat pump or electric heat systems. (This setting is for systems that allow the thermostat to control the fan in a call for heat, if a fan wire is connected to the G terminal.) Set heat anticipator (select models) Move the adjustment arrow ...
E: Change the switch to this setting for heat pump or electric heat systems. (This setting is for systems that allow the thermostat to control the fan in a call for heat, if a fan wire is connected to the G terminal.) Set heat anticipator (select models) Move the adjustment arrow ...


