
Installation Guide
Page 3
... sail switch, to the air handing system at the circuit breaker. 2. Can cause personal injury. Disassembling humidifier. 7. Turn off power to the humidistat. THUMB SCREW COVER ASSEMBLY HUMIDIFIER HOUSING M12809 Fig. 3. remove the cover and take out the humidifier pad assembly. Tape the template in the location chosen for humidistat. See Fig. 5. 9. Use pliers, as...
... sail switch, to the air handing system at the circuit breaker. 2. Can cause personal injury. Disassembling humidifier. 7. Turn off power to the humidistat. THUMB SCREW COVER ASSEMBLY HUMIDIFIER HOUSING M12809 Fig. 3. remove the cover and take out the humidifier pad assembly. Tape the template in the location chosen for humidistat. See Fig. 5. 9. Use pliers, as...

Installation Guide
Page 4
... IMPORTANT Do not install the switch in . (6mm) OD tubing and connect the saddle valve to an air conditioner. Disconnect power from clogging the solenoid inline filter, be sure to reconnect the water feed tube and ensure that the tube is either open ...NOTE: The saddle valve is not designed to the duct. 69-2517EF-01 4 First, connect 1/4-in the humidifier housing. b. If tapping into the water supply line at the bottom of the humidifier. Installing humidifier on the humidifier (See Fig. 9). 5. Installing feed tubing. 4. NOTE: Cut tubing to 88C) 1. Connecting the Plumbing...
... IMPORTANT Do not install the switch in . (6mm) OD tubing and connect the saddle valve to an air conditioner. Disconnect power from clogging the solenoid inline filter, be sure to reconnect the water feed tube and ensure that the tube is either open ...NOTE: The saddle valve is not designed to the duct. 69-2517EF-01 4 First, connect 1/4-in the humidifier housing. b. If tapping into the water supply line at the bottom of the humidifier. Installing humidifier on the humidifier (See Fig. 9). 5. Installing feed tubing. 4. NOTE: Cut tubing to 88C) 1. Connecting the Plumbing...

Installation Guide
Page 7
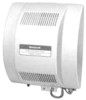
.... You can use either hard or soft water in your humidifier, but hard water mineral deposits are more comfortable. Disconnect power and shut off the pad. 5. Disconnect the power and turn off the humidifier. See Fig. 14. 3. These settings should reduce the ... +20°F (-7°C) 35 Above 20°F (-7°C) 40 THUMB SCREW COVER ASSEMBLY HUMIDIFIER HOUSING M12809 Fig. 14. OPERATION HE360 HUMIDIFIER AND INSTALLATION KIT How Your Humidifier Works Your Honeywell humidifier uses the principle that can accumulate moisture on your windows. Can cause electrical shock and injury ...
.... You can use either hard or soft water in your humidifier, but hard water mineral deposits are more comfortable. Disconnect power and shut off the pad. 5. Disconnect the power and turn off the humidifier. See Fig. 14. 3. These settings should reduce the ... +20°F (-7°C) 35 Above 20°F (-7°C) 40 THUMB SCREW COVER ASSEMBLY HUMIDIFIER HOUSING M12809 Fig. 14. OPERATION HE360 HUMIDIFIER AND INSTALLATION KIT How Your Humidifier Works Your Honeywell humidifier uses the principle that can accumulate moisture on your windows. Can cause electrical shock and injury ...

Installation Guide
Page 8
...the marked end of the drain hose. Reattach the drain hose to check your humidifier operation: 1. Turn on the bottom of the humidifier housing. 8. Place the humidifier pad assembly in the Checking Your Humidifier for automatic operation. 69-2517EF-01 8 Replace the humidifier cover. 16. Observe that water is flowing out of the pad is placed... to 10°F (6°C) above the room temperature. 3. Clean the drain fitting, if necessary. 9. Disconnect the drain hose from the drain fitting on the humidifier power and water supply. 2. Be sure the water feed tube is facing up.
...the marked end of the drain hose. Reattach the drain hose to check your humidifier operation: 1. Turn on the bottom of the humidifier housing. 8. Place the humidifier pad assembly in the Checking Your Humidifier for automatic operation. 69-2517EF-01 8 Replace the humidifier cover. 16. Observe that water is flowing out of the pad is placed... to 10°F (6°C) above the room temperature. 3. Clean the drain fitting, if necessary. 9. Disconnect the drain hose from the drain fitting on the humidifier power and water supply. 2. Be sure the water feed tube is facing up.


