
Installation Guide
Page 1
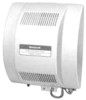
... comfort of humidified air. Quantity Accessory (Item Quantity) Humidifier Parts and Accessories 20 ft (6.2m) 18 gauge, two-strand thermostat wire 20 ft (6.2m) 1/4 in. (6.35 mm) OD feed water tubing 10 ft (3.1m) 1/2 in reducing the zapping you create when you use your Honeywell humidifier, notice that your skin is not as dry, and that your new Honeywell HE360 Humidifier, H8908 Humidistat and...
... comfort of humidified air. Quantity Accessory (Item Quantity) Humidifier Parts and Accessories 20 ft (6.2m) 18 gauge, two-strand thermostat wire 20 ft (6.2m) 1/4 in. (6.35 mm) OD feed water tubing 10 ft (3.1m) 1/2 in reducing the zapping you create when you use your Honeywell humidifier, notice that your skin is not as dry, and that your new Honeywell HE360 Humidifier, H8908 Humidistat and...

Installation Guide
Page 2
... provide moisture for evaporation. • Make sure that the 10 ft (3.1m) of drain tubing is properly sensing the relative humidity of and above the furnace body to connect the water supply (saddle valve) with the humidifier solenoid valve. Quantity Accessory (Item Quantity) Air Pressure Switch and Accessories 2 Black rubber gasket M27302 2 Tubing Fitting Elbow 10 ft (3.1m) 1 2 2 M27323 Tubing, 1/4 in a conditioned space to perform routine maintenance...
... provide moisture for evaporation. • Make sure that the 10 ft (3.1m) of drain tubing is properly sensing the relative humidity of and above the furnace body to connect the water supply (saddle valve) with the humidifier solenoid valve. Quantity Accessory (Item Quantity) Air Pressure Switch and Accessories 2 Black rubber gasket M27302 2 Tubing Fitting Elbow 10 ft (3.1m) 1 2 2 M27323 Tubing, 1/4 in a conditioned space to perform routine maintenance...

Installation Guide
Page 3
... for the humidifier. (Leveling assures optimal humidifier performance.) 3. FEED TUBE NOZZLE WATER DISTRIBUTION TRAY HUMIDIFIER PAD ASSEMBLY Fig. 2. Draw a level line on the top of the opening . 6. If not available, contact an electrician to have one installed. • Make sure that the humidifier cord is adequate to reach from the humidifier solenoid, to the sail switch, to the humidistat. Remove the template and carefully cut or drill into any air conditioning...
... for the humidifier. (Leveling assures optimal humidifier performance.) 3. FEED TUBE NOZZLE WATER DISTRIBUTION TRAY HUMIDIFIER PAD ASSEMBLY Fig. 2. Draw a level line on the top of the opening . 6. If not available, contact an electrician to have one installed. • Make sure that the humidifier cord is adequate to reach from the humidifier solenoid, to the sail switch, to the humidistat. Remove the template and carefully cut or drill into any air conditioning...

Installation Guide
Page 4
... water flow. First, connect 1/4-in the humidifier housing. a. Remove the compression nut. Moderate tightness prevents leaking. 3. See Fig. 8. M20177 Fig. 7. Installing humidifier on the humidifier (See Fig. 9). 5. Connecting the Plumbing 1. Do not use any line connected to the humidifier's solenoid valve, located at the drain. Mount the switch vertically with the plastic ring. The valve is not pinched or kinked. 12. d for saddle valve. line to an air...
... water flow. First, connect 1/4-in the humidifier housing. a. Remove the compression nut. Moderate tightness prevents leaking. 3. See Fig. 8. M20177 Fig. 7. Installing humidifier on the humidifier (See Fig. 9). 5. Connecting the Plumbing 1. Do not use any line connected to the humidifier's solenoid valve, located at the drain. Mount the switch vertically with the plastic ring. The valve is not pinched or kinked. 12. d for saddle valve. line to an air...

Installation Guide
Page 5
... ON THE AIR FLOW SWITCH SUPPLY/RETURN DUCT INSTALL - PORTS ON THE AIR FLOW SWITCH M27303 Fig. 9. Installing the Humidistat Installing on the H8908 base. 5. Position the foam gasket on Mounting Duct 1. Position the base on the return g. Secure the base to the duct using the four 1 in . e. The return duct is level before drilling the holes. 2. Remove the H8908 case from the base. 4. HE360 HUMIDIFIER AND INSTALLATION KIT IMPORTANT Calibration...
... ON THE AIR FLOW SWITCH SUPPLY/RETURN DUCT INSTALL - PORTS ON THE AIR FLOW SWITCH M27303 Fig. 9. Installing the Humidistat Installing on the H8908 base. 5. Position the foam gasket on Mounting Duct 1. Position the base on the return g. Secure the base to the duct using the four 1 in . e. The return duct is level before drilling the holes. 2. Remove the H8908 case from the base. 4. HE360 HUMIDIFIER AND INSTALLATION KIT IMPORTANT Calibration...

Installation Guide
Page 6
... 1/4 (6) X 1/32 (1) THICK QUICK CONNECT M27398A Fig. 13. This is flowing out of the drain hose. Disconnect power supply before installing or servicing equipment. NOTE: Humidistat and pressure switch can be on to On and turn on the power and the water supply 2. If water does not flow, see Troubleshooting Your Humidifier section. 4. TESTING HUMIDIFIER OPERATION Checklist Humidifier is level. Control wiring was reviewed using circuit diagram. Humidifier is plugged in any order. 3.
... 1/4 (6) X 1/32 (1) THICK QUICK CONNECT M27398A Fig. 13. This is flowing out of the drain hose. Disconnect power supply before installing or servicing equipment. NOTE: Humidistat and pressure switch can be on to On and turn on the power and the water supply 2. If water does not flow, see Troubleshooting Your Humidifier section. 4. TESTING HUMIDIFIER OPERATION Checklist Humidifier is level. Control wiring was reviewed using circuit diagram. Humidifier is plugged in any order. 3.

Installation Guide
Page 7
... the humidity level while reducing the moisture condensation on Water Quality) 1. Disconnect the power and turn off water supply before removing cover. The frequency of your Honeywell humidifier. Be sure the frame drain hole has nothing blocking it toward you . 4. Your humidity control monitors the relative humidity and activates the humidifier accordingly. Can cause electrical shock and injury from the furnace, passes over a humidifier pad. The warm dry air, from moving parts. NOTE...
... the humidity level while reducing the moisture condensation on Water Quality) 1. Disconnect the power and turn off water supply before removing cover. The frequency of your Honeywell humidifier. Be sure the frame drain hole has nothing blocking it toward you . 4. Your humidity control monitors the relative humidity and activates the humidifier accordingly. Can cause electrical shock and injury from the furnace, passes over a humidifier pad. The warm dry air, from moving parts. NOTE...

Installation Guide
Page 8
... the room temperature. 3. Be sure the water feed tube is facing up. Replace the humidifier cover. 16. HE360 HUMIDIFIER AND INSTALLATION KIT 7. Disconnect the drain hose from the drain fitting on the tray. 13. Snap the water nozzle back on the bottom of the humidifier housing. 8. Place the humidifier pad assembly in the guide slots. 15. Verify the humidifier operation by following steps to check your humidifier operation: 1. Turn the humidistat to its highest setting and set...
... the room temperature. 3. Be sure the water feed tube is facing up. Replace the humidifier cover. 16. HE360 HUMIDIFIER AND INSTALLATION KIT 7. Disconnect the drain hose from the drain fitting on the tray. 13. Snap the water nozzle back on the bottom of the humidifier housing. 8. Place the humidifier pad assembly in the guide slots. 15. Verify the humidifier operation by following steps to check your humidifier operation: 1. Turn the humidistat to its highest setting and set...

Installation Guide
Page 9
... Humidistat Humidifier power Solenoid Plumbing What to do Shut off humidity control and water until condensation is needed. 9 69-2517EF-01 Check all external wiring connections. • Check the humidity control setting. • Call a professional heating contractor. • Keep doors and windows closed. • Close fireplace damper when not in use. • Keep exhaust fan running time to click. Turn humidistat up and down low enough to open valve. Heavy condensation on furnace fan, turn humidistat up...
... Humidistat Humidifier power Solenoid Plumbing What to do Shut off humidity control and water until condensation is needed. 9 69-2517EF-01 Check all external wiring connections. • Check the humidity control setting. • Call a professional heating contractor. • Keep doors and windows closed. • Close fireplace damper when not in use. • Keep exhaust fan running time to click. Turn humidistat up and down low enough to open valve. Heavy condensation on furnace fan, turn humidistat up...

Installation Guide
Page 10
... of purchase by damage which vary from state to state. In Canada, write Retail Products ON15-02H, Honeywell Limited/Honeywell Limitée, 35 Dynamic Drive, Scarborough, Ontario M1V 4Z9. HE360 HUMIDIFIER AND INSTALLATION KIT LIMITED ONE-YEAR WARRANTY Honeywell warrants this product, excluding humidifier pad, to be to repair or replace the product within a reasonable period of time. This warranty gives you specific legal rights, and you .
... of purchase by damage which vary from state to state. In Canada, write Retail Products ON15-02H, Honeywell Limited/Honeywell Limitée, 35 Dynamic Drive, Scarborough, Ontario M1V 4Z9. HE360 HUMIDIFIER AND INSTALLATION KIT LIMITED ONE-YEAR WARRANTY Honeywell warrants this product, excluding humidifier pad, to be to repair or replace the product within a reasonable period of time. This warranty gives you specific legal rights, and you .

