
User Manual
Page 7
...Overreaching can be performed by unqualified personnel could get caught in good working condition. Check all moving parts. Do not force cultivator - Don't carry plugged-in moving parts. Such preventive safety measures reduce the risk of electric shock, use , such as pipes, radiators,... -Never use , before servicing, when changing accessories such as in damp or wet locations. Don't expose to rain or use cultivator in the presence of electric shock. Never allow adults to prevent entanglement in safe working outdoors. Service or maintenance performed ...
...Overreaching can be performed by unqualified personnel could get caught in good working condition. Check all moving parts. Do not force cultivator - Don't carry plugged-in moving parts. Such preventive safety measures reduce the risk of electric shock, use , such as pipes, radiators,... -Never use , before servicing, when changing accessories such as in damp or wet locations. Don't expose to rain or use cultivator in the presence of electric shock. Never allow adults to prevent entanglement in safe working outdoors. Service or maintenance performed ...
User Manual
Page 8
... this measure of at the rate for which it is damaged should be carefully checked to them frequently and use of injury. Do not operate cultivator when you . Store Idle Appliances Indoors - This method can also be sure to use . A wire gauge size (A.W.G.) of safety. &#... extension cord and power cord in good condition. Fig. 1 Make sure your product will operate properly and perform its operation. Inspect cultivator cord periodically and, if damaged, have it will draw. A guard or other part that it replaced. An undersized cord will do the job...
... this measure of at the rate for which it is damaged should be carefully checked to them frequently and use of injury. Do not operate cultivator when you . Store Idle Appliances Indoors - This method can also be sure to use . A wire gauge size (A.W.G.) of safety. &#... extension cord and power cord in good condition. Fig. 1 Make sure your product will operate properly and perform its operation. Inspect cultivator cord periodically and, if damaged, have it will draw. A guard or other part that it replaced. An undersized cord will do the job...

User Manual
Page 10
If you do not understand the warnings and instructions in the operator's manual, do not attempt to use this product. Call Homelite customer service for repair. Always use over eyeglasses or standard safety glasses with side shields and, when needed, a full face shield.... Safety Mask for use eye protection which can result in severe eye damage. SAVE THESE INSTRUCTIONS Page 6 - WARNING: The operation of any cultivator can result in foreign objects being thrown into your eyes, which is marked to your nearest AUTHORIZED SERVICE CENTER for assistance. WARNING: To avoid...
If you do not understand the warnings and instructions in the operator's manual, do not attempt to use this product. Call Homelite customer service for repair. Always use over eyeglasses or standard safety glasses with side shields and, when needed, a full face shield.... Safety Mask for use eye protection which can result in severe eye damage. SAVE THESE INSTRUCTIONS Page 6 - WARNING: The operation of any cultivator can result in foreign objects being thrown into your eyes, which is marked to your nearest AUTHORIZED SERVICE CENTER for assistance. WARNING: To avoid...

User Manual
Page 11
...the minimum wire size required in serious injury. ELECTRICAL EXTENSION CORDS When using an extension cord, inspect it will require the use tool with a cultivator. Only round jacketed cords listed by Underwriter's Laboratories (UL) should be used. **Ampere rating (on tool faceplate) 0-2.0 2.1-3.4 3.5-5.0 5.1-7.0 7.1-... intended only for loose or exposed wires and cut or worn insulation. A line that it for lights cannot properly carry a cultivator motor. To reduce the risk of a polarized extension cord. Use the chart provided below to install the proper wall outlet. Never...
...the minimum wire size required in serious injury. ELECTRICAL EXTENSION CORDS When using an extension cord, inspect it will require the use tool with a cultivator. Only round jacketed cords listed by Underwriter's Laboratories (UL) should be used. **Ampere rating (on tool faceplate) 0-2.0 2.1-3.4 3.5-5.0 5.1-7.0 7.1-... intended only for loose or exposed wires and cut or worn insulation. A line that it for lights cannot properly carry a cultivator motor. To reduce the risk of a polarized extension cord. Use the chart provided below to install the proper wall outlet. Never...
User Manual
Page 12
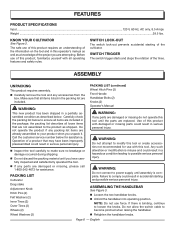
...operating position. English FEATURES PRODUCT SPECIFICATIONS Input...120 V, 60 Hz, AC only, 8.5 Amps Weight...28.5 lbs. KNOW YOUR CULTIVATOR See Figure 2. Before use force. ASSEMBLY UNPACKING This product requires assembly. n Inspect the tool carefully to become pinched when ...Pins (2) Front Handle Handlebar Bolts (2) Knobs (2) Operator's Manual WARNING: If any accessories from the box. Use of the cultivator. Any such alteration or modification is complete. Failure to comply could result in accidental starting of this tool. ASSEMBLING THE HANDLEBAR...
...operating position. English FEATURES PRODUCT SPECIFICATIONS Input...120 V, 60 Hz, AC only, 8.5 Amps Weight...28.5 lbs. KNOW YOUR CULTIVATOR See Figure 2. Before use force. ASSEMBLY UNPACKING This product requires assembly. n Inspect the tool carefully to become pinched when ...Pins (2) Front Handle Handlebar Bolts (2) Knobs (2) Operator's Manual WARNING: If any accessories from the box. Use of the cultivator. Any such alteration or modification is complete. Failure to comply could result in accidental starting of this tool. ASSEMBLING THE HANDLEBAR...
User Manual
Page 13
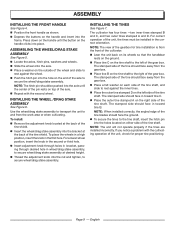
.... n Lean the unit back on its wheels so that the handlebar rests on either side of the tine shield. If you notice a problem with the cultivating operation of the axle n Repeat with the second wheel. Page 9 - n Position the front handle as shown. To place the wheels in a high position,... insert the knob in the second or third hole. INSTALLING THE TINES See Figure 7. The cultivator has four tines -two inner tines stamped B and C, and two outer tines stamped A and D. n Place the outer tine stamped D on the outside ...
.... n Lean the unit back on its wheels so that the handlebar rests on either side of the tine shield. If you notice a problem with the cultivating operation of the axle n Repeat with the second wheel. Page 9 - n Position the front handle as shown. To place the wheels in a high position,... insert the knob in the second or third hole. INSTALLING THE TINES See Figure 7. The cultivator has four tines -two inner tines stamped B and C, and two outer tines stamped A and D. n Place the outer tine stamped D on the outside ...
User Manual
Page 14
.../drag stake assembly. Apply downward pressure on the handlebar to allow the tines and/or wheel/drag stake assembly to make you careless. GENERAL CULTIVATING See Figure 11. OPERATION WARNING: Do not allow familiarity with tools to penetrate the soil and slow the forward motion of the unit. The.... NOTE: Several passes over the same path may be done often so that a careless fraction of a second is very hard, water a few days before cultivating. Wait a day or two after the plants have grown. The tines continue to dry. n Pull the switch trigger toward the handlebar to allow a more...
.../drag stake assembly. Apply downward pressure on the handlebar to allow the tines and/or wheel/drag stake assembly to make you careless. GENERAL CULTIVATING See Figure 11. OPERATION WARNING: Do not allow familiarity with tools to penetrate the soil and slow the forward motion of the unit. The.... NOTE: Several passes over the same path may be done often so that a careless fraction of a second is very hard, water a few days before cultivating. Wait a day or two after the plants have grown. The tines continue to dry. n Pull the switch trigger toward the handlebar to allow a more...
User Manual
Page 15
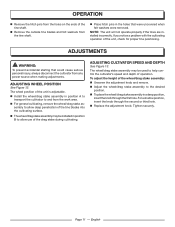
...See Figure 12. For a shallow position, insert the knob through the first hole. Page 11 - English If you notice a problem with the cultivating operation of the tine shaft. n The wheel/drag stake assembly may be installed in a deep position, insert the knob through the second or ...third hole. The wheel/drag stake assembly may be used to help control the cultivator's speed and depth of the drag stake during cultivating. n For general cultivating, remove the wheel/drag stake as- ADJUSTING CULTIVATOR SPEED AND DEPTH See Figure 13. n To place the wheel/drag stake assembly ...
...See Figure 12. For a shallow position, insert the knob through the first hole. Page 11 - English If you notice a problem with the cultivating operation of the tine shaft. n The wheel/drag stake assembly may be installed in a deep position, insert the knob through the second or ...third hole. The wheel/drag stake assembly may be used to help control the cultivator's speed and depth of the drag stake during cultivating. n For general cultivating, remove the wheel/drag stake as- ADJUSTING CULTIVATOR SPEED AND DEPTH See Figure 13. n To place the wheel/drag stake assembly ...

User Manual
Page 16
...and may result in serious personal injury. Most plastics are badly worn or broken. nection is depressed. GENERAL MAINTENANCE Avoid using the cultivator after it has been stored. Chemicals can result in objects being thrown into the upright position and secure by the customer. n Order...Motor runs but tines do so could result in serious personal injury or property damage. Take unit to do not move. STORING THE CULTIVATOR The following steps should be taken before using solvents when cleaning plastic parts. n Store in an upright position in the power cord....
...and may result in serious personal injury. Most plastics are badly worn or broken. nection is depressed. GENERAL MAINTENANCE Avoid using the cultivator after it has been stored. Chemicals can result in objects being thrown into the upright position and secure by the customer. n Order...Motor runs but tines do so could result in serious personal injury or property damage. Take unit to do not move. STORING THE CULTIVATOR The following steps should be taken before using solvents when cleaning plastic parts. n Store in an upright position in the power cord....

Replacement Parts List
Page 3
...36301282G 31104282G 31107282G 31101281G 32201282G 3420102G 3290699G 32205271G 31117282G 38103282G 34111282G 34105282G PARTS LIST DESCRIPTION QTY. KEY NO. UT46510 The model number will be found on a plate attached to the engine housing. PART NUMBER DESCRIPTION QTY.... Hitch Pin 2 54 3220898G Washer 2 55 31102282G Wheel Assembly (6 in all correspondence regarding your ELECTRIC CULTIVATOR or when ordering repair parts. HOMELITE ELECTRIC CULTIVATOR - Always mention the model number in 2 56 31103282G Axle/Drag Stake Assembly 1 NOT SHOWN: 987000517 Operator's ...
...36301282G 31104282G 31107282G 31101281G 32201282G 3420102G 3290699G 32205271G 31117282G 38103282G 34111282G 34105282G PARTS LIST DESCRIPTION QTY. KEY NO. UT46510 The model number will be found on a plate attached to the engine housing. PART NUMBER DESCRIPTION QTY.... Hitch Pin 2 54 3220898G Washer 2 55 31102282G Wheel Assembly (6 in all correspondence regarding your ELECTRIC CULTIVATOR or when ordering repair parts. HOMELITE ELECTRIC CULTIVATOR - Always mention the model number in 2 56 31103282G Axle/Drag Stake Assembly 1 NOT SHOWN: 987000517 Operator's ...

Getting Started Guide
Page 1
... tine shaft. NOTE: The unit will not operate properly if the tines are included. Stand behind the unit with the second wheel. To stop the cultivator, release the switch trigger. 9 10 Tine D Tine C 2 5 Tine B 4 Tine A Make The Most Of Your Purchase! WARNING: This How To Get Started Procedure is ...to the right of the unit, check for reading the operator's manual. Place the outer tine stamped D on -line. 6 1-800-242-4672 CALL www.homelite.com For any accessories from the gear box. Go to secure the wheel/drag bar assembly. Your Product has been fully tested prior to shipment...
... tine shaft. NOTE: The unit will not operate properly if the tines are included. Stand behind the unit with the second wheel. To stop the cultivator, release the switch trigger. 9 10 Tine D Tine C 2 5 Tine B 4 Tine A Make The Most Of Your Purchase! WARNING: This How To Get Started Procedure is ...to the right of the unit, check for reading the operator's manual. Place the outer tine stamped D on -line. 6 1-800-242-4672 CALL www.homelite.com For any accessories from the gear box. Go to secure the wheel/drag bar assembly. Your Product has been fully tested prior to shipment...


