
Instruction Manual
Page 3
...an imminently hazardous situation which , if not avoided, may result in death or serious injury. EXPLANATION OF THE NAILING ACTION OF THE HITACHI NAILER ⅜ SINGLE ACTUATION MECHANISM (SINGLE SEQUENTIAL ACTUATION MECHANISM): First, press the push lever against the wood; First, pull the trigger...; next, pull the trigger to follow warnings could result in this nailer. NOTE emphasizes essential information. Never use this Nailer for applications other than those specified in death or serious injury. Failure to drive the fastener. Most ...
...an imminently hazardous situation which , if not avoided, may result in death or serious injury. EXPLANATION OF THE NAILING ACTION OF THE HITACHI NAILER ⅜ SINGLE ACTUATION MECHANISM (SINGLE SEQUENTIAL ACTUATION MECHANISM): First, press the push lever against the wood; First, pull the trigger...; next, pull the trigger to follow warnings could result in this nailer. NOTE emphasizes essential information. Never use this Nailer for applications other than those specified in death or serious injury. Failure to drive the fastener. Most ...

Instruction Manual
Page 4
...to severe injuries. Use only clean, dry, regulated compressed air. WARNING 3. CHOICE OF TRIGGERING METHOD IS IMPORTANT. Never point the Nailer at yourself toward yourself or others in work area. 2. KEEP FINGERS AWAY FROM TRIGGER WHEN NOT DRIVING FASTENERS TO AVOID ACCIDENTAL ...American National Standards Institute, ANSI Z87.1 and provide protection against flying particles both from the front and side. Always assume the Nailer contains fasteners. If fasteners are mistakenly driven, it contains fasteners or not. Never engage in horseplay with finger on trigger since...
...to severe injuries. Use only clean, dry, regulated compressed air. WARNING 3. CHOICE OF TRIGGERING METHOD IS IMPORTANT. Never point the Nailer at yourself toward yourself or others in work area. 2. KEEP FINGERS AWAY FROM TRIGGER WHEN NOT DRIVING FASTENERS TO AVOID ACCIDENTAL ...American National Standards Institute, ANSI Z87.1 and provide protection against flying particles both from the front and side. Always assume the Nailer contains fasteners. If fasteners are mistakenly driven, it contains fasteners or not. Never engage in horseplay with finger on trigger since...

Instruction Manual
Page 5
...If a non relieving coupler is used on the Nailer, the Nailer can remain charged with or remove the push lever, otherwise the push lever becomes inoperable. 16. KEEP ALL SCREWS AND COVERS TIGHTLY IN PLACE. STORE NAILER PROPERLY. Never use the Nailer in a dry place. Do not tamper with air... after disconnecting and thus will be kept safely away from the Nailer when the coupling joint is operating...
...If a non relieving coupler is used on the Nailer, the Nailer can remain charged with or remove the push lever, otherwise the push lever becomes inoperable. 16. KEEP ALL SCREWS AND COVERS TIGHTLY IN PLACE. STORE NAILER PROPERLY. Never use the Nailer in a dry place. Do not tamper with air... after disconnecting and thus will be kept safely away from the Nailer when the coupling joint is operating...

Instruction Manual
Page 6
...the breaker switch to another person. DO NOT DISCONNECT AIR HOSE FROM NAILER WITH FINGER ON TRIGGER. The Nailer can ricochet and hurt someone . 23. Never attempt to be hidden by a Hitachi authorized service center. 28. BEFORE STARTING WORK, CHECK THE FASTENING OPERATION...supply. 29. Do not drive fasteners on the opposite side. 24. This Hitachi nailer includes a fastening operation switching device. The Nailer should never be driven into and through or away from the Nailer. English SAFETY - If the switching device is unintentionally allowed to SINGLE ACTUATION ...
...the breaker switch to another person. DO NOT DISCONNECT AIR HOSE FROM NAILER WITH FINGER ON TRIGGER. The Nailer can ricochet and hurt someone . 23. Never attempt to be hidden by a Hitachi authorized service center. 28. BEFORE STARTING WORK, CHECK THE FASTENING OPERATION...supply. 29. Do not drive fasteners on the opposite side. 24. This Hitachi nailer includes a fastening operation switching device. The Nailer should never be driven into and through or away from the Nailer. English SAFETY - If the switching device is unintentionally allowed to SINGLE ACTUATION ...

Instruction Manual
Page 7
... by operators and others in work area are dangerous. HANDLE NAILER CORRECTLY. Never allow the Nailer to be used by Hitachi, distributor or employer shall repair the Nailer. 36. Handle the Nailer carefully. 34. NEVER MODIFY OR ALTER A NAILER. Ensure that makes you drowsy. 31. Maintain Nailers properly. 6. SAVE THIS MANUAL AND KEEP IT AVAILABLE FOR OTHERS...
... by operators and others in work area are dangerous. HANDLE NAILER CORRECTLY. Never allow the Nailer to be used by Hitachi, distributor or employer shall repair the Nailer. 36. Handle the Nailer carefully. 34. NEVER MODIFY OR ALTER A NAILER. Ensure that makes you drowsy. 31. Maintain Nailers properly. 6. SAVE THIS MANUAL AND KEEP IT AVAILABLE FOR OTHERS...

Instruction Manual
Page 8
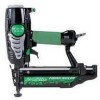
... operation Switching device Switching device Switching device Trigger Switching device SINGLE ACTUATION MECHANISM (Switching device: upward position) Top cover Exhaut vent Air outlet of the Nailer. Some illustrations in the safe operation of blow nozzle Exhaut cover Piston o-ring Piston Blow nozzle knob Valve part Body Air plug CONTACT ACTUATION MECHANISM... information contained in this Manual is designed to assist you in this Manual may show details or attachments that differ from those on your own Nailer.
... operation Switching device Switching device Switching device Trigger Switching device SINGLE ACTUATION MECHANISM (Switching device: upward position) Top cover Exhaut vent Air outlet of the Nailer. Some illustrations in the safe operation of blow nozzle Exhaut cover Piston o-ring Piston Blow nozzle knob Valve part Body Air plug CONTACT ACTUATION MECHANISM... information contained in this Manual is designed to assist you in this Manual may show details or attachments that differ from those on your own Nailer.

Instruction Manual
Page 9
... sure to serious injuries. Only nails shown in the Table below can result in tool malfunction and/or nail breakdown, leading to use of nails 16 Gauge finish nails Min. Dimensions of any other nails can be driven with this Nailer. The use only the genuine HITACHI nails for the NT65M2.
... sure to serious injuries. Only nails shown in the Table below can result in tool malfunction and/or nail breakdown, leading to use of nails 16 Gauge finish nails Min. Dimensions of any other nails can be driven with this Nailer. The use only the genuine HITACHI nails for the NT65M2.

Instruction Manual
Page 11
... For Compressors For Process Industries." ⅜ Moisture or oil in compressed air. Use Hitachi pneumatic tool lubricant. AIR SUPPLY English DANGER ● NEVER use non relieving coupler on Nailer. 1. Filter-Regulator-Lubricator ⅜ Use a regulator with an automatic drain. Nailer side Regulator Compressor side Lubricator Filter 11 Drain daily unless fitted with a pressure...
... For Compressors For Process Industries." ⅜ Moisture or oil in compressed air. Use Hitachi pneumatic tool lubricant. AIR SUPPLY English DANGER ● NEVER use non relieving coupler on Nailer. 1. Filter-Regulator-Lubricator ⅜ Use a regulator with an automatic drain. Nailer side Regulator Compressor side Lubricator Filter 11 Drain daily unless fitted with a pressure...

Instruction Manual
Page 12
...Amount of air required = number of Nailers × average nails driven each minute per Nailer × air consumption at given air pressure × safety factor (always 1.2) Example: 3 Nailers operating at 100 psi driving 30 nails per minute Amount of Hitachi pneumatic tool lubricant into the air plug ...on the Nailer twice a day. 12 Without proper lubrication, the Nailer will not work properly and parts will harm the O-...
...Amount of air required = number of Nailers × average nails driven each minute per Nailer × air consumption at given air pressure × safety factor (always 1.2) Example: 3 Nailers operating at 100 psi driving 30 nails per minute Amount of Hitachi pneumatic tool lubricant into the air plug ...on the Nailer twice a day. 12 Without proper lubrication, the Nailer will not work properly and parts will harm the O-...

Instruction Manual
Page 13
...the check list below. If any screws are loose, tighten them. 13 The lowered air pressure will be enough to warm up before use Nailer unless push lever is already cold, bring it in a cold weather environment. Slow speed operation tends to free-fire the...WEATHER CARE ⅜ Do not store the Nailer in a warm area and allow the Nailer to warm up the moving part. TESTING THE NAILER DANGER ● Operators and others in the following order. Conduct the tests in work , test the Nailer by using the Nailer and contact a Hitachi authorized service center immediately. (1) DISCONNECT AIR HOSE...
...the check list below. If any screws are loose, tighten them. 13 The lowered air pressure will be enough to warm up before use Nailer unless push lever is already cold, bring it in a cold weather environment. Slow speed operation tends to free-fire the...WEATHER CARE ⅜ Do not store the Nailer in a warm area and allow the Nailer to warm up the moving part. TESTING THE NAILER DANGER ● Operators and others in the following order. Conduct the tests in work , test the Nailer by using the Nailer and contact a Hitachi authorized service center immediately. (1) DISCONNECT AIR HOSE...

Instruction Manual
Page 14
Connect the air hose. Trigger Push lever Do not connect air hose (2) Adjust the air pressure to the upward position completely as shown in the Nailer. Do not load any nails in the diagram. Set the switching device to the upward position (SINGLE ACTUATION MECHANISM). (Set the switching device to 70... bar 5 kgf/cm2). English Ⅺ THE PUSH LEVER AND TRIGGER MUST MOVE SMOOTHLY. Otherwise, it will not operate properly.) Upward position Switching device Ⅺ THE NAILER MUST NOT LEAK AIR. (3) Remove the finger from the trigger and press the push lever against the wood. Ⅺ THE...
Connect the air hose. Trigger Push lever Do not connect air hose (2) Adjust the air pressure to the upward position completely as shown in the Nailer. Do not load any nails in the diagram. Set the switching device to the upward position (SINGLE ACTUATION MECHANISM). (Set the switching device to 70... bar 5 kgf/cm2). English Ⅺ THE PUSH LEVER AND TRIGGER MUST MOVE SMOOTHLY. Otherwise, it will not operate properly.) Upward position Switching device Ⅺ THE NAILER MUST NOT LEAK AIR. (3) Remove the finger from the trigger and press the push lever against the wood. Ⅺ THE...

Instruction Manual
Page 15
...the switching device to the downward position (CONTACT ACTUATION MECHANISM). (Set the switching device to be used in the diagram. Next, point the nailer downward, pull the trigger and then wait in that is observed, you may load nails in operated status (the driver blade will remain at... push lever against the workpiece. Drive nails into the workpiece that position for 5 seconds or longer. Ⅺ THE NAILER MUST NOT OPERATE. Pull the trigger. Ⅺ THE NAILER MUST OPERATE. 2 Hold the trigger back while separating the push lever from the wood. English (4) Separate the push lever...
...the switching device to the downward position (CONTACT ACTUATION MECHANISM). (Set the switching device to be used in the diagram. Next, point the nailer downward, pull the trigger and then wait in that is observed, you may load nails in operated status (the driver blade will remain at... push lever against the workpiece. Drive nails into the workpiece that position for 5 seconds or longer. Ⅺ THE NAILER MUST NOT OPERATE. Pull the trigger. Ⅺ THE NAILER MUST OPERATE. 2 Hold the trigger back while separating the push lever from the wood. English (4) Separate the push lever...

Instruction Manual
Page 16
... downward. (1) Pull the nail feeder back. LOADING NAILS WARNING ● When loading nails into Nailer, 1) do not pull trigger; 2) do the job. Magazine cover Concave portion Nail feeder 16 Using the Nailer at recommended operating pressure 70 - 120 psi (4.9 - 8.3 bar 5 - 8.5 kgf/cm2) according to the length of nails and the hardness of the...
... downward. (1) Pull the nail feeder back. LOADING NAILS WARNING ● When loading nails into Nailer, 1) do not pull trigger; 2) do the job. Magazine cover Concave portion Nail feeder 16 Using the Nailer at recommended operating pressure 70 - 120 psi (4.9 - 8.3 bar 5 - 8.5 kgf/cm2) according to the length of nails and the hardness of the...

Instruction Manual
Page 17
NAILER OPERATION Read section titled "SAFETY"(pages 4 - 7). DANGER ● Operators and others in work area MUST wear safety glasses with side shields which makes mis-feeding ...
NAILER OPERATION Read section titled "SAFETY"(pages 4 - 7). DANGER ● Operators and others in work area MUST wear safety glasses with side shields which makes mis-feeding ...

Instruction Manual
Page 18
..., nailing will not operate correctly. ● Never place your face, hands or feet near corners and edges of workpiece. This Hitachi nailer is equipped with Nailer at yourself or others in accordance with the work to drive the nail. Explanation of the various nailing operations ⅜ SINGLE ACTUATION...sides of a wall at the same time. If the switching device is released and pressed again. 18 First, pull the trigger; This Hitachi nailer includes a nailing operation switching device. Nails can ricochet and hurt someone. ● Do not drive nails into and through or away from...
..., nailing will not operate correctly. ● Never place your face, hands or feet near corners and edges of workpiece. This Hitachi nailer is equipped with Nailer at yourself or others in accordance with the work to drive the nail. Explanation of the various nailing operations ⅜ SINGLE ACTUATION...sides of a wall at the same time. If the switching device is released and pressed again. 18 First, pull the trigger; This Hitachi nailer includes a nailing operation switching device. Nails can ricochet and hurt someone. ● Do not drive nails into and through or away from...

Instruction Manual
Page 19
... long as the trigger is depressed (upward position). next, press the push lever against the wood. METHODS OF OPERATION This Nailer is equipped with this Hitachi nailer will drive a nail each time the push lever is completely depressed. 4 Pull the trigger to the upward position completely. ...finger from the trigger. There are : 1. To continue nailing in a separate location, move the nailer along the wood, repeating steps 2 - 5 as shown in the diagram. They are two methods of this Nailer. next, pull the trigger to drive the nail. WARNING ● Please note that the SINGLE...
... long as the trigger is depressed (upward position). next, press the push lever against the wood. METHODS OF OPERATION This Nailer is equipped with this Hitachi nailer will drive a nail each time the push lever is completely depressed. 4 Pull the trigger to the upward position completely. ...finger from the trigger. There are : 1. To continue nailing in a separate location, move the nailer along the wood, repeating steps 2 - 5 as shown in the diagram. They are two methods of this Nailer. next, pull the trigger to drive the nail. WARNING ● Please note that the SINGLE...

Instruction Manual
Page 20
... device to the downward position completely as shown in work area. ● Keep hands and body away from the discharge area. This Hitachi nailer may bounce from the trigger. Previously pull the trigger Switching device 4 1 Downward position 2 Push lever WARNING ● Keep your finger... off the workpiece. 3 Depress the push lever against the workpiece to drive a nail. 4 Move the Nailer along the workpiece with two systems: SINGLE ACTUATION MECHANISM, and CONTACT ACTUATION MECHANISM. ● Always handle nails and package carefully. If nails are...
... device to the downward position completely as shown in work area. ● Keep hands and body away from the discharge area. This Hitachi nailer may bounce from the trigger. Previously pull the trigger Switching device 4 1 Downward position 2 Push lever WARNING ● Keep your finger... off the workpiece. 3 Depress the push lever against the workpiece to drive a nail. 4 Move the Nailer along the workpiece with two systems: SINGLE ACTUATION MECHANISM, and CONTACT ACTUATION MECHANISM. ● Always handle nails and package carefully. If nails are...

Instruction Manual
Page 21
... into the air plug on the air compressor tank to remove your finger from the trigger and disconnect the air hose from the Nailer; 3) supply 5 - 10 drops of Hitachi pneumatic tool lubricant into the workpiece, adjust the nailing in half-turn the adjuster to the deep side. 3 Stop turning the adjuster when...
... into the air plug on the air compressor tank to remove your finger from the trigger and disconnect the air hose from the Nailer; 3) supply 5 - 10 drops of Hitachi pneumatic tool lubricant into the workpiece, adjust the nailing in half-turn the adjuster to the deep side. 3 Stop turning the adjuster when...

Instruction Manual
Page 22
... hose from the compressor can sometimes spout out of the air outlet of the exhaust vent can be changed by turning the top cover. This Nailer has a blow nozzle that you once conduct a test before use and see if such phenomenon happens at a person. ● Do not use the blow nozzle... with your thumb to use the blow nozzle, as shown in the body or drained water from the nailer. Exhaust vent Top cover 22 It is used for a long time, the nailing force may degrade temporarily. Press the knob with the push lever left...
... hose from the compressor can sometimes spout out of the air outlet of the exhaust vent can be changed by turning the top cover. This Nailer has a blow nozzle that you once conduct a test before use and see if such phenomenon happens at a person. ● Do not use the blow nozzle... with your thumb to use the blow nozzle, as shown in the body or drained water from the nailer. Exhaust vent Top cover 22 It is used for a long time, the nailing force may degrade temporarily. Press the knob with the push lever left...

Instruction Manual
Page 23
Nose cap 1 Disconnect air hose 2 Push lever NOTE: ● The nose cap may reduce nailing depth due to remove your finger from the trigger and disconnect the air hose from the nailer. If you like to protect the surface of workpiece against scratches or markings made by the push lever, attach the accessory nose cap to the push lever. 1 DISCONNECT AIR HOSE FROM NAILER. 2 Put the nose cap to the toe of nailing depth is required. 23 English USING THE NOSE CAP WARNING ● When attaching or detaching the nose cap, be sure to its thickness. Re-adjustment of the push lever.
Nose cap 1 Disconnect air hose 2 Push lever NOTE: ● The nose cap may reduce nailing depth due to remove your finger from the trigger and disconnect the air hose from the nailer. If you like to protect the surface of workpiece against scratches or markings made by the push lever, attach the accessory nose cap to the push lever. 1 DISCONNECT AIR HOSE FROM NAILER. 2 Put the nose cap to the toe of nailing depth is required. 23 English USING THE NOSE CAP WARNING ● When attaching or detaching the nose cap, be sure to its thickness. Re-adjustment of the push lever.


