
User Manual
Page 3
... PARTICULAR PURPOSE, AND NON-INFRINGEMENT OF THIRD PARTY. This equipment generates, uses, and can radiate radio frequency energy and, if not installed and used in a commercial environment. REGARDING TO THE PRODUCT WITH INTERNET ACCESS, THE USE OF PRODUCT SHALL BE WHOLLY AT YOUR OWN... the limits for a digital device, pursuant to provide reasonable protection against harmful interference when the equipment is operated in accordance 3 HIKVISION SHALL NOT TAKE ANY RESPONSIBILITES FOR ABNORMAL OPERATION, PRIVACY LEAKAGE OR OTHER DAMAGES RESULTING FROM CYBER ATTACK, HACKER ATTACK, VIRUS INSPECTION,...
... PARTICULAR PURPOSE, AND NON-INFRINGEMENT OF THIRD PARTY. This equipment generates, uses, and can radiate radio frequency energy and, if not installed and used in a commercial environment. REGARDING TO THE PRODUCT WITH INTERNET ACCESS, THE USE OF PRODUCT SHALL BE WHOLLY AT YOUR OWN... the limits for a digital device, pursuant to provide reasonable protection against harmful interference when the equipment is operated in accordance 3 HIKVISION SHALL NOT TAKE ANY RESPONSIBILITES FOR ABNORMAL OPERATION, PRIVACY LEAKAGE OR OTHER DAMAGES RESULTING FROM CYBER ATTACK, HACKER ATTACK, VIRUS INSPECTION,...

User Manual
Page 5
... and 'Cautions': Warnings: Serious injury or death may be caused if any of these precautions to all the local codes. Please install blackouts equipment into the power supply circuit for problems caused by unauthorized repair or maintenance.) 5 User Manual of fire or electrical shock, do... not expose this product to rain or moisture. This installation should be made by a qualified service person and should conform to prevent serious injury or death. Cautions: Injury or equipment damage may be...
... and 'Cautions': Warnings: Serious injury or death may be caused if any of these precautions to all the local codes. Please install blackouts equipment into the power supply circuit for problems caused by unauthorized repair or maintenance.) 5 User Manual of fire or electrical shock, do... not expose this product to rain or moisture. This installation should be made by a qualified service person and should conform to prevent serious injury or death. Cautions: Injury or equipment damage may be...

User Manual
Page 6
... or subject it to physical shock. Do not touch sensor modules with clean soft cloth and isopropyl alcohol. Make certain the installation location does not have reflective surfaces of objects too close to the camera. If cleaning is necessary, use the manufacturer recommended battery type. The strong...on the dome cover will not be packed in its suffix), dusty or damp environment, and do not remove the dome cover film until the installation is required for an extended period of time, put on the dome cover, clean the dome cover with fingers. Notes: For the camera ...
... or subject it to physical shock. Do not touch sensor modules with clean soft cloth and isopropyl alcohol. Make certain the installation location does not have reflective surfaces of objects too close to the camera. If cleaning is necessary, use the manufacturer recommended battery type. The strong...on the dome cover will not be packed in its suffix), dusty or damp environment, and do not remove the dome cover film until the installation is required for an extended period of time, put on the dome cover, clean the dome cover with fingers. Notes: For the camera ...

User Manual
Page 11
... Figure 2-1. 11 User Manual of Network Camera Chapter 2 Network Connection Note: You shall acknowledge that the use of the product with your computer, and install the SADP or iVMS-4200 software to search and change the IP of the network camera.
... Figure 2-1. 11 User Manual of Network Camera Chapter 2 Network Connection Note: You shall acknowledge that the use of the product with your computer, and install the SADP or iVMS-4200 software to search and change the IP of the network camera.

User Manual
Page 13
... SADP software from the device list, and select the inactive device. 13 Check the device status from the supplied disk or the official website, and install the SADP according to search the online devices. 2. And we recommend you create a strong password of your product. Steps: 1. Run the SADP software to the...
... SADP software from the device list, and select the inactive device. 13 Check the device status from the supplied disk or the official website, and install the SADP according to search the online devices. 2. And we recommend you create a strong password of your product. Steps: 1. Run the SADP software to the...

User Manual
Page 15
Follow the steps to the prompts. Get the client software from the supplied disk or the official website, and install the software according to activate the camera. Steps: 1. User Manual of the software pops up, as shown in the figure below. 15 Run the client software and the control panel of Network Camera Figure 2-5 Modify the IP Address 6. Input the password and click the Save button to activate your IP address modification. Activation via Client Software The client software is versatile video management software for multiple kinds of devices.
Follow the steps to the prompts. Get the client software from the supplied disk or the official website, and install the software according to activate the camera. Steps: 1. User Manual of the software pops up, as shown in the figure below. 15 Run the client software and the control panel of Network Camera Figure 2-5 Modify the IP Address 6. Input the password and click the Save button to activate your IP address modification. Activation via Client Software The client software is versatile video management software for multiple kinds of devices.

User Manual
Page 21
... name provider. 2. Refer to Section 6.3.4 Configuring DDNS Settings for detailed configuration. 21 Configure the DDNS settings in a computer with a web browser or the client software. 3. Install and run the IP Server software in the DDNS Settings interface of Network Camera Figure 2-13 Normal Domain Name Resolution Steps: 1. Enable DDNS and select...
... name provider. 2. Refer to Section 6.3.4 Configuring DDNS Settings for detailed configuration. 21 Configure the DDNS settings in a computer with a web browser or the client software. 3. Install and run the IP Server software in the DDNS Settings interface of Network Camera Figure 2-13 Normal Domain Name Resolution Steps: 1. Enable DDNS and select...

User Manual
Page 23
Figure 3-2 Download and Install Plug-in Figure 3-3 Install Plug-in (1) Figure 3-4 Install Plug-in (2) Note: You may have to close the web browser to install the plug-in. Please reopen the 23 Install the plug-in . Please follow the installation prompts to install the plug-in before viewing the live video and operating the camera. User Manual of Network Camera 6.
Figure 3-2 Download and Install Plug-in Figure 3-3 Install Plug-in (1) Figure 3-4 Install Plug-in (2) Note: You may have to close the web browser to install the plug-in. Please reopen the 23 Install the plug-in . Please follow the installation prompts to install the plug-in before viewing the live video and operating the camera. User Manual of Network Camera 6.

User Manual
Page 24
You can view the live view interface of Network Camera web browser and log in again after installing the plug-in. 3.2 Accessing by Client Software The product CD contains the iVMS-4200 client software. Follow the installation prompts to install the software. User Manual of iVMS-4200 client software are shown as below. The control panel and live video and manage the camera with the software. Figure 3-5 iVMS-4200 Control Panel 24
You can view the live view interface of Network Camera web browser and log in again after installing the plug-in. 3.2 Accessing by Client Software The product CD contains the iVMS-4200 client software. Follow the installation prompts to install the software. User Manual of iVMS-4200 client software are shown as below. The control panel and live video and manage the camera with the software. Figure 3-5 iVMS-4200 Control Panel 24
User Manual
Page 31
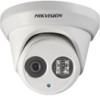
... do not need to increase the security of your product. Proper configuration of all passwords and other security settings is the responsibility of the installer and/or end-user. 4.2 Easy Wi-Fi Connection with WPS function Purpose: The setting of the wireless network connection is never easy. WPS (Wi-Fi...
... do not need to increase the security of your product. Proper configuration of all passwords and other security settings is the responsibility of the installer and/or end-user. 4.2 Easy Wi-Fi Connection with WPS function Purpose: The setting of the wireless network connection is never easy. WPS (Wi-Fi...

User Manual
Page 37
... the live view. Note: To realize PTZ control, the camera connected to the network must support the PTZ function or a pan/tilt unit has been installed to hide it. Turn on and adjust volume /Mute. Note: The captured image will be saved as JPEG file or BMP file in . The saving...
... the live view. Note: To realize PTZ control, the camera connected to the network must support the PTZ function or a pan/tilt unit has been installed to hide it. Turn on and adjust volume /Mute. Note: The captured image will be saved as JPEG file or BMP file in . The saving...

User Manual
Page 47
User Manual of strong passwords for all passwords and other security settings is the responsibility of the installer and/or end-user. 4. which is required for PPPoE access. ranges from 1024 to 65535. 3. Click Save to save the settings. Note: The User Name ...
User Manual of strong passwords for all passwords and other security settings is the responsibility of the installer and/or end-user. 4. which is required for PPPoE access. ranges from 1024 to 65535. 3. Click Save to save the settings. Note: The User Name ...

User Manual
Page 48
... DDNS Type. Before you can use of strong passwords for network access. The password should be something of your own choosing (using a minimum of the installer and/or end-user. Check the Enable DDNS checkbox to increase the security of your system against security risks, we strongly recommend the use the...
... DDNS Type. Before you can use of strong passwords for network access. The password should be something of your own choosing (using a minimum of the installer and/or end-user. Check the Enable DDNS checkbox to increase the security of your system against security risks, we strongly recommend the use the...

User Manual
Page 51
... responsibility of Network Camera (4) Click Save to the surveillance center. Enter the SNMP Settings interface: Configuration > Advanced Configuration > Network > SNMP 51 User Manual of the installer and/or end-user. SNMP v1 provides no security and SNMP v2 requires password for the settings to take effect. 6.3.5 Configuring SNMP Settings Purpose: You...
... responsibility of Network Camera (4) Click Save to the surveillance center. Enter the SNMP Settings interface: Configuration > Advanced Configuration > Network > SNMP 51 User Manual of the installer and/or end-user. SNMP v1 provides no security and SNMP v2 requires password for the settings to take effect. 6.3.5 Configuring SNMP Settings Purpose: You...

User Manual
Page 53
....1X Settings 2. Enter the user name and password to increase the security of your system against security risks, we strongly recommend the use of the installer and/or end-user. Before you start: The authentication server must be configured.
....1X Settings 2. Enter the user name and password to increase the security of your system against security risks, we strongly recommend the use of the installer and/or end-user. Before you start: The authentication server must be configured.

User Manual
Page 56
User Manual of Network Camera we strongly recommend the use of the installer and/or end-user. 3) Select the network mode from the drop-down list. If Auto is selected, the network selection priority comes as: 4G > 3G > ...
User Manual of Network Camera we strongly recommend the use of the installer and/or end-user. 3) Select the network mode from the drop-down list. If Auto is selected, the network selection priority comes as: 4G > 3G > ...

User Manual
Page 60
... is sent. Interval: The interval refers to the time between two actions of the user to better protect your product. Proper configuration of the installer and/or end-user. Up to save the settings. 6.3.11 Configuring NAT (Network Address Translation) Settings Purpose: 1. Receiver: The name of sending attached pictures...
... is sent. Interval: The interval refers to the time between two actions of the user to better protect your product. Proper configuration of the installer and/or end-user. Up to save the settings. 6.3.11 Configuring NAT (Network Address Translation) Settings Purpose: 1. Receiver: The name of sending attached pictures...
User Manual
Page 62
... Access Platform access provides you can select the root directory, parent directory and child directory. and when the Child Directory is the responsibility of the installer and/or end-user. User Manual of Network Camera login the FTP server. For your privacy and to better protect your system against security...
... Access Platform access provides you can select the root directory, parent directory and child directory. and when the Child Directory is the responsibility of the installer and/or end-user. User Manual of Network Camera login the FTP server. For your privacy and to better protect your system against security...

User Manual
Page 64
Figure 6-27 Create Self-signed Certificate 2) Enter the country, host name/IP, validity and other information. 3) Click OK to enter the creation interface. Note: If you already had a certificate installed, the Create Self-signed Certificate is grayed out. 64 User Manual of Network Camera Figure 6-26 HTTPS Settings Create the self-signed certificate 1) Click Create button to save the settings.
Figure 6-27 Create Self-signed Certificate 2) Enter the country, host name/IP, validity and other information. 3) Click OK to enter the creation interface. Note: If you already had a certificate installed, the Create Self-signed Certificate is grayed out. 64 User Manual of Network Camera Figure 6-26 HTTPS Settings Create the self-signed certificate 1) Click Create button to save the settings.

User Manual
Page 65
... certificate to save the settings. 6.4 Configuring Video and Audio Settings 6.4.1 Configuring Video Settings Steps: 1. There will be the certificate information after you successfully create and install the certificate. Figure 6-28...
... certificate to save the settings. 6.4 Configuring Video and Audio Settings 6.4.1 Configuring Video Settings Steps: 1. There will be the certificate information after you successfully create and install the certificate. Figure 6-28...
