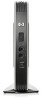
t5740e Review - HP Thin Client
Related Manual Pages


Related Terms
The following terms were also used when searching for t5740e Review - HP Thin Client:- hp t5740 thin client
- t5740 thin client
- t5740e thin client
- hp t5740e thin client
- t5740e review
- t5740 default admin password
- t5740 default password
- t5740e specs
- hp t5740e review
- t5740e downloads
- t5740e quickspecs
- admin password on a t5740e
- hp t5740 admin password
- hp t5740 default admin password
- hp t5740 default administrator password
- hp t5740 default password
- hp t5740 drivers
- hp t5740 factory reset
- hp t5740 remote desktop
- hp t5740 thin client dual monitor
- hp t5740e
- hp t5740e admin password change
- hp t5740e administrator password
- hp t5740e bios
- hp t5740e bios update
- hp t5740e default administrator password
- hp t5740e default password
- hp t5740e don't know password
- hp t5740e download
- hp t5740e downloads
- hp t5740e driver downloads w xp
- hp t5740e drivers
- hp t5740e dual monitor
- hp t5740e factory reset
- hp t5740e firmware
- hp t5740e image
- hp t5740e image download
- hp t5740e keep settings
- hp t5740e kiosk mode
- hp t5740e linux
- hp t5740e manual
- hp t5740e n280
- hp t5740e network drivers
- hp t5740e password
- hp t5740e pcoip
- hp t5740e power cord
- hp t5740e price
- hp t5740e pricing
- hp t5740e quad
- hp t5740e quickspecs
- hp t5740e replace flash drive
- hp t5740e setup
- hp t5740e software
- hp t5740e specifications
- hp t5740e specs
- hp t5740e ssd
- hp t5740e support
- hp t5740e thin
- hp t5740e thin client default password
- hp t5740e thin client desktop
- hp t5740e thin client drivers
- hp t5740e thin client factory reset
- hp t5740e thin client image
- hp t5740e thin client image download
- hp t5740e thin client kiosk mode
- hp t5740e thin client manual
- hp t5740e thin client n280
- hp t5740e thin client on xendesktop 7.1
- hp t5740e thin client price
- hp t5740e thin client prices
- hp t5740e thin client review
- hp t5740e thin client specification
- hp t5740e thin client specs
- hp t5740e thin client windows 7
- hp t5740e thin client xl424aa
- hp t5740e thin client xp image
- hp t5740e updates
- hp t5740e wes 7 thin clients
- hp t5740e windows 10
- hp t5740e windows 7 image
- hp t5740e xendesktop
- hp t5740w
- hp thin client t5740e
- t5740 admin password
- t5740 default administrator password
- t5740 drivers
- t5740 factory reset
- t5740 remote desktop
- t5740 thin client dual monitor
- t5740e
- t5740e 2gb flash
- t5740e adapter
- t5740e admin password change
- t5740e administrator password
- t5740e altiris
- t5740e bios
- t5740e bios password
- t5740e bios update
- t5740e boot order
- t5740e citrix
- t5740e citrix receiver
- t5740e connect to domain
- t5740e cost
- t5740e default admin password
- t5740e default administrator password
- t5740e default password
- t5740e don't know password
- t5740e download
- t5740e driver downloads w xp
- t5740e drivers
- t5740e dual monitor
- t5740e easy tools
- t5740e expansion module
- t5740e factory reset
- t5740e firmware
- t5740e flash
- t5740e flash memory
- t5740e flash upgrade
- t5740e hdmi
- t5740e hp
- t5740e hp us
- t5740e ie 10
- t5740e image
- t5740e image download
- t5740e join domain
- t5740e keep settings
- t5740e kiosk mode
- t5740e linux
- t5740e manual
- t5740e n280
- t5740e network driver
- t5740e network drivers
- t5740e nic driver
- t5740e not powering up
- t5740e password
- t5740e pcoip
- t5740e power cord
- t5740e power supply
- t5740e price
- t5740e pricing
- t5740e quad
- t5740e remove stand
- t5740e replace flash drive
- t5740e setup
- t5740e software
- t5740e software download
- t5740e specification
- t5740e specifications
- t5740e ssd
- t5740e support
- t5740e thin
- t5740e thin client default password
- t5740e thin client desktop
- t5740e thin client drivers
- t5740e thin client factory reset
- t5740e thin client image
- t5740e thin client image download
- t5740e thin client kiosk mode
- t5740e thin client manual
- t5740e thin client n280
- t5740e thin client on xendesktop 7.1
- t5740e thin client power supply
- t5740e thin client price
- t5740e thin client prices
- t5740e thin client review
- t5740e thin client specification
- t5740e thin client specifications password
- t5740e thin client specs
- t5740e thin client windows 7
- t5740e thin client xl424aa
- t5740e thin client xp image
- t5740e thin clients
- t5740e thinpro
- t5740e updates
- t5740e wes 7 thin clients
- t5740e win 7 download
- t5740e windows 10
- t5740e windows 7 image
- t5740e windows update
- t5740e wireless
- t5740e write filter
- t5740e xendesktop
- t5740e xp image download
- thin client t5740e