Maintenance and Service Guide
Page 14
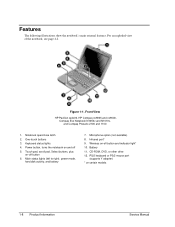
... View HP Pavilion ze4x00, HP Compaq nx9005 and nx9000, Compaq Evo Notebook N1050v and N1010v, and Compaq Presario 2100 and 1100 1. Infrared port* 9. PS/2 keyboard or PS/2 mouse port (supports Y adapter) * on -off button 6. Main status lights (left to right), power mode, hard disk activity, and battery 7. Notebook open/... 4. For an exploded view of the notebook, see page 4-2. Wireless on and off button and indicator light* 10. Battery 11. CD-ROM, DVD, or other drive 12. Microphone option (not available) 8. Power button, turns the notebook on -off 5. One-touch buttons 3....
... View HP Pavilion ze4x00, HP Compaq nx9005 and nx9000, Compaq Evo Notebook N1050v and N1010v, and Compaq Presario 2100 and 1100 1. Infrared port* 9. PS/2 keyboard or PS/2 mouse port (supports Y adapter) * on -off button 6. Main status lights (left to right), power mode, hard disk activity, and battery 7. Notebook open/... 4. For an exploded view of the notebook, see page 4-2. Wireless on and off button and indicator light* 10. Battery 11. CD-ROM, DVD, or other drive 12. Microphone option (not available) 8. Power button, turns the notebook on -off 5. One-touch buttons 3....
Maintenance and Service Guide
Page 17
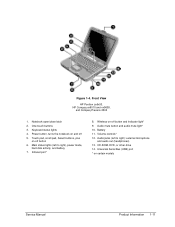
...ze5x00, HP Compaq nx9010 and nx9008, and Compaq Presario 2500 1. Main status lights (left to right), power mode, hard disk activity, and battery 7. Wireless on -off 5. One-touch buttons 3. Universal Serial Bus (USB) port * on and off button 6. Power button, turns the notebook on ...certain models Service Manual Product Information 1-11 Audio jacks (left to right): external microphone and audio out (headphones) 13. CD-ROM, DVD, or other drive 14. Figure 1-4. Infrared port* 8. Notebook open/close latch 2.
...ze5x00, HP Compaq nx9010 and nx9008, and Compaq Presario 2500 1. Main status lights (left to right), power mode, hard disk activity, and battery 7. Wireless on -off 5. One-touch buttons 3. Universal Serial Bus (USB) port * on and off button 6. Power button, turns the notebook on ...certain models Service Manual Product Information 1-11 Audio jacks (left to right): external microphone and audio out (headphones) 13. CD-ROM, DVD, or other drive 14. Figure 1-4. Infrared port* 8. Notebook open/close latch 2.
Maintenance and Service Guide
Page 26
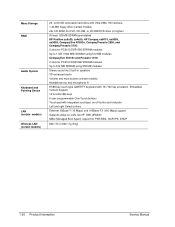
...-ROM, 8x DVD, CD-RW, or CD-RW/DVD drive (or higher) At least 128 MB SDRAM preinstalled HP Pavilion ze5x00, ze4x00, HP Compaq nx9010, nx9008, nx9005, Compaq Evo N1050v, Compaq Presario 2500, and Compaq Presario 2100: 2 slots for PC2100 DDR-266 SDRAM modules Up to 60-GB removable hard drive with 101/102 key emulation. to 1 GB (1024 MB...
...-ROM, 8x DVD, CD-RW, or CD-RW/DVD drive (or higher) At least 128 MB SDRAM preinstalled HP Pavilion ze5x00, ze4x00, HP Compaq nx9010, nx9008, nx9005, Compaq Evo N1050v, Compaq Presario 2500, and Compaq Presario 2100: 2 slots for PC2100 DDR-266 SDRAM modules Up to 60-GB removable hard drive with 101/102 key emulation. to 1 GB (1024 MB...
Maintenance and Service Guide
Page 54
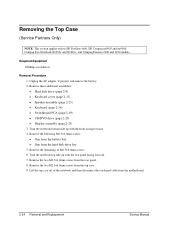
... facing forward. 4. Removing the Top Case (Service Partners Only) NOTE: This section applies only to HP Pavilion 4x00, HP Compaq nx9005 and nx9000, Compaq Evo Notebook N1050v and N1010v, and Compaq Presario 2100 and 1100 models. Remove these additional assemblies: • Hard disk drive (page 2-9) • Keyboard cover (page 2-13) • Speaker assembly (page 2-23) • Keyboard (page...
... facing forward. 4. Removing the Top Case (Service Partners Only) NOTE: This section applies only to HP Pavilion 4x00, HP Compaq nx9005 and nx9000, Compaq Evo Notebook N1050v and N1010v, and Compaq Presario 2100 and 1100 models. Remove these additional assemblies: • Hard disk drive (page 2-9) • Keyboard cover (page 2-13) • Speaker assembly (page 2-23) • Keyboard (page...
Maintenance and Service Guide
Page 56
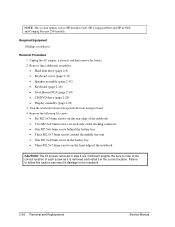
...the notebook CAUTION: The 16 screws removed in step 4 are 3 different lengths. Remove the following 16 screws: • Six M2.5×7.0mm screws on each screw as it is removed and install it in damage to HP Pavilion 5x00, HP Compaq nx9010 and HP nx9008, and Compaq Presario... 2500 models. Unplug the AC adapter, if present, and then remove the battery. 2. Remove these additional assemblies: • Hard disk drive (page 2-9) • Keyboard cover (page 2-13) •...
...the notebook CAUTION: The 16 screws removed in step 4 are 3 different lengths. Remove the following 16 screws: • Six M2.5×7.0mm screws on each screw as it is removed and install it in damage to HP Pavilion 5x00, HP Compaq nx9010 and HP nx9008, and Compaq Presario... 2500 models. Unplug the AC adapter, if present, and then remove the battery. 2. Remove these additional assemblies: • Hard disk drive (page 2-9) • Keyboard cover (page 2-13) •...
Maintenance and Service Guide
Page 59
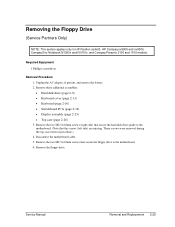
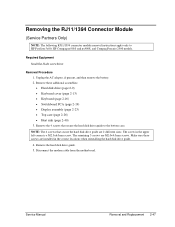
... screwdriver Removal Procedure 1. Remove the two M2.5×4.0mm screws (right side) that secure the hard disk drive guide to HP Pavilion ze4x00, HP Compaq nx9005 and nx9000, Compaq Evo Notebook N1050v and N1010v, and Compaq Presario 2100 and 1100 models. Removing the Floppy Drive (Service Partners Only) NOTE: This section applies only to the motherboard. (Note that the...
... screwdriver Removal Procedure 1. Remove the two M2.5×4.0mm screws (right side) that secure the hard disk drive guide to HP Pavilion ze4x00, HP Compaq nx9005 and nx9000, Compaq Evo Notebook N1050v and N1010v, and Compaq Presario 2100 and 1100 models. Removing the Floppy Drive (Service Partners Only) NOTE: This section applies only to the motherboard. (Note that the...
Maintenance and Service Guide
Page 60
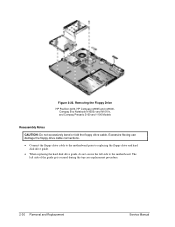
... Drive HP Pavilion 4x00, HP Compaq nx9005 and nx9000, Compaq Evo Notebook N1050v and N1010v, and Compaq Presario 2100 and 1100 Models Reassembly Notes CAUTION: Do not excessively bend or fold the floppy drive cable. Excessive flexing can damage the floppy drive cable connections. • Connect the floppy drive cable to the motherboard prior to replacing the floppy drive and hard disk drive...
... Drive HP Pavilion 4x00, HP Compaq nx9005 and nx9000, Compaq Evo Notebook N1050v and N1010v, and Compaq Presario 2100 and 1100 Models Reassembly Notes CAUTION: Do not excessively bend or fold the floppy drive cable. Excessive flexing can damage the floppy drive cable connections. • Connect the floppy drive cable to the motherboard prior to replacing the floppy drive and hard disk drive...
Maintenance and Service Guide
Page 61
.... Service Manual Removal and Replacement 2-31 Remove the insulating tape that secure the floppy drive and floppy drive bezel to HP Pavilion 5x00, HP Compaq nx9010 and nx9008, and Compaq Presario 2500 models. Remove these additional assemblies: • Hard disk drive (page 2-9) • Keyboard cover (page 2-13) • Keyboard (page 2-16) • Switchboard PCA (page 2-19) • Display assembly...
.... Service Manual Removal and Replacement 2-31 Remove the insulating tape that secure the floppy drive and floppy drive bezel to HP Pavilion 5x00, HP Compaq nx9010 and nx9008, and Compaq Presario 2500 models. Remove these additional assemblies: • Hard disk drive (page 2-9) • Keyboard cover (page 2-13) • Keyboard (page 2-16) • Switchboard PCA (page 2-19) • Display assembly...
Maintenance and Service Guide
Page 65
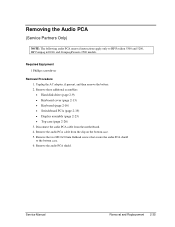
...from the motherboard. 4. Remove the two M2.0×3.0mm flathead screws that secure the audio PCA shield to HP Pavilion 5300 and 5200, HP Compaq nx9010, and Compaq Presario 2500 models. Remove the audio PCA shield. Service Manual Removal and Replacement 2-35 Removing the Audio ...if present, and then remove the battery. 2. Disconnect the audio PCA cable from the clip on the bottom case. 5. Remove these additional assemblies: • Hard disk drive (page 2-9) • Keyboard cover (page 2-13) • Keyboard (page 2-16) • Switchboard PCA (page 2-19) • Display assembly (...
...from the motherboard. 4. Remove the two M2.0×3.0mm flathead screws that secure the audio PCA shield to HP Pavilion 5300 and 5200, HP Compaq nx9010, and Compaq Presario 2500 models. Remove the audio PCA shield. Service Manual Removal and Replacement 2-35 Removing the Audio ...if present, and then remove the battery. 2. Disconnect the audio PCA cable from the clip on the bottom case. 5. Remove these additional assemblies: • Hard disk drive (page 2-9) • Keyboard cover (page 2-13) • Keyboard (page 2-16) • Switchboard PCA (page 2-19) • Display assembly (...
Maintenance and Service Guide
Page 67
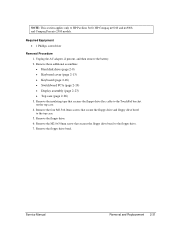
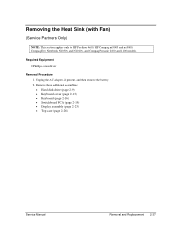
Remove these additional assemblies: • Hard disk drive (page 2-9) • Keyboard cover (page 2-13) • Keyboard (page 2-16) • Switchboard PCA (page 2-19) • Display assembly (page 2-23) • Top case (page ... 2-37 Required Equipment 0 Phillips screwdriver Removal Procedure 1. Removing the Heat Sink (with Fan) (Service Partners Only) NOTE: This section applies only to HP Pavilion 4x00, HP Compaq nx9005 and nx9000, Compaq Evo Notebook N1050v and N1010v, and Compaq Presario 2100 and 1100 models. Unplug the AC adapter, if present, and then remove the battery. 2.
Remove these additional assemblies: • Hard disk drive (page 2-9) • Keyboard cover (page 2-13) • Keyboard (page 2-16) • Switchboard PCA (page 2-19) • Display assembly (page 2-23) • Top case (page ... 2-37 Required Equipment 0 Phillips screwdriver Removal Procedure 1. Removing the Heat Sink (with Fan) (Service Partners Only) NOTE: This section applies only to HP Pavilion 4x00, HP Compaq nx9005 and nx9000, Compaq Evo Notebook N1050v and N1010v, and Compaq Presario 2100 and 1100 models. Unplug the AC adapter, if present, and then remove the battery. 2.
Maintenance and Service Guide
Page 69
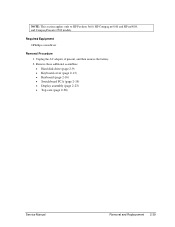
NOTE: This section applies only to HP Pavilion 5x00, HP Compaq nx9010 and HP nx9008, and Compaq Presario 2500 models. Remove these additional assemblies: • Hard disk drive (page 2-9) • Keyboard cover (page 2-13) • Keyboard (page 2-16) • Switchboard PCA (page 2-19) • Display assembly (page 2-23) • Top case (page 2-26) Service Manual Removal and Replacement 2-39 Required Equipment 0 Phillips screwdriver Removal Procedure 1. Unplug the AC adapter, if present, and then remove the battery. 2.
NOTE: This section applies only to HP Pavilion 5x00, HP Compaq nx9010 and HP nx9008, and Compaq Presario 2500 models. Remove these additional assemblies: • Hard disk drive (page 2-9) • Keyboard cover (page 2-13) • Keyboard (page 2-16) • Switchboard PCA (page 2-19) • Display assembly (page 2-23) • Top case (page 2-26) Service Manual Removal and Replacement 2-39 Required Equipment 0 Phillips screwdriver Removal Procedure 1. Unplug the AC adapter, if present, and then remove the battery. 2.
Maintenance and Service Guide
Page 71
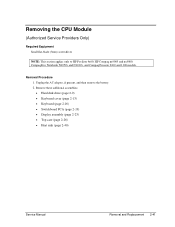
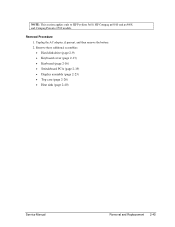
Unplug the AC adapter, if present, and then remove the battery. 2. Remove these additional assemblies: • Hard disk drive (page 2-9) • Keyboard cover (page 2-13) • Keyboard (page 2-16) • Switchboard PCA (page 2-19) • Display assembly (page 2-23) • Top case ...41 Removing the CPU Module (Authorized Service Providers Only) Required Equipment Small flat-blade (3mm) screwdriver NOTE: This section applies only to HP Pavilion 4x00, HP Compaq nx9005 and nx9000, Compaq Evo Notebook N1050v and N1010v, and Compaq Presario 2100 and 1100 models. Removal Procedure 1.
Unplug the AC adapter, if present, and then remove the battery. 2. Remove these additional assemblies: • Hard disk drive (page 2-9) • Keyboard cover (page 2-13) • Keyboard (page 2-16) • Switchboard PCA (page 2-19) • Display assembly (page 2-23) • Top case ...41 Removing the CPU Module (Authorized Service Providers Only) Required Equipment Small flat-blade (3mm) screwdriver NOTE: This section applies only to HP Pavilion 4x00, HP Compaq nx9005 and nx9000, Compaq Evo Notebook N1050v and N1010v, and Compaq Presario 2100 and 1100 models. Removal Procedure 1.
Maintenance and Service Guide
Page 75
Unplug the AC adapter, if present, and then remove the battery. 2. NOTE: This section applies only to HP Pavilion 5x00, HP Compaq nx9010 and nx9008, and Compaq Presario 2500 models. Remove these additional assemblies: • Hard disk drive (page 2-9) • Keyboard cover (page 2-13) • Keyboard (page 2-16) • Switchboard PCA (page 2-19) • Display assembly (page 2-23) • Top case (page 2-26) • Heat sink (page 2-40) Service Manual Removal and Replacement 2-45 Removal Procedure 1.
Unplug the AC adapter, if present, and then remove the battery. 2. NOTE: This section applies only to HP Pavilion 5x00, HP Compaq nx9010 and nx9008, and Compaq Presario 2500 models. Remove these additional assemblies: • Hard disk drive (page 2-9) • Keyboard cover (page 2-13) • Keyboard (page 2-16) • Switchboard PCA (page 2-19) • Display assembly (page 2-23) • Top case (page 2-26) • Heat sink (page 2-40) Service Manual Removal and Replacement 2-45 Removal Procedure 1.
Maintenance and Service Guide
Page 77
... AC adapter, if present, and then remove the battery. 2. The screw in the correct locations when reinstalling the hard disk drive guide. 4. NOTE: The 4 screws that secure the hard disk drive guide to HP Pavilion 5x00, HP Compaq nx9010 and nx9008, and Compaq Presario 2500 models. Disconnect the modem cable from the motherboard. Make sure these additional assemblies: •...
... AC adapter, if present, and then remove the battery. 2. The screw in the correct locations when reinstalling the hard disk drive guide. 4. NOTE: The 4 screws that secure the hard disk drive guide to HP Pavilion 5x00, HP Compaq nx9010 and nx9008, and Compaq Presario 2500 models. Disconnect the modem cable from the motherboard. Make sure these additional assemblies: •...

Maintenance and Service Guide
Page 79
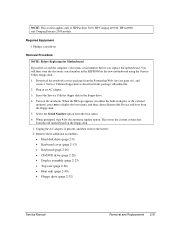
... Notebook N1050v and N1010v, and Compaq Presario 2100 and 1100 models. When prompted, type A for the automatic update option. Download the notebook service package from the boot menu. 6. When the HP logo appears (on the floppy disk. 1. Unplug the AC adapter, if present, and then remove the battery. 2. Remove these additional assemblies: • Hard disk drive...
... Notebook N1050v and N1010v, and Compaq Presario 2100 and 1100 models. When prompted, type A for the automatic update option. Download the notebook service package from the boot menu. 6. When the HP logo appears (on the floppy disk. 1. Unplug the AC adapter, if present, and then remove the battery. 2. Remove these additional assemblies: • Hard disk drive...
Maintenance and Service Guide
Page 81
... the notebook. When prompted, type A for the automatic update option. You will then store the electronic serial number in display or the external monitor), press esc to HP Pavilion 5x00, HP Compaq nx9010, HP nx9008, and Compaq Presario 2500 models. This stores the current system data from the boot menu. 6. Remove these additional assemblies: • Hard disk drive (page...
... the notebook. When prompted, type A for the automatic update option. You will then store the electronic serial number in display or the external monitor), press esc to HP Pavilion 5x00, HP Compaq nx9010, HP nx9008, and Compaq Presario 2500 models. This stores the current system data from the boot menu. 6. Remove these additional assemblies: • Hard disk drive (page...

