Wireless Setup Guide
Page 2
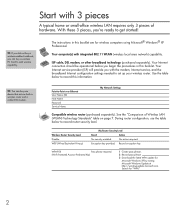
... using Microsoft® Windows® XP Professional. TIP: You can buy a wireless-enabled notebook, you 're ready to set up your wireless router. During router configuration, use the table...computer(s) with the modem, Internet service, and the broadband Internet configuration settings needed to get started! Start with 3 pieces A typical home or small-office wireless LAN requires only 3 pieces of ... WLAN (wireless local area network) capability. TIP: If you did not buy a wireless PC Card to record this booklet are for "WPA." 2 Point-to record router security level...
... using Microsoft® Windows® XP Professional. TIP: You can buy a wireless-enabled notebook, you 're ready to set up your wireless router. During router configuration, use the table...computer(s) with the modem, Internet service, and the broadband Internet configuration settings needed to get started! Start with 3 pieces A typical home or small-office wireless LAN requires only 3 pieces of ... WLAN (wireless local area network) capability. TIP: If you did not buy a wireless PC Card to record this booklet are for "WPA." 2 Point-to record router security level...

Wireless Setup Guide
Page 3
... computer according to the wireless icon is off. After you Do not continue with these instructions until you can have the necessary components to get started, you're ready to connect the pieces of the wireless button and light varies by model. 3 Connect the wireless router according to the manufacturer's instructions...
... computer according to the wireless icon is off. After you Do not continue with these instructions until you can have the necessary components to get started, you're ready to connect the pieces of the wireless button and light varies by model. 3 Connect the wireless router according to the manufacturer's instructions...
Wireless Setup Guide
Page 4
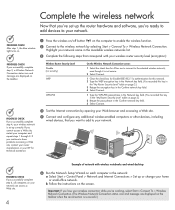
.../off button on the screen. Highlight your network name in the Available wireless networks list. 3 Complete the following steps that correspond with wireless notebooks and wired desktop PROGRESS CHECK If you successfully complete step 6, all computers on your network can access a Web site. 4 6 Run the... Network Setup Wizard on page 2.) 2 Retype the pass phrase in the network: a Select Start > Control Panel > Network and Internet Connections > Set up the router hardware and software, you're ready to add devices to your network. If you...
.../off button on the screen. Highlight your network name in the Available wireless networks list. 3 Complete the following steps that correspond with wireless notebooks and wired desktop PROGRESS CHECK If you successfully complete step 6, all computers on your network can access a Web site. 4 6 Run the... Network Setup Wizard on page 2.) 2 Retype the pass phrase in the network: a Select Start > Control Panel > Network and Internet Connections > Set up the router hardware and software, you're ready to add devices to your network. If you...
Wireless Setup Guide
Page 5
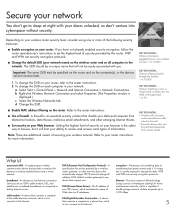
... modem, DSL, and satellite are security encryption protocols. ■ Change the default SSID (your network name) on the wireless router and on your network: a Select Start > Control Panel > Network and Internet Connection > Network Connections. d Change the SSID. DID YOU KNOW... Chance of being hacked through email: 1 in 10,000 DID YOU...
... modem, DSL, and satellite are security encryption protocols. ■ Change the default SSID (your network name) on the wireless router and on your network: a Select Start > Control Panel > Network and Internet Connection > Network Connections. d Change the SSID. DID YOU KNOW... Chance of being hacked through email: 1 in 10,000 DID YOU...

Modem and Local Area Network - Windows Vista and Windows XP
Page 10
Your location is displayed under Location. 4 Chapter 1 Using the modem (select models only) Click Clock, Language, and Region. 3. Selecting a location setting Viewing the current location selection To view the current location setting for the modem, follow these steps: 1. Select Start > Control Panel. 2. Click Regional and Language Options. 4.
Your location is displayed under Location. 4 Chapter 1 Using the modem (select models only) Click Clock, Language, and Region. 3. Selecting a location setting Viewing the current location selection To view the current location setting for the modem, follow these steps: 1. Select Start > Control Panel. 2. Click Regional and Language Options. 4.
Modem and Local Area Network - Windows Vista and Windows XP
Page 11
... OK. CAUTION: To prevent losing your home country settings, do not delete your new location setting. (The Phone and Modem Options window is displayed.) 4. Select Start > Control Panel > Hardware and Sound > Phone and Modem Options. 2. Click New. (The New Location window is displayed.) 9. Next to Dial using the modem. As you...
... OK. CAUTION: To prevent losing your home country settings, do not delete your new location setting. (The Phone and Modem Options window is displayed.) 4. Select Start > Control Panel > Hardware and Sound > Phone and Modem Options. 2. Click New. (The New Location window is displayed.) 9. Next to Dial using the modem. As you...
Modem and Local Area Network - Windows Vista and Windows XP
Page 12
... an analog line. ● Check for the modem. 4. Click Modem. 6. Tones indicate that the telephone line supports pulse dialing. Select your modem location setting. 4. Select Start > Control Panel > Hardware and Sound > Phone and Modem Options. 2. Then click the Modems tab. 3. The modem requires an analog, not a digital, telephone line. Select...
... an analog line. ● Check for the modem. 4. Click Modem. 6. Tones indicate that the telephone line supports pulse dialing. Select your modem location setting. 4. Select Start > Control Panel > Hardware and Sound > Phone and Modem Options. 2. Then click the Modems tab. 3. The modem requires an analog, not a digital, telephone line. Select...
Backup and Recovery - Windows Vista
Page 7
...). Recovery discs are designed to help you to reverse undesirable changes to your computer by the operating system and Recovery Manager software are used to start up your full factory image if you reinstall a program or driver without performing a full system recovery. ● Performing a full system recovery (Recovery Manager software feature...
...). Recovery discs are designed to help you to reverse undesirable changes to your computer by the operating system and Recovery Manager software are used to start up your full factory image if you reinstall a program or driver without performing a full system recovery. ● Performing a full system recovery (Recovery Manager software feature...
Backup and Recovery - Windows Vista
Page 8
... compatible with double-layer support discs (purchased separately). Click Advanced Options. NOTE: Handle these discs carefully and keep them in case of recovery discs. Select Start > All Programs > Recovery Manager > Recovery Manager. NOTE: Read-write discs, such as CD-RW, DVD ± RW, and DVD±RW double-...layer discs, are used to start up the computer for the first time, be sure to continue the disc creation process. Follow the on battery power, you have finished creating the...
... compatible with double-layer support discs (purchased separately). Click Advanced Options. NOTE: Handle these discs carefully and keep them in case of recovery discs. Select Start > All Programs > Recovery Manager > Recovery Manager. NOTE: Read-write discs, such as CD-RW, DVD ± RW, and DVD±RW double-...layer discs, are used to start up the computer for the first time, be sure to continue the disc creation process. Follow the on battery power, you have finished creating the...
Backup and Recovery - Windows Vista
Page 10
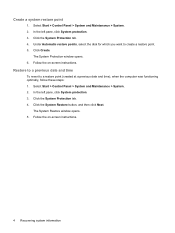
.... Follow the on -screen instructions. 4 Recovering system information Click the System Protection tab. 4. The System Restore window opens. 5. Click Create. Create a system restore point 1. Select Start > Control Panel > System and Maintenance > System. 2. Click the System Restore button, and then click Next. In the left pane, click System protection. 3. The System Protection...
.... Follow the on -screen instructions. 4 Recovering system information Click the System Protection tab. 4. The System Restore window opens. 5. Click Create. Create a system restore point 1. Select Start > Control Panel > System and Maintenance > System. 2. Click the System Restore button, and then click Next. In the left pane, click System protection. 3. The System Protection...
Backup and Recovery - Windows Vista
Page 11
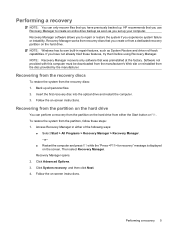
HP recommends that you set up your computer. Back up . Recovery Manager opens. 2. NOTE... features, such as you have not already tried these steps: 1. NOTE: Windows has its own built-in either the Start button or f11. Performing a recovery NOTE: You can perform a recovery from the partition on the hard drive from either... of the following ways: ● Select Start > All Programs > Recovery Manager > Recovery Manager. -or- ● Restart the computer and press f11 while the "Press ...
HP recommends that you set up your computer. Back up . Recovery Manager opens. 2. NOTE... features, such as you have not already tried these steps: 1. NOTE: Windows has its own built-in either the Start button or f11. Performing a recovery NOTE: You can perform a recovery from the partition on the hard drive from either... of the following ways: ● Select Start > All Programs > Recovery Manager > Recovery Manager. -or- ● Restart the computer and press f11 while the "Press ...
Security - Windows Vista
Page 8
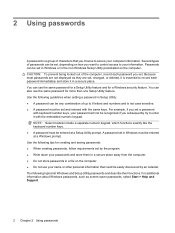
... keyboard number keys. ● A password must be set . For additional information about Windows passwords, such as they are not displayed as screen-saver passwords, select Start > Help and Support. 2 Chapter 2 Using passwords You can also use your name or other personal information that you set and entered with the same keys...
... keyboard number keys. ● A password must be set . For additional information about Windows passwords, such as they are not displayed as screen-saver passwords, select Start > Help and Support. 2 Chapter 2 Using passwords You can also use your name or other personal information that you set and entered with the same keys...

Security - Windows Vista
Page 12
... that you protect the computer against newly discovered viruses, antivirus software must be kept up to date. To view and access Norton Internet Security, select Start > All Programs > Norton Internet Security. For more information about computer viruses, type viruses in the Search field in most cases, repair any damage they have...
... that you protect the computer against newly discovered viruses, antivirus software must be kept up to date. To view and access Norton Internet Security, select Start > All Programs > Norton Internet Security. For more information about computer viruses, type viruses in the Search field in most cases, repair any damage they have...

Security - Windows Vista
Page 14
... updates and install them on your computer: ● Run Windows Update monthly to install the latest software from Microsoft. ● Use the update link at Start > All Programs > Windows Update. Additional updates to Windows and other software may have become available after the computer was shipped. Updates to the operating system...
... updates and install them on your computer: ● Run Windows Update monthly to install the latest software from Microsoft. ● Use the update link at Start > All Programs > Windows Update. Additional updates to Windows and other software may have become available after the computer was shipped. Updates to the operating system...

Setup Utility - Windows Vista
Page 3
Table of contents 1 Starting the Setup Utility 2 Using the Setup Utility Changing the language of the Setup Utility 2 Navigating and selecting in the Setup Utility 2 Displaying system information ...3 Restoring default settings in the Setup Utility 3 Using advanced Setup Utility features 4 Closing the Setup Utility ...4 3 Setup Utility menus Main menu ...5 Security menu ...5 System Configuration menu ...6 Diagnostics menu ...6 Index ...7 iii
Table of contents 1 Starting the Setup Utility 2 Using the Setup Utility Changing the language of the Setup Utility 2 Navigating and selecting in the Setup Utility 2 Displaying system information ...3 Restoring default settings in the Setup Utility 3 Using advanced Setup Utility features 4 Closing the Setup Utility ...4 3 Setup Utility menus Main menu ...5 Security menu ...5 System Configuration menu ...6 Diagnostics menu ...6 Index ...7 iii
Setup Utility - Windows Vista
Page 5
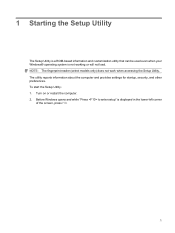
... will not load. Turn on or restart the computer. 2. The utility reports information about the computer and provides settings for startup, security, and other preferences. 1 Starting the Setup Utility The Setup Utility is a ROM-based information and customization utility that can be used even when your Windows® operating system is...
... will not load. Turn on or restart the computer. 2. The utility reports information about the computer and provides settings for startup, security, and other preferences. 1 Starting the Setup Utility The Setup Utility is a ROM-based information and customization utility that can be used even when your Windows® operating system is...
Setup Utility - Windows Vista
Page 6
... to toggle a field, for example an Enable/Disable field, use the arrow keys) to select a language, and then press enter to save your preference. 5. To start the Setup Utility, turn on the screen. Press f5 or f6 (or use either the arrow keys or f5 or f6. ● To select an...
... to toggle a field, for example an Enable/Disable field, use the arrow keys) to select a language, and then press enter to save your preference. 5. To start the Setup Utility, turn on the screen. Press f5 or f6 (or use either the arrow keys or f5 or f6. ● To select an...
Setup Utility - Windows Vista
Page 7
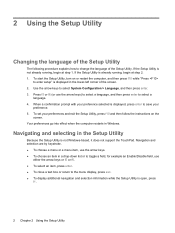
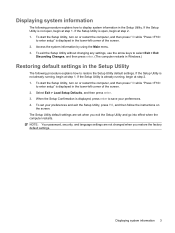
To start the Setup Utility, turn on the screen. If the Setup Utility is not already running , begin at step 2. 1. The Setup Utility default settings are not ... set your preferences. 4. Access the system information by using the Main menu. 3. To set when you restore the factory default settings. Displaying system information 3 To start the Setup Utility, turn on or restart the computer, and then press f10 while "Press to save your preferences and exit the Setup Utility, press...
To start the Setup Utility, turn on the screen. If the Setup Utility is not already running , begin at step 2. 1. The Setup Utility default settings are not ... set your preferences. 4. Access the system information by using the Main menu. 3. To set when you restore the factory default settings. Displaying system information 3 To start the Setup Utility, turn on or restart the computer, and then press f10 while "Press to save your preferences and exit the Setup Utility, press...
Setup Utility - Windows Vista
Page 8
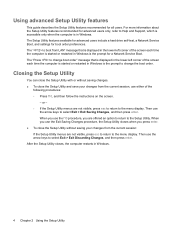
... Setup Utility and save your changes from LAN" message that is displayed in the lower-left corner of the screen each time the computer is started or restarted in Windows is the prompt to the menu display. or - ◦ If the Setup Utility menus are not visible, press esc to return... advanced users only, refer to change boot order" message that is displayed in the lower-left corner of the screen each time the computer is started or restarted in Windows is the prompt for a Network Service Boot. Closing the Setup Utility You can close the Setup Utility with or without saving...
... Setup Utility and save your changes from LAN" message that is displayed in the lower-left corner of the screen each time the computer is started or restarted in Windows is the prompt to the menu display. or - ◦ If the Setup Utility menus are not visible, press esc to return... advanced users only, refer to change boot order" message that is displayed in the lower-left corner of the screen each time the computer is started or restarted in Windows is the prompt for a Network Service Boot. Closing the Setup Utility You can close the Setup Utility with or without saving...

Setup Utility - Windows Vista
Page 11
... in the Setup Utility 2 Setup Utility changing the language 2 closing 4 Diagnostics menu 6 displaying system information 3 Main menu 5 navigating and selecting 2 restoring default settings 3 Security menu 5 starting 1 System Configuration menu 6 using 2 using advanced features 4 System Configuration menu 6 system information 5 H hard drive self test 6 L language support 6 M Main menu 5 N navigating in the Setup Utility...
... in the Setup Utility 2 Setup Utility changing the language 2 closing 4 Diagnostics menu 6 displaying system information 3 Main menu 5 navigating and selecting 2 restoring default settings 3 Security menu 5 starting 1 System Configuration menu 6 using 2 using advanced features 4 System Configuration menu 6 system information 5 H hard drive self test 6 L language support 6 M Main menu 5 N navigating in the Setup Utility...


