
Setup Utility - Windows Vista and Windows 7
Page 10
...and f10 functions of the Setup Utility in DC mode. Enable/disable the processor Virtualization Technology. NOTE: On models with two hard drives, this Change the Setup Utility language. System Configuration menu Select Language Support Button Sound (select models only) Virtualization Technology (select ...: ◦ USB Floppy ◦ Internal CD/DVD ROM drive ◦ USB CD/DVD ROM drive ◦ Hard drive ◦ USB Diskette on Key ◦ USB Hard drive ◦ Network adapter Diagnostics menu Select Hard Disk Self Test Secondary Hard Disk Self Test (select models only) Memory Test To do...
...and f10 functions of the Setup Utility in DC mode. Enable/disable the processor Virtualization Technology. NOTE: On models with two hard drives, this Change the Setup Utility language. System Configuration menu Select Language Support Button Sound (select models only) Virtualization Technology (select ...: ◦ USB Floppy ◦ Internal CD/DVD ROM drive ◦ USB CD/DVD ROM drive ◦ Hard drive ◦ USB Diskette on Key ◦ USB Hard drive ◦ Network adapter Diagnostics menu Select Hard Disk Self Test Secondary Hard Disk Self Test (select models only) Memory Test To do...
Setup Utility - Windows Vista and Windows 7
Page 11
... Reader Power Saving 6 changing the Setup Utility language 2 D Diagnostics menu 6 displaying system information 3 drives, boot order 6 E exiting the Setup Utility 4 F fan always on 6 fingerprint reader 1 H hard drive self test 6 L LAN Power Saving 6 language support 6 M Main menu 5 memory test 6 ...N navigating in the Setup Utility 2 P passwords 5 power-on password 5 Processor C6 State 6 R restoring default settings 3 S secondary hard drive self test 6 Security menu 5 selecting in the Setup Utility 2 starting the Setup Utility 1 System Configuration menu 6 system information 5 U using ...
... Reader Power Saving 6 changing the Setup Utility language 2 D Diagnostics menu 6 displaying system information 3 drives, boot order 6 E exiting the Setup Utility 4 F fan always on 6 fingerprint reader 1 H hard drive self test 6 L LAN Power Saving 6 language support 6 M Main menu 5 memory test 6 ...N navigating in the Setup Utility 2 P passwords 5 power-on password 5 Processor C6 State 6 R restoring default settings 3 S secondary hard drive self test 6 Security menu 5 selecting in the Setup Utility 2 starting the Setup Utility 1 System Configuration menu 6 system information 5 U using ...

Software Update, Backup and Recovery - Windows Vista
Page 6
... selection to your computer and access the BIOS update you need this information to locate the update later, after it has been downloaded to the hard drive. 2 Updating software Make a note of the date, name, or other system information is connected to know the version of the screen, press f10. 2.... computer: Select Start > Help and Support, and then click the link for software, driver, and BIOS updates. 2. Access the page on the HP Web site that is selected, BIOS and other identifier. To use the arrow keys to an optional power source. At the download area, follow these...
... selection to your computer and access the BIOS update you need this information to locate the update later, after it has been downloaded to the hard drive. 2 Updating software Make a note of the date, name, or other system information is connected to know the version of the screen, press f10. 2.... computer: Select Start > Help and Support, and then click the link for software, driver, and BIOS updates. 2. Access the page on the HP Web site that is selected, BIOS and other identifier. To use the arrow keys to an optional power source. At the download area, follow these...
Software Update, Backup and Recovery - Windows Vista
Page 7
....exe). NOTE: After a message on the screen reports a successful installation, you can delete the downloaded file from your hard drive that contains the update. 4. You will be downloaded. NOTE: If you connect your hard drive designation. Follow any software updates, especially system BIOS updates. Make a note of the path to the location on your...
....exe). NOTE: After a message on the screen reports a successful installation, you can delete the downloaded file from your hard drive that contains the update. 4. You will be downloaded. NOTE: If you connect your hard drive designation. Follow any software updates, especially system BIOS updates. Make a note of the path to the location on your...

Software Update, Backup and Recovery - Windows Vista
Page 8
..., and double-click the file to step 6. 3. If you may be able to download the driver and install it later. Click your hard drive. Click Install now to http://www.hp.com/support, and select your computer. Proceed to install. 7. NOTE: In some locations you want a specific SoftPaq, enter the SoftPaq number in... and driver downloads, type your operating system. 5. Select your computer model number in the Search box, press enter, and follow these steps: To use the HP Web site: 1.
..., and double-click the file to step 6. 3. If you may be able to download the driver and install it later. Click your hard drive. Click Install now to http://www.hp.com/support, and select your computer. Proceed to install. 7. NOTE: In some locations you want a specific SoftPaq, enter the SoftPaq number in... and driver downloads, type your operating system. 5. Select your computer model number in the Search box, press enter, and follow these steps: To use the HP Web site: 1.
Drives - Windows Vista
Page 3
... or DVD ...7 Creating or "burning" a CD or DVD ...7 Removing an optical disc (CD or DVD 8 3 Improving hard drive performance Using Disk Defragmenter ...9 Using Disk Cleanup ...9 4 Replacing the hard drive 5 Troubleshooting The optical disc tray does not open for removal of a CD or DVD 13 The computer does not detect the... optical drive 14 A disc does not play ...15 A disc does not play automatically ...16 The process of burning a disc does not begin, or it stops before completion 16 A device driver must be reinstalled ...17 Obtaining the latest HP device drivers 17 Obtaining ...
... or DVD ...7 Creating or "burning" a CD or DVD ...7 Removing an optical disc (CD or DVD 8 3 Improving hard drive performance Using Disk Defragmenter ...9 Using Disk Cleanup ...9 4 Replacing the hard drive 5 Troubleshooting The optical disc tray does not open for removal of a CD or DVD 13 The computer does not detect the... optical drive 14 A disc does not play ...15 A disc does not play automatically ...16 The process of burning a disc does not begin, or it stops before completion 16 A device driver must be reinstalled ...17 Obtaining the latest HP device drivers 17 Obtaining ...
Drives - Windows Vista
Page 8
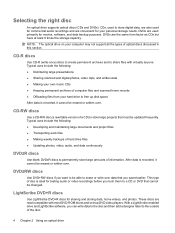
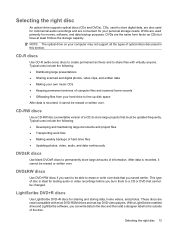
... LightScribe software, you want to be erased or written over. Selecting the right disc An optical drive supports optical discs (CDs and DVDs). NOTE: The optical drive on your hard drive to a CD or DVD that must be changed. Typical uses include the following : ● ...uses include the following : ● Developing and maintaining large documents and project files ● Transporting work files ● Making weekly backups of hard drive files ● Updating photos, video, audio, and data continuously DVD±R discs Use blank DVD±R discs to permanently store large amounts...
... LightScribe software, you want to be erased or written over. Selecting the right disc An optical drive supports optical discs (CDs and DVDs). NOTE: The optical drive on your hard drive to a CD or DVD that must be changed. Typical uses include the following : ● ...uses include the following : ● Developing and maintaining large documents and project files ● Transporting work files ● Making weekly backups of hard drive files ● Updating photos, video, audio, and data continuously DVD±R discs Use blank DVD±R discs to permanently store large amounts...
Drives - Windows Vista
Page 11
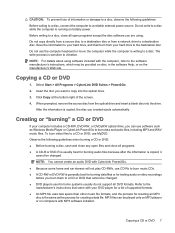
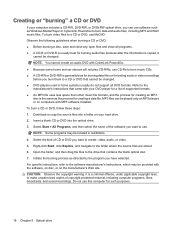
...after the information is running on the manufacturer's Web site. Do not copy directly from a source disc to a destination disc or from a network drive to vibration. Click Copy at the bottom right of the screen. 4. NOTE: For details about using . Select Start > All Programs > CyberLink...except the disc software you are using software included with your hard drive to a reliable external power source. Save the information to your hard drive, and then burn from the optical drive and insert a blank disc into the optical drive. 3. Copying a CD or DVD 1. After the information ...
...after the information is running on the manufacturer's Web site. Do not copy directly from a source disc to a destination disc or from a network drive to vibration. Click Copy at the bottom right of the screen. 4. NOTE: For details about using . Select Start > All Programs > CyberLink...except the disc software you are using software included with your hard drive to a reliable external power source. Save the information to your hard drive, and then burn from the optical drive and insert a blank disc into the optical drive. 3. Copying a CD or DVD 1. After the information ...
Drives - Windows Vista
Page 12
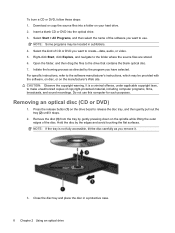
... Remove the disc (3) from the tray by the edges and avoid touching the flat surfaces. Right-click Start, click Explore, and navigate to the drive that contains the blank optical disc. 7. CAUTION: Observe the copyright warning. NOTE: If the tray is a criminal offense, under applicable copyright laws... this computer for such purposes. Close the disc tray and place the disc in subfolders. 4. Hold the disc by gently pressing down on your hard drive. 2. Insert a blank CD or DVD into a folder on the spindle while lifting the outer edges of the software you remove it stops. ...
... Remove the disc (3) from the tray by the edges and avoid touching the flat surfaces. Right-click Start, click Explore, and navigate to the drive that contains the blank optical disc. 7. CAUTION: Observe the copyright warning. NOTE: If the tray is a criminal offense, under applicable copyright laws... this computer for such purposes. Close the disc tray and place the disc in subfolders. 4. Hold the disc by gently pressing down on your hard drive. 2. Insert a blank CD or DVD into a folder on the spindle while lifting the outer edges of the software you remove it stops. ...
Drives - Windows Vista
Page 13
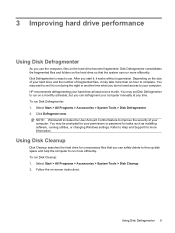
HP recommends defragmenting your computer. Select Start > All Programs > Accessories > System Tools > Disk Defragmenter. 2. NOTE: Windows® includes the User Account Control feature to improve the security of your hard drive at any time. To run Disk Defragmenter: 1. Disk Defragmenter is easy ... or password for tasks such as installing software, running utilities, or changing Windows settings. Using Disk Cleanup Disk Cleanup searches the hard drive for more efficiently. Select Start > All Programs > Accessories > System Tools > Disk Cleanup. 2. Depending on the size of...
HP recommends defragmenting your computer. Select Start > All Programs > Accessories > System Tools > Disk Defragmenter. 2. NOTE: Windows® includes the User Account Control feature to improve the security of your hard drive at any time. To run Disk Defragmenter: 1. Disk Defragmenter is easy ... or password for tasks such as installing software, running utilities, or changing Windows settings. Using Disk Cleanup Disk Cleanup searches the hard drive for more efficiently. Select Start > All Programs > Accessories > System Tools > Disk Cleanup. 2. Depending on the size of...
Drives - Windows Vista
Page 14
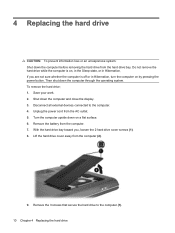
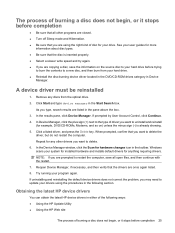
... 5. Then shut down the computer and close the display. 3. Lift the hard drive cover away from the hard drive bay. Shut down the computer through the operating system. With the hard drive bay toward you are not sure whether the computer is on, in the ...flat surface. 6. Remove the 3 screws that secure the hard drive to the computer. 4. To remove the hard drive: 1. Save your work. 2. Disconnect all external devices connected to the computer (1). 10 Chapter 4 Replacing the hard drive 4 Replacing the hard drive CAUTION: To prevent information loss or an unresponsive system: Shut...
... 5. Then shut down the computer and close the display. 3. Lift the hard drive cover away from the hard drive bay. Shut down the computer through the operating system. With the hard drive bay toward you are not sure whether the computer is on, in the ...flat surface. 6. Remove the 3 screws that secure the hard drive to the computer. 4. To remove the hard drive: 1. Save your work. 2. Disconnect all external devices connected to the computer (1). 10 Chapter 4 Replacing the hard drive 4 Replacing the hard drive CAUTION: To prevent information loss or an unresponsive system: Shut...
Drives - Windows Vista
Page 15
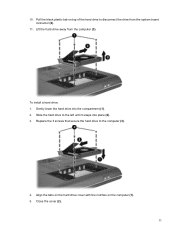
Close the cover (2). 11 To install a hard drive: 1. Align the tabs on the hard drive cover with the notches on top of the hard drive to the computer (3). 4. Lift the hard drive away from the system board connector (2). 11. Gently lower the hard drive into place (2). 3. Replace the 3 screws that secure the hard drive to disconnect the drive from the computer (3). Pull the black plastic tab on the computer (1). 5. Slide the hard drive to the left until it snaps into the compartment (1). 2. 10.
Close the cover (2). 11 To install a hard drive: 1. Align the tabs on the hard drive cover with the notches on top of the hard drive to the computer (3). 4. Lift the hard drive away from the system board connector (2). 11. Gently lower the hard drive into place (2). 3. Replace the 3 screws that secure the hard drive to disconnect the drive from the computer (3). Pull the black plastic tab on the computer (1). 5. Slide the hard drive to the left until it snaps into the compartment (1). 2. 10.

Drives - Windows Vista
Page 16
Tighten the 2 hard drive cover screws (3). 12 Chapter 4 Replacing the hard drive 6.
Tighten the 2 hard drive cover screws (3). 12 Chapter 4 Replacing the hard drive 6.
Drives - Windows Vista
Page 20
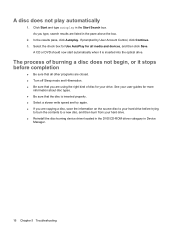
... 1. A CD or DVD should now start automatically when it stops before trying to burn the contents to your drive. See your hard drive. ● Reinstall the disc-burning device driver located in the DVD/CD-ROM drives category in Device Manager. 16 Chapter 5 Troubleshooting Click Start and type autoplay in the pane above the... information about disc types. ● Be sure that all media and devices, and then click Save. Select the check box for Use AutoPlay for your hard drive before completion ● Be sure that the disc is inserted into the optical...
... 1. A CD or DVD should now start automatically when it stops before trying to burn the contents to your drive. See your hard drive. ● Reinstall the disc-burning device driver located in the DVD/CD-ROM drives category in Device Manager. 16 Chapter 5 Troubleshooting Click Start and type autoplay in the pane above the... information about disc types. ● Be sure that all media and devices, and then click Save. Select the check box for Use AutoPlay for your hard drive before completion ● Be sure that the disc is inserted into the optical...
Drives - Windows Vista
Page 22
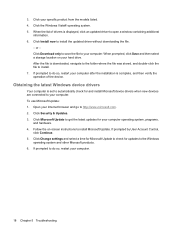
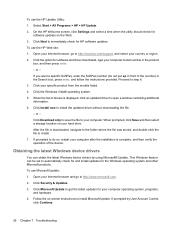
...® operating system. 5. When the list of the device. Obtaining the latest Windows device drivers Your computer is displayed, click an updated driver to your hard drive. Click Microsoft Update to the Windows operating system and other Microsoft products. 6. Follow the on your computer. Click Change settings and select a time for Microsoft...
...® operating system. 5. When the list of the device. Obtaining the latest Windows device drivers Your computer is displayed, click an updated driver to your hard drive. Click Microsoft Update to the Windows operating system and other Microsoft products. 6. Follow the on your computer. Click Change settings and select a time for Microsoft...
Drives - Windows Vista
Page 23
... copying 7 playing 5 removing 8 CD drive 3 CD, drive 2 copyright warning 6 D device drivers HP drivers 17 Windows drivers 18 Disk Cleanup software 9 Disk Defragmenter software 9 disk performance 9 drives caring for 1 hard 10, 11 optical 2 drives, optical drive 3 DVD burning 7, 16 changing region setting 6 copying 7 drive 2 playing 5 removing 8 DVD drive 3 H hard disk drive installing 11 removing 10 replacing 10 hard drive installing 11 removing 10 replacing...
... copying 7 playing 5 removing 8 CD drive 3 CD, drive 2 copyright warning 6 D device drivers HP drivers 17 Windows drivers 18 Disk Cleanup software 9 Disk Defragmenter software 9 disk performance 9 drives caring for 1 hard 10, 11 optical 2 drives, optical drive 3 DVD burning 7, 16 changing region setting 6 copying 7 drive 2 playing 5 removing 8 DVD drive 3 H hard disk drive installing 11 removing 10 replacing 10 hard drive installing 11 removing 10 replacing...
Multimedia - Windows Vista
Page 17
... CDs ● Keeping permanent archives of computer files and scanned home records ● Offloading files from your hard drive to permanently store large amounts of information. This type of hard drive files ● Updating photos, video, audio, and data continuously DVD±R discs Use blank DVD±R... discs to free up disk space After data is recorded, it cannot be changed. Selecting the right disc An optical drive supports optical discs (CDs...
... CDs ● Keeping permanent archives of computer files and scanned home records ● Offloading files from your hard drive to permanently store large amounts of information. This type of hard drive files ● Updating photos, video, audio, and data continuously DVD±R discs Use blank DVD±R... discs to free up disk space After data is recorded, it cannot be changed. Selecting the right disc An optical drive supports optical discs (CDs...
Multimedia - Windows Vista
Page 22
...then drag the files to a CD or DVD, use this computer for such purposes. 18 Chapter 5 Optical drive CAUTION: Observe the copyright warning. Observe the following guidelines when burning a CD or DVD: ● Before ...and audio files, including MP3 and WAV music files. Download or copy the source files into the optical drive. 3. Select Start > All Programs, and then select the name of supported formats. ● An ...disc, or on your computer includes a CD-RW, DVD-RW, or DVD±RW optical drive, you burn them to the folder where the source files are stored. 6. Initiate the burning ...
...then drag the files to a CD or DVD, use this computer for such purposes. 18 Chapter 5 Optical drive CAUTION: Observe the copyright warning. Observe the following guidelines when burning a CD or DVD: ● Before ...and audio files, including MP3 and WAV music files. Download or copy the source files into the optical drive. 3. Select Start > All Programs, and then select the name of supported formats. ● An ...disc, or on your computer includes a CD-RW, DVD-RW, or DVD±RW optical drive, you burn them to the folder where the source files are stored. 6. Initiate the burning ...
Multimedia - Windows Vista
Page 29
...HP Web site The process of burning a disc does not begin , or it stops before completion 25 Reopen Device Manager, if necessary, and then verify that the drivers are using the procedures in the toolbar. Try running your system for installed hardware and installs default drivers for your hard drive.... ● Reinstall the disc-burning device driver located in the DVD/CD-ROM drives category in either of disc for anything requiring drivers. Click a listed driver,...
...HP Web site The process of burning a disc does not begin , or it stops before completion 25 Reopen Device Manager, if necessary, and then verify that the drivers are using the procedures in the toolbar. Try running your system for installed hardware and installs default drivers for your hard drive.... ● Reinstall the disc-burning device driver located in the DVD/CD-ROM drives category in either of disc for anything requiring drivers. Click a listed driver,...
Multimedia - Windows Vista
Page 30
...system. 5. Click Install now to immediately check for HP software updates. Click Download only to save the file to your Internet browser and go to get the latest updates for software and driver downloads, type your hard drive. Open your computer. If prompted by using Microsoft®...; Update. Select Start > All Programs > HP > HP Update. 2. Click Next to install the updated driver without downloading the file. - Click...
...system. 5. Click Install now to immediately check for HP software updates. Click Download only to save the file to your Internet browser and go to get the latest updates for software and driver downloads, type your hard drive. Open your computer. If prompted by using Microsoft®...; Update. Select Start > All Programs > HP > HP Update. 2. Click Next to install the updated driver without downloading the file. - Click...


