Compaq Presario CQ35 and CQ36 Notebook PC - Maintenance and Service Guide
Page 20
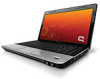
... control (provided with select models only). Connect optional USB devices. Produces sound when connected to optical discs. Blinking: The hard drive or optical drive is being accessed. Blinking: The drive is being accessed. External component identification Front components Item Component (1) Power light (2) Battery light (3) Drive light (4) Consumer infrared lens (5) Audio-in the computer are fully charged. Connects an optional computer headset microphone, stereo array microphone, or monaural microphone. Item (1) (2) Component Power connector AC adapter light (3) USB ports...
... control (provided with select models only). Connect optional USB devices. Produces sound when connected to optical discs. Blinking: The hard drive or optical drive is being accessed. Blinking: The drive is being accessed. External component identification Front components Item Component (1) Power light (2) Battery light (3) Drive light (4) Consumer infrared lens (5) Audio-in the computer are fully charged. Connects an optional computer headset microphone, stereo array microphone, or monaural microphone. Item (1) (2) Component Power connector AC adapter light (3) USB ports...
Compaq Presario CQ35 and CQ36 Notebook PC - Maintenance and Service Guide
Page 59
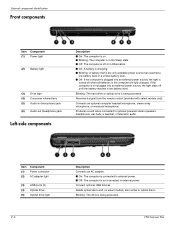
... computer models: 2-GB memory module (PC2-6400, 800-MHz, DDR2) 1-GB memory module (PC2-6400, 800-MHz, DDR2) For use only with a notch 3 to prevent incorrect insertion into the memory module slot. Shut down through the operating system. 2. Remove the hard drive cover (see "Battery" on page 8). Remove the battery (see "Hard drive" on page 7). 5. Reverse this procedure to release the memory module. (The edge of the memory module to install a memory module. 4-11 Disconnect all external devices connected...
... computer models: 2-GB memory module (PC2-6400, 800-MHz, DDR2) 1-GB memory module (PC2-6400, 800-MHz, DDR2) For use only with a notch 3 to prevent incorrect insertion into the memory module slot. Shut down through the operating system. 2. Remove the hard drive cover (see "Battery" on page 8). Remove the battery (see "Hard drive" on page 7). 5. Reverse this procedure to release the memory module. (The edge of the memory module to install a memory module. 4-11 Disconnect all external devices connected...
Compaq Presario CQ35 and CQ36 Notebook PC - Maintenance and Service Guide
Page 104
...; USB CD/DVD ROM drive ❐ USB floppy ❐ Network adapter Diagnostics menu Select Hard Disk Self Test Secondary Hard Disk Self Test (select models only) Memory Test To Do This Run a comprehensive self-test on the system memory. 5-4 Setup Utility System Configuration menu Select Language Support Button Sound (select models only) Virtualization Technology Processor C6 State (select models only) LAN Power Saving (select models only) Card Reader/1394 Power Saving (select models only) Fan Always On Boot Options To Do This Change the Setup Utility language. Enable/disable...
...; USB CD/DVD ROM drive ❐ USB floppy ❐ Network adapter Diagnostics menu Select Hard Disk Self Test Secondary Hard Disk Self Test (select models only) Memory Test To Do This Run a comprehensive self-test on the system memory. 5-4 Setup Utility System Configuration menu Select Language Support Button Sound (select models only) Virtualization Technology Processor C6 State (select models only) LAN Power Saving (select models only) Card Reader/1394 Power Saving (select models only) Fan Always On Boot Options To Do This Change the Setup Utility language. Enable/disable...
Compaq Presario CQ35 and CQ36 Notebook PC - Maintenance and Service Guide
Page 149
... part number 3-24 Bluetooth module removal 4-39 spare part number 3-4, 3-17, 3-23, 4-39 Bluetooth module cable, spare part number 3-4, 3-22, 4-39 Blu-ray ROM DVD±R/RW SuperMulti DL Drive precautions 4-2 removal 3-22, 4-20 spare part number 3-25 spare part numbers 3-6, 3-16, 3-22, 4-20 specifications 6-4 boot options 5-4 boot order 5-4 bottom components 2-8 button components 2-2 button sound 5-4 buttons power 2-2 TouchPad 2-5 TouchPad on/off 2-5 volume mute 2-2 wireless 2-2 C cables, service considerations 4-1 caps lock light 2-4 Card Reader Power Saving 5-4 changing the Setup Utility...
... part number 3-24 Bluetooth module removal 4-39 spare part number 3-4, 3-17, 3-23, 4-39 Bluetooth module cable, spare part number 3-4, 3-22, 4-39 Blu-ray ROM DVD±R/RW SuperMulti DL Drive precautions 4-2 removal 3-22, 4-20 spare part number 3-25 spare part numbers 3-6, 3-16, 3-22, 4-20 specifications 6-4 boot options 5-4 boot order 5-4 bottom components 2-8 button components 2-2 button sound 5-4 buttons power 2-2 TouchPad 2-5 TouchPad on/off 2-5 volume mute 2-2 wireless 2-2 C cables, service considerations 4-1 caps lock light 2-4 Card Reader Power Saving 5-4 changing the Setup Utility...
Compaq Presario CQ35 and CQ36 Notebook PC - Maintenance and Service Guide
Page 152
... panel 1-2 Ethernet 1-4 external media card 1-4 graphics 1-2 hard drive 1-3 keyboard 1-5 memory 1-3 microphone 1-4 operating system 1-6 optical drive 1-3 pointing device 1-5 ports 1-5 power requirements 1-5 processor 1-1 security 1-5 serviceability 1-6 webcam 1-4 wireless 1-4 product name 1-1, 3-1, 4-5 R recovering a program or driver 8-1 recovering from the dedicated recovery partition 8-4 recovering from the recovery discs 8-4 recovery discs 8-1, 8-5 Recovery Manager 8-1, 8-4 recovery partition 8-1 recovery, system 8-1, 8-4 recycling battery 11-1 display components 11-1 removal/replacement...
... panel 1-2 Ethernet 1-4 external media card 1-4 graphics 1-2 hard drive 1-3 keyboard 1-5 memory 1-3 microphone 1-4 operating system 1-6 optical drive 1-3 pointing device 1-5 ports 1-5 power requirements 1-5 processor 1-1 security 1-5 serviceability 1-6 webcam 1-4 wireless 1-4 product name 1-1, 3-1, 4-5 R recovering a program or driver 8-1 recovering from the dedicated recovery partition 8-4 recovering from the recovery discs 8-4 recovery discs 8-1, 8-5 Recovery Manager 8-1, 8-4 recovery partition 8-1 recovery, system 8-1, 8-4 recycling battery 11-1 display components 11-1 removal/replacement...
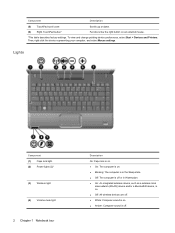
User Guide - Windows 7
Page 12
...: An integrated wireless device, such as a wireless local area network (WLAN) device and/or a Bluetooth® device, is on. ● Off: All wireless devices are off. ● White: Computer sound is off. Component Description (5) TouchPad scroll zone Scrolls up or down. (6) Right TouchPad button* Functions like the right button on . ● Amber: Computer sound is on an external mouse. *This table describes factory settings. To view and change pointing device preferences, select Start > Devices and Printers.
...: An integrated wireless device, such as a wireless local area network (WLAN) device and/or a Bluetooth® device, is on. ● Off: All wireless devices are off. ● White: Computer sound is off. Component Description (5) TouchPad scroll zone Scrolls up or down. (6) Right TouchPad button* Functions like the right button on . ● Amber: Computer sound is on an external mouse. *This table describes factory settings. To view and change pointing device preferences, select Start > Devices and Printers.
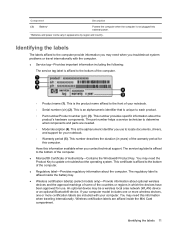
User Guide - Windows 7
Page 21
... use to locate documents, drivers, and support for this information available when you may be a wireless local area network (WLAN) device or an optional Bluetooth® device. Have this computer. You may need the Product Key to update or troubleshoot the operating system. If your computer. Identifying the labels 11 The service tag label is unique to the bottom of Authenticity-Contains the Windows® Product Key. An optional device...
... use to locate documents, drivers, and support for this information available when you may be a wireless local area network (WLAN) device or an optional Bluetooth® device. Have this computer. You may need the Product Key to update or troubleshoot the operating system. If your computer. Identifying the labels 11 The service tag label is unique to the bottom of Authenticity-Contains the Windows® Product Key. An optional device...
User Guide - Windows 7
Page 36
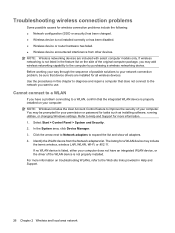
... not have a problem connecting to a WLAN, confirm that the integrated WLAN device is not installed correctly or has been disabled. ● Wireless device or router hardware has failed. ● Wireless device encountered interference from the Network adapters list. Troubleshooting wireless connection problems Some possible causes for wireless connection problems include the following: ● Network configuration (SSID or security) has been changed. ● Wireless device is properly installed on your computer: NOTE: Windows includes the User Account Control feature to...
... not have a problem connecting to a WLAN, confirm that the integrated WLAN device is not installed correctly or has been disabled. ● Wireless device or router hardware has failed. ● Wireless device encountered interference from the Network adapters list. Troubleshooting wireless connection problems Some possible causes for wireless connection problems include the following: ● Network configuration (SSID or security) has been changed. ● Wireless device is properly installed on your computer: NOTE: Windows includes the User Account Control feature to...
User Guide - Windows 7
Page 40
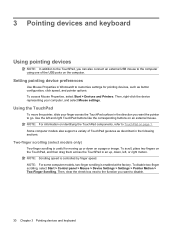
.... Some computer models also support a variety of the USB ports on an external mouse. NOTE: Scrolling speed is enabled at the factory. To disable two-finger scrolling, select Start > Control panel > Mouse > Device Settings > Settings > Pointer Motion > Two-Finger Scrolling. To scroll, place two fingers on a page or image. Using the TouchPad To move the pointer, slide your computer, and select Mouse settings. Two-finger scrolling (select models only) Two-finger scrolling is useful for pointing devices, such as...
.... Some computer models also support a variety of the USB ports on an external mouse. NOTE: Scrolling speed is enabled at the factory. To disable two-finger scrolling, select Start > Control panel > Mouse > Device Settings > Settings > Pointer Motion > Two-Finger Scrolling. To scroll, place two fingers on a page or image. Using the TouchPad To move the pointer, slide your computer, and select Mouse settings. Two-finger scrolling (select models only) Two-finger scrolling is useful for pointing devices, such as...
User Guide - Windows 7
Page 42
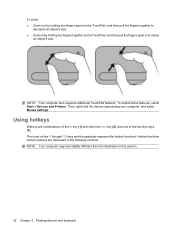
... from the illustration in the following sections. To enable these features, select Start > Devices and Printers. Using hotkeys Hotkeys are discussed in this section. 32 Chapter 3 Pointing devices and keyboard NOTE: Your computer also supports additional TouchPad features. Hotkey functions and procedures are combinations of the fn key (1) and either the esc key (2), and one of the function keys (3). To pinch: ● Zoom out by holding...
... from the illustration in the following sections. To enable these features, select Start > Devices and Printers. Using hotkeys Hotkeys are discussed in this section. 32 Chapter 3 Pointing devices and keyboard NOTE: Your computer also supports additional TouchPad features. Hotkey functions and procedures are combinations of the fn key (1) and either the esc key (2), and one of the function keys (3). To pinch: ● Zoom out by holding...
User Guide - Windows 7
Page 63
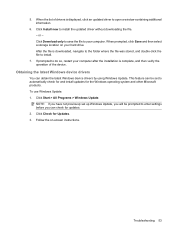
... hard drive. Troubleshooting 53 5. or - After the file is displayed, click an updated driver to automatically check for and install updates for Updates. 3. Click Start > All Programs > Windows Update. Click Check for the Windows operating system and other Microsoft products. Click Download only to save the file to install. 7. Follow the on your computer. When the list of the device. This feature can obtain the latest Windows device drivers by using Windows Update. Click Install...
... hard drive. Troubleshooting 53 5. or - After the file is displayed, click an updated driver to automatically check for and install updates for Updates. 3. Click Start > All Programs > Windows Update. Click Check for the Windows operating system and other Microsoft products. Click Download only to save the file to install. 7. Follow the on your computer. When the list of the device. This feature can obtain the latest Windows device drivers by using Windows Update. Click Install...
User Guide - Windows 7
Page 74
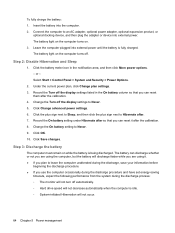
... the battery is fully charged. Change the On battery setting to an AC adapter, optional power adapter, optional expansion product, or optional docking device, and then plug the adapter or device into the computer. 2. Connect the computer to Never. 9. or - The battery light on the computer turns on. 3. Step 2: Disable Hibernation and Sleep 1. Click Change advanced power settings. 6. Click OK. 10. Insert the battery into external power. The battery can discharge whether or not you are using the...
... the battery is fully charged. Change the On battery setting to an AC adapter, optional power adapter, optional expansion product, or optional docking device, and then plug the adapter or device into the computer. 2. Connect the computer to Never. 9. or - The battery light on the computer turns on. 3. Step 2: Disable Hibernation and Sleep 1. Click Change advanced power settings. 6. Click OK. 10. Insert the battery into external power. The battery can discharge whether or not you are using the...

User Guide - Windows 7
Page 75
... network (LAN) connections and exit modem applications when you are not using them. ● Disconnect external devices that are not using them. ● Stop, disable, or remove any external media cards that you are not plugged into external power and maintain external power until the battery is discharged, the battery light turns off . When the battery is discharged. Select Start > Control Panel > System and Security > Power Options. 2. Reenter the settings that you recorded for On battery. 7. Click Save changes...
... network (LAN) connections and exit modem applications when you are not using them. ● Disconnect external devices that are not using them. ● Stop, disable, or remove any external media cards that you are not plugged into external power and maintain external power until the battery is discharged, the battery light turns off . When the battery is discharged. Select Start > Control Panel > System and Security > Power Options. 2. Reenter the settings that you recorded for On battery. 7. Click Save changes...
User Guide - Windows 7
Page 86
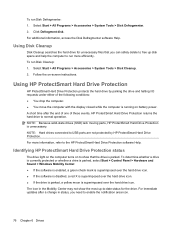
..., select Start > Control Panel > Hardware and Sound > Windows Mobility Center: ● If the software is enabled, a green check mark is superimposed over the hard drive icon. ● If the software is disabled, a red X is superimposed over the hard drive icon. The icon in status, you can safely delete to free up -to show that the drive is unnecessary. For additional information, access the Disk Defragmenter software Help. Follow the on battery power...
..., select Start > Control Panel > Hardware and Sound > Windows Mobility Center: ● If the software is enabled, a green check mark is superimposed over the hard drive icon. ● If the software is disabled, a red X is superimposed over the hard drive icon. The icon in status, you can safely delete to free up -to show that the drive is unnecessary. For additional information, access the Disk Defragmenter software Help. Follow the on battery power...

User Guide - Windows 7
Page 126
... utilities, or changing Windows settings. NOTE: Windows® includes the User Account Control feature to improve the security of this guide: 1. If your computer model, product category, and series or family. To update the software, follow these steps, which contains information regarding installing and troubleshooting the file. Refer to a network, consult the network administrator before installing any software updates, especially system BIOS updates. NOTE: The computer system BIOS is connected to Help and Support...
... utilities, or changing Windows settings. NOTE: Windows® includes the User Account Control feature to improve the security of this guide: 1. If your computer model, product category, and series or family. To update the software, follow these steps, which contains information regarding installing and troubleshooting the file. Refer to a network, consult the network administrator before installing any software updates, especially system BIOS updates. NOTE: The computer system BIOS is connected to Help and Support...
User Guide - Windows 7
Page 127
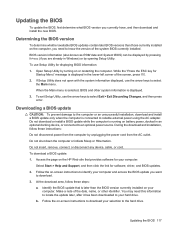
... by turning on the computer, you need this information to locate the update later, after it has been downloaded to select Exit > Exit Discarding Changes, and then press enter. To download a BIOS update: 1. If Setup Utility does not open with the system information displayed, use the arrow keys to your computer and access the BIOS update you currently have, and then download and install the new BIOS. Do not insert, remove, connect, or disconnect any device, cable...
... by turning on the computer, you need this information to locate the update later, after it has been downloaded to select Exit > Exit Discarding Changes, and then press enter. To download a BIOS update: 1. If Setup Utility does not open with the system information displayed, use the arrow keys to your computer and access the BIOS update you currently have, and then download and install the new BIOS. Do not insert, remove, connect, or disconnect any device, cable...
User Guide - Windows 7
Page 129
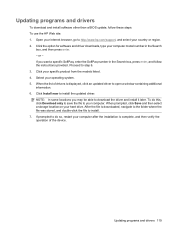
... able to http://www.hp.com/support, and select your computer after the installation is displayed, click an updated driver to open a window containing additional information. 6. Select your hard drive. NOTE: In some locations you want a specific SoftPaq, enter the SoftPaq number in the Search box, and then press enter. - When the list of drivers is complete, and then verify the operation of the device. When prompted, click Save...
... able to http://www.hp.com/support, and select your computer after the installation is displayed, click an updated driver to open a window containing additional information. 6. Select your hard drive. NOTE: In some locations you want a specific SoftPaq, enter the SoftPaq number in the Search box, and then press enter. - When the list of drivers is complete, and then verify the operation of the device. When prompted, click Save...
User Guide - Windows 7
Page 130
... ROM with LightScribe DVD ±R/RW SuperMulti DL Drive 70 Bluetooth device 14, 25 Bluetooth label 11 boot options 115 boot order 115 button sound 114 buttons power 4 TouchPad 1 TouchPad on/off 1 volume mute 4, 40 volume scroll zone 40 wireless 4 C cables eSATA 83 LAN 29 USB 81 caps lock light, identifying 2 Card Reader Power Saving 114 CD burning 74 copying 74 playing 72 removing 75 CD drive 69 Certificate of Authenticity label 11 charging batteries 61, 63 checking audio functions 43 compartments hard drive 8 memory module 8 wireless module 8 components additional hardware...
... ROM with LightScribe DVD ±R/RW SuperMulti DL Drive 70 Bluetooth device 14, 25 Bluetooth label 11 boot options 115 boot order 115 button sound 114 buttons power 4 TouchPad 1 TouchPad on/off 1 volume mute 4, 40 volume scroll zone 40 wireless 4 C cables eSATA 83 LAN 29 USB 81 caps lock light, identifying 2 Card Reader Power Saving 114 CD burning 74 copying 74 playing 72 removing 75 CD drive 69 Certificate of Authenticity label 11 charging batteries 61, 63 checking audio functions 43 compartments hard drive 8 memory module 8 wireless module 8 components additional hardware...
User Guide - Windows 7
Page 131
... 88 ExpressCard slot, identifying 6 external audio devices, connecting 43 external monitor port 45 external monitor port, identifying 7 F fan always on 115 fingerprint reader 106 fingerprint reader location 107 fingerprint reader, identifying 4 firewall 18 firewall software, using 104 fn key 32 fn key, identifying 5 function keys 32 function keys, identifying 5 H hard disk drive HP ProtectSmart Hard Drive Protection 76 installing 79 removing 78 replacing 77 hard drive HP ProtectSmart Hard Drive Protection 76 installing 79 removing 78 replacing 77 Hard drive bay, identifying 8 hard drive self...
... 88 ExpressCard slot, identifying 6 external audio devices, connecting 43 external monitor port 45 external monitor port, identifying 7 F fan always on 115 fingerprint reader 106 fingerprint reader location 107 fingerprint reader, identifying 4 firewall 18 firewall software, using 104 fn key 32 fn key, identifying 5 function keys 32 function keys, identifying 5 H hard disk drive HP ProtectSmart Hard Drive Protection 76 installing 79 removing 78 replacing 77 hard drive HP ProtectSmart Hard Drive Protection 76 installing 79 removing 78 replacing 77 Hard drive bay, identifying 8 hard drive self...
User Guide - Windows 7
Page 133
... 100 restoring default settings 112 selecting 111 starting 110 Setup Utility, passwords set in 100 shutdown 66 shutting down 66 SIM inserting 20 removing 23 SIM label 12 Sleep exiting 54 initiating 54 slots Digital Media 6 ExpressCard 6 memory module 8 security cable 7 software Disk Cleanup 76 Disk Defragmenter 75 using 42 Wireless Assistant 15 software, updating 116 solid-state drive (SSD) 68 speakers 39 storing battery 66 SuperMulti LightScribe DVD±RW and CD-RW Combo Drive with DL support...
... 100 restoring default settings 112 selecting 111 starting 110 Setup Utility, passwords set in 100 shutdown 66 shutting down 66 SIM inserting 20 removing 23 SIM label 12 Sleep exiting 54 initiating 54 slots Digital Media 6 ExpressCard 6 memory module 8 security cable 7 software Disk Cleanup 76 Disk Defragmenter 75 using 42 Wireless Assistant 15 software, updating 116 solid-state drive (SSD) 68 speakers 39 storing battery 66 SuperMulti LightScribe DVD±RW and CD-RW Combo Drive with DL support...


