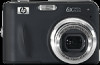
Quick Start Guide
Page 3
..............10 Install the software 11 Windows 11 Macintosh 12 3 Taking pictures and recording video clips Take a picture 13 Record a video clip 13 4 Reviewing and deleting images and video clips Review images and video clips 15 Delete an image 15 5 Transferring and printing images Transfer images 16 Print images from the camera 16...
..............10 Install the software 11 Windows 11 Macintosh 12 3 Taking pictures and recording video clips Take a picture 13 Record a video clip 13 4 Reviewing and deleting images and video clips Review images and video clips 15 Delete an image 15 5 Transferring and printing images Transfer images 16 Print images from the camera 16...

Quick Start Guide
Page 15
... deleting images and video clips Review images and video clips You can delete individual images during Playback: 1. NOTE: To hear audio associated with video clips, transfer them to scroll through your ... of the clip appears on the Image Display. Use to select This Image from the menu, then press . Delete Reviewing and deleting images and video clips 15 Delete an image You can review images and video clips in Playback. 1. Use to select an image or video clip. 3. Use to your images and...
... deleting images and video clips Review images and video clips You can delete individual images during Playback: 1. NOTE: To hear audio associated with video clips, transfer them to scroll through your ... of the clip appears on the Image Display. Use to select This Image from the menu, then press . Delete Reviewing and deleting images and video clips 15 Delete an image You can review images and video clips in Playback. 1. Use to select an image or video clip. 3. Use to your images and...

Quick Start Guide
Page 18
...; Shooting Mode (Auto, Close-up, Super Close-up, Steady Photo, Theatre, Landscape, Portrait, Action, Night Portrait, Sunset) • Self-Timer 18 HP Photosmart Mz60 series Digital Camera Camera Menus Menus allow you review and delete images and video clips. English 6 Camera quick reference Use this menu, slide to , then press . To activate Video Record...
...; Shooting Mode (Auto, Close-up, Super Close-up, Steady Photo, Theatre, Landscape, Portrait, Action, Night Portrait, Sunset) • Self-Timer 18 HP Photosmart Mz60 series Digital Camera Camera Menus Menus allow you review and delete images and video clips. English 6 Camera quick reference Use this menu, slide to , then press . To activate Video Record...

Quick Start Guide
Page 20
... • Using Design Gallery • Using Photosmart Express • Printing Images • Recording Video Clips • Reviewing Pictures and Videos • Tagging Favorites • Deleting Images • Transferring Images • Managing Batteries • Getting Assistance • Tour Camera Features • Camera Shortcuts • About 20 HP Photosmart Mz60 series Digital Camera You can select from...
... • Using Design Gallery • Using Photosmart Express • Printing Images • Recording Video Clips • Reviewing Pictures and Videos • Tagging Favorites • Deleting Images • Transferring Images • Managing Batteries • Getting Assistance • Tour Camera Features • Camera Shortcuts • About 20 HP Photosmart Mz60 series Digital Camera You can select from...
User Guide
Page 3
... memory card 6 Install the software...6 Using your camera...7 2 Taking pictures and recording video clips Taking pictures...8 Recording video clips...9 Instant Review...9 Auto focus and exposure...9 Focusing on the subject...10 Optimizing focus...10 Using Focus Lock...11 Optimizing exposure...11 Using zoom...11 Optical ......13 Using the Picture Capture and Video Record menus 14 Using the Self-Timer setting 15 Using the Burst setting...15 4 Reviewing images and video clips Deleting images...18 Viewing thumbnails...18 Magnifying images...18 Using the Playback Menu...18 Removing red eyes...19...
... memory card 6 Install the software...6 Using your camera...7 2 Taking pictures and recording video clips Taking pictures...8 Recording video clips...9 Instant Review...9 Auto focus and exposure...9 Focusing on the subject...10 Optimizing focus...10 Using Focus Lock...11 Optimizing exposure...11 Using zoom...11 Optical ......13 Using the Picture Capture and Video Record menus 14 Using the Self-Timer setting 15 Using the Burst setting...15 4 Reviewing images and video clips Deleting images...18 Viewing thumbnails...18 Magnifying images...18 Using the Playback Menu...18 Removing red eyes...19...

User Guide
Page 5
... flash" on page 13). 6 selector-Switches between Picture Capture, Video Record, and Playback (see "Taking pictures" on page 8, "Recording video clips" on page 9, and "Reviewing images and video clips" on page 17). 7 Zoom lever-Accesses / Zoom (see "Using zoom" on page 11), Thumbnails (see "Viewing thumbnails" on page 18), and... actions. 11 Back button-Returns you to back out of all menus. 12 Image Display. 1 Getting started 3 Accesses the flash settings while in Instant Review (see "Instant Review" on page 9) and Playback (see "Magnifying images" on page 18). 5 Flash button-
... flash" on page 13). 6 selector-Switches between Picture Capture, Video Record, and Playback (see "Taking pictures" on page 8, "Recording video clips" on page 9, and "Reviewing images and video clips" on page 17). 7 Zoom lever-Accesses / Zoom (see "Using zoom" on page 11), Thumbnails (see "Viewing thumbnails" on page 18), and... actions. 11 Back button-Returns you to back out of all menus. 12 Image Display. 1 Getting started 3 Accesses the flash settings while in Instant Review (see "Instant Review" on page 9) and Playback (see "Magnifying images" on page 18). 5 Flash button-

User Guide
Page 9
..., and Playback, slide to the desired option. You may change settings so the HP Photosmart Software starts automatically when you can take and review pictures and video clips. Macintosh: 1. Using your CD drive, then click OK. 3. Windows: 1. Insert the HP Photosmart Software CD into the CD drive and follow the on the computer desktop. 3. Once...
..., and Playback, slide to the desired option. You may change settings so the HP Photosmart Software starts automatically when you can take and review pictures and video clips. Macintosh: 1. Using your CD drive, then click OK. 3. Windows: 1. Insert the HP Photosmart Software CD into the CD drive and follow the on the computer desktop. 3. Once...

User Guide
Page 11
... clips You can record a video clip when the camera is locked (see "Auto focus and exposure" on page 9). 4. Slide to measure focus and exposure. Instant Review After you want to begin recording video. 5. Press the Shutter button all the way down to . 2. If you have taken a picture or recorded a video clip...
... clips You can record a video clip when the camera is locked (see "Auto focus and exposure" on page 9). 4. Slide to measure focus and exposure. Instant Review After you want to begin recording video. 5. Press the Shutter button all the way down to . 2. If you have taken a picture or recorded a video clip...

User Guide
Page 17
... after pressing the Shutter button. 1. Using the Burst setting Burst allows you are not available in Instant Review (see "Deleting images" on page 31). To delete individual images, see "Instant Review" on the image. • Date Only-Date permanently imprinted. • Date & Time-Date and ... camera on a tripod or stable surface, then press the Shutter button all the way down until it . Frame the subject in Instant Review. You can delete the entire burst sequence in the Image Display. 4. Press the Shutter button halfway down to take up to three pictures...
... after pressing the Shutter button. 1. Using the Burst setting Burst allows you are not available in Instant Review (see "Deleting images" on page 31). To delete individual images, see "Instant Review" on the image. • Date Only-Date permanently imprinted. • Date & Time-Date and ... camera on a tripod or stable surface, then press the Shutter button all the way down until it . Frame the subject in Instant Review. You can delete the entire burst sequence in the Image Display. 4. Press the Shutter button halfway down to take up to three pictures...

User Guide
Page 19
... (see "Buying prints online" on page 29). 7 Number of electronic Photosmart Share destinations (see "Using 1 HP Photosmart Express" on page 27). 8 Number of stored images and video clips. 5 Image tagged as Favorite (see "Tagging images as described here. Slide to view video clips; Reviewing images and video clips 17 Use to scroll through your...
... (see "Buying prints online" on page 29). 7 Number of electronic Photosmart Share destinations (see "Using 1 HP Photosmart Express" on page 27). 8 Number of stored images and video clips. 5 Image tagged as Favorite (see "Tagging images as described here. Slide to view video clips; Reviewing images and video clips 17 Use to scroll through your...

User Guide
Page 20
... 2x. 2. Use and to change the magnification. 4. Using the Playback Menu 1. While in Playback, press (same as Favorites. Use and to highlight an option. 18 Reviewing images and video clips Press to Playback. Press . 2. Use to scroll through the thumbnails. 3. Chapter 4 Deleting images To delete a displayed image during Playback: 1. While in...
... 2x. 2. Use and to change the magnification. 4. Using the Playback Menu 1. While in Playback, press (same as Favorites. Use and to highlight an option. 18 Reviewing images and video clips Press to Playback. Press . 2. Use to scroll through the thumbnails. 3. Chapter 4 Deleting images To delete a displayed image during Playback: 1. While in...

User Guide
Page 22
...untag the image as a Favorite. 2. Viewing slideshows Select View Slideshow to configure and run a slideshow of time each additional image you have the HP Photosmart Software installed on your computer (see "Transferring and printing images" on the camera Image Display. This Image is shown: 2 secs, 5 secs...Default), 10 secs, 15 secs, 60 secs. • Loop-Specifies how often the slideshow repeats: Once (Default), 2x, 3x, Continuous. 20 Reviewing images and video clips From the View Slideshow menu, use to display an image you want to tag as a Favorite, use to your computer,...
...untag the image as a Favorite. 2. Viewing slideshows Select View Slideshow to configure and run a slideshow of time each additional image you have the HP Photosmart Software installed on your computer (see "Transferring and printing images" on the camera Image Display. This Image is shown: 2 secs, 5 secs...Default), 10 secs, 15 secs, 60 secs. • Loop-Specifies how often the slideshow repeats: Once (Default), 2x, 3x, Continuous. 20 Reviewing images and video clips From the View Slideshow menu, use to display an image you want to tag as a Favorite, use to your computer,...

User Guide
Page 25
... off during the transfer process or it takes to turn on your camera, to review images, and to a printer and/or the Internet. 2. When you connect your camera to a computer with the HP Photosmart Software installed: • If you through the transfer process. Transferring and printing images...computer indicates that came with the images to your camera batteries are automatically sent to their destinations. • If you have installed the HP Photosmart Software (see "Install the software" on page 6), use an optional memory card reader. If you have marked images to buy as ...
... off during the transfer process or it takes to turn on your camera, to review images, and to a printer and/or the Internet. 2. When you connect your camera to a computer with the HP Photosmart Software installed: • If you through the transfer process. Transferring and printing images...computer indicates that came with the images to your camera batteries are automatically sent to their destinations. • If you have installed the HP Photosmart Software (see "Install the software" on page 6), use an optional memory card reader. If you have marked images to buy as ...

User Guide
Page 35
... have to recharge the NiMH batteries frequently. 33 Transfer images from the camera to your computer (see "Transferring and printing images" on page 23) and review them . • For tips on conserving battery life, see "Extending battery life" on if you have timed out. if the camera works, replace the memory...
... have to recharge the NiMH batteries frequently. 33 Transfer images from the camera to your computer (see "Transferring and printing images" on page 23) and review them . • For tips on conserving battery life, see "Extending battery life" on if you have timed out. if the camera works, replace the memory...

User Guide
Page 37
... and format an optional memory card" on page 32). The video is off, or the camera seems stuck and won't operate. • Slide to review images. • Power-on time in this camera, which supports High Capacity Secure Digital cards. • Your memory card may be defective. Replace your... with a faster card. It takes a long time to keep, then format the memory card (see "Transferring and printing images" on page 23) and review them . The camera responds sluggishly when trying to a different position or press any data on the memory card that you can store 2000 images regardless...
... and format an optional memory card" on page 32). The video is off, or the camera seems stuck and won't operate. • Slide to review images. • Power-on time in this camera, which supports High Capacity Secure Digital cards. • Your memory card may be defective. Replace your... with a faster card. It takes a long time to keep, then format the memory card (see "Transferring and printing images" on page 23) and review them . The camera responds sluggishly when trying to a different position or press any data on the memory card that you can store 2000 images regardless...
User Guide
Page 40
... best from your warranty. Support options and fees vary by phone. Extending or upgrading your HP product, consult the following standard HP support offerings: 1. Consult the product documentation. • Review "Troubleshooting" on your digital camera, including links to helpful websites and an overview of the... Help screens. 2. If you already purchased an HP Care Pack Service, please check the support conditions on page 32 in this document. • Review the electronic Help section within the software. • Refer to all HP customers. 10 Product support Use this section to find...
... best from your warranty. Support options and fees vary by phone. Extending or upgrading your HP product, consult the following standard HP support offerings: 1. Consult the product documentation. • Review "Troubleshooting" on your digital camera, including links to helpful websites and an overview of the... Help screens. 2. If you already purchased an HP Care Pack Service, please check the support conditions on page 32 in this document. • Review the electronic Help section within the software. • Refer to all HP customers. 10 Product support Use this section to find...

User Guide
Page 46
...3 focal length 42 focus auto focus 9 brackets 9 focus lock 11 optimizing 10 format memory card 6 G getting assistance 38 H HP Photosmart Express 27 HP Photosmart Software 6 I Image Display 3 Image Quality 14, 43 images Date & Time Imprint 15 Image Quality 14 magnifying 18 number remaining 8... sending 30 transfer to computer 23 install memory card 6 install software 6 Instant Review 9, 15 interfaces 43 internal memory 8, 43 L Landscape mode 14 Language...
...3 focal length 42 focus auto focus 9 brackets 9 focus lock 11 optimizing 10 format memory card 6 G getting assistance 38 H HP Photosmart Express 27 HP Photosmart Software 6 I Image Display 3 Image Quality 14, 43 images Date & Time Imprint 15 Image Quality 14 magnifying 18 number remaining 8... sending 30 transfer to computer 23 install memory card 6 install software 6 Instant Review 9, 15 interfaces 43 internal memory 8, 43 L Landscape mode 14 Language...
User Guide
Page 47
... prints, buy online 29 problems and solutions 32 R record video clips 9 red-eye removal 19 Region 5 remaining pictures count 8 removing red eyes 19 resolution 42 reviewing images 17 S safety precautions for batteries 39 selecting images for destinations 29, 30 selecting images for printing 27 Self-Timer light 4 Self-Timer setting 14...
... prints, buy online 29 problems and solutions 32 R record video clips 9 red-eye removal 19 Region 5 remaining pictures count 8 removing red eyes 19 resolution 42 reviewing images 17 S safety precautions for batteries 39 selecting images for destinations 29, 30 selecting images for printing 27 Self-Timer light 4 Self-Timer setting 14...
