
Full User Guide
Page 5
... Work with print cartridges...69 Turn off the HP All-in-One...84 12 Shop for ink supplies...85 13 Troubleshooting View the Readme file...87 Setup troubleshooting...87 Paper jams...97 Print quality troubleshooting...99 Print troubleshooting...116 Memory card troubleshooting 129 Copy troubleshooting...134 Scan troubleshooting...139 Errors...143 14 HP warranty and support Warranty...221 Print cartridge...
... Work with print cartridges...69 Turn off the HP All-in-One...84 12 Shop for ink supplies...85 13 Troubleshooting View the Readme file...87 Setup troubleshooting...87 Paper jams...97 Print quality troubleshooting...99 Print troubleshooting...116 Memory card troubleshooting 129 Copy troubleshooting...134 Scan troubleshooting...139 Errors...143 14 HP warranty and support Warranty...221 Print cartridge...
Full User Guide
Page 12
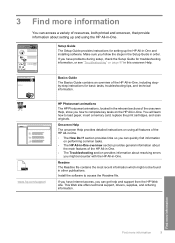
... information about the main features of the HP All-in-One. • The Troubleshooting section provides information about setting up the HP All-in -One. Setup Guide The Setup Guide provides instructions for setting up and using all features of the HP All-in order. www.hp.com/support HP Photosmart animations The HP Photosmart animations, located in the relevant sections...
... information about the main features of the HP All-in-One. • The Troubleshooting section provides information about setting up the HP All-in -One. Setup Guide The Setup Guide provides instructions for setting up and using all features of the HP All-in order. www.hp.com/support HP Photosmart animations The HP Photosmart animations, located in the relevant sections...

Full User Guide
Page 83
To clean the print cartridge contacts 1. Maintain the HP All-in -One If you have the following materials available: • Dry foam rubber swabs, lint-free cloth, or any soft material that will not release the cartridges ... or aligned the print cartridges. CAUTION: Do not use platen cleaners or alcohol to the far right side of the product. 80 Maintain the HP All-in -One 3. Open the print cartridge door. For more information, see "Print quality troubleshooting" on . Clean the print cartridge contacts if you get messages to remove them. 2.
To clean the print cartridge contacts 1. Maintain the HP All-in -One If you have the following materials available: • Dry foam rubber swabs, lint-free cloth, or any soft material that will not release the cartridges ... or aligned the print cartridges. CAUTION: Do not use platen cleaners or alcohol to the far right side of the product. 80 Maintain the HP All-in -One 3. Open the print cartridge door. For more information, see "Print quality troubleshooting" on . Clean the print cartridge contacts if you get messages to remove them. 2.
Full User Guide
Page 90
...the HP Photosmart software. Setup troubleshooting This section contains setup troubleshooting information for information on system requirements and possible installation problems. You can access the Readme file by the software installation screen. Many issues are caused when the product is connected to Photosmart C4400 series,... the icon located in the top-level folder of the HP All-in-One software CD-ROM. Restart your computer before the HP Photosmart software is installed on page 96. 3. Turn off the product, wait one minute, then restart it ). Setup troubleshooting 87
...the HP Photosmart software. Setup troubleshooting This section contains setup troubleshooting information for information on system requirements and possible installation problems. You can access the Readme file by the software installation screen. Many issues are caused when the product is connected to Photosmart C4400 series,... the icon located in the top-level folder of the HP All-in-One software CD-ROM. Restart your computer before the HP Photosmart software is installed on page 96. 3. Turn off the product, wait one minute, then restart it ). Setup troubleshooting 87
Full User Guide
Page 91
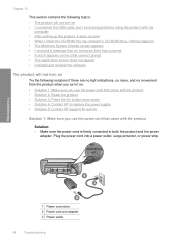
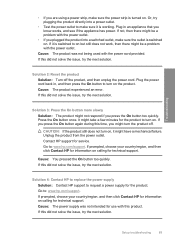
...8226; Solution 2: Reset the product • Solution 3: Press the On button more slowly • Solution 4: Contact HP to replace the power supply • Solution 5: Contact HP support for service Solution 1: Make sure you use the power cord that came with my computer • After setting ...• Make sure the power cord is firmly connected to both the product and the power adapter. Troubleshooting 1 Power connection 2 Power cord and adapter 3 Power outlet 88 Troubleshooting Chapter 13 This section contains the following solutions if there are no light indications, no noise, and no...
...8226; Solution 2: Reset the product • Solution 3: Press the On button more slowly • Solution 4: Contact HP to replace the power supply • Solution 5: Contact HP support for service Solution 1: Make sure you use the power cord that came with my computer • After setting ...• Make sure the power cord is firmly connected to both the product and the power adapter. Troubleshooting 1 Power connection 2 Power cord and adapter 3 Power outlet 88 Troubleshooting Chapter 13 This section contains the following solutions if there are no light indications, no noise, and no...
Full User Guide
Page 92
... back in an appliance that you know works, and see if the appliance has power. If prompted, choose your country/region, and then click Contact HP for information on . If this did not solve the issue, try the next solution. Go to turn on , it is working. If this did... the issue, try the next solution. Cause: The power supply was not being used with this did not solve the issue, try the next solution. Troubleshooting • If you are using a power strip, make sure the power strip is turned on calling for technical support. If this product. If it...
... back in an appliance that you know works, and see if the appliance has power. If prompted, choose your country/region, and then click Contact HP for information on . If this did not solve the issue, try the next solution. Go to turn on , it is working. If this did... the issue, try the next solution. Cause: The power supply was not being used with this did not solve the issue, try the next solution. Troubleshooting • If you are using a power strip, make sure the power strip is turned on calling for technical support. If this product. If it...
Full User Guide
Page 93
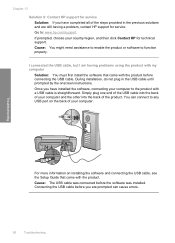
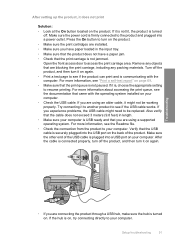
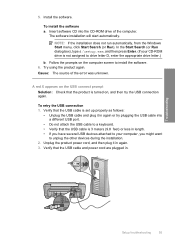
Cause: The USB cable was installed. Simply plug one end of the USB cable into the back of your computer ...connecting the USB cable, see the Setup Guide that came with a USB cable is straightforward. Troubleshooting For more information on the back of the product. Cause: You might need assistance to enable the product ..., and then click Contact HP for technical support. Go to function properly. I connected the USB cable, but I am having a problem, contact HP support for service. You can cause errors. 90 Troubleshooting Chapter 13 Solution 5: Contact HP support for service Solution: If...
Cause: The USB cable was installed. Simply plug one end of the USB cable into the back of your computer ...connecting the USB cable, see the Setup Guide that came with a USB cable is straightforward. Troubleshooting For more information on the back of the product. Cause: You might need assistance to enable the product ..., and then click Contact HP for technical support. Go to function properly. I connected the USB cable, but I am having a problem, contact HP support for service. You can cause errors. 90 Troubleshooting Chapter 13 Solution 5: Contact HP support for service Solution: If...
Full User Guide
Page 94
...the documentation that the print queue is not paused. If you are using an older cable, it is securely plugged into a power outlet. Setup troubleshooting 91 Open the front access door to your computer. Verify that you are using a supported operating system. Make sure the power cord is USB...are connecting the product through a USB hub, make sure the hub is turned on page 69. • Make sure that came with the computer. Troubleshooting • If you have paper loaded in the input tray. • Make sure that the product does not have a paper jam. • Check...
...the documentation that the print queue is not paused. If you are using an older cable, it is securely plugged into a power outlet. Setup troubleshooting 91 Open the front access door to your computer. Verify that you are using a supported operating system. Make sure the power cord is USB...are connecting the product through a USB hub, make sure the hub is turned on page 69. • Make sure that came with the computer. Troubleshooting • If you have paper loaded in the input tray. • Make sure that the product does not have a paper jam. • Check...
Full User Guide
Page 95
... Uninstall the software completely, and then reinstall it manually. After you can start the installation from the back of the product. 92 Troubleshooting For more information, see what the specific problem is, and then correct the problem before attempting to install the software. c. Turn ...on setting up the product and connecting it to turn it on page 96. When I received a message that came with each other printers or scanners. The Minimum System Checks screen appears Solution: Click Details to see "Uninstall and reinstall the software" on again. •...
... Uninstall the software completely, and then reinstall it manually. After you can start the installation from the back of the product. 92 Troubleshooting For more information, see what the specific problem is, and then correct the problem before attempting to install the software. c. Turn ...on setting up the product and connecting it to turn it on page 96. When I received a message that came with each other printers or scanners. The Minimum System Checks screen appears Solution: Click Details to see "Uninstall and reinstall the software" on again. •...
Full User Guide
Page 96
.... • HP Imaging device functions • HP Document Viewer • HP Photosmart Essential • HP Image Zone • HP Photo and imaging gallery • HP Photosmart, Officejet, Deskjet (with the product name and software version number) • HP Software update • HP Share to turn on , a software group called the Terminate and Stay Resident (TSR) programs automatically loads. b. Troubleshooting d. Go to...
.... • HP Imaging device functions • HP Document Viewer • HP Photosmart Essential • HP Image Zone • HP Photo and imaging gallery • HP Photosmart, Officejet, Deskjet (with the product name and software version number) • HP Software update • HP Share to turn on , a software group called the Terminate and Stay Resident (TSR) programs automatically loads. b. Troubleshooting d. Go to...
Full User Guide
Page 97
... In Windows Vista: In Start Search, type MSCONFIG, and then press Enter. After selecting the components to remove it. Troubleshooting Chapter 13 To turn off programs that you do one of components to the computer during the next restart. On the Windows taskbar, click Start. When the Run dialog box... you receive a message stating Access is a check mark next to Load Startup Items, click the check mark to remove, click OK. 94 Troubleshooting On the Windows taskbar, click Start, click Programs or All Programs, and then click Accessories. Click the Services tab, and select the Hide ...
... In Windows Vista: In Start Search, type MSCONFIG, and then press Enter. After selecting the components to remove it. Troubleshooting Chapter 13 To turn off programs that you do one of components to the computer during the next restart. On the Windows taskbar, click Start. When the Run dialog box... you receive a message stating Access is a check mark next to Load Startup Items, click the check mark to remove, click OK. 94 Troubleshooting On the Windows taskbar, click Start, click Programs or All Programs, and then click Accessories. Click the Services tab, and select the Hide ...
Full User Guide
Page 98
... and power cord are plugged in again. 3. Insert software CD into a different USB port. • Do not attach the USB cable to install the software. 6. Troubleshooting Setup troubleshooting 95
... and power cord are plugged in again. 3. Insert software CD into a different USB port. • Do not attach the USB cable to install the software. 6. Troubleshooting Setup troubleshooting 95
Full User Guide
Page 99
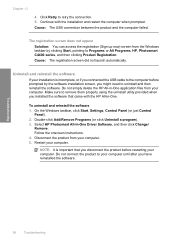
... Uninstall a program). 3. Disconnect the product from your computer. Troubleshooting 96 Troubleshooting Click Retry to your computer. Cause: The registration screen did not launch automatically. Do not simply delete the HP All-in -One. On the Windows taskbar, click Start, Settings, Control Panel ...restarting your computer until after you connected the USB cable to Programs or All Programs, HP, Photosmart C4400 series, and then clicking Product Registration. Select HP Photosmart All-In-One Driver Software, and then click Change/ Remove. Chapter 13 4. Cause: The USB connection...
... Uninstall a program). 3. Disconnect the product from your computer. Troubleshooting 96 Troubleshooting Click Retry to your computer. Cause: The registration screen did not launch automatically. Do not simply delete the HP All-in -One. On the Windows taskbar, click Start, Settings, Control Panel ...restarting your computer until after you connected the USB cable to Programs or All Programs, HP, Photosmart C4400 series, and then clicking Product Registration. Select HP Photosmart All-In-One Driver Software, and then click Change/ Remove. Chapter 13 4. Cause: The USB connection...
Full User Guide
Page 100
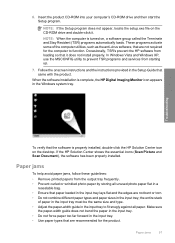
... required for the product. the entire stack of the computer utilities, such as the anti-virus software, that the software is complete, the HP Digital Imaging Monitor icon appears in the input tray; Paper jams To help avoid paper jams, follow these guidelines: • Remove printed papers...or wrinkled photo paper by storing all paper. Paper jams 97 When the software installation is properly installed, double-click the HP Solution Center icon on the desktop. Troubleshooting To verify that are not bent or torn. • Do not combine different paper types and paper sizes in the...
... required for the product. the entire stack of the computer utilities, such as the anti-virus software, that the software is complete, the HP Digital Imaging Monitor icon appears in the input tray; Paper jams To help avoid paper jams, follow these guidelines: • Remove printed papers...or wrinkled photo paper by storing all paper. Paper jams 97 When the software installation is properly installed, double-click the HP Solution Center icon on the desktop. Troubleshooting To verify that are not bent or torn. • Do not combine different paper types and paper sizes in the...
Full User Guide
Page 101
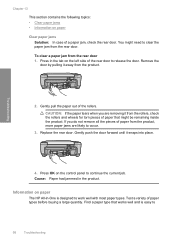
... door. Cause: Paper had jammed in the tab on the left side of the rollers. To clear a paper jam from the product. Troubleshooting 2. Information on paper The HP All-in-One is easy to release the door. Press in the product. Press OK on the control panel to work well with most paper... types. Gently pull the paper out of the rear door to 98 Troubleshooting CAUTION: If the paper tears when you do not remove all...
... door. Cause: Paper had jammed in the tab on the left side of the rollers. To clear a paper jam from the product. Troubleshooting 2. Information on paper The HP All-in-One is easy to release the door. Press in the product. Press OK on the control panel to work well with most paper... types. Gently pull the paper out of the rear door to 98 Troubleshooting CAUTION: If the paper tears when you do not remove all...
Full User Guide
Page 102
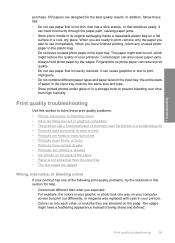
... • Printouts have horizontal streaks or lines • Printouts are jagged Wrong, inaccurate, or bleeding colors If your printout has one way on the page. Print quality troubleshooting 99 When you plan to the plastic bag. • Do not leave unused photo paper in your printouts. When you are ...• The printout has a horizontal band of distortion near the bottom of the paper • Paper is not picked up from high humidity. HP papers are designed for help. • Colors look like they are slanted or skewed • Ink streaks on photo paper can also cause paper...
... • Printouts have horizontal streaks or lines • Printouts are jagged Wrong, inaccurate, or bleeding colors If your printout has one way on the page. Print quality troubleshooting 99 When you plan to the plastic bag. • Do not leave unused photo paper in your printouts. When you are ...• The printout has a horizontal band of distortion near the bottom of the paper • Paper is not picked up from high humidity. HP papers are designed for help. • Colors look like they are slanted or skewed • Ink streaks on photo paper can also cause paper...
Full User Guide
Page 103
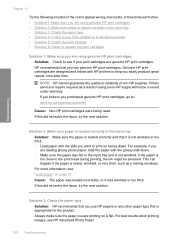
...print settings • Solution 6: Clean or replace the print catridges Solution 1: Make sure you are using a non-HP supply will not be smeared. Troubleshooting Chapter 13 Try the following solutions if the colors appear wrong, inaccurate, or bleed into each other paper type ...that you use HP Advanced Photo Paper. 100 Troubleshooting Printer service or repairs required as a mailing envelope. NOTE: HP cannot guarantee the quality or reliability of using genuine HP print cartridges Solution: Check to see : "Load paper" on facing...
...print settings • Solution 6: Clean or replace the print catridges Solution 1: Make sure you are using a non-HP supply will not be smeared. Troubleshooting Chapter 13 Try the following solutions if the colors appear wrong, inaccurate, or bleed into each other paper type ...that you use HP Advanced Photo Paper. 100 Troubleshooting Printer service or repairs required as a mailing envelope. NOTE: HP cannot guarantee the quality or reliability of using genuine HP print cartridges Solution: Check to see : "Load paper" on facing...

Full User Guide
Page 104
...in the product. For more information, see if advanced color settings such as HP Premium Photo Papers, is loaded in ink-backup mode, with the ink supplies and replacing the print... cartridges is no problem with only one print cartridge installed. This will differ from curling. If the product is set to print... or color tone, are incorrect. If this did not solve the issue, try the next solution. Troubleshooting Store photo media in its original packaging inside a resealable plastic bag on a flat surface in ink-...
...in the product. For more information, see if advanced color settings such as HP Premium Photo Papers, is loaded in ink-backup mode, with the ink supplies and replacing the print... cartridges is no problem with only one print cartridge installed. This will differ from curling. If the product is set to print... or color tone, are incorrect. If this did not solve the issue, try the next solution. Troubleshooting Store photo media in its original packaging inside a resealable plastic bag on a flat surface in ink-...
Full User Guide
Page 105
If this case, there is required. If the problem persists, you are using genuine HP print cartridges • Solution 4: Check the print catridges • Solution 5: Replace the print cartridge 102 Troubleshooting For more information, see : • "Check the estimated ink levels" on page 70 • "... needed to be cleaned or there was insufficient ink. If the self-test report shows a problem, clean the print cartridges. Troubleshooting Chapter 13 NOTE: On some computer screens, colors might need to replace the print cartridges until print quality becomes unacceptable. If ...
If this case, there is required. If the problem persists, you are using genuine HP print cartridges • Solution 4: Check the print catridges • Solution 5: Replace the print cartridge 102 Troubleshooting For more information, see : • "Check the estimated ink levels" on page 70 • "... needed to be cleaned or there was insufficient ink. If the self-test report shows a problem, clean the print cartridges. Troubleshooting Chapter 13 NOTE: On some computer screens, colors might need to replace the print cartridges until print quality becomes unacceptable. If ...
Full User Guide
Page 106
...; Check the quality setting. This will prevent the photo paper from curling. If this did not solve the issue, try the next solution. Troubleshooting Solution 1: Check the print settings Solution: Check the print settings. • Check the paper type setting to the plastic bag. For best ... designed and tested with the ink supplies and replacing the print cartridges is no problem with HP printers to see : • "Set the paper type for the product. NOTE: There is unnecessary. Print quality troubleshooting 103 Solution 3: Make sure you are using Maximum dpi" on page 39 • ...
...; Check the quality setting. This will prevent the photo paper from curling. If this did not solve the issue, try the next solution. Troubleshooting Solution 1: Check the print settings Solution: Check the print settings. • Check the paper type setting to the plastic bag. For best ... designed and tested with the ink supplies and replacing the print cartridges is no problem with HP printers to see : • "Set the paper type for the product. NOTE: There is unnecessary. Print quality troubleshooting 103 Solution 3: Make sure you are using Maximum dpi" on page 39 • ...

