

Expansion Base - Maintenance and Service Guide
Page 33
Removal and Replacement Procedures 5.3 Preparing the HP Notebook Expansion Base for Disassembly Perform the following steps before disassembling the Expansion Base: 1. Disconnecting the expansion cable 5-4 Maintenance and Service Guide Disconnect the AC adapter and all external devices. ✎ The location of the expansion cable 1 to disconnect the cable from the notebook 2. 2. If the notebook computer is in the Expansion Base, turn off the notebook and press the buttons on the end of the expansion connector on the notebook may vary by notebook series and model.
Removal and Replacement Procedures 5.3 Preparing the HP Notebook Expansion Base for Disassembly Perform the following steps before disassembling the Expansion Base: 1. Disconnecting the expansion cable 5-4 Maintenance and Service Guide Disconnect the AC adapter and all external devices. ✎ The location of the expansion cable 1 to disconnect the cable from the notebook 2. 2. If the notebook computer is in the Expansion Base, turn off the notebook and press the buttons on the end of the expansion connector on the notebook may vary by notebook series and model.

Expansion Base - Maintenance and Service Guide
Page 51
Specifications Power supply Rated input voltage Rated input current Rated frequency Table 6-2 Internal AC Adapter 160 W with PFC 100 to 240 VAC RMS 1.7 A RMS 47 to 63 Hz 6-2 Maintenance and Service Guide
Specifications Power supply Rated input voltage Rated input current Rated frequency Table 6-2 Internal AC Adapter 160 W with PFC 100 to 240 VAC RMS 1.7 A RMS 47 to 63 Hz 6-2 Maintenance and Service Guide

Expansion Base - Maintenance and Service Guide
Page 72
Index A AC adapter specifications 6-2 audio line-out pin assignments A-3 B back panel removal 5-16 spare part number 3-3 base enclosure, spare part number 3-3 base plate removal 5-5 spare part number 3-3 C cables, ...
Index A AC adapter specifications 6-2 audio line-out pin assignments A-3 B back panel removal 5-16 spare part number 3-3 base enclosure, spare part number 3-3 base plate removal 5-5 spare part number 3-3 C cables, ...
Expansion Base - Maintenance and Service Guide
Page 73
... connector location 1-7 screw listing C-1 security cable slot 1-5, 1-8 serial connector location 1-7 pin assignments A-4 serial number 3-1, 5-2 service considerations 4-1 speaker assembly location 1-4 removal 5-18 spare part number 3-3 specifications AC adapter 6-2 expansion base 6-1 static shielding materials 4-6 S-Video connector location 1-7 pin assignments A-3 Index-2 Maintenance and Service Guide
... connector location 1-7 screw listing C-1 security cable slot 1-5, 1-8 serial connector location 1-7 pin assignments A-4 serial number 3-1, 5-2 service considerations 4-1 speaker assembly location 1-4 removal 5-18 spare part number 3-3 specifications AC adapter 6-2 expansion base 6-1 static shielding materials 4-6 S-Video connector location 1-7 pin assignments A-3 Index-2 Maintenance and Service Guide

Hardware Guide
Page 27
Hardware Components Rear Components Component 1 Power connector 2 Exhaust vent 3 External monitor connector 4 Parallel connector 5 RJ-11 jack Description Connects an AC adapter. Additional vents are on the bottom of the notebook. Ä To prevent overheating, do not obstruct the vent. Connects the modem cable. 1-20 Hardware Guide Connects an optional parallel device, such as...
Hardware Components Rear Components Component 1 Power connector 2 Exhaust vent 3 External monitor connector 4 Parallel connector 5 RJ-11 jack Description Connects an AC adapter. Additional vents are on the bottom of the notebook. Ä To prevent overheating, do not obstruct the vent. Connects the modem cable. 1-20 Hardware Guide Connects an optional parallel device, such as...

Hardware Guide
Page 28
... the modem cable. (select models) Hardware Guide 1-21 Additional vents are on the bottom of the notebook. Ä To prevent overheating, do not obstruct the vent. Hardware Components Component 1 Power connector 2 Exhaust vent 3 External monitor connector 4 Parallel connector 5 RJ-11 jack (select models) Description Connects an AC adapter. Allows airflow to block airflow.
... the modem cable. (select models) Hardware Guide 1-21 Additional vents are on the bottom of the notebook. Ä To prevent overheating, do not obstruct the vent. Hardware Components Component 1 Power connector 2 Exhaust vent 3 External monitor connector 4 Parallel connector 5 RJ-11 jack (select models) Description Connects an AC adapter. Allows airflow to block airflow.

Hardware Guide
Page 41
... a non-RJ-11 telephone jack. 5 Japan-specific outlet adapter Connects the AC adapter to a country-specific modem adapter. Hardware Components Cords, Cables and Adapters Component Description 1 Power cord* Connects the AC adapter to an AC electrical outlet. 2 AC adapter** Converts AC power to DC power. 3 Modem cables (select models)* 4 Country-specific modem adapter (included by region as required) Connects the modem to...
... a non-RJ-11 telephone jack. 5 Japan-specific outlet adapter Connects the AC adapter to a country-specific modem adapter. Hardware Components Cords, Cables and Adapters Component Description 1 Power cord* Connects the AC adapter to an AC electrical outlet. 2 AC adapter** Converts AC power to DC power. 3 Modem cables (select models)* 4 Country-specific modem adapter (included by region as required) Connects the modem to...

Hardware Guide
Page 59
... powered off. If the notebook contains a charged battery pack and is running on external AC power, the notebook will switch to the availability of a power outage. Hardware Guide 3-1 3 Battery Packs Running the Notebook on Battery Power The notebook switches between AC power and battery power according to battery power only if the AC adapter is disconnected from the...
... powered off. If the notebook contains a charged battery pack and is running on external AC power, the notebook will switch to the availability of a power outage. Hardware Guide 3-1 3 Battery Packs Running the Notebook on Battery Power The notebook switches between AC power and battery power according to battery power only if the AC adapter is disconnected from the...

Hardware Guide
Page 62
The battery pack charges whether the notebook is powered off or in use , but it charges faster when the notebook is connected to external power through an AC adapter. Identifying the battery light Identifying the battery light 3-4 Hardware Guide When the notebook is in use , charging will take longer, depending on while the battery pack is fully charged. The light turns off when the battery is charging. The battery light on the notebook stays on system activity. Battery Packs Charging a Battery Pack The battery pack automatically charges when the notebook is powered off.
The battery pack charges whether the notebook is powered off or in use , but it charges faster when the notebook is connected to external power through an AC adapter. Identifying the battery light Identifying the battery light 3-4 Hardware Guide When the notebook is in use , charging will take longer, depending on while the battery pack is fully charged. The light turns off when the battery is charging. The battery light on the notebook stays on system activity. Battery Packs Charging a Battery Pack The battery pack automatically charges when the notebook is powered off.

Hardware Guide
Page 65
... save your work might be lost . The power/Standby light turns off , indicating that the notebook is in Hibernation. ■ If external power is available to the notebook, connect the AC adapter. ■ If a charged battery pack is restored to the system, you will be prompted to the hard drive. To verify that the...
... save your work might be lost . The power/Standby light turns off , indicating that the notebook is in Hibernation. ■ If external power is available to the notebook, connect the AC adapter. ■ If a charged battery pack is restored to the system, you will be prompted to the hard drive. To verify that the...

Hardware Guide
Page 66
How to Calibrate To calibrate a battery pack, you observe a significant change in use . Insert the battery pack into the notebook. 2. Calibrate the battery pack under the following conditions: ■ When the battery status display seems inaccurate. ■ When you must fully charge, fully discharge... charge the battery pack when the notebook is in normal battery run time. ■ When the battery pack has not been used , it should not be necessary to calibrate it is the only power source. It is not necessary to external power through an AC adapter. (The battery light turns on.)...
How to Calibrate To calibrate a battery pack, you observe a significant change in use . Insert the battery pack into the notebook. 2. Calibrate the battery pack under the following conditions: ■ When the battery status display seems inaccurate. ■ When you must fully charge, fully discharge... charge the battery pack when the notebook is in normal battery run time. ■ When the battery pack has not been used , it should not be necessary to calibrate it is the only power source. It is not necessary to external power through an AC adapter. (The battery light turns on.)...

Hardware Guide
Page 68
... > Performance and Maintenance > Power Options > Power Schemes. 3. Connect the notebook to emphasize saving power. 3-10 Hardware Guide Conserving Power as You Work To conserve power while you use the notebook: ■ Plug in the AC adapter, especially if you are using them. ■ Set the automatic timeout settings... to external power and keep the notebook connected until the battery pack is fully recharged and the ...
... > Performance and Maintenance > Power Options > Power Schemes. 3. Connect the notebook to emphasize saving power. 3-10 Hardware Guide Conserving Power as You Work To conserve power while you use the notebook: ■ Plug in the AC adapter, especially if you are using them. ■ Set the automatic timeout settings... to external power and keep the notebook connected until the battery pack is fully recharged and the ...

Hardware Guide
Page 159
Index A AC adapter disconnecting 3-1 identifying 1-34 adapter, modem 7-5 airport security devices 4-3 altitude specifications 9-1 AT commands 7-7 audio devices, connecting 5-4 audio-out jack connecting devices 5-6 location 5-4 AutoPlay/Autorun...-battery condition 3-6 recycling 3-12 storing 3-11 switching power sources 3-1 battery release latch 1-30, 1-31 blackout periods, modem 7-6 Bluetooth wireless 7-15 bottom components 1-30, 1-31 buttons PC Card eject 1-22, 1-24, 8-5 power 1-9, 1-10 Quick Launch 1-11 scroll 2-2, 2-3 TouchPad 2-2, 2-3 volume 1-9, 1-10, 1-17, 1-28, 5-1, 5-2 wireless 1-13, 1-...
Index A AC adapter disconnecting 3-1 identifying 1-34 adapter, modem 7-5 airport security devices 4-3 altitude specifications 9-1 AT commands 7-7 audio devices, connecting 5-4 audio-out jack connecting devices 5-6 location 5-4 AutoPlay/Autorun...-battery condition 3-6 recycling 3-12 storing 3-11 switching power sources 3-1 battery release latch 1-30, 1-31 blackout periods, modem 7-6 Bluetooth wireless 7-15 bottom components 1-30, 1-31 buttons PC Card eject 1-22, 1-24, 8-5 power 1-9, 1-10 Quick Launch 1-11 scroll 2-2, 2-3 TouchPad 2-2, 2-3 volume 1-9, 1-10, 1-17, 1-28, 5-1, 5-2 wireless 1-13, 1-...

Software Guide
Page 7
...Use This Power Source: ■ Charged battery pack in the Hardware Guide on external power from an AC adapter and other devices. External power, such as an AC adapter or optional HP Notebook Expansion Base. ✎ For more details, refer to any drive media. Charge or calibrate a battery ... for general tasks. Install or modify system software or write to the "Battery Packs" chapter in the notebook. ■ External power, such as an AC adapter or optional HP Notebook Expansion Base. External power, such as an AC adapter or optional HP Notebook Expansion Base. Task Work in the...
...Use This Power Source: ■ Charged battery pack in the Hardware Guide on external power from an AC adapter and other devices. External power, such as an AC adapter or optional HP Notebook Expansion Base. ✎ For more details, refer to any drive media. Charge or calibrate a battery ... for general tasks. Install or modify system software or write to the "Battery Packs" chapter in the notebook. ■ External power, such as an AC adapter or optional HP Notebook Expansion Base. External power, such as an AC adapter or optional HP Notebook Expansion Base. Task Work in the...
Software Guide
Page 54
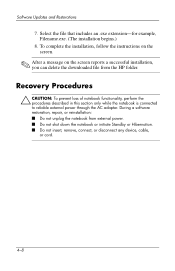
... on the screen reports a successful installation, you can delete the downloaded file from external power. ■ Do not shut down the notebook or initiate Standby or Hibernation. ■ Do not insert, remove, connect, or disconnect any device, cable, or cord. 4-8 During... software restoration, repair, or reinstallation: ■ Do not unplug the notebook from the HP folder. Recovery Procedures Ä CAUTION: To prevent loss of notebook functionality, perform the procedures described in this section only while the notebook is connected to reliable external power through the AC adapter.
... on the screen reports a successful installation, you can delete the downloaded file from external power. ■ Do not shut down the notebook or initiate Standby or Hibernation. ■ Do not insert, remove, connect, or disconnect any device, cable, or cord. 4-8 During... software restoration, repair, or reinstallation: ■ Do not unplug the notebook from the HP folder. Recovery Procedures Ä CAUTION: To prevent loss of notebook functionality, perform the procedures described in this section only while the notebook is connected to reliable external power through the AC adapter.

Getting Started
Page 8
c. Hardware and Software Setup 2. Connect the AC adapter cable to AC power 1-4 Startup Guide Plug the power cord into an electrical outlet 3. (Electrical outlets vary by region and country.) d. Connect the notebook to the AC adapter 2. (Power cords and AC adapters vary by region and country.) Connecting the notebook to the power connector on a flat surface near an electrical outlet. Connect the power cord to AC power: a. b. Place the notebook on the notebook 1.
c. Hardware and Software Setup 2. Connect the AC adapter cable to AC power 1-4 Startup Guide Plug the power cord into an electrical outlet 3. (Electrical outlets vary by region and country.) d. Connect the notebook to the AC adapter 2. (Power cords and AC adapters vary by region and country.) Connecting the notebook to the power connector on a flat surface near an electrical outlet. Connect the power cord to AC power: a. b. Place the notebook on the notebook 1.

Getting Started
Page 41
...soft surface, such as a printer. Startup Guide 3-19 Allows airflow to block airflow. Additional vents are on the bottom panel of the notebook. Ä To prevent overheating, do not obstruct the vent. Connects the modem cable. Connects an optional external monitor or overhead projector. ...Connects an optional parallel device, such as bedding or clothing, to cool internal components. Rear Components Notebook Features Component 1 Power connector 2 Exhaust vent 3 External monitor connector 4 Parallel connector 5 RJ-11 jack Description Connects an AC adapter.
...soft surface, such as a printer. Startup Guide 3-19 Allows airflow to block airflow. Additional vents are on the bottom panel of the notebook. Ä To prevent overheating, do not obstruct the vent. Connects the modem cable. Connects an optional external monitor or overhead projector. ...Connects an optional parallel device, such as bedding or clothing, to cool internal components. Rear Components Notebook Features Component 1 Power connector 2 Exhaust vent 3 External monitor connector 4 Parallel connector 5 RJ-11 jack Description Connects an AC adapter.

Getting Started
Page 42
Notebook Features Component 1 Power connector 2 Exhaust vent 3 External monitor connector 4 Parallel connector 5 RJ-11 jack (select models) Description Connects an AC adapter. Connects an optional external monitor or overhead projector. Do not allow a hard surface, such as an adjoining printer, or a soft surface, such as... bedding or clothing, to cool internal components. Allows airflow to block airflow. Additional vents are on the bottom panel of the notebook. Ä To prevent overheating, do not obstruct the vent. Connects the modem cable (select models). 3-20 Startup Guide
Notebook Features Component 1 Power connector 2 Exhaust vent 3 External monitor connector 4 Parallel connector 5 RJ-11 jack (select models) Description Connects an AC adapter. Connects an optional external monitor or overhead projector. Do not allow a hard surface, such as an adjoining printer, or a soft surface, such as... bedding or clothing, to cool internal components. Allows airflow to block airflow. Additional vents are on the bottom panel of the notebook. Ä To prevent overheating, do not obstruct the vent. Connects the modem cable (select models). 3-20 Startup Guide

Getting Started
Page 53
...3-15, 3-18 battery pack, inserting 1-2 battery release latch 3-29, 3-30 bottom components 3-29, 3-30 buttons PC Card eject 3-21, 3-23 power 1-7, 3-9, 3-10 Quick Launch 3-11 volume 3-9, 3-10, 3-16, 3-27 Wireless On/Off 3-12, 3-18 C cables AC adapter 3-19, 3-20 network 3-26, 3-28 security 3-21 caps lock light 3-7, 3-8 connectors 1394 3-25, 3-28...3-22 display component location 3-1, 3-2 opening 1-6, 1-7 settings 1-10 display release latch 1-6, 1-7 Documentation Library CD 2-2 drive light 3-8 drivers 1-1 drives diskette 3-22, 3-24 HP USB Digital Drive 3-22, 3-24 optical 3-22 Startup Guide Index-1
...3-15, 3-18 battery pack, inserting 1-2 battery release latch 3-29, 3-30 bottom components 3-29, 3-30 buttons PC Card eject 3-21, 3-23 power 1-7, 3-9, 3-10 Quick Launch 3-11 volume 3-9, 3-10, 3-16, 3-27 Wireless On/Off 3-12, 3-18 C cables AC adapter 3-19, 3-20 network 3-26, 3-28 security 3-21 caps lock light 3-7, 3-8 connectors 1394 3-25, 3-28...3-22 display component location 3-1, 3-2 opening 1-6, 1-7 settings 1-10 display release latch 1-6, 1-7 Documentation Library CD 2-2 drive light 3-8 drivers 1-1 drives diskette 3-22, 3-24 HP USB Digital Drive 3-22, 3-24 optical 3-22 Startup Guide Index-1

Reference Guide
Page 7
... coaxial cable. 7 Composite video jack Connects the Expansion Base to a television. 8 S-Video jack Connects the Expansion Base to notebook AC adapter. Connect USB devices; Rear Getting Started Component 1 Expansion cable Description Connects the Expansion Base to a notebook. 2 Power connectors (3) 3 USB ports (2) Connect the Expansion Base to a television. 9 Hard drive power connector Connects the power...
... coaxial cable. 7 Composite video jack Connects the Expansion Base to a television. 8 S-Video jack Connects the Expansion Base to notebook AC adapter. Connect USB devices; Rear Getting Started Component 1 Expansion cable Description Connects the Expansion Base to a notebook. 2 Power connectors (3) 3 USB ports (2) Connect the Expansion Base to a television. 9 Hard drive power connector Connects the power...


