
Reference Guide
Page 7
... 2: Connect AC power 11 Step 3: Connect a phone line 12 Step 4: Turn on the notebook 13 Step 5: Set up Windows 13 Basic Operation ...15 Operating Your Notebook 16 Default power settings 16 To reset the notebook 17 To change the boot device 17 To use the TouchPad 18 To use the function hot keys 19... insert or remove a CD or DVD 22 To play DVD movies 23 To create or copy CDs 23 Securing Your Notebook 24 To set up password protection 24 To lock your notebook 24 To attach a security cable 25 To protect against viruses 25 To lock the hard drive 26 Reference Guide vii
... 2: Connect AC power 11 Step 3: Connect a phone line 12 Step 4: Turn on the notebook 13 Step 5: Set up Windows 13 Basic Operation ...15 Operating Your Notebook 16 Default power settings 16 To reset the notebook 17 To change the boot device 17 To use the TouchPad 18 To use the function hot keys 19... insert or remove a CD or DVD 22 To play DVD movies 23 To create or copy CDs 23 Securing Your Notebook 24 To set up password protection 24 To lock your notebook 24 To attach a security cable 25 To protect against viruses 25 To lock the hard drive 26 Reference Guide vii
Reference Guide
Page 23
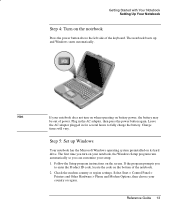
Getting Started with Your Notebook Setting Up Your Notebook Step 4: Turn on the notebook Press the power button above the left side of the notebook. 2. The notebook boots up Windows Your notebook has the Microsoft Windows operating system preinstalled on the screen. Charge times will vary. Plug in ... customize your setup. 1. Select Start > Control Panel > Printers and Other Hardware > Phone and Modem Options, then choose your notebook, the Windows Setup program runs automatically so you to fully charge the battery. Reference Guide 13 Leave the AC adapter plugged in the...
Getting Started with Your Notebook Setting Up Your Notebook Step 4: Turn on the notebook Press the power button above the left side of the notebook. 2. The notebook boots up Windows Your notebook has the Microsoft Windows operating system preinstalled on the screen. Charge times will vary. Plug in ... customize your setup. 1. Select Start > Control Panel > Printers and Other Hardware > Phone and Modem Options, then choose your notebook, the Windows Setup program runs automatically so you to fully charge the battery. Reference Guide 13 Leave the AC adapter plugged in the...
Reference Guide
Page 26
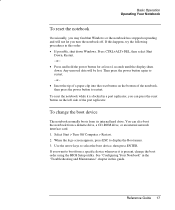
... its internal hard drive. Reference Guide 17 Any unsaved data will not let you turn the notebook off. To reset the notebook while it is docked in a port replicator, you can also boot the notebook from a diskette drive, a CD-ROM drive, or an internal network interface card. 1. When ...the logo screen appears, press ESC to select the boot device, then press ENTER. Use the arrow keys to display the Boot menu. 3. To change the boot device The notebook normally boots from a specific device whenever it is present, change the boot order using the BIOS Setup utility. If you want ...
... its internal hard drive. Reference Guide 17 Any unsaved data will not let you turn the notebook off. To reset the notebook while it is docked in a port replicator, you can also boot the notebook from a diskette drive, a CD-ROM drive, or an internal network interface card. 1. When ...the logo screen appears, press ESC to select the boot device, then press ENTER. Use the arrow keys to display the Boot menu. 3. To change the boot device The notebook normally boots from a specific device whenever it is present, change the boot order using the BIOS Setup utility. If you want ...

Reference Guide
Page 35
... Start > Turn Off Computer > Restart. 2. Hard drive lock does not protect a second hard drive installed in the module bay. CAUTION Basic Operation Securing Your Notebook To lock the hard drive The notebook enables you cannot recover your information secure. If you forget the password, you to lock its internal hard drive to...
... Start > Turn Off Computer > Restart. 2. Hard drive lock does not protect a second hard drive installed in the module bay. CAUTION Basic Operation Securing Your Notebook To lock the hard drive The notebook enables you cannot recover your information secure. If you forget the password, you to lock its internal hard drive to...

Reference Guide
Page 76
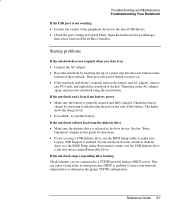
... Start > Turn Off Computer > Restart. If the notebook cannot read a CD or DVD • For a single-sided CD or DVD, make sure the disc is placed in Volume Control, make sure the microphone is selected as the boot device. If you get a Region Code error when playing a DVD movie • DVDs can... have regional codes embedded in the disc data. Clean the disc with the label facing up. • Clean the disc. • Wait 5 to 10 seconds after closing the tray to give the notebook time to...
... Start > Turn Off Computer > Restart. If the notebook cannot read a CD or DVD • For a single-sided CD or DVD, make sure the disc is placed in Volume Control, make sure the microphone is selected as the boot device. If you get a Region Code error when playing a DVD movie • DVDs can... have regional codes embedded in the disc data. Clean the disc with the label facing up. • Clean the disc. • Wait 5 to 10 seconds after closing the tray to give the notebook time to...
Reference Guide
Page 90
... hardware Device Manager, then select Universal Serial Bus Controller. If the notebook will not boot from battery power • Make sure the battery is properly inserted and fully charged. If the notebook stops responding after booting Check whether you are connected to make sure the USB diskette drive...use the BIOS Setup utility Boot menu to turn it on • Connect the AC adapter. • Reset the notebook by removing it on. • If the notebook still doesn't respond, remove the battery and AC adapter, remove any PC Cards, and undock the notebook if docked. Check the battery...
... hardware Device Manager, then select Universal Serial Bus Controller. If the notebook will not boot from battery power • Make sure the battery is properly inserted and fully charged. If the notebook stops responding after booting Check whether you are connected to make sure the USB diskette drive...use the BIOS Setup utility Boot menu to turn it on • Connect the AC adapter. • Reset the notebook by removing it on. • If the notebook still doesn't respond, remove the battery and AC adapter, remove any PC Cards, and undock the notebook if docked. Check the battery...
Reference Guide
Page 95
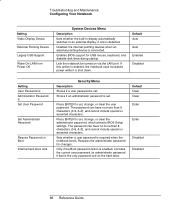
... the user password. Default Clear Clear Enter Enter Disabled Disabled 86 Reference Guide Lets the notebook be turned on the hard drive. If this option is enabled, the notebook uses increased power while it is required when the notebook boots. The password can have no more than 8 characters (0-9, A-Z), and cannot include special or accented...
... the user password. Default Clear Clear Enter Enter Disabled Disabled 86 Reference Guide Lets the notebook be turned on the hard drive. If this option is enabled, the notebook uses increased power while it is required when the notebook boots. The password can have no more than 8 characters (0-9, A-Z), and cannot include special or accented...

Reference Guide
Page 96
... affect password, date, or time changes. Restores default settings, and remains in LAN Troubleshooting and Maintenance Configuring Your Notebook Boot Menu Description Shows the order of your notebook, depending on your video memory: 1. Hard Drive 2. Selections include 8 MB, 16MB, 64MB, or Auto. ...4. Default To change the performance of boot devices. Select Start > Turn Off Computer > Restart. 2. Discards any Setup changes made ...
... affect password, date, or time changes. Restores default settings, and remains in LAN Troubleshooting and Maintenance Configuring Your Notebook Boot Menu Description Shows the order of your notebook, depending on your video memory: 1. Hard Drive 2. Selections include 8 MB, 16MB, 64MB, or Auto. ...4. Default To change the performance of boot devices. Select Start > Turn Off Computer > Restart. 2. Discards any Setup changes made ...
Reference Guide
Page 119
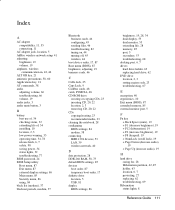
... CDs copying/creating, 23 recommended media, 23 cleaning the notebook, 28 configuring BIOS settings, 84 modem, 38 connecting IEEE 1394 devices, 53 LAN, 39 wireless network, 40 D data protection, 28 DDR-266 RAM, 58, 73 default BIOS settings, 85 devices boot order, 87 temporary boot order, 17 diskette drive location, 5 USB, 81 display...
... CDs copying/creating, 23 recommended media, 23 cleaning the notebook, 28 configuring BIOS settings, 84 modem, 38 connecting IEEE 1394 devices, 53 LAN, 39 wireless network, 40 D data protection, 28 DDR-266 RAM, 58, 73 default BIOS settings, 85 devices boot order, 87 temporary boot order, 17 diskette drive location, 5 USB, 81 display...
Reference Guide
Page 121
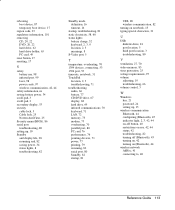
rebooting boot device, 87 temporary boot device, 17 region code, 23 regulatory information, 101 removing CD, 20, 22 DVD, 20, 22 hard drive, 62 hard drive holder, 63 PC card, 49 reset button, 17 resetting, 17 S safety battery use, 98 infrared port, 99 laser, 98 power ..., 32 keyboard, 2, 3, 9 location, 2, 3 meanings, 8 S-Video port, 5 T temperature, overheating, 70 1394 devices, connecting, 53 1394 port, 53 timeouts, notebook, 31 TouchPad location, 2, 3 troubleshooting, 71 troubleshooting audio, 66 battery, 77 CD/DVD drive, 67 display, 68 hard drive, 69 infrared communications, 70 keyboard, 71 ...
rebooting boot device, 87 temporary boot device, 17 region code, 23 regulatory information, 101 removing CD, 20, 22 DVD, 20, 22 hard drive, 62 hard drive holder, 63 PC card, 49 reset button, 17 resetting, 17 S safety battery use, 98 infrared port, 99 laser, 98 power ..., 32 keyboard, 2, 3, 9 location, 2, 3 meanings, 8 S-Video port, 5 T temperature, overheating, 70 1394 devices, connecting, 53 1394 port, 53 timeouts, notebook, 31 TouchPad location, 2, 3 troubleshooting, 71 troubleshooting audio, 66 battery, 77 CD/DVD drive, 67 display, 68 hard drive, 69 infrared communications, 70 keyboard, 71 ...
Maintenance and Service Guide
Page 5
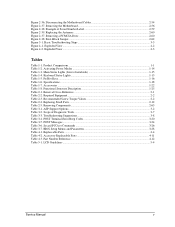
...Small Parts ...2-12 Table 2-5. BIOS Setup Menus and Parameters 3-28 Table 4-1. Removing a PCMCIA Door 2-60 Figure 2-38. Boot-Block Jumper...2-62 Figure 3-1. Activating Power Modes ...1-14 Table 1-3. Specifications...1-18 Table 1-7. POST Terminal-Error Beep Codes 3-20 ...Figure 2-39. Fn Hot Keys ...1-16 Table 1-6. ASP Support Options...3-2 Table 3-2. Sycard PCCtest Commands ...3-26 Table 3-7. Example of notebook 1-15 Table 1-4. Basic Troubleshooting Steps ...3-3 Figure 4-1. Recommended Screw Torque Values 2-2 Table 2-4. POST Messages ...3-24 Table 3-6. Removal Cross...
...Small Parts ...2-12 Table 2-5. BIOS Setup Menus and Parameters 3-28 Table 4-1. Removing a PCMCIA Door 2-60 Figure 2-38. Boot-Block Jumper...2-62 Figure 3-1. Activating Power Modes ...1-14 Table 1-3. Specifications...1-18 Table 1-7. POST Terminal-Error Beep Codes 3-20 ...Figure 2-39. Fn Hot Keys ...1-16 Table 1-6. ASP Support Options...3-2 Table 3-2. Sycard PCCtest Commands ...3-26 Table 3-7. Example of notebook 1-15 Table 1-4. Basic Troubleshooting Steps ...3-3 Figure 4-1. Recommended Screw Torque Values 2-2 Table 2-4. POST Messages ...3-24 Table 3-6. Removal Cross...
Maintenance and Service Guide
Page 23
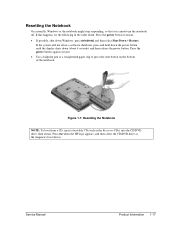
Press esc when the HP logo appears, and then select the CD/DVD drive as the Recovery CDs) into the CD/DVD drive, then restart. Press the power button again ... button to press the reset button on the bottom of the notebook. If this happens, try the following in the order listed. Resetting the Notebook NOTE: To boot from a CD, insert a bootable CD (such as the temporary boot device. Resetting the Notebook Occasionally, Windows or the notebook might stop responding, so that you cannot turn the...
Press esc when the HP logo appears, and then select the CD/DVD drive as the Recovery CDs) into the CD/DVD drive, then restart. Press the power button again ... button to press the reset button on the bottom of the notebook. If this happens, try the following in the order listed. Resetting the Notebook NOTE: To boot from a CD, insert a bootable CD (such as the temporary boot device. Resetting the Notebook Occasionally, Windows or the notebook might stop responding, so that you cannot turn the...
Maintenance and Service Guide
Page 26
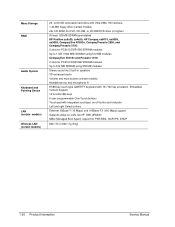
... floppy drive (certain models) 24x CD-ROM, 8x DVD, CD-RW, or CD-RW/DVD drive (or higher) At least 128 MB SDRAM preinstalled HP Pavilion ze5x00, ze4x00, HP Compaq nx9010, nx9008, nx9005, Compaq Evo N1050v, Compaq Presario 2500, and Compaq Presario 2100: 2 slots for PC2100 DDR-266 SDRAM modules Up to 1 ... and right Select buttons Ethernet 10Base-T (10 Mbps) and 100Base-TX (100 Mbps) support Supports wake-on-LAN, fast IP, DMI, dRMON MBA (Managed Boot Agent) support for PXE/BINL, NCP/IPX, DHCP 802.11b or 802.11g (54g) 1-20 Product Information Service Manual Embedded numeric keypad. 12 function (Fn...
... floppy drive (certain models) 24x CD-ROM, 8x DVD, CD-RW, or CD-RW/DVD drive (or higher) At least 128 MB SDRAM preinstalled HP Pavilion ze5x00, ze4x00, HP Compaq nx9010, nx9008, nx9005, Compaq Evo N1050v, Compaq Presario 2500, and Compaq Presario 2100: 2 slots for PC2100 DDR-266 SDRAM modules Up to 1 ... and right Select buttons Ethernet 10Base-T (10 Mbps) and 100Base-TX (100 Mbps) support Supports wake-on-LAN, fast IP, DMI, dRMON MBA (Managed Boot Agent) support for PXE/BINL, NCP/IPX, DHCP 802.11b or 802.11g (54g) 1-20 Product Information Service Manual Embedded numeric keypad. 12 function (Fn...
Maintenance and Service Guide
Page 35
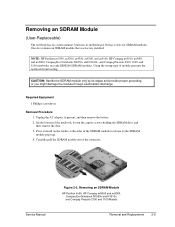
NOTE: HP Pavilion ze5300, ze5200, ze4300, ze4200, and ze4100, HP Compaq nx9010, nx9005 and nx9000, Compaq Evo Notebook N1050v and N1010v, and Compaq Presario 2500, 2100, and 1100 notebooks use only DDR266 SDRAM modules. Removing an SDRAM Module HP Pavilion 4x00, HP Compaq nx9005 and nx9000, Compaq Evo Notebook N1050v ...pops up). 4. Press outward on the latches at the sides of module prevents the notebook from booting. Service Manual Figure 2-3. Removing an SDRAM Module (User-Replaceable) The notebook has no system memory built into its edges and provide proper grounding, or you might...
NOTE: HP Pavilion ze5300, ze5200, ze4300, ze4200, and ze4100, HP Compaq nx9010, nx9005 and nx9000, Compaq Evo Notebook N1050v and N1010v, and Compaq Presario 2500, 2100, and 1100 notebooks use only DDR266 SDRAM modules. Removing an SDRAM Module HP Pavilion 4x00, HP Compaq nx9005 and nx9000, Compaq Evo Notebook N1050v ...pops up). 4. Press outward on the latches at the sides of module prevents the notebook from booting. Service Manual Figure 2-3. Removing an SDRAM Module (User-Replaceable) The notebook has no system memory built into its edges and provide proper grounding, or you might...
Maintenance and Service Guide
Page 41
...appears, follow any instructions that appear. 8. select Advanced and then select to the notebook. 2. Connect the AC adapter to restore only the C partition. 7. When prompted to display the Boot menu. 5. Service Manual Removal and Replacement 2-11 Turn on -screen instructions for ...installing the drivers. 10. Follow the on or restart the notebook. 4. After the drivers have been installed, the application software may be installed. When the HP logo appears...
...appears, follow any instructions that appear. 8. select Advanced and then select to the notebook. 2. Connect the AC adapter to restore only the C partition. 7. When prompted to display the Boot menu. 5. Service Manual Removal and Replacement 2-11 Turn on -screen instructions for ...installing the drivers. 10. Follow the on or restart the notebook. 4. After the drivers have been installed, the application software may be installed. When the HP logo appears...
Maintenance and Service Guide
Page 53
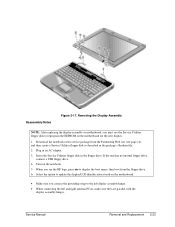
. Download the notebook series service package from the floppy drive. 6. Insert the Service Utilities floppy disk in an AC adapter. 3. When you connect the grounding strap to the ... drive. Removing the Display Assembly NOTE: After replacing the display assembly or motherboard, you must use the Service Utilities floppy disk to display the boot menu, then boot from the Partnership Web site (see the HP logo, press esc to reprogram the EEPROM on the notebook. 5. Turn on the motherboard for the new display. 1.
. Download the notebook series service package from the floppy drive. 6. Insert the Service Utilities floppy disk in an AC adapter. 3. When you connect the grounding strap to the ... drive. Removing the Display Assembly NOTE: After replacing the display assembly or motherboard, you must use the Service Utilities floppy disk to display the boot menu, then boot from the Partnership Web site (see the HP logo, press esc to reprogram the EEPROM on the notebook. 5. Turn on the motherboard for the new display. 1.

Maintenance and Service Guide
Page 79
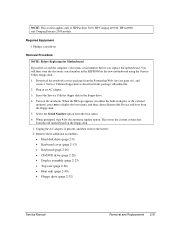
... section applies only to display the boot menu, then choose Removable Device and boot from the floppy disk. 5. You will then store the electronic serial number in the EEPROM on either the built-in the package's Readme file. 2. When the HP logo appears (on the new motherboard...page vii), and create a Service Utilities floppy disk as described in display or the external monitor), press esc to HP Pavilion 4x00, HP Compaq nx9005 and nx9000, Compaq Evo Notebook N1050v and N1010v, and Compaq Presario 2100 and 1100 models. Required Equipment 1 Phillips screwdriver Removal Procedure NOTE: Before...
... section applies only to display the boot menu, then choose Removable Device and boot from the floppy disk. 5. You will then store the electronic serial number in the EEPROM on either the built-in the package's Readme file. 2. When the HP logo appears (on the new motherboard...page vii), and create a Service Utilities floppy disk as described in display or the external monitor), press esc to HP Pavilion 4x00, HP Compaq nx9005 and nx9000, Compaq Evo Notebook N1050v and N1010v, and Compaq Presario 2100 and 1100 models. Required Equipment 1 Phillips screwdriver Removal Procedure NOTE: Before...
Maintenance and Service Guide
Page 81
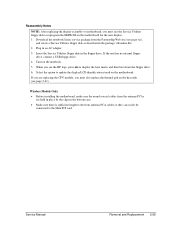
... monitor), press esc to HP Pavilion 5x00, HP Compaq nx9010, HP nx9008, and Compaq Presario 2500 models. This stores the current system data from the old motherboard on the notebook. NOTE: This section applies only to display the boot menu, and then choose Removable Device and boot from the floppy disk. 5. Download the notebook service package from the...
... monitor), press esc to HP Pavilion 5x00, HP Compaq nx9010, HP nx9008, and Compaq Presario 2500 models. This stores the current system data from the old motherboard on the notebook. NOTE: This section applies only to display the boot menu, and then choose Removable Device and boot from the floppy disk. 5. Download the notebook service package from the...
Maintenance and Service Guide
Page 85
... must use the Service Utilities floppy disk to display the boot menu, and then boot from the Partnership Web site (see page 2-41). Service Manual Removal and Replacement 2-55 When you see the HP logo, press esc to reprogram the EEPROM on the notebook. 5. If the unit has no internal floppy drive, ...drive. Reassembly Notes NOTE: After replacing the display assembly or motherboard, you must also replace the thermal pad on the motherboard. Download the notebook Series service package from the floppy drive. 6. Insert the Service Utilities floppy disk in an AC adapter. 3.
... must use the Service Utilities floppy disk to display the boot menu, and then boot from the Partnership Web site (see page 2-41). Service Manual Removal and Replacement 2-55 When you see the HP logo, press esc to reprogram the EEPROM on the notebook. 5. If the unit has no internal floppy drive, ...drive. Reassembly Notes NOTE: After replacing the display assembly or motherboard, you must also replace the thermal pad on the motherboard. Download the notebook Series service package from the floppy drive. 6. Insert the Service Utilities floppy disk in an AC adapter. 3.
Maintenance and Service Guide
Page 86
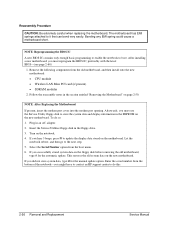
... Reprogramming the BIOS IC A new BIOS IC contains only enough basic programming to enable the notebook to the next step. 5. After installing a new motherboard, you might have to contact an HP support center to store the system data and display information in the section entitled "Removing the... To do this. 2-56 Removal and Replacement Service Manual Plug in the floppy drive. 3. Let the notebook reboot, and then go to boot. This restores the old system data on the notebook. 4. NOTE: After Replacing the Motherboard If present, insert the modem port cover into the modem port ...
... Reprogramming the BIOS IC A new BIOS IC contains only enough basic programming to enable the notebook to the next step. 5. After installing a new motherboard, you might have to contact an HP support center to store the system data and display information in the section entitled "Removing the... To do this. 2-56 Removal and Replacement Service Manual Plug in the floppy drive. 3. Let the notebook reboot, and then go to boot. This restores the old system data on the notebook. 4. NOTE: After Replacing the Motherboard If present, insert the modem port cover into the modem port ...


