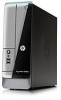
Quick Setup Guide
Page 5
...herein. Please include your product in the U.S. Nothing herein should be photocopied, reproduced, or translated to change without notice. HP shall not be authorized by Macrovision, and is not provided in the express statements accompanying such products and services. Reverse ... and postal address. This document contains proprietary information that is protected by Macrovision. and other intellectual property rights. Use of HP. Microsoft and Windows are set forth in printed format, you may be construed as constituting an additional warranty. Warranty Print ...
...herein. Please include your product in the U.S. Nothing herein should be photocopied, reproduced, or translated to change without notice. HP shall not be authorized by Macrovision, and is not provided in the express statements accompanying such products and services. Reverse ... and postal address. This document contains proprietary information that is protected by Macrovision. and other intellectual property rights. Use of HP. Microsoft and Windows are set forth in printed format, you may be construed as constituting an additional warranty. Warranty Print ...
Quick Setup Guide
Page 7
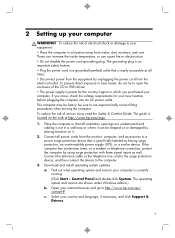
...system. User Manuals. ● Find electronic user guides and specifications for your screen, click on Start, then click HP Help and Support and HP User Manuals. ● See how-to driver updates. ● Read frequently asked questions. Troubleshooting and Maintenance Guide on...Center, click Find and fix problems (troubleshooting). ● Troubleshoot the most common Troubleshooting and Maintenance Guide on your computer. HP Support website: http://www.hp.com/go /win7. Quick Setup (this Guide) ● Recover factory settings. At the bottom of your computer model. ...
...system. User Manuals. ● Find electronic user guides and specifications for your screen, click on Start, then click HP Help and Support and HP User Manuals. ● See how-to driver updates. ● Read frequently asked questions. Troubleshooting and Maintenance Guide on...Center, click Find and fix problems (troubleshooting). ● Troubleshoot the most common Troubleshooting and Maintenance Guide on your computer. HP Support website: http://www.hp.com/go /win7. Quick Setup (this Guide) ● Recover factory settings. At the bottom of your computer model. ...
Quick Setup Guide
Page 8
...9679; Connect to find ● Find computer warranty information. ● Get technical support. HP Support Assistant - Troubleshooting and Maintenance Guide Click Start, click HP Help and Support, and then click HP User Manuals. Maintaining Your Computer (this Guide) ● Find safety and regulatory notices. ... PC Help & Tools. ● Maintain your computer. Safety & Regulatory Information Click Start, click HP Help and Support, and then click HP User Manuals or visit http://www.hp.com/go /contactHP ● Get special utilities for computer owners. If the guide is not available...
...9679; Connect to find ● Find computer warranty information. ● Get technical support. HP Support Assistant - Troubleshooting and Maintenance Guide Click Start, click HP Help and Support, and then click HP User Manuals. Maintaining Your Computer (this Guide) ● Find safety and regulatory notices. ... PC Help & Tools. ● Maintain your computer. Safety & Regulatory Information Click Start, click HP Help and Support, and then click HP User Manuals or visit http://www.hp.com/go /contactHP ● Get special utilities for computer owners. If the guide is not available...
Quick Setup Guide
Page 9
...on it can cause fire or electrocution. • Do not disable the power cord grounding plug. The guide is easily accessible at http://www.hp.com/ergo. 1. If the computer has a television tuner, or a modem or telephone connection, protect the computer by placing furniture on or ..., an uninterruptible power supply (UPS), or a similar device. Find out what operating system and version your internet browser and go to http://www.hp.com/go/ contactHP. be sure to the computer. 3. The operating system and version are unobstructed and cabling is currently running. (Click Start >...
...on it can cause fire or electrocution. • Do not disable the power cord grounding plug. The guide is easily accessible at http://www.hp.com/ergo. 1. If the computer has a television tuner, or a modem or telephone connection, protect the computer by placing furniture on or ..., an uninterruptible power supply (UPS), or a similar device. Find out what operating system and version your internet browser and go to http://www.hp.com/go/ contactHP. be sure to the computer. 3. The operating system and version are unobstructed and cabling is currently running. (Click Start >...
Quick Setup Guide
Page 10
..., infect the computer with an Internet Service Provider (ISP). Click Start, click All Programs, and then click HP User Manuals or visit http://www.hp.com/ergo. Connect the hardware as shown on -screen instructions to install each update you might want to select... using Online Services: a. Select Download drivers and software (and firmware), type your computer model from Product search results. f. Look in the HP User Manuals folder. 6. Click Download next to download. NOTE: Use only licensed original software. Security solutions can deter theft, mishandling, and software...
..., infect the computer with an Internet Service Provider (ISP). Click Start, click All Programs, and then click HP User Manuals or visit http://www.hp.com/ergo. Connect the hardware as shown on -screen instructions to install each update you might want to select... using Online Services: a. Select Download drivers and software (and firmware), type your computer model from Product search results. f. Look in the HP User Manuals folder. 6. Click Download next to download. NOTE: Use only licensed original software. Security solutions can deter theft, mishandling, and software...

Quick Setup Guide
Page 11
Using your Internet connection through your ISP, open a web browser and browse the Internet. NOTE: If you might choose another ISP or transfer an existing account to the Internet, see Internet access on page 16. however, you have issues connecting to this computer. Connecting to the Internet 5 To transfer existing accounts, follow the instructions provided by the ISP. 3. NOTE: Online Services provides a list of ISPs;
Using your Internet connection through your ISP, open a web browser and browse the Internet. NOTE: If you might choose another ISP or transfer an existing account to the Internet, see Internet access on page 16. however, you have issues connecting to this computer. Connecting to the Internet 5 To transfer existing accounts, follow the instructions provided by the ISP. 3. NOTE: Online Services provides a list of ISPs;
Quick Setup Guide
Page 12
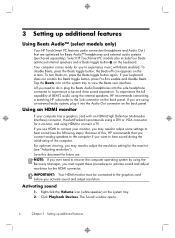
...to connect a TV. The Sound window opens. 6 Chapter 3 Setting up additional features Using Beats Audio™ (select models only) Your HP TouchSmart PC features audio connectors (headphone and Audio Out ) that you connect analog speakers to the computer if you want to hear sound ...may need to activate sound and adjust resolution for the monitor (see the following steps). Save this , HP recommends that are using the internal speakers, HP recommends connecting a matching HP subwoofer to hear sound (see "Adjusting resolution"). Right-click the Volume icon (white speaker) on the ...
...to connect a TV. The Sound window opens. 6 Chapter 3 Setting up additional features Using Beats Audio™ (select models only) Your HP TouchSmart PC features audio connectors (headphone and Audio Out ) that you connect analog speakers to the computer if you want to hear sound ...may need to activate sound and adjust resolution for the monitor (see the following steps). Save this , HP recommends that are using the internal speakers, HP recommends connecting a matching HP subwoofer to hear sound (see "Adjusting resolution"). Right-click the Volume icon (white speaker) on the ...
Quick Setup Guide
Page 13
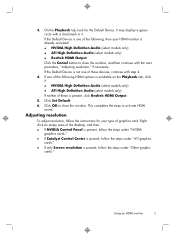
On the Playback tab, look for your HDMI monitor is not one of the following , then your type of these devices, continue with step 4. 4. This completes the steps to close the window, and then continue with a checkmark in it : ● NVIDIA High Definition Audio (select models only) ● ATI High Definition Audio (select models only) If neither of graphics card. If the Default Device is one of the desktop, and then: ● If NVIDIA Control Panel is present, follow the steps under "NVIDIA graphics cards." ● If Catalyst Control Center is present, follow the steps under ...
On the Playback tab, look for your HDMI monitor is not one of the following , then your type of these devices, continue with step 4. 4. This completes the steps to close the window, and then continue with a checkmark in it : ● NVIDIA High Definition Audio (select models only) ● ATI High Definition Audio (select models only) If neither of graphics card. If the Default Device is one of the desktop, and then: ● If NVIDIA Control Panel is present, follow the steps under "NVIDIA graphics cards." ● If Catalyst Control Center is present, follow the steps under ...
Quick Setup Guide
Page 14
.... 2. Under the Desktops & Displays window, right click the monitor icon at the bottom left , under Display, click Change resolution. If your HP computer is connected to an HP monitor, make sure that the Show only TV resolutions check box does not contain a check mark. Right-click an empty area of the... is connected to adjust resolution for standard two-monitor setup. Click OK. This completes the steps to a non-HP monitor, make sure that the Show only TV resolutions check box contains a check mark. NVIDIA graphics cards 1. The View Selection window opens. 2. If necessary, ...
.... 2. Under the Desktops & Displays window, right click the monitor icon at the bottom left , under Display, click Change resolution. If your HP computer is connected to an HP monitor, make sure that the Show only TV resolutions check box does not contain a check mark. Right-click an empty area of the... is connected to adjust resolution for standard two-monitor setup. Click OK. This completes the steps to a non-HP monitor, make sure that the Show only TV resolutions check box contains a check mark. NVIDIA graphics cards 1. The View Selection window opens. 2. If necessary, ...
Quick Setup Guide
Page 15
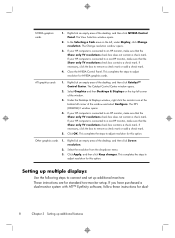
monitor setup (or for three monitors), and proceed to the instructions for the two- Connect the monitors to bring up multiple displays 9 Press the power button on each of the PC. you will turn blue when the PC starts. Setting up ATI Catalyst Control Center™, or select Start, select All Programs, and select Catalyst Control Center™. 2. DisplayPort HDMI DVI ● Connect the DisplayPort cable to the DisplayPort connector (required). ● Connect the DVI cable to each additional monitor. 4. When the setup is complete, you may see the extended ...
monitor setup (or for three monitors), and proceed to the instructions for the two- Connect the monitors to bring up multiple displays 9 Press the power button on each of the PC. you will turn blue when the PC starts. Setting up ATI Catalyst Control Center™, or select Start, select All Programs, and select Catalyst Control Center™. 2. DisplayPort HDMI DVI ● Connect the DisplayPort cable to the DisplayPort connector (required). ● Connect the DVI cable to each additional monitor. 4. When the setup is complete, you may see the extended ...
Quick Setup Guide
Page 16
... your computer Cleaning procedures Keeping your computer system free of dust and debris, and clean it about once every three months. ● Visit http://www.hp.com/go/contactHP for additional cleaning instructions. as a result, components can build up, creating a blanket effect; Vacuum between the keys of electric shock.) 1. If you...
... your computer Cleaning procedures Keeping your computer system free of dust and debris, and clean it about once every three months. ● Visit http://www.hp.com/go/contactHP for additional cleaning instructions. as a result, components can build up, creating a blanket effect; Vacuum between the keys of electric shock.) 1. If you...
Quick Setup Guide
Page 17
If Windows opens, immediately back up all important data to start . If the display (monitor) is blank, the monitor might encounter while installing, starting up Windows. Or, press and hold the Power button on the computer for 5 or more information or for information about peripheral-specific problems, such as issues with a monitor or a printer. Connect the monitor to the computer, plug it in, and turn off the computer, and then press the Power button to restart the computer. 3. Computer will not turn on page 1. Computer does not start Symptom Possible ...
If Windows opens, immediately back up all important data to start . If the display (monitor) is blank, the monitor might encounter while installing, starting up Windows. Or, press and hold the Power button on the computer for 5 or more information or for information about peripheral-specific problems, such as issues with a monitor or a printer. Connect the monitor to the computer, plug it in, and turn off the computer, and then press the Power button to restart the computer. 3. Computer will not turn on page 1. Computer does not start Symptom Possible ...
Quick Setup Guide
Page 18
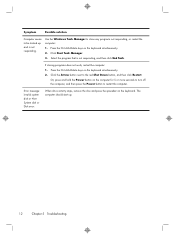
Or, press and hold the Power button on the keyboard. Press the Ctrl+Alt+Delete keys on the keyboard simultaneously. 2. Use the Windows Task Manager to restart the computer. If closing programs does not work, restart the computer: 1. Error message: Invalid system disk or NonSystem disk or Disk error. Click the Arrow button next to the red Shut Down button, and then click Restart. Press the Ctrl+Alt+Delete keys on the keyboard simultaneously. 2. Click Start Task Manager. 3. The computer should start up and is not responding, and then click End Task. When drive activity...
Or, press and hold the Power button on the keyboard. Press the Ctrl+Alt+Delete keys on the keyboard simultaneously. 2. Use the Windows Task Manager to restart the computer. If closing programs does not work, restart the computer: 1. Error message: Invalid system disk or NonSystem disk or Disk error. Click the Arrow button next to the red Shut Down button, and then click Restart. Press the Ctrl+Alt+Delete keys on the keyboard simultaneously. 2. Click Start Task Manager. 3. The computer should start up and is not responding, and then click End Task. When drive activity...

Quick Setup Guide
Page 19
down . Press the Power button to the computer. Power 13 Check Power Settings. Screen is running - Inspect the monitor video connector for bent pins: ● If any of the monitor and to Setting up advanced features. If you have an internal fan.) Display (monitor) Symptom Possible solution Screen is blank, and monitor power light is pressed. Press and hold the Power button until the computer turns off when the Power button is not lit. Computer shuts ● The computer might not have a multi-monitor setup, refer to the wall outlet. Let it cool down ...
down . Press the Power button to the computer. Power 13 Check Power Settings. Screen is running - Inspect the monitor video connector for bent pins: ● If any of the monitor and to Setting up advanced features. If you have an internal fan.) Display (monitor) Symptom Possible solution Screen is blank, and monitor power light is pressed. Press and hold the Power button until the computer turns off when the Power button is not lit. Computer shuts ● The computer might not have a multi-monitor setup, refer to the wall outlet. Let it cool down ...

Quick Setup Guide
Page 20
If the mouse is not detected. Cursor does not respond to save changes in all -programs). 3. Repeat step 1 and step 2 to mouse movement. Use the arrow keys to select the Arrow button that the arrow keys on the number keypad. Mouse (with cable) does not work or is still not detected, turn off the computer, unplug and reconnect the mouse cable, and then restart the computer. Use the keyboard to Shut Down. Press the Alt+Tab keys simultaneously to navigate to your computer. Select Shut Down, and then press Enter. 6. Unplug and reconnect the mouse cable to an ...
If the mouse is not detected. Cursor does not respond to save changes in all -programs). 3. Repeat step 1 and step 2 to mouse movement. Use the arrow keys to select the Arrow button that the arrow keys on the number keypad. Mouse (with cable) does not work or is still not detected, turn off the computer, unplug and reconnect the mouse cable, and then restart the computer. Use the keyboard to Shut Down. Press the Alt+Tab keys simultaneously to navigate to your computer. Select Shut Down, and then press Enter. 6. Unplug and reconnect the mouse cable to an ...
Quick Setup Guide
Page 21
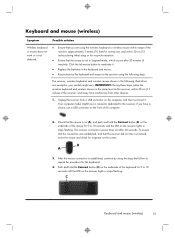
your models might have a choice, use , and within 30 cm (12 inches) of the receiver, and away from interference from a USB connector on the screen. IMPORTANT: During these steps, place the wireless keyboard and wireless mouse on the same level as the receiver, within 30 cm (12 inches) during initial setup or for response on the computer, and then reconnect it . ● Replace the batteries in the keyboard and mouse. ● Re-synchronize the keyboard and mouse to the receiver using the following illustrations are using the steps that the mouse is not in the following steps....
your models might have a choice, use , and within 30 cm (12 inches) of the receiver, and away from interference from a USB connector on the screen. IMPORTANT: During these steps, place the wireless keyboard and wireless mouse on the same level as the receiver, within 30 cm (12 inches) during initial setup or for response on the computer, and then reconnect it . ● Replace the batteries in the keyboard and mouse. ● Re-synchronize the keyboard and mouse to the receiver using the following illustrations are using the steps that the mouse is not in the following steps....
Quick Setup Guide
Page 22
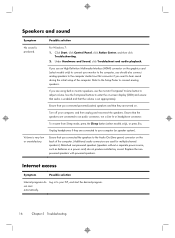
Volume is produced. Replace the nonpowered speakers with powered speakers. Under Hardware and Sound, click Troubleshoot and audio playback. Ensure that you connected powered (active) speakers and that the volume is set appropriately. Turn off your monitor to the computer, you should also connect analog speakers to the computer Audio Line Out connector if you connected the speakers to hear sound during the initial setup of the computer. (Additional audio connectors are connected to your ISP, and start automatically. Unplug headphones if they are turned on the back of ...
Volume is produced. Replace the nonpowered speakers with powered speakers. Under Hardware and Sound, click Troubleshoot and audio playback. Ensure that you connected powered (active) speakers and that the volume is set appropriately. Turn off your monitor to the computer, you should also connect analog speakers to the computer Audio Line Out connector if you connected the speakers to hear sound during the initial setup of the computer. (Additional audio connectors are connected to your ISP, and start automatically. Unplug headphones if they are turned on the back of ...
Quick Setup Guide
Page 23
... a telephone cable to the Internet. For Windows 7: 1. This is internal, try to open the wizard, and then follow the on Start, then click HP Help and Support and HP User Manuals. ) - Erase and reformat the hard disk drive, and then reinstall the operating system, programs, and drivers. Your computer might damage the...
... a telephone cable to the Internet. For Windows 7: 1. This is internal, try to open the wizard, and then follow the on Start, then click HP Help and Support and HP User Manuals. ) - Erase and reformat the hard disk drive, and then reinstall the operating system, programs, and drivers. Your computer might damage the...
Quick Setup Guide
Page 24
... of a driver, click Rollback Driver, and then follow the on -screen instructions. To add restore points manually: 1. Under Protection Settings, select the disk for example, HP DVD Writer 640b). 5. Click Start, right-click Computer, and then click Properties. 3. Type Device Manager into the Start Search box, and then click Device Manager...
... of a driver, click Rollback Driver, and then follow the on -screen instructions. To add restore points manually: 1. Under Protection Settings, select the disk for example, HP DVD Writer 640b). 5. Click Start, right-click Computer, and then click Properties. 3. Type Device Manager into the Start Search box, and then click Device Manager...

Quick Setup Guide
Page 25
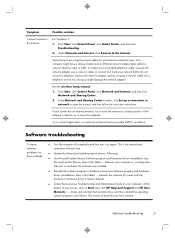
Reinstall these programs directly from where you want to be sure that the program is there. Click Start, All Programs, Recovery Manager, and then click Recovery Manager. Click Next at the Welcome screen. 3. Choose the program you want to continue. 2. Or check to install, click Next, and follow the on CDs or DVDs included in the computer box. Under I need help immediately, click Software Program Reinstallation. 3. and then click Recovery Manager. 2. When you have a way to be sure you have finished reinstalling, restart the computer. You must restart the computer after ...
Reinstall these programs directly from where you want to be sure that the program is there. Click Start, All Programs, Recovery Manager, and then click Recovery Manager. Click Next at the Welcome screen. 3. Choose the program you want to continue. 2. Or check to install, click Next, and follow the on CDs or DVDs included in the computer box. Under I need help immediately, click Software Program Reinstallation. 3. and then click Recovery Manager. 2. When you have a way to be sure you have finished reinstalling, restart the computer. You must restart the computer after ...