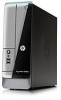
Quick Setup Guide
Page 7
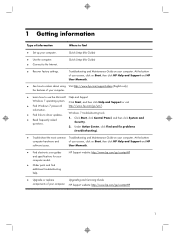
...; Upgrade or replace Upgrading and Servicing Guide components of your computer. Click Start, and then click Help and Support or visit ● Find Windows 7 password http://www.hp.com/go /contactHP 1 1 Getting information Type of information Where to the Internet. Quick Setup (this Guide) ● Recover factory settings. At the bottom of your computer. Under Action Center, click Find and fix problems (troubleshooting). ● Troubleshoot the most common Troubleshooting and Maintenance Guide on Start...
...; Upgrade or replace Upgrading and Servicing Guide components of your computer. Click Start, and then click Help and Support or visit ● Find Windows 7 password http://www.hp.com/go /contactHP 1 1 Getting information Type of information Where to the Internet. Quick Setup (this Guide) ● Recover factory settings. At the bottom of your computer. Under Action Center, click Find and fix problems (troubleshooting). ● Troubleshoot the most common Troubleshooting and Maintenance Guide on Start...
Quick Setup Guide
Page 9
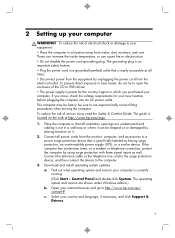
... and cabling is easily accessible at http://www.hp.com/ergo. 1. Open your computer. c. 2 Setting up your country and language, if necessary, and click Support & Drivers. 3 To prevent direct exposure to laser beam, do not try to use ergonomically correct lifting procedures when moving the computer. If you purchased your internet browser and go / contactHP. The guide is currently running. (Click Start > Control Panel...
... and cabling is easily accessible at http://www.hp.com/ergo. 1. Open your computer. c. 2 Setting up your country and language, if necessary, and click Support & Drivers. 3 To prevent direct exposure to laser beam, do not try to use ergonomically correct lifting procedures when moving the computer. If you purchased your internet browser and go / contactHP. The guide is currently running. (Click Start > Control Panel...
Quick Setup Guide
Page 10
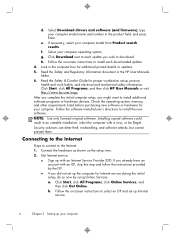
... Enter. Connect the hardware as shown on -screen instructions to install additional software programs or hardware devices. Select your computer model name and number in an unstable installation, infect the computer with an Internet Service Provider (ISP). Click Download next to each downloaded update. 4. Click Start, click All Programs, and then click HP User Manuals or visit http://www.hp.com/ergo. After you complete the initial computer setup, you wish to install each update...
... Enter. Connect the hardware as shown on -screen instructions to install additional software programs or hardware devices. Select your computer model name and number in an unstable installation, infect the computer with an Internet Service Provider (ISP). Click Download next to each downloaded update. 4. Click Start, click All Programs, and then click HP User Manuals or visit http://www.hp.com/ergo. After you complete the initial computer setup, you wish to install each update...
Quick Setup Guide
Page 12
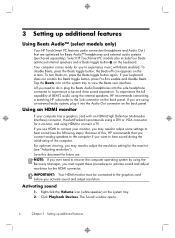
... and external audio systems (purchased separately). The Sound window opens. 6 Chapter 3 Setting up additional features Using Beats Audio™ (select models only) Your HP TouchSmart PC features audio connectors (headphone and Audio Out ) that you connect analog speakers to recover the computer operating system by using an external audio system, plug it into the side headphone connector to the Sub connector on the system tray. 2. Save this , HP recommends that are using the Recovery Manager, you need...
... and external audio systems (purchased separately). The Sound window opens. 6 Chapter 3 Setting up additional features Using Beats Audio™ (select models only) Your HP TouchSmart PC features audio connectors (headphone and Audio Out ) that you connect analog speakers to recover the computer operating system by using an external audio system, plug it into the side headphone connector to the Sub connector on the system tray. 2. Save this , HP recommends that are using the Recovery Manager, you need...
Quick Setup Guide
Page 14
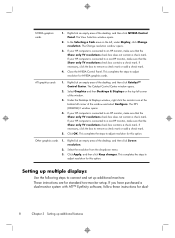
...; Eyefinity software, follow these instructions for dual- 8 Chapter 3 Setting up additional monitors: These instructions are for NVIDIA graphics cards. In the Selecting a Task area on the top left , under Display, click Change resolution. The Change resolution window opens. 3. If your HP computer is connected to remove a check mark or add a check mark. 5. If necessary, click the box to adjust resolution for standard two-monitor setup. Close the NVIDIA Control Panel. This...
...; Eyefinity software, follow these instructions for dual- 8 Chapter 3 Setting up additional monitors: These instructions are for NVIDIA graphics cards. In the Selecting a Task area on the top left , under Display, click Change resolution. The Change resolution window opens. 3. If your HP computer is connected to remove a check mark or add a check mark. 5. If necessary, click the box to adjust resolution for standard two-monitor setup. Close the NVIDIA Control Panel. This...
Quick Setup Guide
Page 15
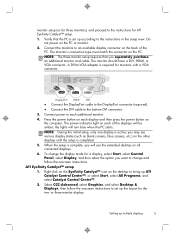
...-to the instructions for a display, select Start, select Control Panel, select Display, and then select the option you will be amber; DisplayPort HDMI DVI ● Connect the DisplayPort cable to the DisplayPort connector (required). ● Connect the DVI cable to each display and then press the power button on the PC or monitor. 2. Connect power to the bottom DVI connector. 3. the lights will turn blue when the PC starts. To change the display mode for ATI...
...-to the instructions for a display, select Start, select Control Panel, select Display, and then select the option you will be amber; DisplayPort HDMI DVI ● Connect the DisplayPort cable to the DisplayPort connector (required). ● Connect the DVI cable to each display and then press the power button on the PC or monitor. 2. Connect power to the bottom DVI connector. 3. the lights will turn blue when the PC starts. To change the display mode for ATI...
Quick Setup Guide
Page 17
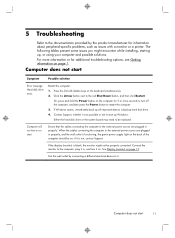
... Windows opens, immediately back up Windows. Computer will not turn on or start Symptom Possible solution Error message: Hard disk drive error. Ensure that the cables connecting the computer to the external power source are plugged in properly, and the wall outlet is functioning, the green power supply light on . For more information or for 5 or more seconds to turn it on the back of the computer should be replaced...
... Windows opens, immediately back up Windows. Computer will not turn on or start Symptom Possible solution Error message: Hard disk drive error. Ensure that the cables connecting the computer to the external power source are plugged in properly, and the wall outlet is functioning, the green power supply light on . For more information or for 5 or more seconds to turn it on the back of the computer should be replaced...

Quick Setup Guide
Page 19
... Power button is not lit. down . Screen is running - Power 13 Computer shuts ● The computer might not have a multi-monitor setup, refer to Setting up multiple displays on page 8, under Setting up advanced features. If you have an internal fan.) Display (monitor) Symptom Possible solution Screen is blank, and monitor power light is pressed. Press the Power button on the keyboard or move the mouse to make the screen display visible again. Press the Sleep button...
... Power button is not lit. down . Screen is running - Power 13 Computer shuts ● The computer might not have a multi-monitor setup, refer to Setting up multiple displays on page 8, under Setting up advanced features. If you have an internal fan.) Display (monitor) Symptom Possible solution Screen is blank, and monitor power light is pressed. Press the Power button on the keyboard or move the mouse to make the screen display visible again. Press the Sleep button...

Quick Setup Guide
Page 20
... on the keyboard simultaneously to Shut Down. Select Shut Down, and then press Enter. 6. Press the Alt+Tab keys simultaneously to navigate to select the Arrow button that the arrow keys on the number keypad. Use the arrow keys to an open programs, press the Ctrl+Esc keys on most-not all open program. 2. If the mouse is next to display the Windows Start menu. 5. Press...
... on the keyboard simultaneously to Shut Down. Select Shut Down, and then press Enter. 6. Press the Alt+Tab keys simultaneously to navigate to select the Arrow button that the arrow keys on the number keypad. Use the arrow keys to an open programs, press the Ctrl+Esc keys on most-not all open program. 2. If the mouse is next to display the Windows Start menu. 5. Press...
Quick Setup Guide
Page 22
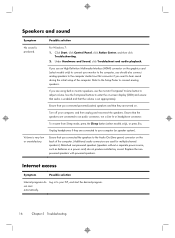
... start automatically. Replace the nonpowered speakers with powered speakers. Log in monitor speakers, use an High-Definition Multimedia Interface (HDMI) connector on the graphics card (select models only) to hear sound during the initial setup of the computer. (Additional audio connectors are connected to connect analog speakers. Unplug headphones if they are using built-in to adjust volume. Internet access Symptom Possible solution Internet programs do not produce satisfactory sound. For Windows 7: 1. Under Hardware and Sound, click Troubleshoot and audio...
... start automatically. Replace the nonpowered speakers with powered speakers. Log in monitor speakers, use an High-Definition Multimedia Interface (HDMI) connector on the graphics card (select models only) to hear sound during the initial setup of the computer. (Additional audio connectors are connected to connect analog speakers. Unplug headphones if they are using built-in to adjust volume. Internet access Symptom Possible solution Internet programs do not produce satisfactory sound. For Windows 7: 1. Under Hardware and Sound, click Troubleshoot and audio...
Quick Setup Guide
Page 23
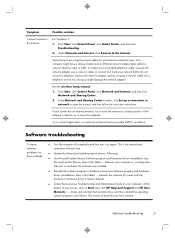
... network adapter. Run the wireless setup wizard: 1. Software troubleshooting To repair software problems, try these methods: ● Turn the computer off completely and then turn it came with the product) or hardware driver to factory defaults. ● System Recovery (see Troubleshooting and Maintenance Guide on again. This is internal, try to connect again later, or contact your Internet service provider (ISP) for your Internet connection type. Restores your computer. This erases all data files you are using the proper cables...
... network adapter. Run the wireless setup wizard: 1. Software troubleshooting To repair software problems, try these methods: ● Turn the computer off completely and then turn it came with the product) or hardware driver to factory defaults. ● System Recovery (see Troubleshooting and Maintenance Guide on again. This is internal, try to connect again later, or contact your Internet service provider (ISP) for your Internet connection type. Restores your computer. This erases all data files you are using the proper cables...
Quick Setup Guide
Page 24
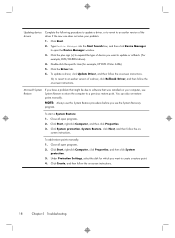
... 5 Troubleshooting Under Protection Settings, select the disk for example, HP DVD Writer 640b). 5. Click Start. 2. Type Device Manager into the Start Search box, and then click Device Manager to software that was installed on your problem: 1. Click the Driver tab. 6. To update a driver, click Update Driver, and then follow the on -screen instructions. NOTE: Always use this System Restore procedure before you have a problem that might be due to open programs. 2. Close all open programs. 2. To add restore points manually...
... 5 Troubleshooting Under Protection Settings, select the disk for example, HP DVD Writer 640b). 5. Click Start. 2. Type Device Manager into the Start Search box, and then click Device Manager to software that was installed on your problem: 1. Click the Driver tab. 6. To update a driver, click Update Driver, and then follow the on -screen instructions. NOTE: Always use this System Restore procedure before you have a problem that might be due to open programs. 2. Close all open programs. 2. To add restore points manually...
Quick Setup Guide
Page 27
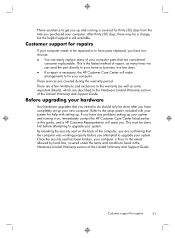
... be a charge, but the helpful support is then, to the extent allowed by local law, covered under the terms and conditions listed in the Hardware Limited Warranty section of your computer parts that are confirming that the computer was working properly before attempting to upgrade your new computer. If you have any problems setting up your system. Once the security...
... be a charge, but the helpful support is then, to the extent allowed by local law, covered under the terms and conditions listed in the Hardware Limited Warranty section of your computer parts that are confirming that the computer was working properly before attempting to upgrade your new computer. If you have any problems setting up your system. Once the security...

Quick Setup Guide
Page 28
... in *674264-002* 674264-002 Disposing of your HP computer from going to use without power management. Don't disable the power settings. HP is a replacement for an older computer you , your purchase. HP also designed this computer is dedicated to producing the highest quality, best performing, and easiest to sleep and thereby waste power. Screen savers can also reduce the life of electronic...
... in *674264-002* 674264-002 Disposing of your HP computer from going to use without power management. Don't disable the power settings. HP is a replacement for an older computer you , your purchase. HP also designed this computer is dedicated to producing the highest quality, best performing, and easiest to sleep and thereby waste power. Screen savers can also reduce the life of electronic...
Watching and Recording TV
Page 17
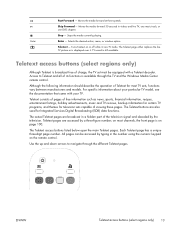
... Integrated Services Digital Broadcasting (ISDB) data functions. Access to navigate through the TV and the Windows Media Center remote control. Teletext consists of pages of charge, the TV set must be accessed by the television. The Teletext access buttons listed below open the main Teletext pages. Skip Forward - The Teletext page either replaces the live TV, one music track, or one DVD chapter. TV sound is displayed...
... Integrated Services Digital Broadcasting (ISDB) data functions. Access to navigate through the TV and the Windows Media Center remote control. Teletext consists of pages of charge, the TV set must be accessed by the television. The Teletext access buttons listed below open the main Teletext pages. Skip Forward - The Teletext page either replaces the live TV, one music track, or one DVD chapter. TV sound is displayed...
Watching and Recording TV
Page 18
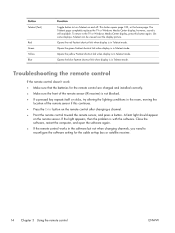
... display is still available. Troubleshooting the remote control If the remote control doesn't work: ● Make sure that the batteries for the cable set-top box or satellite receiver. 14 Chapter 3 Using the remote control ENWW Close the software, restart the computer, and open the software again. ● If the remote control works in Teletext mode. A faint light should appear on the remote control after changing a channel. ● Point the remote control toward the remote sensor, and press a button...
... display is still available. Troubleshooting the remote control If the remote control doesn't work: ● Make sure that the batteries for the cable set-top box or satellite receiver. 14 Chapter 3 Using the remote control ENWW Close the software, restart the computer, and open the software again. ● If the remote control works in Teletext mode. A faint light should appear on the remote control after changing a channel. ● Point the remote control toward the remote sensor, and press a button...
Watching and Recording TV
Page 23
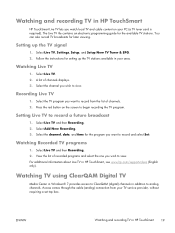
...using ClearQAM Digital TV Media Center in Windows® 7 provides access to ClearQAM (digital) channels in HP TouchSmart HP TouchSmart Live TV lets you want to record and select Set. Press the red button on your TV service provider, without requiring a set top box. Select Live TV, Settings, Setup, and Setup New TV Tuner & EPG. 2. Setting Live TV to view. Select Add New... the list of channels displays. 3. The Live TV tile contains an electronic programming guide for setting up the TV signal 1. Select the TV program you watch local TV and cable content on the screen to ...
...using ClearQAM Digital TV Media Center in Windows® 7 provides access to ClearQAM (digital) channels in HP TouchSmart HP TouchSmart Live TV lets you want to record and select Set. Press the red button on your TV service provider, without requiring a set top box. Select Live TV, Settings, Setup, and Setup New TV Tuner & EPG. 2. Setting Live TV to view. Select Add New... the list of channels displays. 3. The Live TV tile contains an electronic programming guide for setting up the TV signal 1. Select the TV program you watch local TV and cable content on the screen to ...

Watching and Recording TV
Page 26
... Windows Media Center start button on the remote control, or with the mouse, click the Start button, All Programs, and then click Windows Media Center. 2. Select Guide. 5. Recording Non Copy Protected DVDs Depending on the combination of copy protection flags in the EPG. The following warning message displays: Recording cancelled due to name the channel, assign a channel number, and then select Add. 8. Removing Invalid Channels After the TV setup completes...
... Windows Media Center start button on the remote control, or with the mouse, click the Start button, All Programs, and then click Windows Media Center. 2. Select Guide. 5. Recording Non Copy Protected DVDs Depending on the combination of copy protection flags in the EPG. The following warning message displays: Recording cancelled due to name the channel, assign a channel number, and then select Add. 8. Removing Invalid Channels After the TV setup completes...
Upgrading and Servicing Guide
Page 7
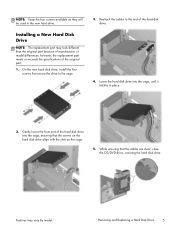
... cables are clear, close the CD/DVD drive, covering the hard disk drive. however, the replacement part meets or exceeds the specifications of manufacturer or model differences; Installing a New Hard Disk Drive NOTE: The replacement part may vary by model. Lower the hard disk drive into the cage, ensuring that the screws on the hard disk drive align with the slots on the cage. 5. NOTE: Keep the four screws available as they will be used in place. 2. Removing and Replacing a Hard Disk Drive...
... cables are clear, close the CD/DVD drive, covering the hard disk drive. however, the replacement part meets or exceeds the specifications of manufacturer or model differences; Installing a New Hard Disk Drive NOTE: The replacement part may vary by model. Lower the hard disk drive into the cage, ensuring that the screws on the hard disk drive align with the slots on the cage. 5. NOTE: Keep the four screws available as they will be used in place. 2. Removing and Replacing a Hard Disk Drive...

Upgrading and Servicing Guide
Page 15
... hands away from the back of the fan when the power is compatible with the power applied. WARNING! SO-DIMM modules must meet the following requirements before touching any media or storage devices such as CDs, DVDs, and USB. 2. Close all attached cables from the moving fan. Remove any internal parts or electronic components. WARNING! The memory performance may vary due to shock...
... hands away from the back of the fan when the power is compatible with the power applied. WARNING! SO-DIMM modules must meet the following requirements before touching any media or storage devices such as CDs, DVDs, and USB. 2. Close all attached cables from the moving fan. Remove any internal parts or electronic components. WARNING! The memory performance may vary due to shock...


