Notebook PC User Guide - Windows 7
Page 21
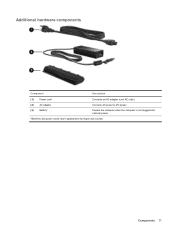
Components 11 Additional hardware components Component Description (1) Power cord* Connects an AC adapter to an AC outlet. (2) AC adapter Converts AC power to DC power. (3) Battery* Powers the computer when the computer is not plugged into external power. *Batteries and power cords vary in appearance by region and country.
Components 11 Additional hardware components Component Description (1) Power cord* Connects an AC adapter to an AC outlet. (2) AC adapter Converts AC power to DC power. (3) Battery* Powers the computer when the computer is not plugged into external power. *Batteries and power cords vary in appearance by region and country.

Notebook PC User Guide - Windows 7
Page 61
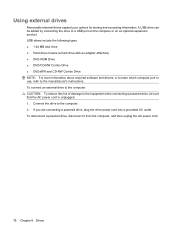
... an important safety feature. Plug the other end of electric shock or damage to external AC power: 1. Do not disable the power cord grounding pin, for example, by unplugging the power cord from the computer). The grounding pin is easily accessible at all times. Plug the AC adapter... into the power connector (1) on the power cord, plug the cord into an AC outlet (3). Connecting the AC adapter WARNING! Disconnect power from the computer by unplugging the power cord from the AC outlet (not by attaching a 2-pin adapter. To reduce...
... an important safety feature. Plug the other end of electric shock or damage to external AC power: 1. Do not disable the power cord grounding pin, for example, by unplugging the power cord from the computer). The grounding pin is easily accessible at all times. Plug the AC adapter... into the power connector (1) on the power cord, plug the cord into an AC outlet (3). Connecting the AC adapter WARNING! Disconnect power from the computer by unplugging the power cord from the AC outlet (not by attaching a 2-pin adapter. To reduce...
Notebook PC User Guide - Windows 7
Page 88
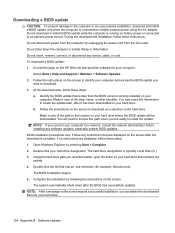
... your options for storing and accessing information. Connect the drive to the manufacturer's instructions. A USB drive can be sure that the AC power cord is unplugged. 1. To connect an external drive to the computer: CAUTION: To reduce the risk of damage to the equipment when connecting..., be added by connecting the drive to a USB port on the computer or on an optional expansion product. If you are connecting a powered drive, plug the drive power cord into a grounded AC outlet. USB drives include the following types: ● 1.44 MB disk drive ● Hard drive module (a hard drive ...
... your options for storing and accessing information. Connect the drive to the manufacturer's instructions. A USB drive can be sure that the AC power cord is unplugged. 1. To connect an external drive to the computer: CAUTION: To reduce the risk of damage to the equipment when connecting..., be added by connecting the drive to a USB port on the computer or on an optional expansion product. If you are connecting a powered drive, plug the drive power cord into a grounded AC outlet. USB drives include the following types: ● 1.44 MB disk drive ● Hard drive module (a hard drive ...

Notebook PC User Guide - Windows 7
Page 90
... drive CAUTION: To prevent information loss or an unresponsive system: Shut down the computer before removing the hard drive from the AC outlet. 5. Unplug the power cord from the hard drive bay. Turn the computer upside down on , in the Sleep state, or in Hibernation, turn the computer on by pressing the...
... drive CAUTION: To prevent information loss or an unresponsive system: Shut down the computer before removing the hard drive from the AC outlet. 5. Unplug the power cord from the hard drive bay. Turn the computer upside down on , in the Sleep state, or in Hibernation, turn the computer on by pressing the...

Notebook PC User Guide - Windows 7
Page 98
...Adding or replacing a memory module To add or replace a memory module: 1. Disconnect all batteries before installing a memory module. Unplug the power cord from the computer. 7. CAUTION: Electrostatic discharge (ESD) can be sure that you are discharged of electric shock and damage to the equipment, unplug... the power cord and remove all external devices connected to the vacant expansion memory module slot or by upgrading the existing memory module in Hibernation...
...Adding or replacing a memory module To add or replace a memory module: 1. Disconnect all batteries before installing a memory module. Unplug the power cord from the computer. 7. CAUTION: Electrostatic discharge (ESD) can be sure that you are discharged of electric shock and damage to the equipment, unplug... the power cord and remove all external devices connected to the vacant expansion memory module slot or by upgrading the existing memory module in Hibernation...
Notebook PC User Guide - Windows 7
Page 114
...a note of the date, name, or other identifier. If no instructions are displayed, follow these instructions: Do not disconnect power from the computer by unplugging the power cord from your hard drive where the BIOS update will need this path when you are displayed on the screen after it has...selecting Start > Computer. 2. Do not download or install a BIOS update while the computer is typically Local Disk (C:). 3. Access the page on the HP Web site that contains the update. 4. Make a note of the path to the location on your hard drive. 104 Appendix B Software updates The hard...
...a note of the date, name, or other identifier. If no instructions are displayed, follow these instructions: Do not disconnect power from the computer by unplugging the power cord from your hard drive where the BIOS update will need this path when you are displayed on the screen after it has...selecting Start > Computer. 2. Do not download or install a BIOS update while the computer is typically Local Disk (C:). 3. Access the page on the HP Web site that contains the update. 4. Make a note of the path to the location on your hard drive. 104 Appendix B Software updates The hard...
Service Guide
Page 9
... Audio-out (headphone) ...115 Audio-in (microphone) ...115 External monitor ...116 RJ-11 (modem) ...117 RJ-45 (network) ...117 HDMI ...118 Universal Serial Bus ...119 9 Power cord set requirements ...121 Requirements for all countries or regions 121 Requirements for specific countries or regions 122 ENWW ix
... Audio-out (headphone) ...115 Audio-in (microphone) ...115 External monitor ...116 RJ-11 (modem) ...117 RJ-45 (network) ...117 HDMI ...118 Universal Serial Bus ...119 9 Power cord set requirements ...121 Requirements for all countries or regions 121 Requirements for specific countries or regions 122 ENWW ix

Service Guide
Page 27
Description Connects an AC adapter to DC power. ENWW Additional hardware components 17 Converts AC power to an AC outlet. Powers the computer when the computer is not plugged into external power. Additional hardware components Component (1) Power cord* (2) AC adapter (3) Battery* *Power cords vary in appearance by country or region.
Description Connects an AC adapter to DC power. ENWW Additional hardware components 17 Converts AC power to an AC outlet. Powers the computer when the computer is not plugged into external power. Additional hardware components Component (1) Power cord* (2) AC adapter (3) Battery* *Power cords vary in appearance by country or region.
Service Guide
Page 42
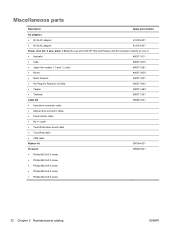
... parts Description Spare part number AC adapters ● 65-W AC adapter 613152-001 ● 90-W AC adapter 613153-001 Power cord, AC, 3 wire, black, 1.83-m (for use with both HP G62 and Presario CQ 62 computer models) for use in: ● Australia 490371-011 ● India 490371-D61 ●... 490371-AB1 ● Thailand 490371-201 Cable Kit 595201-001 ● Hard drive connector cable ● Optical drive connector cable ● Power button cable ● RJ-11 cable ● TouchPad button board cable ● TouchPad cable ● USB cable Rubber kit 600184-001 ...
... parts Description Spare part number AC adapters ● 65-W AC adapter 613152-001 ● 90-W AC adapter 613153-001 Power cord, AC, 3 wire, black, 1.83-m (for use with both HP G62 and Presario CQ 62 computer models) for use in: ● Australia 490371-011 ● India 490371-D61 ●... 490371-AB1 ● Thailand 490371-201 Cable Kit 595201-001 ● Hard drive connector cable ● Optical drive connector cable ● Power button cable ● RJ-11 cable ● TouchPad button board cable ● TouchPad cable ● USB cable Rubber kit 600184-001 ...
Service Guide
Page 43
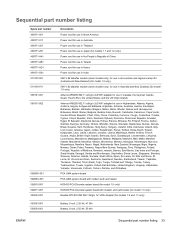
... 592810-001 592811-001 593533-001 Description Power cord for use in North America Power cord for use in Australia Power cord for use in Thailand Power cord for use in Japan (for models 1.1 and 1.2 only) Power cord for use in the People's Republic of China Power cord for use in Taiwan Power cord for use in Korea Power cord for use in India 56K V.92...
... 592810-001 592811-001 593533-001 Description Power cord for use in North America Power cord for use in Australia Power cord for use in Thailand Power cord for use in Japan (for models 1.1 and 1.2 only) Power cord for use in the People's Republic of China Power cord for use in Taiwan Power cord for use in Korea Power cord for use in India 56K V.92...

Service Guide
Page 56
... battery: 1. Shut down on the computer, and then shut it out of the battery into place. 46 Chapter 4 Removal and replacement procedures ENWW Disconnect the power from the computer by first disconnecting the power cord from the AC outlet and then disconnecting the AC adapter from the computer.
... battery: 1. Shut down on the computer, and then shut it out of the battery into place. 46 Chapter 4 Removal and replacement procedures ENWW Disconnect the power from the computer by first disconnecting the power cord from the AC outlet and then disconnecting the AC adapter from the computer.
Service Guide
Page 57
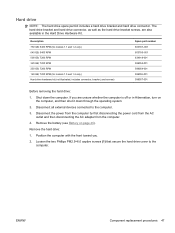
... page 46). Loosen the two Phillips PM2.5×6.0 captive screws (1) that secure the hard drive cover to the computer. 3. Disconnect the power from the computer by first disconnecting the power cord from the AC outlet and then disconnecting the AC adapter from the computer. 4. Remove the battery (see Battery on the computer, and...
... page 46). Loosen the two Phillips PM2.5×6.0 captive screws (1) that secure the hard drive cover to the computer. 3. Disconnect the power from the computer by first disconnecting the power cord from the AC outlet and then disconnecting the AC adapter from the computer. 4. Remove the battery (see Battery on the computer, and...

Service Guide
Page 60
... the computer. Remove the hard drive (see Battery on page 47). Remove the battery (see Hard drive on page 46). 5. Disconnect the power from the computer by first disconnecting the power cord from the AC outlet and then disconnecting the AC adapter from the computer. 4. If you . 2. Description DVD±RW and CD...
... the computer. Remove the hard drive (see Battery on page 47). Remove the battery (see Hard drive on page 46). 5. Disconnect the power from the computer by first disconnecting the power cord from the AC outlet and then disconnecting the AC adapter from the computer. 4. If you . 2. Description DVD±RW and CD...

Service Guide
Page 62
... the computer is off or in Hibernation, turn on page 46). Disconnect all external devices connected to the computer. 3. Disconnect the power from the computer by first disconnecting the power cord from the AC outlet and then disconnecting the AC adapter from the computer. 4. Turn the computer upside down through the operating system...
... the computer is off or in Hibernation, turn on page 46). Disconnect all external devices connected to the computer. 3. Disconnect the power from the computer by first disconnecting the power cord from the AC outlet and then disconnecting the AC adapter from the computer. 4. Turn the computer upside down through the operating system...

Service Guide
Page 65
... down with the front toward you are unsure whether the computer is included in place. Remove the memory module: 1. Disconnect the power from the computer by first disconnecting the power cord from the AC outlet and then disconnecting the AC adapter from the computer. 4. Lift the back side of the memory module cover...
... down with the front toward you are unsure whether the computer is included in place. Remove the memory module: 1. Disconnect the power from the computer by first disconnecting the power cord from the AC outlet and then disconnecting the AC adapter from the computer. 4. Lift the back side of the memory module cover...

Service Guide
Page 67
...-121 595199-291 595199-AD1 595199-001 595199-AB1 595199-281 Before removing the keyboard: 1. ENWW Component replacement procedures 57 Disconnect the power from the computer by first disconnecting the power cord from the AC outlet and then disconnecting the AC adapter from the computer. 4. Remove the three Phillips PM2.5×5.0 and three...
...-121 595199-291 595199-AD1 595199-001 595199-AB1 595199-281 Before removing the keyboard: 1. ENWW Component replacement procedures 57 Disconnect the power from the computer by first disconnecting the power cord from the AC outlet and then disconnecting the AC adapter from the computer. 4. Remove the three Phillips PM2.5×5.0 and three...

Service Guide
Page 69
... use with the front toward you are unsure whether the computer is off or in Hibernation, turn on page 55). Disconnect the power from the computer by first disconnecting the power cord from the AC outlet and then disconnecting AC adapter from the computer. 4. Remove the following components: a. b. Keyboard (see WLAN module on...
... use with the front toward you are unsure whether the computer is off or in Hibernation, turn on page 55). Disconnect the power from the computer by first disconnecting the power cord from the AC outlet and then disconnecting AC adapter from the computer. 4. Remove the following components: a. b. Keyboard (see WLAN module on...

Service Guide
Page 72
...) Spare part number 602744-001 Before removing the speaker assembly: 1. Optical drive (see Keyboard on page 50) b. Turn the top cover upside down. 2. Disconnect the power from the computer by first disconnecting the power cord from the AC outlet and then disconnecting the AC adapter from the computer. 4.
...) Spare part number 602744-001 Before removing the speaker assembly: 1. Optical drive (see Keyboard on page 50) b. Turn the top cover upside down. 2. Disconnect the power from the computer by first disconnecting the power cord from the AC outlet and then disconnecting the AC adapter from the computer. 4.

Service Guide
Page 73
... power cord from the AC outlet and then disconnecting the AC adapter from the computer. 4. Remove the following components: a. ENWW Component replacement procedures 63 Hard drive (see Battery on page 47) b. Remove the Phillips PM2.0×3.0 screw (1) that secures the power button board to install the power ...cover upside down with the rear edge toward you are unsure whether the computer is off or in Hibernation, turn on page 59) Remove the power button board: 1. Reverse this procedure to the top cover. 3. Top cover (see Optical drive on page 57) d. Keyboard (see Keyboard...
... power cord from the AC outlet and then disconnecting the AC adapter from the computer. 4. Remove the following components: a. ENWW Component replacement procedures 63 Hard drive (see Battery on page 47) b. Remove the Phillips PM2.0×3.0 screw (1) that secures the power button board to install the power ...cover upside down with the rear edge toward you are unsure whether the computer is off or in Hibernation, turn on page 59) Remove the power button board: 1. Reverse this procedure to the top cover. 3. Top cover (see Optical drive on page 57) d. Keyboard (see Keyboard...

Service Guide
Page 74
If you . 2. Disconnect the power from the computer by first disconnecting the power cord from the AC outlet and then disconnecting the AC adapter from the TouchPad bracket. Remove the following components: a. Turn the top cover upside down with ...
If you . 2. Disconnect the power from the computer by first disconnecting the power cord from the AC outlet and then disconnecting the AC adapter from the TouchPad bracket. Remove the following components: a. Turn the top cover upside down with ...

