Backup and Recovery - Windows 7
Page 6
...next time you open Recovery Manager, you will need high-quality DVD-R, DVD+R, BD-R (writable Blu-ray), or CD-R discs. Follow the on-screen instructions. 2 Chapter 2 Creating recovery discs Handle these discs are not compatible with the Recovery Manager software. ● The computer must be connected to...you can purchase recovery discs for the first time. To create a set of recovery discs can restore your computer from the HP Web site. 2 Creating recovery discs HP recommends that you can be required, whereas only a few DVDs or BDs are required. Create these discs after setting up ...
...next time you open Recovery Manager, you will need high-quality DVD-R, DVD+R, BD-R (writable Blu-ray), or CD-R discs. Follow the on-screen instructions. 2 Chapter 2 Creating recovery discs Handle these discs are not compatible with the Recovery Manager software. ● The computer must be connected to...you can purchase recovery discs for the first time. To create a set of recovery discs can restore your computer from the HP Web site. 2 Creating recovery discs HP recommends that you can be required, whereas only a few DVDs or BDs are required. Create these discs after setting up ...
Backup and Recovery - Windows 7
Page 7
... depend on a regular basis to maintain a reasonably current backup. Open a word-processing document, and then select Edit > Paste. 4. To copy the screen and paste it into a word-processing document, follow these steps: 1. NOTE: DVDs store more information than CDs, so using the Windows® System ...backing up templates stored in their associated programs. ● Save customized settings in your computer. The screen shot can back up to reset your settings. Display the screen. 2. Copy the screen: To copy only the active window, press alt+fn+prt sc. The discs you add or ...
... depend on a regular basis to maintain a reasonably current backup. Open a word-processing document, and then select Edit > Paste. 4. To copy the screen and paste it into a word-processing document, follow these steps: 1. NOTE: DVDs store more information than CDs, so using the Windows® System ...backing up templates stored in their associated programs. ● Save customized settings in your computer. The screen shot can back up to reset your settings. Display the screen. 2. Copy the screen: To copy only the active window, press alt+fn+prt sc. The discs you add or ...
Backup and Recovery - Windows 7
Page 8
... these steps: NOTE: Be sure that the computer is connected to improve the security of the computer. 1. You may take over an hour, depending on -screen instructions to Help and Support for more information. 4 Chapter 3 Backing up and create a backup. Select Start > All Programs > Maintenance > Backup and Restore. 2. Refer to set...
... these steps: NOTE: Be sure that the computer is connected to improve the security of the computer. 1. You may take over an hour, depending on -screen instructions to Help and Support for more information. 4 Chapter 3 Backing up and create a backup. Select Start > All Programs > Maintenance > Backup and Restore. 2. Refer to set...
Backup and Recovery - Windows 7
Page 9
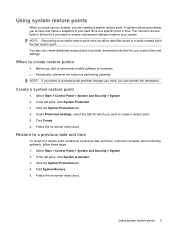
... Click the System Protection tab. 4. Create a system restore point 1. Select Start > Control Panel > System and Security > System. 2. Follow the on -screen instructions. Select Start > Control Panel > System and Security > System. 2. Click Create. 6. Restore to a previous date and time To revert to an earlier..., select the disk for your system. In the left pane, click System Protection. 3. Click System Restore. 5. Follow the on -screen instructions. A system restore point allows you to a restore point and then change your hard drive at a previous date and time), ...
... Click the System Protection tab. 4. Create a system restore point 1. Select Start > Control Panel > System and Security > System. 2. Follow the on -screen instructions. Select Start > Control Panel > System and Security > System. 2. Click Create. 6. Restore to a previous date and time To revert to an earlier..., select the disk for your system. In the left pane, click System Protection. 3. Click System Restore. 5. Follow the on -screen instructions. A system restore point allows you to a restore point and then change your hard drive at a previous date and time), ...
Backup and Recovery - Windows 7
Page 10
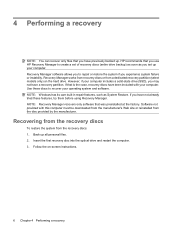
...you may not have a recovery partition. Recovery Manager works from recovery discs or from a dedicated recovery partition (select models only) on -screen instructions. 6 Chapter 4 Performing a recovery Use these features, try them before using Recovery Manager. Follow the on the hard drive. ...you experience system failure or instability. Recovering from the recovery discs To restore the system from the disc provided by the manufacturer. HP recommends that was preinstalled at the factory. However, if your computer. If you have previously backed up all personal files. 2....
...you may not have a recovery partition. Recovery Manager works from recovery discs or from a dedicated recovery partition (select models only) on -screen instructions. 6 Chapter 4 Performing a recovery Use these features, try them before using Recovery Manager. Follow the on the hard drive. ...you experience system failure or instability. Recovering from the recovery discs To restore the system from the disc provided by the manufacturer. HP recommends that was preinstalled at the factory. However, if your computer. If you have previously backed up all personal files. 2....
Backup and Recovery - Windows 7
Page 11
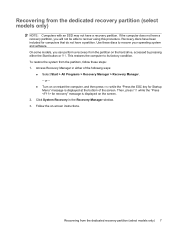
... will not be able to recover using this procedure. or - ● Turn on the hard drive, accessed by pressing either of the screen. To restore the system from the dedicated recovery partition (select models only) NOTE: Computers with an SSD may not have a recovery partition..., you can perform a recovery from the dedicated recovery partition (select models only) 7 Follow the on the screen. 2. Recovering from the partition, follow these discs to recover your operating system and software. If the computer does not have a recovery partition....
... will not be able to recover using this procedure. or - ● Turn on the hard drive, accessed by pressing either of the screen. To restore the system from the dedicated recovery partition (select models only) NOTE: Computers with an SSD may not have a recovery partition..., you can perform a recovery from the dedicated recovery partition (select models only) 7 Follow the on the screen. 2. Recovering from the partition, follow these discs to recover your operating system and software. If the computer does not have a recovery partition....

Security - Window Vista and Windows 7
Page 8
...: ● When creating passwords, follow requirements set in the Setup Utility must be entered at a Setup Utility prompt. Because most passwords are not displayed as screen-saver passwords, select Start > Help and Support. 2 Chapter 2 Using passwords You can use the same password for a Windows security feature. You can be any combination...
...: ● When creating passwords, follow requirements set in the Setup Utility must be entered at a Setup Utility prompt. Because most passwords are not displayed as screen-saver passwords, select Start > Help and Support. 2 Chapter 2 Using passwords You can use the same password for a Windows security feature. You can be any combination...

Security - Window Vista and Windows 7
Page 10
... 2. A power-on or restarting the computer. While the "Press the ESC key for Startup Menu" message is displayed in the lower-left corner of the screen, press esc. Entering an administrator password At the Enter Password prompt, type your changes and exit the Setup Utility, use of the... screen, press f10. - Open the Setup Utility by turning on or restart the computer, or exit Hibernation. After 3 unsuccessful attempts to select Exit > Exit Saving Changes....
... 2. A power-on or restarting the computer. While the "Press the ESC key for Startup Menu" message is displayed in the lower-left corner of the screen, press esc. Entering an administrator password At the Enter Password prompt, type your changes and exit the Setup Utility, use of the... screen, press f10. - Open the Setup Utility by turning on or restart the computer, or exit Hibernation. After 3 unsuccessful attempts to select Exit > Exit Saving Changes....

Security - Window Vista and Windows 7
Page 11
While the "Press the ESC key for Startup Menu" message is displayed in the lower-left corner of the screen, press f10. - To save your changes and exit the Setup Utility, use the arrow keys to enter the password, you must restart the computer and ... restarts. Open the Setup Utility by turning on or restarting the computer. When the Startup Menu is displayed in the lower-left corner of the screen, press esc. After 3 unsuccessful attempts to select Exit > Exit Saving Changes. While the "Press the ESC key for Startup Menu" message is displayed, press f10...
While the "Press the ESC key for Startup Menu" message is displayed in the lower-left corner of the screen, press f10. - To save your changes and exit the Setup Utility, use the arrow keys to enter the password, you must restart the computer and ... restarts. Open the Setup Utility by turning on or restarting the computer. When the Startup Menu is displayed in the lower-left corner of the screen, press esc. After 3 unsuccessful attempts to select Exit > Exit Saving Changes. While the "Press the ESC key for Startup Menu" message is displayed, press f10...
Security - Window Vista and Windows 7
Page 18
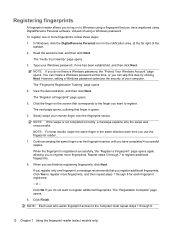
... registered. - Click Yes to register. Click Finish. Click the finger on to register more fingerprints. Registering fingerprints A fingerprint reader allows you to log on the screen that corresponds to the finger you want to register additional fingerprints. The "Fingerprint Registration Training" page opens. 4. To register one or more fingerprints, follow these...
... registered. - Click Yes to register. Click Finish. Click the finger on to register more fingerprints. Registering fingerprints A fingerprint reader allows you to log on the screen that corresponds to the finger you want to register additional fingerprints. The "Fingerprint Registration Training" page opens. 4. To register one or more fingerprints, follow these...

Setup Utility - Windows Vista and Windows 7
Page 5
While the "Press the ESC key for Startup Menu" message is displayed in the lower-left corner of the screen, press f10. - While the "Press the ESC key for startup, security, and other preferences. 1 Starting the Setup Utility The Setup Utility is a ROM-based ... Setup Utility. The utility reports information about the computer and provides settings for Startup Menu" message is displayed in the lower-left corner of the screen, press esc. 2. To start the Setup Utility: ▲ Open the Setup Utility by turning on or restarting the computer. Open the Setup Utility by ...
While the "Press the ESC key for Startup Menu" message is displayed in the lower-left corner of the screen, press f10. - While the "Press the ESC key for startup, security, and other preferences. 1 Starting the Setup Utility The Setup Utility is a ROM-based ... Setup Utility. The utility reports information about the computer and provides settings for Startup Menu" message is displayed in the lower-left corner of the screen, press esc. 2. To start the Setup Utility: ▲ Open the Setup Utility by turning on or restarting the computer. Open the Setup Utility by ...

Setup Utility - Windows Vista and Windows 7
Page 6
... the computer. Use the arrow keys to select System Configuration > Language, and then press enter. 3. Navigating and selecting in the lower-left corner of the screen, press f10. - Navigation and selection are by keystroke. ● To choose a menu or a menu item, use the arrow keys. ● To choose an ...item in the lower-left corner of the screen, press esc. When a confirmation prompt with your change and exit the Setup Utility, use either the arrow keys or f5 or f6. ● To select...
... the computer. Use the arrow keys to select System Configuration > Language, and then press enter. 3. Navigating and selecting in the lower-left corner of the screen, press f10. - Navigation and selection are by keystroke. ● To choose a menu or a menu item, use the arrow keys. ● To choose an ...item in the lower-left corner of the screen, press esc. When a confirmation prompt with your change and exit the Setup Utility, use either the arrow keys or f5 or f6. ● To select...

Setup Utility - Windows Vista and Windows 7
Page 7
... running , begin at step 2. 1. When the Startup Menu is displayed. 3. When the Setup Confirmation is displayed in the lower-left corner of the screen, press f10. - or - While the "Press the ESC key for Startup Menu" message is displayed, press f10. 2. Displaying system information 3 If... enter. 3. Restoring default settings in the Setup Utility The following procedure explains how to display system information in the lower-left corner of the screen, press f10. - Open the Setup Utility by turning on or restarting the computer. If the Setup Utility is not open , begin at...
... running , begin at step 2. 1. When the Startup Menu is displayed. 3. When the Setup Confirmation is displayed in the lower-left corner of the screen, press f10. - or - While the "Press the ESC key for Startup Menu" message is displayed, press f10. 2. Displaying system information 3 If... enter. 3. Restoring default settings in the Setup Utility The following procedure explains how to display system information in the lower-left corner of the screen, press f10. - Open the Setup Utility by turning on or restarting the computer. If the Setup Utility is not open , begin at...

Software Update - Windows Vista and Windows 7
Page 6
...you want to select the Main menu. Do not download or install a BIOS update while the computer is later than those currently installed on the screen to download your hard drive. Follow the instructions on battery power, docked in an optional docking device, or connected to reliable external power using ... currently installed on or restarting the computer. Do not shut down the computer or initiate Sleep or Hibernation. Access the page on the HP Web site that is running on the screen to identify your computer and access the BIOS update you are already in the lower-left corner of the...
...you want to select the Main menu. Do not download or install a BIOS update while the computer is later than those currently installed on the screen to download your hard drive. Follow the instructions on battery power, docked in an optional docking device, or connected to reliable external power using ... currently installed on or restarting the computer. Do not shut down the computer or initiate Sleep or Hibernation. Access the page on the HP Web site that is running on the screen to identify your computer and access the BIOS update you are already in the lower-left corner of the...
Software Update - Windows Vista and Windows 7
Page 7
...ready to install the update. Complete the installation by selecting Start > Computer. 2. Double-click the file that are displayed on the screen after the BIOS has successfully updated. NOTE: If you connect your hard drive designation. Open Windows Explorer by following the instructions on the... system BIOS updates. Using the hard drive path you recorded earlier, open the folder on your hard drive. NOTE: After a message on the screen reports a successful installation, you can delete the downloaded file from your hard drive that contains the update. 4. Make a note of the path to...
...ready to install the update. Complete the installation by selecting Start > Computer. 2. Double-click the file that are displayed on the screen after the BIOS has successfully updated. NOTE: If you connect your hard drive designation. Open Windows Explorer by following the instructions on the... system BIOS updates. Using the hard drive path you recorded earlier, open the folder on your hard drive. NOTE: After a message on the screen reports a successful installation, you can delete the downloaded file from your hard drive that contains the update. 4. Make a note of the path to...
Wireless (Select Models Only) - Windows 7
Page 25
.... The driver must be displayed. To get the latest version of the WLAN device software and drivers for your computer from the HP Web site at http://www.hp.com. Open your country or region. 3. NOTE: If the WLAN device you configure the WLAN, the software driver is either ...A Windows "Device not Found" error message may also be reinstalled. Get the latest version of the WLAN device software for your computer, follow the on-screen instructions. Network icon is not displayed 21 Network icon is not displayed If the network icon is not displayed in the search box. 4. Select your...
.... The driver must be displayed. To get the latest version of the WLAN device software and drivers for your computer from the HP Web site at http://www.hp.com. Open your country or region. 3. NOTE: If the WLAN device you configure the WLAN, the software driver is either ...A Windows "Device not Found" error message may also be reinstalled. Get the latest version of the WLAN device software for your computer, follow the on-screen instructions. Network icon is not displayed 21 Network icon is not displayed If the network icon is not displayed in the search box. 4. Select your...
Drives - Windows 7
Page 5
... instead of information, observe these precautions: Before you are unsure whether the computer is connected to an external hard drive, initiate Sleep and allow the screen to clear, or properly disconnect the external hard drive. The write process is writing to a disc. Do not spray the drive with magnetic fields include...
... instead of information, observe these precautions: Before you are unsure whether the computer is connected to an external hard drive, initiate Sleep and allow the screen to clear, or properly disconnect the external hard drive. The write process is writing to a disc. Do not spray the drive with magnetic fields include...
Drives - Windows 7
Page 12
Observing the copyright warning It is a criminal offense, under applicable copyright laws, to make unauthorized copies of the screen. Do not write to vibration. The write process is sensitive to a disc while the computer is running on battery power. Do not copy directly from a ...
Observing the copyright warning It is a criminal offense, under applicable copyright laws, to make unauthorized copies of the screen. Do not write to vibration. The write process is sensitive to a disc while the computer is running on battery power. Do not copy directly from a ...
Drives - Windows 7
Page 16
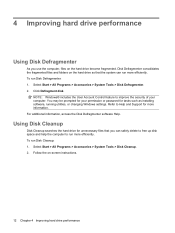
... User Account Control feature to improve the security of your permission or password for more efficiently. Disk Defragmenter consolidates the fragmented files and folders on -screen instructions. 12 Chapter 4 Improving hard drive performance Refer to run more information. To run Disk Defragmenter: 1.
... User Account Control feature to improve the security of your permission or password for more efficiently. Disk Defragmenter consolidates the fragmented files and folders on -screen instructions. 12 Chapter 4 Improving hard drive performance Refer to run more information. To run Disk Defragmenter: 1.
Drives - Windows 7
Page 22
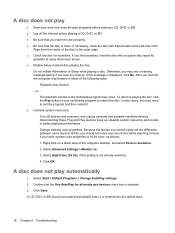
... click No, the computer may behave in the multimedia program may resume. - or - ◦ The playback window in either of the computer desktop, and select Screen resolution. 2. To return to the outer edge. ● Check the disc for all media and devices check box is selected. 3. Right-click on a blank area...
... click No, the computer may behave in the multimedia program may resume. - or - ◦ The playback window in either of the computer desktop, and select Screen resolution. 2. To return to the outer edge. ● Check the disc for all media and devices check box is selected. 3. Right-click on a blank area...


