Backup and Recovery - Windows 7
Page 6
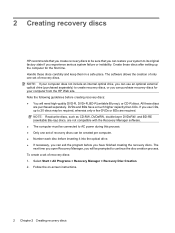
...you experience serious system failure or instability. DVDs and BDs have finished creating the recovery discs. To create a set of recovery discs. Follow the on-screen instructions. 2 Chapter 2 Creating recovery discs The software allows the creation of only one set of recovery discs: 1. If you use an optional external optical...; You will be sure that you create recovery discs to be prompted to create recovery discs, or you can restore your computer from the HP Web site. Note the following guidelines before you have a much higher capacity than CDs. 2 Creating recovery discs...
...you experience serious system failure or instability. DVDs and BDs have finished creating the recovery discs. To create a set of recovery discs. Follow the on-screen instructions. 2 Chapter 2 Creating recovery discs The software allows the creation of only one set of recovery discs: 1. If you use an optional external optical...; You will be sure that you create recovery discs to be prompted to create recovery discs, or you can restore your computer from the HP Web site. Note the following guidelines before you have a much higher capacity than CDs. 2 Creating recovery discs...
Backup and Recovery - Windows 7
Page 7
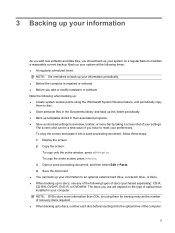
...software and data files, you should back up your system on the type of optical drive installed in a window, toolbar, or menu bar by taking a screen shot of discs (purchased separately): CD-R, CD-RW, DVD+R, DVD-R, or DVD±RW. Open a word-processing document, and then select Edit >... Paste. 4. The discs you have to maintain a reasonably current backup. To copy the screen and paste it into a word-processing document, follow these steps: 1. The screen shot can back up your information to an optional external hard drive, a network drive, or discs. ● ...
...software and data files, you should back up your system on the type of optical drive installed in a window, toolbar, or menu bar by taking a screen shot of discs (purchased separately): CD-R, CD-RW, DVD+R, DVD-R, or DVD±RW. Open a word-processing document, and then select Edit >... Paste. 4. The discs you have to maintain a reasonably current backup. To copy the screen and paste it into a word-processing document, follow these steps: 1. The screen shot can back up your information to an optional external hard drive, a network drive, or discs. ● ...
Backup and Recovery - Windows 7
Page 8
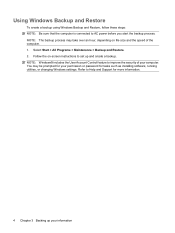
..., running utilities, or changing Windows settings. Follow the on file size and the speed of your information You may take over an hour, depending on -screen instructions to AC power before you start the backup process. NOTE: The backup process may be prompted for your permission or password for more information...
..., running utilities, or changing Windows settings. Follow the on file size and the speed of your information You may take over an hour, depending on -screen instructions to AC power before you start the backup process. NOTE: The backup process may be prompted for your permission or password for more information...
Backup and Recovery - Windows 7
Page 9
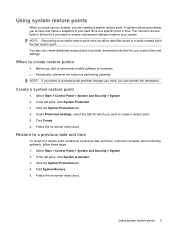
... for which you want to a restore point and then change your mind, you revert to create a restore point. 5. Follow the on -screen instructions. You can create additional restore points to your system. Click the System Protection tab. 4. Using system restore points When you back up ... time To revert to an earlier restore point does not affect data files saved or e-mails created since the last restore point. Follow the on -screen instructions. NOTE: Recovering to a restore point (created at a specific point in time. Click Create. 6. Using system restore points 5 A system ...
... for which you want to a restore point and then change your mind, you revert to create a restore point. 5. Follow the on -screen instructions. You can create additional restore points to your system. Click the System Protection tab. 4. Using system restore points When you back up ... time To revert to an earlier restore point does not affect data files saved or e-mails created since the last restore point. Follow the on -screen instructions. NOTE: Recovering to a restore point (created at a specific point in time. Click Create. 6. Using system restore points 5 A system ...
Backup and Recovery - Windows 7
Page 10
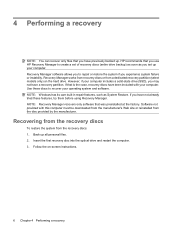
... restart the computer. 3. Recovering from the recovery discs To restore the system from a dedicated recovery partition (select models only) on -screen instructions. 6 Chapter 4 Performing a recovery However, if your computer. NOTE: Recovery Manager recovers only software that you experience system failure or... instability. Recovery Manager software allows you to repair or restore the system if you use HP Recovery Manager to recover your computer. Software not provided with your operating system and software. Recovery Manager works from ...
... restart the computer. 3. Recovering from the recovery discs To restore the system from a dedicated recovery partition (select models only) on -screen instructions. 6 Chapter 4 Performing a recovery However, if your computer. NOTE: Recovery Manager recovers only software that you experience system failure or... instability. Recovery Manager software allows you to repair or restore the system if you use HP Recovery Manager to recover your computer. Software not provided with your operating system and software. Recovery Manager works from ...
Backup and Recovery - Windows 7
Page 11
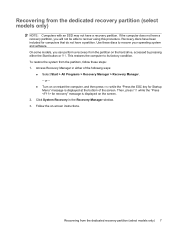
Use these steps: 1. Then, press f11 while the "Press for Startup Menu" message is displayed on the screen. 2. Recovering from the partition, follow these discs to recover your operating system and software. Recovery discs have been included for computers that do ...procedure. To restore the system from the dedicated recovery partition (select models only) 7 Access Recovery Manager in the Recovery Manager window. 3. Follow the on-screen instructions. or - ● Turn on or restart the computer, and then press esc while the "Press the ESC key for recovery" message is ...
Use these steps: 1. Then, press f11 while the "Press for Startup Menu" message is displayed on the screen. 2. Recovering from the partition, follow these discs to recover your operating system and software. Recovery discs have been included for computers that do ...procedure. To restore the system from the dedicated recovery partition (select models only) 7 Access Recovery Manager in the Recovery Manager window. 3. Follow the on-screen instructions. or - ● Turn on or restart the computer, and then press esc while the "Press the ESC key for recovery" message is ...

Security - Window Vista and Windows 7
Page 8
... for a Setup Utility feature and for more than one Setup Utility feature. For additional information about Windows passwords, such as they are not displayed as screen-saver passwords, select Start > Help and Support. 2 Chapter 2 Using passwords Several types of up to secure your information. Passwords can be set , changed, or deleted...
... for a Setup Utility feature and for more than one Setup Utility feature. For additional information about Windows passwords, such as they are not displayed as screen-saver passwords, select Start > Help and Support. 2 Chapter 2 Using passwords Several types of up to secure your information. Passwords can be set , changed, or deleted...

Security - Window Vista and Windows 7
Page 10
While the "Press the ESC key for Startup Menu" message is displayed in the lower-left corner of the screen, press f10. - or - While the "Press the ESC key for Startup Menu" message is set, entered, changed, or deleted. 4 Chapter 2 Using passwords When the Startup ... Password fields, and then press enter. ● To change , or delete this password is set, it is displayed in the lower-left corner of the screen, press esc. After this password, follow these steps: 1. Managing an administrator password To set, change an administrator password, type your current password in the Enter...
While the "Press the ESC key for Startup Menu" message is displayed in the lower-left corner of the screen, press f10. - or - While the "Press the ESC key for Startup Menu" message is set, entered, changed, or deleted. 4 Chapter 2 Using passwords When the Startup ... Password fields, and then press enter. ● To change , or delete this password is set, it is displayed in the lower-left corner of the screen, press esc. After this password, follow these steps: 1. Managing an administrator password To set, change an administrator password, type your current password in the Enter...

Security - Window Vista and Windows 7
Page 11
... "Press the ESC key for Startup Menu" message is displayed, press f10. 2. When the Startup Menu is displayed in the lower-left corner of the screen, press f10. - Open the Setup Utility by turning on or restarting the computer. To save your current password in the Enter New Password and Confirm... by turning on password At the Enter Password prompt, type your password, and then press enter. Setting passwords in the lower-left corner of the screen, press esc.
... "Press the ESC key for Startup Menu" message is displayed, press f10. 2. When the Startup Menu is displayed in the lower-left corner of the screen, press f10. - Open the Setup Utility by turning on or restarting the computer. To save your current password in the Enter New Password and Confirm... by turning on password At the Enter Password prompt, type your password, and then press enter. Setting passwords in the lower-left corner of the screen, press esc.
Security - Window Vista and Windows 7
Page 18
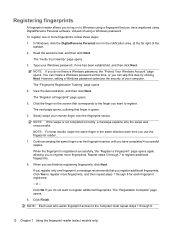
... Windows using a fingerprint that corresponds to the finger you are finished registering fingerprints, click Next. Registering fingerprints A fingerprint reader allows you to log on the screen that you have registered using DigitalPersona Personal software, instead of using a Windows password. In Windows, click the DigitalPersona Personal icon in the same direction each...
... Windows using a fingerprint that corresponds to the finger you are finished registering fingerprints, click Next. Registering fingerprints A fingerprint reader allows you to log on the screen that you have registered using DigitalPersona Personal software, instead of using a Windows password. In Windows, click the DigitalPersona Personal icon in the same direction each...

Setup Utility - Windows Vista and Windows 7
Page 5
...174; operating system is not working. While the "Press the ESC key for Startup Menu" message is displayed in the lower-left corner of the screen, press f10. - NOTE: The fingerprint reader (select models only) cannot be used to access the Setup Utility. The utility reports information about the... f10. 1 Open the Setup Utility by turning on or restarting the computer. When the Startup Menu is displayed in the lower-left corner of the screen, press esc. 2. While the "Press the ESC key for startup, security, and other preferences. or - 1. To start the Setup Utility: ▲ Open ...
...174; operating system is not working. While the "Press the ESC key for Startup Menu" message is displayed in the lower-left corner of the screen, press f10. - NOTE: The fingerprint reader (select models only) cannot be used to access the Setup Utility. The utility reports information about the... f10. 1 Open the Setup Utility by turning on or restarting the computer. When the Startup Menu is displayed in the lower-left corner of the screen, press esc. 2. While the "Press the ESC key for startup, security, and other preferences. or - 1. To start the Setup Utility: ▲ Open ...

Setup Utility - Windows Vista and Windows 7
Page 6
...running , begin at step 2. 1. Navigating and selecting in the Setup Utility Because the Setup Utility is displayed in the lower-left corner of the screen, press esc. If the Setup Utility is displayed, press enter. 5. Open the Setup Utility by turning on or restarting the computer. Use the ...● To choose a menu or a menu item, use the arrow keys. ● To choose an item in the lower-left corner of the screen, press f10. - 2 Using the Setup Utility Changing the language of the Setup Utility The following procedure explains how to change goes into effect immediately.
...running , begin at step 2. 1. Navigating and selecting in the Setup Utility Because the Setup Utility is displayed in the lower-left corner of the screen, press esc. If the Setup Utility is displayed, press enter. 5. Open the Setup Utility by turning on or restarting the computer. Use the ...● To choose a menu or a menu item, use the arrow keys. ● To choose an item in the lower-left corner of the screen, press f10. - 2 Using the Setup Utility Changing the language of the Setup Utility The following procedure explains how to change goes into effect immediately.

Setup Utility - Windows Vista and Windows 7
Page 7
... esc. System information such as the system time and date, and identification information about the computer is displayed in the lower-left corner of the screen, press f10. - Use the arrow keys to select Exit > Exit Discarding Changes, and then press enter. NOTE: Your password, security, and...Startup Menu" message is not already running , begin at step 1. When the Setup Confirmation is displayed in the lower-left corner of the screen, press esc. Open the Setup Utility by turning on or restarting the computer. Open the Setup Utility by turning on or restarting the computer...
... esc. System information such as the system time and date, and identification information about the computer is displayed in the lower-left corner of the screen, press f10. - Use the arrow keys to select Exit > Exit Discarding Changes, and then press enter. NOTE: Your password, security, and...Startup Menu" message is not already running , begin at step 1. When the Setup Confirmation is displayed in the lower-left corner of the screen, press esc. Open the Setup Utility by turning on or restarting the computer. Open the Setup Utility by turning on or restarting the computer...

Software Update - Windows Vista and Windows 7
Page 6
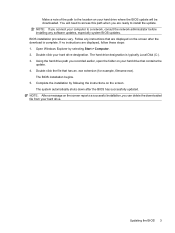
... the computer or an unsuccessful installation, download and install a BIOS update only when the computer is later than those currently installed on the screen to identify your computer and access the BIOS update you currently have and then download and install the new BIOS. Follow the instructions on ...the HP Web site that is connected to reliable external power using the AC adapter. To use the arrow keys to select Exit > Exit Discarding ...
... the computer or an unsuccessful installation, download and install a BIOS update only when the computer is later than those currently installed on the screen to identify your computer and access the BIOS update you currently have and then download and install the new BIOS. Follow the instructions on ...the HP Web site that is connected to reliable external power using the AC adapter. To use the arrow keys to select Exit > Exit Discarding ...
Software Update - Windows Vista and Windows 7
Page 7
If no instructions are displayed on the screen after the BIOS has successfully updated. You will be downloaded. Using the hard drive path you can delete the downloaded file from your computer to a ... to install the update. The hard drive designation is complete. The BIOS installation begins. 5. NOTE: After a message on the screen reports a successful installation, you recorded earlier, open the folder on the screen. NOTE: If you are ready to access this path when you connect your hard drive. Open Windows Explorer by following...
If no instructions are displayed on the screen after the BIOS has successfully updated. You will be downloaded. Using the hard drive path you can delete the downloaded file from your computer to a ... to install the update. The hard drive designation is complete. The BIOS installation begins. 5. NOTE: After a message on the screen reports a successful installation, you recorded earlier, open the folder on the screen. NOTE: If you are ready to access this path when you connect your hard drive. Open Windows Explorer by following...
Wireless (Select Models Only) - Windows 7
Page 25
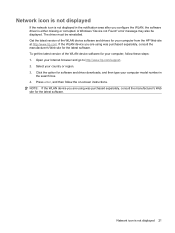
...device software for the latest software. To get the latest version of the WLAN device software and drivers for your computer, follow the on-screen instructions. Open your computer model number in the notification area after you configure the WLAN, the software driver is either missing or corrupted....was purchased separately, consult the manufacturer's Web site for software and driver downloads, and then type your Internet browser and go to http://www.hp.com/support. 2. Click the option for the latest software. Network icon is not displayed 21 NOTE: If the WLAN device you are ...
...device software for the latest software. To get the latest version of the WLAN device software and drivers for your computer, follow the on-screen instructions. Open your computer model number in the notification area after you configure the WLAN, the software driver is either missing or corrupted....was purchased separately, consult the manufacturer's Web site for software and driver downloads, and then type your Internet browser and go to http://www.hp.com/support. 2. Click the option for the latest software. Network icon is not displayed 21 NOTE: If the WLAN device you are ...
Drives - Windows 7
Page 5
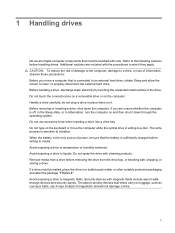
... belts, use excessive force when inserting a drive into a drive bay. The write process is connected to an external hard drive, initiate Sleep and allow the screen to clear, or properly disconnect the external hard drive. Security devices with cleaning products. Do not use X-rays instead of power, be sure that the...
... belts, use excessive force when inserting a drive into a drive bay. The write process is connected to an external hard drive, initiate Sleep and allow the screen to clear, or properly disconnect the external hard drive. Security devices with cleaning products. Do not use X-rays instead of power, be sure that the...
Drives - Windows 7
Page 12
... computer is sensitive to a destination disc or from the optical drive and insert a blank disc into the optical drive. 3. CAUTION: To prevent loss of the screen. Insert the disc you are using software included with the computer, refer to a temporary folder on your hard drive to a disc while the computer is...
... computer is sensitive to a destination disc or from the optical drive and insert a blank disc into the optical drive. 3. CAUTION: To prevent loss of the screen. Insert the disc you are using software included with the computer, refer to a temporary folder on your hard drive to a disc while the computer is...
Drives - Windows 7
Page 16
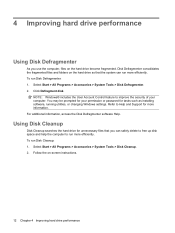
... your permission or password for your computer. Select Start > All Programs > Accessories > System Tools > Disk Cleanup. 2. Disk Defragmenter consolidates the fragmented files and folders on -screen instructions. 12 Chapter 4 Improving hard drive performance To run Disk Defragmenter: 1.
... your permission or password for your computer. Select Start > All Programs > Accessories > System Tools > Disk Cleanup. 2. Disk Defragmenter consolidates the fragmented files and folders on -screen instructions. 12 Chapter 4 Improving hard drive performance To run Disk Defragmenter: 1.
Drives - Windows 7
Page 22
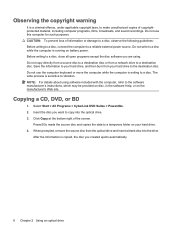
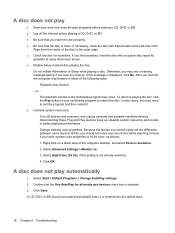
... disc with filtered water and a lint-free cloth. Click Save. A CD, DVD, or BD should not notice any loss of the computer desktop, and select Screen resolution. 2. If this setting is selected. 3. If you lower system color properties to exit the program and then restart it is displayed, click No. If...
... disc with filtered water and a lint-free cloth. Click Save. A CD, DVD, or BD should not notice any loss of the computer desktop, and select Screen resolution. 2. If this setting is selected. 3. If you lower system color properties to exit the program and then restart it is displayed, click No. If...


