HP Notebook Reference Guide
Page 45
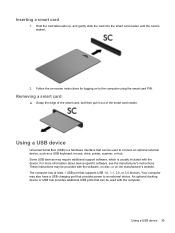
Removing a smart card ▲ Grasp the edge of the smart card, and then pull it out of the smart card reader. Using a USB device 35 Inserting a ... is seated. 2. An optional docking device or USB hub provides additional USB ports that provides power to connect an optional external device, such as a USB keyboard, mouse, drive, printer, scanner, or hub. These instructions may also have a USB charging port that can be used with the computer. Follow the on-screen...
Removing a smart card ▲ Grasp the edge of the smart card, and then pull it out of the smart card reader. Using a USB device 35 Inserting a ... is seated. 2. An optional docking device or USB hub provides additional USB ports that provides power to connect an optional external device, such as a USB keyboard, mouse, drive, printer, scanner, or hub. These instructions may also have a USB charging port that can be used with the computer. Follow the on-screen...
HP Notebook Reference Guide
Page 52
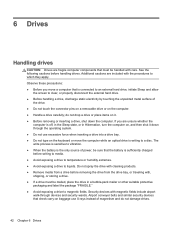
.... Additional cautions are fragile computer components that check carry-on it down the computer. Do not spray the drive with cleaning products. ● Remove media from a drive before removing the drive from the drive bay, or traveling with magnetic fields include airport walk-through the operating system. ● Do not use X-rays... fields. do not drop a drive or place items on baggage use excessive force when inserting a drive into a drive bay. ● Do not type on the keyboard or move a computer that the battery is sufficiently charged before handling drives.
.... Additional cautions are fragile computer components that check carry-on it down the computer. Do not spray the drive with cleaning products. ● Remove media from a drive before removing the drive from the drive bay, or traveling with magnetic fields include airport walk-through the operating system. ● Do not use X-rays... fields. do not drop a drive or place items on baggage use excessive force when inserting a drive into a drive bay. ● Do not type on the keyboard or move a computer that the battery is sufficiently charged before handling drives.
HP Notebook Reference Guide
Page 61
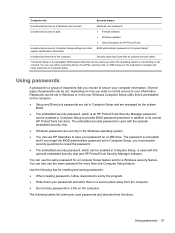
... You can use either a pointing device (TouchPad, pointing stick, or USB mouse) or the keyboard to navigate and make selections in addition to its normal HP ProtectTools functions. Use the following tables list commonly used even when the operating system is encrypted, and...with the optional embedded security chip. ● Windows passwords are set in Windows or in Computer Setup* system identification information Unauthorized removal of characters that is a preinstalled, ROM-based utility that can be used passwords and describe their functions. Computer risk Security ...
... You can use either a pointing device (TouchPad, pointing stick, or USB mouse) or the keyboard to navigate and make selections in addition to its normal HP ProtectTools functions. Use the following tables list commonly used even when the operating system is encrypted, and...with the optional embedded security chip. ● Windows passwords are set in Windows or in Computer Setup* system identification information Unauthorized removal of characters that is a preinstalled, ROM-based utility that can be used passwords and describe their functions. Computer risk Security ...
HP Notebook Reference Guide
Page 71
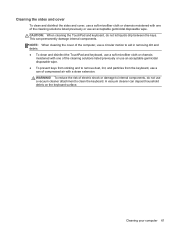
... the keys. NOTE: When cleaning the cover of the computer, use a circular motion to aid in removing dirt and debris. ● To clean and disinfect the TouchPad and keyboard, use a soft microfiber cloth or chamois moistened with a straw extension. Cleaning your computer 61 This can... cleaning solutions listed previously or use an acceptable germicidal disposable wipe. ● To prevent keys from sticking and to remove dust, lint, and particles from the keyboard, use a can of compressed air with one of the cleaning solutions listed previously or use an acceptable germicidal disposable ...
... the keys. NOTE: When cleaning the cover of the computer, use a circular motion to aid in removing dirt and debris. ● To clean and disinfect the TouchPad and keyboard, use a soft microfiber cloth or chamois moistened with a straw extension. Cleaning your computer 61 This can... cleaning solutions listed previously or use an acceptable germicidal disposable wipe. ● To prevent keys from sticking and to remove dust, lint, and particles from the keyboard, use a can of compressed air with one of the cleaning solutions listed previously or use an acceptable germicidal disposable ...
HP ProtectTools Getting Started
Page 16
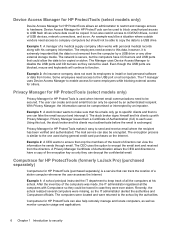
...though the USB ports are blocked, mouse and keyboards will continue to enable access for some employees ... must authenticate before the email is used . Computrace for HP ProtectTools (formerly LoJack Pro) (purchased separately) Computrace for HP ProtectTools (purchased separately) is not removed from the computer by a USB drive or any other ... Introduction to ensure that could allow the data to encrypt the email sent and received from home. Computrace for HP ProtectTools is exchanged. Example 1: A manager of a medical supply company often works with personal medical records along ...
...though the USB ports are blocked, mouse and keyboards will continue to enable access for some employees ... must authenticate before the email is used . Computrace for HP ProtectTools (formerly LoJack Pro) (purchased separately) Computrace for HP ProtectTools (purchased separately) is not removed from the computer by a USB drive or any other ... Introduction to ensure that could allow the data to encrypt the email sent and received from home. Computrace for HP ProtectTools is exchanged. Example 1: A manager of a medical supply company often works with personal medical records along ...
HP ProtectTools Getting Started
Page 109
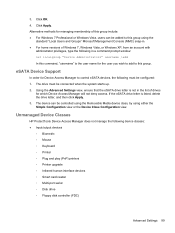
... Access Manager to control eSATA devices, the following must be controlled using the Removable Media device class, by using the standard "Local Users and Groups" Microsoft Management...users can be connected when the system starts up. 2. Click Apply. Unmanaged Device Classes HP ProtectTools Device Access Manager does not manage the following in a command prompt window: net ... type the following device classes: ● Input/output devices ◦ Biometric ◦ Mouse ◦ Keyboard ◦ Printer ◦ Plug and play (PnP) printers ◦ Printer upgrade ◦ Infrared human ...
... Access Manager to control eSATA devices, the following must be controlled using the Removable Media device class, by using the standard "Local Users and Groups" Microsoft Management...users can be connected when the system starts up. 2. Click Apply. Unmanaged Device Classes HP ProtectTools Device Access Manager does not manage the following in a command prompt window: net ... type the following device classes: ● Input/output devices ◦ Biometric ◦ Mouse ◦ Keyboard ◦ Printer ◦ Plug and play (PnP) printers ◦ Printer upgrade ◦ Infrared human ...
HP ProtectTools Getting Started
Page 120
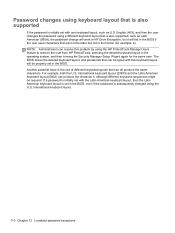
... password is initially set with this problem by using the HP ProtectTools Manage Users feature to remove the user from HP ProtectTools, selecting the desired keyboard layout in the operating system, and then running the Security Manager Setup Wizard again for example, ē). International keyboard layout. 110 Chapter 12 Localized password exceptions The BIOS stores...
... password is initially set with this problem by using the HP ProtectTools Manage Users feature to remove the user from HP ProtectTools, selecting the desired keyboard layout in the operating system, and then running the Security Manager Setup Wizard again for example, ē). International keyboard layout. 110 Chapter 12 Localized password exceptions The BIOS stores...
HP ProtectTools Getting Started
Page 135
... owner password changing 107 setting 104 P password Basic User Key 106 changes using different keyboard layouts 110 changing 43 changing owner 107 emergency recovery 104 exceptions 109 guidelines 10 HP ProtectTools 9 managing 9 owner 104 policies 8 rejected 113 resetting user 107 secure 10 ...Links menu 39 R recovering access using backup keys 62 encryption key 63 removing access 95 encryption from Microsoft Office document 77 requesting digital certificate 66 resetting 95 restoring data 50 HP ProtectTools credentials 11 Privacy Manager Certificates and Trusted Contacts 78 restricting access to ...
... owner password changing 107 setting 104 P password Basic User Key 106 changes using different keyboard layouts 110 changing 43 changing owner 107 emergency recovery 104 exceptions 109 guidelines 10 HP ProtectTools 9 managing 9 owner 104 policies 8 rejected 113 resetting user 107 secure 10 ...Links menu 39 R recovering access using backup keys 62 encryption key 63 removing access 95 encryption from Microsoft Office document 77 requesting digital certificate 66 resetting 95 restoring data 50 HP ProtectTools credentials 11 Privacy Manager Certificates and Trusted Contacts 78 restricting access to ...
Regulatory, Safety and Environmental Notices User Guide
Page 38
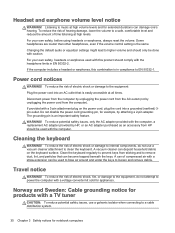
...power cord from the AC outlet (not by unplugging the power cord from sticking and to remove dust, lint, and particles that is in EN 50332-2. The grounding pin is the same. Cleaning the keyboard WARNING! A can be used to blow air around and under the keys to power ... Norway and Sweden: Cable grounding notice for appliances. Listening to clean the keyboard. Power cord notices WARNING! Do not disable the power cord grounding pin, for example, by HP, or an AC adapter purchased as an accessory from HP should be done with the headphone limits in compliance to a cable distribution...
...power cord from the AC outlet (not by unplugging the power cord from sticking and to remove dust, lint, and particles that is in EN 50332-2. The grounding pin is the same. Cleaning the keyboard WARNING! A can be used to blow air around and under the keys to power ... Norway and Sweden: Cable grounding notice for appliances. Listening to clean the keyboard. Power cord notices WARNING! Do not disable the power cord grounding pin, for example, by HP, or an AC adapter purchased as an accessory from HP should be done with the headphone limits in compliance to a cable distribution...
Getting Started HP Notebook
Page 6
... service door 27 Replacing the service door 27 Replacing or upgrading the hard drive 28 Intel Smart Response Technology (select models only 28 Removing the hard drive ...29 Installing a hard drive ...31 Replacing a drive in the upgrade bay 33 Replacing a hard drive ...33 ...products ...43 Cleaning procedures ...43 Cleaning the display 43 Cleaning the sides and cover 43 Cleaning the TouchPad and keyboard 43 6 Backup and recovery ...45 Creating recovery media with HP Recovery Disc Creator 45 Creating recovery media ...46 Backing up your information ...46 Performing a system recovery ...47 ...
... service door 27 Replacing the service door 27 Replacing or upgrading the hard drive 28 Intel Smart Response Technology (select models only 28 Removing the hard drive ...29 Installing a hard drive ...31 Replacing a drive in the upgrade bay 33 Replacing a hard drive ...33 ...products ...43 Cleaning procedures ...43 Cleaning the display 43 Cleaning the sides and cover 43 Cleaning the TouchPad and keyboard 43 6 Backup and recovery ...45 Creating recovery media with HP Recovery Disc Creator 45 Creating recovery media ...46 Backing up your information ...46 Performing a system recovery ...47 ...

Getting Started HP Notebook
Page 43
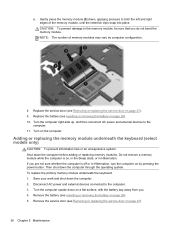
... memory module slots depending on a flat surface, with the upgrade bay toward you. 2. Replace the service door (see Inserting or removing the battery on page 27). 5. Insert the battery (see Removing or replacing the service door on page 26). 6. Turn on the computer. To install an optical drive in the upgrade bay... up, and then reconnect AC power and external devices to the computer. 7. Tighten the upgrade bay screw (2). 4. Two memory module slots are located under the keyboard. Additionally, quad-core computers also include two memory module slots under the service door.
... memory module slots depending on a flat surface, with the upgrade bay toward you. 2. Replace the service door (see Inserting or removing the battery on page 27). 5. Insert the battery (see Removing or replacing the service door on page 26). 6. Turn on the computer. To install an optical drive in the upgrade bay... up, and then reconnect AC power and external devices to the computer. 7. Tighten the upgrade bay screw (2). 4. Two memory module slots are located under the keyboard. Additionally, quad-core computers also include two memory module slots under the service door.
Getting Started HP Notebook
Page 46
...edges of memory modules may vary by pressing the power button. To replace the primary memory module underneath the keyboard: 1. Remove the service door (see Inserting or removing the battery on page 27). 38 Chapter 5 Maintenance Save your work and shut down the computer through the... computer. 2. If you . 4. Adding or replacing the memory module underneath the keyboard (select models only) CAUTION: To prevent information loss or an unresponsive system: Shut down on the computer. Do not remove a memory module while the computer is off or in Hibernation, turn the computer on...
...edges of memory modules may vary by pressing the power button. To replace the primary memory module underneath the keyboard: 1. Remove the service door (see Inserting or removing the battery on page 27). 38 Chapter 5 Maintenance Save your work and shut down the computer through the... computer. 2. If you . 4. Adding or replacing the memory module underneath the keyboard (select models only) CAUTION: To prevent information loss or an unresponsive system: Shut down on the computer. Do not remove a memory module while the computer is off or in Hibernation, turn the computer on...

Getting Started HP Notebook
Page 47
...). 7. Then rest the keyboard on the bottom of the keyboard (3). b. NOTE: Do not disconnect the keyboard cable. To avoid disconnecting the keyboard cable, do not pull the keyboard away from the upgrade bay (see Replacing a drive in the upgrade bay 39 c. Replacing a drive in the upgrade bay on the keyboard release cut-out (2). 6. Remove the hard or...
...). 7. Then rest the keyboard on the bottom of the keyboard (3). b. NOTE: Do not disconnect the keyboard cable. To avoid disconnecting the keyboard cable, do not pull the keyboard away from the upgrade bay (see Replacing a drive in the upgrade bay 39 c. Replacing a drive in the upgrade bay on the keyboard release cut-out (2). 6. Remove the hard or...

Getting Started HP Notebook
Page 50
... Assistant, click the Mobile Display Assistant icon in the upgrade bay on page 26.) 13. Go to http://www.hp.com/support to lock the keyboard into place. 11. Insert the battery (see Removing or replacing the service door on the computer. You can use this program to receive automatic update notifications when...
... Assistant, click the Mobile Display Assistant icon in the upgrade bay on page 26.) 13. Go to http://www.hp.com/support to lock the keyboard into place. 11. Insert the battery (see Removing or replacing the service door on the computer. You can use this program to receive automatic update notifications when...

Getting Started HP Notebook
Page 51
...or a chamois (static-free cloth without oil) ● Static-free cloth wipes CAUTION: Avoid the following products to clean the keyboard. Cleaning your computer: ● Dimethyl benzyl ammonium chloride 0.3 percent maximum concentration (For example: germicidal disposable wipes. Cleaning your ... components. Fibrous materials, such as alcohol, acetone, ammonium chloride, methylene chloride, and hydrocarbons, which can get trapped in removing dirt and debris. To prevent electric shock or damage to components, do not use an acceptable germicidal disposable wipe. Disconnect ...
...or a chamois (static-free cloth without oil) ● Static-free cloth wipes CAUTION: Avoid the following products to clean the keyboard. Cleaning your computer: ● Dimethyl benzyl ammonium chloride 0.3 percent maximum concentration (For example: germicidal disposable wipes. Cleaning your ... components. Fibrous materials, such as alcohol, acetone, ammonium chloride, methylene chloride, and hydrocarbons, which can get trapped in removing dirt and debris. To prevent electric shock or damage to components, do not use an acceptable germicidal disposable wipe. Disconnect ...

Getting Started HP Notebook
Page 52
This can permanently damage internal components. ● To clean and disinfect the TouchPad and keyboard, use a soft microfiber cloth or chamois moistened with one of the cleaning solutions listed previously or use an acceptable germicidal disposable wipe. ● To prevent keys from sticking and to remove dust, lint, and particles from the keyboard, use a can of compressed air with a straw extension. 44 Chapter 5 Maintenance CAUTION: When cleaning the TouchPad and keyboard, do not let liquids drip between the keys.
This can permanently damage internal components. ● To clean and disinfect the TouchPad and keyboard, use a soft microfiber cloth or chamois moistened with one of the cleaning solutions listed previously or use an acceptable germicidal disposable wipe. ● To prevent keys from sticking and to remove dust, lint, and particles from the keyboard, use a can of compressed air with a straw extension. 44 Chapter 5 Maintenance CAUTION: When cleaning the TouchPad and keyboard, do not let liquids drip between the keys.
Getting Started HP Notebook
Page 56
All files you have created and any keyboard key. 4. If the HP Recovery partition is listed, restart the computer, and ... have created and any software installed on the computer are permanently removed. After the repair is displayed at the factory. NOTE: If the HP Recovery partition is not listed, you restore the operating system, ... a Windows 7 operating system DVD (purchased separately) To order a Windows 7 operating system DVD, go to http://welcome.hp.com/country/us/en/ wwcontact_us.html. For contact information, see Using a Windows 7 operating system DVD (purchased separately) ...
All files you have created and any keyboard key. 4. If the HP Recovery partition is listed, restart the computer, and ... have created and any software installed on the computer are permanently removed. After the repair is displayed at the factory. NOTE: If the HP Recovery partition is not listed, you restore the operating system, ... a Windows 7 operating system DVD (purchased separately) To order a Windows 7 operating system DVD, go to http://welcome.hp.com/country/us/en/ wwcontact_us.html. For contact information, see Using a Windows 7 operating system DVD (purchased separately) ...
Getting Started HP Notebook
Page 60
...identifying 8, 19 function keys, identifying 8 H hard drive bracket removal 0 , 0 installing 31 removing 29 hard drive light 9 hard drive recovery 48 hard drive, ...identifying 15 headphone (audio-out) jack 10 hot keys adjusting volume 20 decrease screen brightness 20 decreasing speaker sound 20 description 19 increase screen brightness 20 increasing speaker sound 20 keyboard... RJ-11 (modem) 12 RJ-45 (network) 11 K keyboard backlight 20 keyboard hot keys, identifying 19 keypad integrated numeric 8 keypads, identifying 20 keys esc...
...identifying 8, 19 function keys, identifying 8 H hard drive bracket removal 0 , 0 installing 31 removing 29 hard drive light 9 hard drive recovery 48 hard drive, ...identifying 15 headphone (audio-out) jack 10 hot keys adjusting volume 20 decrease screen brightness 20 decreasing speaker sound 20 description 19 increase screen brightness 20 increasing speaker sound 20 keyboard... RJ-11 (modem) 12 RJ-45 (network) 11 K keyboard backlight 20 keyboard hot keys, identifying 19 keypad integrated numeric 8 keypads, identifying 20 keys esc...

HP EliteBook 8570w Mobile Workstation Maintenance and Service Guide
Page 61
... PC3-12800) Spare part number 670034-001 641369-001 652972-001 Before removing a memory module, follow these steps: 1. Remove the service door (see Service door on page 74. Remove the memory module: 1. To access memory modules under keyboard) on page 52). Shut down through the operating system. 2. If ...power cord from the AC outlet, and then unplugging the AC adapter from the computer.) Component replacement procedures 53 Remove the battery (see Memory Modules (under the keyboard, see Battery on each side of the memory module slot to the computer. 3. In this case, the...
... PC3-12800) Spare part number 670034-001 641369-001 652972-001 Before removing a memory module, follow these steps: 1. Remove the service door (see Service door on page 74. Remove the memory module: 1. To access memory modules under keyboard) on page 52). Shut down through the operating system. 2. If ...power cord from the AC outlet, and then unplugging the AC adapter from the computer.) Component replacement procedures 53 Remove the battery (see Memory Modules (under the keyboard, see Battery on each side of the memory module slot to the computer. 3. In this case, the...
HP EliteBook 8570w Mobile Workstation Maintenance and Service Guide
Page 80
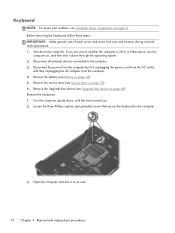
...the computer on page 21. Before removing the keyboard, follow these steps: IMPORTANT: Make special note of each screw and screw lock size and location during removal and replacement. 1. Remove the battery (see Battery on page 68) Remove the keyboard: 1. Remove the Upgrade bay device (see Upgrade... bay device on page 46). 5. If you . 2. Keyboard NOTE: For spare part numbers, see Computer major...
...the computer on page 21. Before removing the keyboard, follow these steps: IMPORTANT: Make special note of each screw and screw lock size and location during removal and replacement. 1. Remove the battery (see Battery on page 68) Remove the keyboard: 1. Remove the Upgrade bay device (see Upgrade... bay device on page 46). 5. If you . 2. Keyboard NOTE: For spare part numbers, see Computer major...


