

HP Notebook Reference Guide
Page 44
.... A smart card is needed to gain access to unlock it. Release and remove the ExpressCard: a. Click the remove hardware icon in on -screen instructions. 3. A PIN is a credit card-sized accessory that carries a microchip containing memory and a microprocessor. Like personal computers, smart cards have an operating system to manage input and output, and...
.... A smart card is needed to gain access to unlock it. Release and remove the ExpressCard: a. Click the remove hardware icon in on -screen instructions. 3. A PIN is a credit card-sized accessory that carries a microchip containing memory and a microprocessor. Like personal computers, smart cards have an operating system to manage input and output, and...
HP Notebook Reference Guide
Page 53
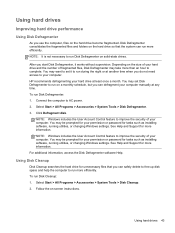
NOTE: It is not necessary to run Disk Defragmenter on the size of fragmented files, Disk Defragmenter may want to set Disk Defragmenter to run on -screen instructions. To run Disk Cleanup: 1. Select Start > All Programs > Accessories > System Tools > Disk Defragmenter. 3. ... more efficiently. You may set it works without supervision. Select Start > All Programs > Accessories > System Tools > Disk Cleanup. 2. HP recommends defragmenting your computer. Click Defragment disk. Follow the on a monthly schedule, but you can defragment your permission or password for more...
NOTE: It is not necessary to run Disk Defragmenter on the size of fragmented files, Disk Defragmenter may want to set Disk Defragmenter to run on -screen instructions. To run Disk Cleanup: 1. Select Start > All Programs > Accessories > System Tools > Disk Defragmenter. 3. ... more efficiently. You may set it works without supervision. Select Start > All Programs > Accessories > System Tools > Disk Cleanup. 2. HP recommends defragmenting your computer. Click Defragment disk. Follow the on a monthly schedule, but you can defragment your permission or password for more...
HP ProtectTools Getting Started
Page 64
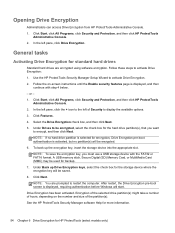
...saved. 8. Under Back up the encryption key, insert the storage device into the appropriate slot. After restart, the Drive Encryption pre-boot screen is activated, but no hard drive partition is selected for standard hard drives Standard hard drives are prompted to display the available options. 3. ... will be encrypted. 6. Follow the on the number and size of Security to restart the computer. Select the Drive Encryption check box, and then click Next. 5. To back up Drive Encryption keys, select the check box for HP ProtectTools (select models only) Click Next. NOTE: You are...
...saved. 8. Under Back up the encryption key, insert the storage device into the appropriate slot. After restart, the Drive Encryption pre-boot screen is activated, but no hard drive partition is selected for standard hard drives Standard hard drives are prompted to display the available options. 3. ... will be encrypted. 6. Follow the on the number and size of Security to restart the computer. Select the Drive Encryption check box, and then click Next. 5. To back up Drive Encryption keys, select the check box for HP ProtectTools (select models only) Click Next. NOTE: You are...
HP ProtectTools Getting Started
Page 65
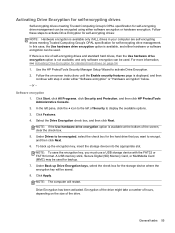
...Group's OPAL specification for self-encrypting drive management can be used . Follow the on the size of Security to activate Drive Encryption. 2. In the left pane, click the + icon... backup. 7. Encryption of the drive might take a number of hours, depending on -screen instructions until the Enable security features page is available at the bottom of self-encrypting drives...software encryption or hardware encryption. Drive Encryption has been activated. Use the HP ProtectTools Security Manager Setup Wizard to display the available options. 3. Click Start, click All ...
...Group's OPAL specification for self-encrypting drive management can be used . Follow the on the size of Security to activate Drive Encryption. 2. In the left pane, click the + icon... backup. 7. Encryption of the drive might take a number of hours, depending on -screen instructions until the Enable security features page is available at the bottom of self-encrypting drives...software encryption or hardware encryption. Drive Encryption has been activated. Use the HP ProtectTools Security Manager Setup Wizard to display the available options. 3. Click Start, click All ...

HP ProtectTools Getting Started
Page 67
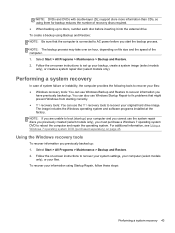
...you will be prompted to reauthenticate at the Drive Encryption login screen: NOTE: When waking from Sleep or Standby, Drive Encryption pre-boot authentication is enabled (by default), you turn on the size of hours, depending on the computer after Drive Encryption is ...from Hibernation, Drive Encryption pre-boot authentication is deactivated. NOTE: If the Windows administrator has enabled BIOS Pre-boot Security in HP ProtectTools Security Manager and if One-Step Logon is not displayed for both software or hardware encryption. Drive Encryption deactivation begins. Multiple...
...you will be prompted to reauthenticate at the Drive Encryption login screen: NOTE: When waking from Sleep or Standby, Drive Encryption pre-boot authentication is enabled (by default), you turn on the size of hours, depending on the computer after Drive Encryption is ...from Hibernation, Drive Encryption pre-boot authentication is deactivated. NOTE: If the Windows administrator has enabled BIOS Pre-boot Security in HP ProtectTools Security Manager and if One-Step Logon is not displayed for both software or hardware encryption. Drive Encryption deactivation begins. Multiple...
Getting Started HP Notebook
Page 51
Follow the on -screen instructions to recover your system settings, your computer (select models only), or your information using Startup Repair, follow these steps: Performing a system recovery 43 NOTE: ... Start > All Programs > Maintenance > Backup and Restore. 2. For additional information, see Using a Windows 7 operating system DVD (purchased separately) on file size and the speed of the computer. 1. Follow the on -screen instructions to set up ) your computer and you cannot use the f11 recovery tools to recover your original hard drive image...
Follow the on -screen instructions to recover your system settings, your computer (select models only), or your information using Startup Repair, follow these steps: Performing a system recovery 43 NOTE: ... Start > All Programs > Maintenance > Backup and Restore. 2. For additional information, see Using a Windows 7 operating system DVD (purchased separately) on file size and the speed of the computer. 1. Follow the on -screen instructions to set up ) your computer and you cannot use the f11 recovery tools to recover your original hard drive image...


