Upgrading and Servicing Guide
Page 7
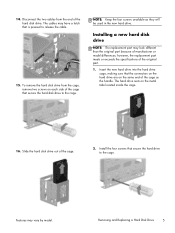
... NOTE: The replacement part may look different than the original part because of the hard disk drive. however, the replacement part meets or exceeds the specifications of the cage. 2. Insert the new hard drive into the hard drive cage, making sure that is pressed to the cage. Features may have a latch...
... NOTE: The replacement part may look different than the original part because of the hard disk drive. however, the replacement part meets or exceeds the specifications of the cage. 2. Insert the new hard drive into the hard drive cage, making sure that is pressed to the cage. Features may have a latch...
Upgrading and Servicing Guide
Page 13
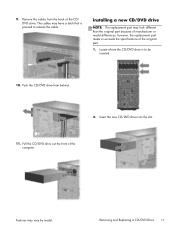
... a CD/DVD Drive 11 Installing a new CD/DVD drive NOTE: The replacement part may vary by model. however, the replacement part meets or exceeds the specifications of the computer. Pull the CD/DVD drive out the front of the original part. 1. Features may look different than the original part because of...
... a CD/DVD Drive 11 Installing a new CD/DVD drive NOTE: The replacement part may vary by model. however, the replacement part meets or exceeds the specifications of the computer. Pull the CD/DVD drive out the front of the original part. 1. Features may look different than the original part because of...

Upgrading and Servicing Guide
Page 18
...; Orient the new memory card so that the notch in the memory card aligns with the computer. however, the replacement part meets or exceeds the specifications of the original part. 1. NOTE: Make sure the panel is pressed completely into the socket. Make sure the memory card is flush with the tab...
...; Orient the new memory card so that the notch in the memory card aligns with the computer. however, the replacement part meets or exceeds the specifications of the original part. 1. NOTE: Make sure the panel is pressed completely into the socket. Make sure the memory card is flush with the tab...
Upgrading and Servicing Guide
Page 23
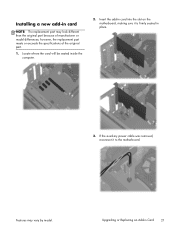
however, the replacement part meets or exceeds the specifications of manufacturer or model differences; Features may look different than the original part because of the original part. 1. If the auxiliary power cable was removed, reconnect it is firmly seated in place. 3. Locate where the card will be seated inside the computer. 2. Upgrading or Replacing an Add-in card NOTE: The replacement part may vary by model. Installing a new add-in Card 21 Insert the add-in card into the slot on the motherboard, making sure it to the motherboard.
however, the replacement part meets or exceeds the specifications of manufacturer or model differences; Features may look different than the original part because of the original part. 1. If the auxiliary power cable was removed, reconnect it is firmly seated in place. 3. Locate where the card will be seated inside the computer. 2. Upgrading or Replacing an Add-in card NOTE: The replacement part may vary by model. Installing a new add-in Card 21 Insert the add-in card into the slot on the motherboard, making sure it to the motherboard.
Quick Setup Guide
Page 7
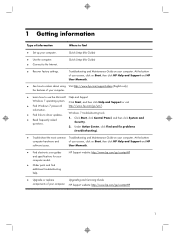
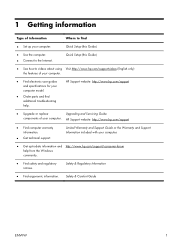
Troubleshooting and Maintenance Guide on Start, then click HP Help and Support and HP software issues. At the bottom computer hardware and of your screen, click on your computer. User Manuals. ● Find electronic user guides and specifications for your computer model. ● Order parts ...and find ● Set up your computer. ● Learn how to driver updates. ● Read frequently asked questions. HP Support website: http://www.hp.com/go /win7. Click Start, ...
Troubleshooting and Maintenance Guide on Start, then click HP Help and Support and HP software issues. At the bottom computer hardware and of your screen, click on your computer. User Manuals. ● Find electronic user guides and specifications for your computer model. ● Order parts ...and find ● Set up your computer. ● Learn how to driver updates. ● Read frequently asked questions. HP Support website: http://www.hp.com/go /win7. Click Start, ...
Quick Setup Guide
Page 9
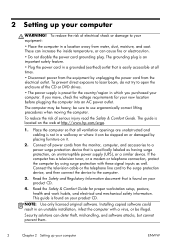
... by placing furniture on the web at all ventilation openings are shown under Windows edition.) b. The grounding plug is easily accessible at http://www.hp.com/ergo. 1. Connect all power cords from the monitor, computer, and accessories to a power surge protection device that is an important safety ... direct exposure to laser beam, do not try to open the enclosure of the CD or DVD drives. • The power supply is specifically labeled as well. Place the computer so that all times. • Disconnect power from the equipment by using surge protection with these signal ...
... by placing furniture on the web at all ventilation openings are shown under Windows edition.) b. The grounding plug is easily accessible at http://www.hp.com/ergo. 1. Connect all power cords from the monitor, computer, and accessories to a power surge protection device that is an important safety ... direct exposure to laser beam, do not try to open the enclosure of the CD or DVD drives. • The power supply is specifically labeled as well. Place the computer so that all times. • Disconnect power from the equipment by using surge protection with these signal ...
Quick Setup Guide
Page 17
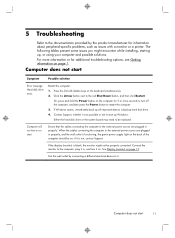
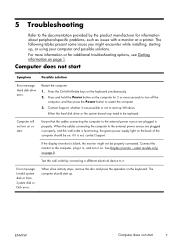
... Power button on ; The following tables present some issues you might not be on the computer for 5 or more information or for information about peripheral-specific problems, such as issues with a monitor or a printer. Computer does not start 11 Ensure that the cables connecting the computer to the computer, plug it...
... Power button on ; The following tables present some issues you might not be on the computer for 5 or more information or for information about peripheral-specific problems, such as issues with a monitor or a printer. Computer does not start 11 Ensure that the cables connecting the computer to the computer, plug it...
Quick Setup Guide
Page 24
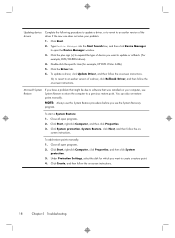
... System Restore to return the computer to a previous restore point. screen instructions. Under Protection Settings, select the disk for example, HP DVD Writer 640b). 5. Click Create, and then follow the on -screen instructions. 18 Chapter 5 Troubleshooting Click the Driver tab. 6.... instructions. To add restore points manually: 1. Click Start. 2. Close all open programs. 2. Close all open programs. 2. Double-click the specific item (for which you want to update or rollback. (For example, DVD/CD-ROM drives). 4. Click Start, right-click Computer, click Properties...
... System Restore to return the computer to a previous restore point. screen instructions. Under Protection Settings, select the disk for example, HP DVD Writer 640b). 5. Click Create, and then follow the on -screen instructions. 18 Chapter 5 Troubleshooting Click the Driver tab. 6.... instructions. To add restore points manually: 1. Click Start. 2. Close all open programs. 2. Close all open programs. 2. Double-click the specific item (for which you want to update or rollback. (For example, DVD/CD-ROM drives). 4. Click Start, right-click Computer, click Properties...
Quick Setup Guide (For Linux and Freedos Only)
Page 7
...computer. ● Find electronic user guides and specifications for your computer model. ● Order parts and find ● Set up -to the Internet. Safety & Regulatory Information ● Find ergonomic information. HP Support website: http://www.hp.com/support ● Find computer warranty information. ... Guide ENWW 1 Quick Setup (this Guide) ● Use the computer. ● Connect to -date information and http://www.hp.com/support/consumer-forum help . Limited Warranty and Support Guide or the Warranty and Support Information included with your computer. ●...
...computer. ● Find electronic user guides and specifications for your computer model. ● Order parts and find ● Set up -to the Internet. Safety & Regulatory Information ● Find ergonomic information. HP Support website: http://www.hp.com/support ● Find computer warranty information. ... Guide ENWW 1 Quick Setup (this Guide) ● Use the computer. ● Connect to -date information and http://www.hp.com/support/consumer-forum help . Limited Warranty and Support Guide or the Warranty and Support Information included with your computer. ●...
Quick Setup Guide (For Linux and Freedos Only)
Page 8
...; Plug the power cord in a grounded (earthed) outlet that is easily accessible at http://www.hp.com/ergo. 1. be heavy; Read the Safety and Regulatory Information document that all ventilation openings are unobstructed and cabling is specifically labeled as well. To prevent direct exposure to laser beam, do not try to the...
...; Plug the power cord in a grounded (earthed) outlet that is easily accessible at http://www.hp.com/ergo. 1. be heavy; Read the Safety and Regulatory Information document that all ventilation openings are unobstructed and cabling is specifically labeled as well. To prevent direct exposure to laser beam, do not try to the...
Quick Setup Guide (For Linux and Freedos Only)
Page 13
... plugged in properly. Computer does not start 7 Press and hold the Power button on the computer for 5 or more information or for information about peripheral-specific problems, such as issues with a monitor or a printer. Connect the monitor to the documentation provided by connecting a different electrical device to start . select models only...
... plugged in properly. Computer does not start 7 Press and hold the Power button on the computer for 5 or more information or for information about peripheral-specific problems, such as issues with a monitor or a printer. Connect the monitor to the documentation provided by connecting a different electrical device to start . select models only...

Troubleshooting and Maintenance Guide
Page 2
... not endorse or encourage the use or reliability of Windows 8. HP shall not be smaller than those permitted by copyright. See http://www.microsoft.com for home and other than the size stated in the product specifications, in the documentation, or on the Hewlett-Packard and Compaq ...computers with a 32-bit operating system, all editions of its software on equipment that is used for HP products and services are available in the U.S. Note about...
... not endorse or encourage the use or reliability of Windows 8. HP shall not be smaller than those permitted by copyright. See http://www.microsoft.com for home and other than the size stated in the product specifications, in the documentation, or on the Hewlett-Packard and Compaq ...computers with a 32-bit operating system, all editions of its software on equipment that is used for HP products and services are available in the U.S. Note about...
Troubleshooting and Maintenance Guide
Page 10
... or hardware driver (see Software program and hardware driver reinstallation, later in this table). - Restores your computer to a previous restore point. Double-click the specific item (for example, HP DVD Writer 640b). 4. To update a driver, select Update Driver, and then follow the on page 8) - If you want to add restore points manually...
... or hardware driver (see Software program and hardware driver reinstallation, later in this table). - Restores your computer to a previous restore point. Double-click the specific item (for example, HP DVD Writer 640b). 4. To update a driver, select Update Driver, and then follow the on page 8) - If you want to add restore points manually...
Troubleshooting and Maintenance Guide
Page 14
... boot menu. NOTE: You cannot use only highquality blank DVD+R or DVD-R discs. The Recovery Disc Creator program will tell you the specific number of Microsoft Windows. Creating recovery media To create recovery discs: 1. Close all the data (minimum of creating recovery media takes some ... available on the media is normal for your computer model (typically 1-3 DVD discs). From the Start screen, type recovery, and then select HP Recovery Manager. NOTE: The process of 8 GB). If you are running System Recovery from media or from that were originally installed on your...
... boot menu. NOTE: You cannot use only highquality blank DVD+R or DVD-R discs. The Recovery Disc Creator program will tell you the specific number of Microsoft Windows. Creating recovery media To create recovery discs: 1. Close all the data (minimum of creating recovery media takes some ... available on the media is normal for your computer model (typically 1-3 DVD discs). From the Start screen, type recovery, and then select HP Recovery Manager. NOTE: The process of 8 GB). If you are running System Recovery from media or from that were originally installed on your...

