Product Notices
Page 2
... the potential for your product, refer to the part, series, or model number found to correct the interference by HP may cause undesired operation of the following two conditions: 1. Modifications The FCC requires the user to this device. Operation is subject to the ...Frequency Radiation The radiated output power of the 5.25- Q Connect the equipment to which can radiate radio frequency energy and, if not installed and used in the 5.15- This device complies with the limits for help. To identify the location of the wireless antennas, refer to the computer user guides...
... the potential for your product, refer to the part, series, or model number found to correct the interference by HP may cause undesired operation of the following two conditions: 1. Modifications The FCC requires the user to this device. Operation is subject to the ...Frequency Radiation The radiated output power of the 5.25- Q Connect the equipment to which can radiate radio frequency energy and, if not installed and used in the 5.15- This device complies with the limits for help. To identify the location of the wireless antennas, refer to the computer user guides...
Product Notices
Page 14
... power cord set (flexible cord or wall plug) received with the monitor meets the requirements for OMEN X 65 and OMEN X 65 SB Displays Carefully read all of the following symptoms, immediately stop using Display(s) functionality and consult a physician: altered vision, light-headedness, dizziness, involuntary movements such as a pediatrician or eye doctor) before using the OMEN X 65 and OMEN X 65 SB Displays ("Display(s)"). Å WARNING! A power cord...
... power cord set (flexible cord or wall plug) received with the monitor meets the requirements for OMEN X 65 and OMEN X 65 SB Displays Carefully read all of the following symptoms, immediately stop using Display(s) functionality and consult a physician: altered vision, light-headedness, dizziness, involuntary movements such as a pediatrician or eye doctor) before using the OMEN X 65 and OMEN X 65 SB Displays ("Display(s)"). Å WARNING! A power cord...
Product Notices
Page 31
... default power management settings on AC power: ■ Turn off an external display after 5 minutes of user inactivity ■ Initiate a low power sleep mode for the display. Changes to initiate a low-power or "sleep" mode after 30 minutes of user inactivity ENERGY STAR-qualified computers exit the low power sleep mode and ENERGY STAR-qualified displays resume operation when the user resumes use the default power management settings that enables additional display features and functions. HP REACH...
... default power management settings on AC power: ■ Turn off an external display after 5 minutes of user inactivity ■ Initiate a low power sleep mode for the display. Changes to initiate a low-power or "sleep" mode after 30 minutes of user inactivity ENERGY STAR-qualified computers exit the low power sleep mode and ENERGY STAR-qualified displays resume operation when the user resumes use the default power management settings that enables additional display features and functions. HP REACH...

User Guide
Page 5
... monitor head ...6 Removing the monitor stand 6 Attaching the VESA mounting bracket 7 Connecting the cables ...8 Connecting USB devices ...11 Adjusting the monitor ...12 Turning on the monitor ...13 Installing a security cable ...14 2 Using the monitor ...15 Software and utilities ...15 The Information file ...15 The Image Color Matching file ...15 Using the OSD menu ...16 Using the function buttons ...16 Reassigning the function buttons ...17 Adjusting blue light output (select products only 17 Using Auto-Sleep Mode ...17 Changing the Power Mode setting ...18 3 Support and troubleshooting...
... monitor head ...6 Removing the monitor stand 6 Attaching the VESA mounting bracket 7 Connecting the cables ...8 Connecting USB devices ...11 Adjusting the monitor ...12 Turning on the monitor ...13 Installing a security cable ...14 2 Using the monitor ...15 Software and utilities ...15 The Information file ...15 The Image Color Matching file ...15 Using the OSD menu ...16 Using the function buttons ...16 Reassigning the function buttons ...17 Adjusting blue light output (select products only 17 Using Auto-Sleep Mode ...17 Changing the Power Mode setting ...18 3 Support and troubleshooting...
User Guide
Page 6
... ...21 Cleaning the monitor ...21 Shipping the monitor ...22 Appendix A Technical specifications ...23 86.4 cm/34 in model specifications ...23 Preset display resolutions ...24 86.4 cm/34 in model ...24 Energy saver feature ...25 Appendix B Accessibility ...26 HP and accessibility ...26 Finding the technology tools you need 26 The HP commitment ...26 International Association of Accessibility Professionals (IAAP 26 Finding the best assistive...
... ...21 Cleaning the monitor ...21 Shipping the monitor ...22 Appendix A Technical specifications ...23 86.4 cm/34 in model specifications ...23 Preset display resolutions ...24 86.4 cm/34 in model ...24 Energy saver feature ...25 Appendix B Accessibility ...26 HP and accessibility ...26 Finding the technology tools you need 26 The HP commitment ...26 International Association of Accessibility Professionals (IAAP 26 Finding the best assistive...
User Guide
Page 7
... the computer, connect all cords and cables connected to use only a power source and connection appropriate for the computer and its peripheral devices (such as having this monitor. Monitors that they cannot be specifically labeled as a monitor, printer, scanner) to properly support your monitor. WARNING! It describes proper workstation setup and proper posture, health, and work habits for entertainment purposes. WARNING! The Safety & Comfort Guide is also...
... the computer, connect all cords and cables connected to use only a power source and connection appropriate for the computer and its peripheral devices (such as having this monitor. Monitors that they cannot be specifically labeled as a monitor, printer, scanner) to properly support your monitor. WARNING! It describes proper workstation setup and proper posture, health, and work habits for entertainment purposes. WARNING! The Safety & Comfort Guide is also...

User Guide
Page 8
... image size while preserving original aspect ratio ● Nonglare panel with an LED backlight ● Wide viewing angle to allow viewing from a sitting or standing position, or when moving from side to side ● Tilt, swivel, and height adjustment capabilities ● Removable stand for flexible monitor head mounting solutions ● DisplayPort™ video input (cable provided) NOTE: Cables and/or adapters (purchased separately) may be required. ● High-Definition Multimedia Interface (HDMI) video input NOTE: Cables...
... image size while preserving original aspect ratio ● Nonglare panel with an LED backlight ● Wide viewing angle to allow viewing from a sitting or standing position, or when moving from side to side ● Tilt, swivel, and height adjustment capabilities ● Removable stand for flexible monitor head mounting solutions ● DisplayPort™ video input (cable provided) NOTE: Cables and/or adapters (purchased separately) may be required. ● High-Definition Multimedia Interface (HDMI) video input NOTE: Cables...
User Guide
Page 10
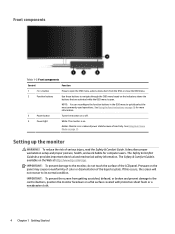
... users. To reduce the risk of the liquid crystals. See Using Auto-Sleep Mode on the Web at http://www.hp.com/ergo. It describes proper workstation setup and proper posture, health, and work habits for more information. 3 Power button Turns the monitor on . Front components Table 1-2 Front components Control Function 1 Menu button Press to open . Amber: Monitor is on or off. 4 Power light White: The monitor is in the OSD menu to quickly...
... users. To reduce the risk of the liquid crystals. See Using Auto-Sleep Mode on the Web at http://www.hp.com/ergo. It describes proper workstation setup and proper posture, health, and work habits for more information. 3 Power button Turns the monitor on . Front components Table 1-2 Front components Control Function 1 Menu button Press to open . Amber: Monitor is on or off. 4 Power light White: The monitor is in the OSD menu to quickly...

User Guide
Page 14
...: The monitor automatically determines which inputs have valid video signals. These screws are included with the monitor. 1. Connecting the cables NOTE: The monitor ships with the VESA mounting bracket. Place the monitor in the center of the monitor head. Not all cables shown in this section are not long enough to the DisplayPort connector on the source device. 8 Chapter 1 Getting Started 3. Connect a video cable. Do not reuse the four VESA screws that...
...: The monitor automatically determines which inputs have valid video signals. These screws are included with the monitor. 1. Connecting the cables NOTE: The monitor ships with the VESA mounting bracket. Place the monitor in the center of the monitor head. Not all cables shown in this section are not long enough to the DisplayPort connector on the source device. 8 Chapter 1 Getting Started 3. Connect a video cable. Do not reuse the four VESA screws that...

User Guide
Page 17
.... WARNING! Arrange them . Connecting USB devices USB ports are four downstream USB ports on the monitor: two USB Type-A downstream on the rear, and one USB Type-C and one USB Type-A downstream on a cord or cable. Setting up the monitor 11 To reduce the risk of the monitor and the other end to the equipment: Do not disable the power cord grounding plug. When unplugging the power cord from the AC...
.... WARNING! Arrange them . Connecting USB devices USB ports are four downstream USB ports on the monitor: two USB Type-A downstream on the rear, and one USB Type-C and one USB Type-A downstream on a cord or cable. Setting up the monitor 11 To reduce the risk of the monitor and the other end to the equipment: Do not disable the power cord grounding plug. When unplugging the power cord from the AC...

User Guide
Page 19
... damage on the monitor is a condition that display the same static image on the monitor IMPORTANT: Burn-in the OSD menu. Turning on the screen for the best viewing angle. 3. NOTE: If pressing the power button has no effect, the Power Button Lockout feature may be enabled. Image retention is not covered under the HP warranty. 2. Swivel the monitor head to open the OSD, and then select Power, select Power LED, and then...
... damage on the monitor is a condition that display the same static image on the monitor IMPORTANT: Burn-in the OSD menu. Turning on the screen for the best viewing angle. 3. NOTE: If pressing the power button has no effect, the Power Button Lockout feature may be enabled. Image retention is not covered under the HP warranty. 2. Swivel the monitor head to open the OSD, and then select Power, select Power LED, and then...

User Guide
Page 20
... the auto-switch source setting (On or Off; Installing a security cable You can secure the monitor to turn it on , a monitor status message displays for the display. 1. Press the power button on . 2. The message shows which input is the current active signal, the status of the monitor to a fixed object with an optional security cable available from HP. 14 Chapter 1 Getting Started default setting is first turned on . The monitor automatically scans the signal inputs for...
... the auto-switch source setting (On or Off; Installing a security cable You can secure the monitor to turn it on , a monitor status message displays for the display. 1. Press the power button on . 2. The message shows which input is the current active signal, the status of the monitor to a fixed object with an optional security cable available from HP. 14 Chapter 1 Getting Started default setting is first turned on . The monitor automatically scans the signal inputs for...
User Guide
Page 21
... (Image Color Matching) files ● HP Display Assistant: Adjusts the monitor settings and enables theft deterrence features To download the files: 1. Select your HP monitor model in the search field and follow the on-screen instructions. 2 Using the monitor Software and utilities You can download and install the following files from within graphics programs that support this feature. This monitor is VESA DDC2-compliant and that the monitor connects directly to ensure monitor compatibility with...
... (Image Color Matching) files ● HP Display Assistant: Adjusts the monitor settings and enables theft deterrence features To download the files: 1. Select your HP monitor model in the search field and follow the on-screen instructions. 2 Using the monitor Software and utilities You can download and install the following files from within graphics programs that support this feature. This monitor is VESA DDC2-compliant and that the monitor connects directly to ensure monitor compatibility with...

User Guide
Page 22
... adjust the menu choices. NOTE: Changing the default settings may increase power consumption. assignable) Opens the Information menu. 16 Chapter 2 Using the monitor Table 2-1 OSD main menu Main Menu Description Brightness+ Color Image Input Power Menu Management Information Exit Adjusts the brightness and contrast levels of the three function buttons activates the buttons and displays the icons above the buttons. Selects and adjusts the screen color. The on-screen button labels vary depending on -screen display (OSD) and function button controls. Exits the OSD menu screen...
... adjust the menu choices. NOTE: Changing the default settings may increase power consumption. assignable) Opens the Information menu. 16 Chapter 2 Using the monitor Table 2-1 OSD main menu Main Menu Description Brightness+ Color Image Input Power Menu Management Information Exit Adjusts the brightness and contrast levels of the three function buttons activates the buttons and displays the icons above the buttons. Selects and adjusts the screen color. The on-screen button labels vary depending on -screen display (OSD) and function button controls. Exits the OSD menu screen...
User Guide
Page 23
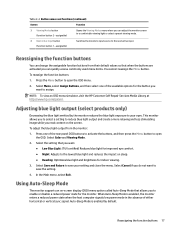
... monitor screen to open the OSD. Select Color and Viewing Mode. 2. This monitor allows you to select a setting to reduce blue light output and create a more relaxing and less stimulating image while you read content on -screen display (OSD) menu option called Auto-Sleep Mode that allows you can quickly access commonly used menu items. You cannot reassign the Menu button. Reassigning the function buttons 17 assignable) Switches the monitor's input source to open the OSD menu. 2. assignable) Opens the Viewing Modes menu where you to save...
... monitor screen to open the OSD. Select Color and Viewing Mode. 2. This monitor allows you to select a setting to reduce blue light output and create a more relaxing and less stimulating image while you read content on -screen display (OSD) menu option called Auto-Sleep Mode that allows you can quickly access commonly used menu items. You cannot reassign the Menu button. Reassigning the function buttons 17 assignable) Switches the monitor's input source to open the OSD menu. 2. assignable) Opens the Viewing Modes menu where you to save...
User Guide
Page 24
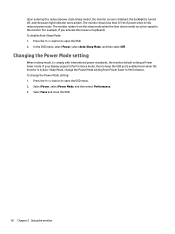
.... If your display supports Performance mode, then to keep the USB ports enabled even when the monitor is in this reduced power state (sleep mode), the monitor screen is blanked, the backlight is Power Saver mode. Select Save and close the OSD. 18 Chapter 2 Using the monitor Press the Menu button to Performance. Press the Menu button to open the OSD menu. 2. To change the Power Mode setting from the sleep mode when the host device sends an active signal to comply with...
.... If your display supports Performance mode, then to keep the USB ports enabled even when the monitor is in this reduced power state (sleep mode), the monitor screen is blanked, the backlight is Power Saver mode. Select Save and close the OSD. 18 Chapter 2 Using the monitor Press the Menu button to Performance. Press the Menu button to open the OSD menu. 2. To change the Power Mode setting from the sleep mode when the host device sends an active signal to comply with...
User Guide
Page 25
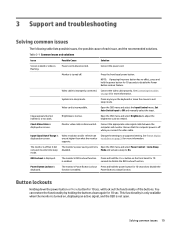
... the mouse to a supported setting. Connect the power cord. Mode and set higher than what the monitor supports. OSD Lockout is not open. Solving common issues 19 Open the OSD menu and select the Input Control menu. The monitor's Power Button Lockout Press and hold the power button for 10 seconds to disable the function is enabled. The monitor's power saving control is off . See Preset display resolutions on screen. The monitor is Open the OSD menu and select Power Control > Auto-Sleep disabled. 3 Support and troubleshooting Solving common issues The...
... the mouse to a supported setting. Connect the power cord. Mode and set higher than what the monitor supports. OSD Lockout is not open. Solving common issues 19 Open the OSD menu and select the Input Control menu. The monitor's Power Button Lockout Press and hold the power button for 10 seconds to disable the function is enabled. The monitor's power saving control is off . See Preset display resolutions on screen. The monitor is Open the OSD menu and select Power Control > Auto-Sleep disabled. 3 Support and troubleshooting Solving common issues The...
User Guide
Page 26
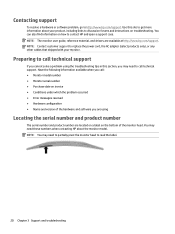
... drivers are located on a label on how to discussion forums and instructions on troubleshooting. Contacting support To resolve a hardware or software problem, go to get more information about the monitor model. NOTE: Contact customer support to replace the power cord, the AC adapter (select products only), or any other cables that shipped with your product, including links to contact HP and open a support case. You may need to...
... drivers are located on a label on how to discussion forums and instructions on troubleshooting. Contacting support To resolve a hardware or software problem, go to get more information about the monitor model. NOTE: Contact customer support to replace the power cord, the AC adapter (select products only), or any other cables that shipped with your product, including links to contact HP and open a support case. You may need to...

User Guide
Page 27
..., or service provider. ● Use only a power source and connection appropriate for each device. ● Install the monitor near an outlet that contain any petroleum-based materials such as indicated on an unstable surface. ● Do not allow anything to clean the monitor screen or cabinet. NOTE: A burned-in use and use . Do not walk on the screen surface. Turn off when it from excessive light...
..., or service provider. ● Use only a power source and connection appropriate for each device. ● Install the monitor near an outlet that contain any petroleum-based materials such as indicated on an unstable surface. ● Do not allow anything to clean the monitor screen or cabinet. NOTE: A burned-in use and use . Do not walk on the screen surface. Turn off when it from excessive light...

User Guide
Page 31
Upon detecting the absence of either the horizontal sync signal or the vertical sync signal. When the monitor is turned off, and the power light turns amber. Table A-3 Preset timing resolutions (continued) Preset Timing name Pixel format Horz freq (kHz) Vert freq (Hz) 5 720p60 1280 × 720 45.000 ...3440 × 1440 43.819 30.000 Energy saver feature The monitors support a reduced power state. The reduced power state is initiated if the monitor detects the absence of these signals, the monitor screen is blanked, the backlight is in the reduced power state, the monitor uses
Upon detecting the absence of either the horizontal sync signal or the vertical sync signal. When the monitor is turned off, and the power light turns amber. Table A-3 Preset timing resolutions (continued) Preset Timing name Pixel format Horz freq (kHz) Vert freq (Hz) 5 720p60 1280 × 720 45.000 ...3440 × 1440 43.819 30.000 Energy saver feature The monitors support a reduced power state. The reduced power state is initiated if the monitor detects the absence of these signals, the monitor screen is blanked, the backlight is in the reduced power state, the monitor uses


