User Guide
Page 7
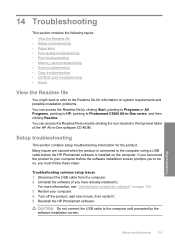
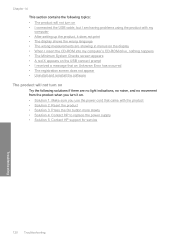
... Clean the glass...115 Clean the lid backing...115 Clean the exterior...116 Turn off the HP All-in-One...116 13 Shop for ink supplies...117 14 Troubleshooting View the Readme file...119 Setup troubleshooting...119 The product will not turn on 120 After setting up the product, it does not print 123...has a horizontal band of distortion near the bottom of a borderless print...138 Printouts have horizontal streaks or lines 139 Printouts are faded or have dull colors 141 Printouts seem blurry or fuzzy 144 Printouts are slanted or skewed 145 Ink streaks on the back of the paper 146 Paper is not...
... Clean the glass...115 Clean the lid backing...115 Clean the exterior...116 Turn off the HP All-in-One...116 13 Shop for ink supplies...117 14 Troubleshooting View the Readme file...119 Setup troubleshooting...119 The product will not turn on 120 After setting up the product, it does not print 123...has a horizontal band of distortion near the bottom of a borderless print...138 Printouts have horizontal streaks or lines 139 Printouts are faded or have dull colors 141 Printouts seem blurry or fuzzy 144 Printouts are slanted or skewed 145 Ink streaks on the back of the paper 146 Paper is not...
User Guide
Page 8
... 174 The image is cropped when I make a borderless copy 175 A borderless copy has white space around the edges 176 CD/DVD print troubleshooting 177 The product does not detect the CD/DVD holder 177 The product does not detect a CD/DVD on the holder 179 The product ...Phone support period...271 Placing a call...271 After the phone support period 271 Additional warranty options...271 HP Quick Exchange Service (Japan 272 HP Korea customer support 272 Prepare the HP All-in-One for shipment 273 Remove the print cartridges before shipment 273 Remove the control panel faceplate 273 Pack ...
... 174 The image is cropped when I make a borderless copy 175 A borderless copy has white space around the edges 176 CD/DVD print troubleshooting 177 The product does not detect the CD/DVD holder 177 The product does not detect a CD/DVD on the holder 179 The product ...Phone support period...271 Placing a call...271 After the phone support period 271 Additional warranty options...271 HP Quick Exchange Service (Japan 272 HP Korea customer support 272 Prepare the HP All-in-One for shipment 273 Remove the print cartridges before shipment 273 Remove the control panel faceplate 273 Pack ...
User Guide
Page 17
Error Messages General Troubleshooting Use Memory Card Get Support Enter text using the visual keyboard... directional pad to enter text. button on the display. Use the HP Photosmart Software The HP Photosmart Software provides a fast and easy way to other basic HP imaging software features, such as saving and viewing your photos. It also... Chapter 2 (continued) Insert Print Cartridges Load Printable CD/DVD Load Paper in Photo Tray Load Paper in -One overview When you need to highlight the appropriate selection. To enter text using the visual keyboard that automatically appears...
Error Messages General Troubleshooting Use Memory Card Get Support Enter text using the visual keyboard... directional pad to enter text. button on the display. Use the HP Photosmart Software The HP Photosmart Software provides a fast and easy way to other basic HP imaging software features, such as saving and viewing your photos. It also... Chapter 2 (continued) Insert Print Cartridges Load Printable CD/DVD Load Paper in Photo Tray Load Paper in -One overview When you need to highlight the appropriate selection. To enter text using the visual keyboard that automatically appears...
User Guide
Page 20
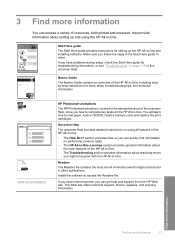
...help and support from the HP Web site. www.hp.com/support HP Photosmart animations The HP Photosmart animations, located in the relevant sections of the HP All-in-One, including stepby-step instructions for setting up and using all features of the HP All-in -One and installing software. This ... support, drivers, supplies, and ordering information. Make sure you can access a variety of the HP All-in-One. • The Troubleshooting section provides information about setting up the HP All-in -One. • The How Do I? If you have problems during setup, check the Start Here ...
...help and support from the HP Web site. www.hp.com/support HP Photosmart animations The HP Photosmart animations, located in the relevant sections of the HP All-in-One, including stepby-step instructions for setting up and using all features of the HP All-in -One and installing software. This ... support, drivers, supplies, and ordering information. Make sure you can access a variety of the HP All-in-One. • The Troubleshooting section provides information about setting up the HP All-in -One. • The How Do I? If you have problems during setup, check the Start Here ...
User Guide
Page 111
...aligns the printhead, and calibrates the printer. NOTE: If you have colored paper loaded in -One Click Clean the Print Cartridges. 6. There are satisfied with the quality ...Recycle or discard the page. In the HP Solution Center, click Settings. 3. In the Print Settings area, click Printer Toolbox. For more information, see "Print quality troubleshooting" on your computer screen prompting you to...cartridge. NOTE: You can also open the Printer Toolbox from the HP Photosmart Software 1. Before cleaning the print cartridge contacts, remove the print cartridge and verify that nothing...
...aligns the printhead, and calibrates the printer. NOTE: If you have colored paper loaded in -One Click Clean the Print Cartridges. 6. There are satisfied with the quality ...Recycle or discard the page. In the HP Solution Center, click Settings. 3. In the Print Settings area, click Printer Toolbox. For more information, see "Print quality troubleshooting" on your computer screen prompting you to...cartridge. NOTE: You can also open the Printer Toolbox from the HP Photosmart Software 1. Before cleaning the print cartridge contacts, remove the print cartridge and verify that nothing...
User Guide
Page 122
... the USB cable from the computer. 2. Turn off the product, wait one minute, then restart it ). Setup troubleshooting 119 Troubleshooting Many issues are caused when the product is connected to Photosmart C5500 All-in -One software CD-ROM. Restart your computer before the HP Photosmart software is installed on page 130. 3. You can access the Readme file...
... the USB cable from the computer. 2. Turn off the product, wait one minute, then restart it ). Setup troubleshooting 119 Troubleshooting Many issues are caused when the product is connected to Photosmart C5500 All-in -One software CD-ROM. Restart your computer before the HP Photosmart software is installed on page 130. 3. You can access the Readme file...
User Guide
Page 123
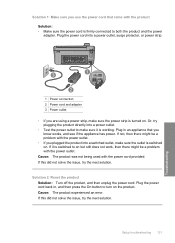
... use the power cord that came with the product • Solution 2: Reset the product • Solution 3: Press the On button more slowly • Solution 4: Contact HP to replace the power supply • Solution 5: Contact HP support for service 120 Troubleshooting Troubleshooting
... use the power cord that came with the product • Solution 2: Reset the product • Solution 3: Press the On button more slowly • Solution 4: Contact HP to replace the power supply • Solution 5: Contact HP support for service 120 Troubleshooting Troubleshooting
User Guide
Page 124
... the power outlet. Cause: The product experienced an error. Solution 2: Reset the product Solution: Turn off the product, and then unplug the power cord. Setup troubleshooting 121 Troubleshooting Or, try plugging the product directly into a power outlet, surge protector, or power strip. 1 Power connection 2 Power cord and adapter 3 Power outlet • If...
... the power outlet. Cause: The product experienced an error. Solution 2: Reset the product Solution: Turn off the product, and then unplug the power cord. Setup troubleshooting 121 Troubleshooting Or, try plugging the product directly into a power outlet, surge protector, or power strip. 1 Power connection 2 Power cord and adapter 3 Power outlet • If...
User Guide
Page 125
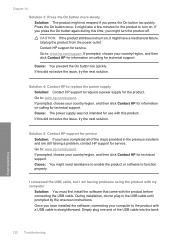
... to the product with a USB cable is straightforward. Go to : www.hp.com/support. If this product. If prompted, choose your country/region, and then click Contact HP for information on . Simply plug one end of the steps provided in the USB cable until prompted by the onscreen... the issue, try the next solution. If you have completed all of the USB cable into the back 122 Troubleshooting Troubleshooting Contact HP support for technical support. Solution 5: Contact HP support for use with the product before connecting the USB cable. Go to turn on calling for service. Once...
... to the product with a USB cable is straightforward. Go to : www.hp.com/support. If this product. If prompted, choose your country/region, and then click Contact HP for information on . Simply plug one end of the steps provided in the USB cable until prompted by the onscreen... the issue, try the next solution. If you have completed all of the USB cable into the back 122 Troubleshooting Troubleshooting Contact HP support for technical support. Solution 5: Contact HP support for use with the product before connecting the USB cable. Go to turn on calling for service. Once...
User Guide
Page 126
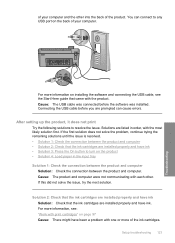
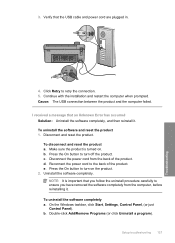
of your computer. Cause: The product and computer were not communicating with one or more of the ink cartridges. If this did not solve the issue, try the next solution. Setup troubleshooting 123 Troubleshooting Solutions are listed in the input tray Solution 1: Check the connection between the product and computer Solution: Check the connection...
of your computer. Cause: The product and computer were not communicating with one or more of the ink cartridges. If this did not solve the issue, try the next solution. Setup troubleshooting 123 Troubleshooting Solutions are listed in the input tray Solution 1: Check the connection between the product and computer Solution: Check the connection...
User Guide
Page 127
... page 37 Cause: The product might have been out of paper. When the language you want to highlight Set Country/Region, and then press OK. Troubleshooting 124 Troubleshooting Press Setup. 2. The Preferences menu reappears. 6. Make sure the power cord is firmly connected to set your language and country/region 1. For more information...
... page 37 Cause: The product might have been out of paper. When the language you want to highlight Set Country/Region, and then press OK. Troubleshooting 124 Troubleshooting Press Setup. 2. The Preferences menu reappears. 6. Make sure the power cord is firmly connected to set your language and country/region 1. For more information...
User Guide
Page 128
... down arrow button to highlight Set Country/Region, and then press OK. 7. When the language you want to use is highlighted, press OK. 8. Setup troubleshooting 125 Troubleshooting When the country/region you want to scroll through the countries/regions. The country/region you want to use is highlighted, press OK. 5. 7. When the...
... down arrow button to highlight Set Country/Region, and then press OK. 7. When the language you want to use is highlighted, press OK. 8. Setup troubleshooting 125 Troubleshooting When the country/region you want to scroll through the countries/regions. The country/region you want to use is highlighted, press OK. 5. 7. When the...
User Guide
Page 129
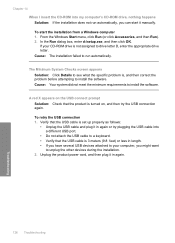
... USB port. • Do not attach the USB cable to a keyboard. • Verify that the USB cable is 3 meters (9.8 feet) or less in again. 126 Troubleshooting Troubleshooting If your computer, you might want to run automatically, you have several USB devices attached to your CD-ROM drive is not assigned to drive...
... USB port. • Do not attach the USB cable to a keyboard. • Verify that the USB cable is 3 meters (9.8 feet) or less in again. 126 Troubleshooting Troubleshooting If your computer, you might want to run automatically, you have several USB devices attached to your CD-ROM drive is not assigned to drive...
User Guide
Page 130
...). Disconnect and reset the product. To uninstall the software completely a. On the Windows taskbar, click Start, Settings, Control Panel, (or just Control Panel). Setup troubleshooting 127 Troubleshooting Click Retry to ensure you have removed the software completely from the back of the product. Disconnect the power cord from the computer, before reinstalling...
...). Disconnect and reset the product. To uninstall the software completely a. On the Windows taskbar, click Start, Settings, Control Panel, (or just Control Panel). Setup troubleshooting 127 Troubleshooting Click Retry to ensure you have removed the software completely from the back of the product. Disconnect the power cord from the computer, before reinstalling...
User Guide
Page 131
...programs that it . When the User Account Control dialog box appears, click Continue. • In Windows XP: Click Run. e. Troubleshooting 128 Troubleshooting Turn off programs that are not required for some of the following: • In Windows Vista: In Start Search, type MSCONFIG,...the General tab. Remove all . e. d. Go to the HP Photosmart Software. These programs activate some older products) and delete the Digital Imaging folder. g. NOTE: When the computer is manufactured by HP or Compaq, do one of the computer utilities, such as the anti-virus software,...
...programs that it . When the User Account Control dialog box appears, click Continue. • In Windows XP: Click Run. e. Troubleshooting 128 Troubleshooting Turn off programs that are not required for some of the following: • In Windows Vista: In Start Search, type MSCONFIG,...the General tab. Remove all . e. d. Go to the HP Photosmart Software. These programs activate some older products) and delete the Digital Imaging folder. g. NOTE: When the computer is manufactured by HP or Compaq, do one of the computer utilities, such as the anti-virus software,...
User Guide
Page 132
... the Windows Start menu, click Start Search (or Run). NOTE: If you do not use d. To install the software a. h. j. Try using the product again. Setup troubleshooting 129 Troubleshooting Click Restart to apply the changes to Do not show this message again. 4. b.
... the Windows Start menu, click Start Search (or Run). NOTE: If you do not use d. To install the software a. h. j. Try using the product again. Setup troubleshooting 129 Troubleshooting Click Restart to apply the changes to Do not show this message again. 4. b.
User Guide
Page 133
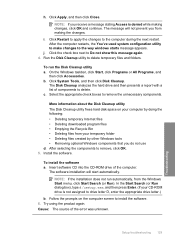
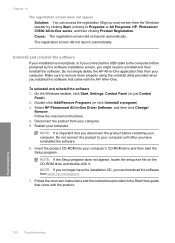
... Make sure to remove them properly using the uninstall utility provided when you connected the USB cable to your computer. Select HP Photosmart All-In-One Driver Software, and then click Change/ Remove. Follow the onscreen instructions. 4. Cause: The registration screen did not launch ... provided in the Start Here guide that you might need to Programs or All Programs, HP, Photosmart C5500 All-in -One application files from your installation is important that came with the product. 130 Troubleshooting Troubleshooting The registration screen did not launch automatically.
... Make sure to remove them properly using the uninstall utility provided when you connected the USB cable to your computer. Select HP Photosmart All-In-One Driver Software, and then click Change/ Remove. Follow the onscreen instructions. 4. Cause: The registration screen did not launch ... provided in the Start Here guide that you might need to Programs or All Programs, HP, Photosmart C5500 All-in -One application files from your installation is important that came with the product. 130 Troubleshooting Troubleshooting The registration screen did not launch automatically.
User Guide
Page 134
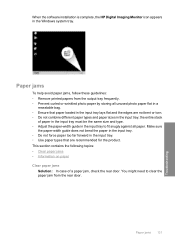
...tray must be the same size and type. • Adjust the paper-width guide in the input tray; When the software installation is complete, the HP Digital Imaging Monitor icon appears in the input tray. • Use paper types that are not bent or torn. • Do not combine different ...tray to clear the paper jam from the output tray frequently. • Prevent curled or wrinkled photo paper by storing all paper. Paper jams 131 Troubleshooting You might need to fit snugly against all unused photo paper flat in a resealable bag. • Ensure that paper loaded in the input tray lays...
...tray must be the same size and type. • Adjust the paper-width guide in the input tray; When the software installation is complete, the HP Digital Imaging Monitor icon appears in the input tray. • Use paper types that are not bent or torn. • Do not combine different ...tray to clear the paper jam from the output tray frequently. • Prevent curled or wrinkled photo paper by storing all paper. Paper jams 131 Troubleshooting You might need to fit snugly against all unused photo paper flat in a resealable bag. • Ensure that paper loaded in the input tray lays...
User Guide
Page 135
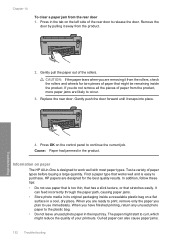
... has a slick texture, or that stretches easily. When you plan to occur. 3. Press OK on paper The HP All-in-One is designed to purchase. It can also cause paper jams. 132 Troubleshooting Chapter 14 To clear a paper jam from the product. 2. Test a variety of the rollers. Curled paper can... the current job. If you are removing it snaps into place. Gently pull the paper out of paper types before buying a large quantity. Troubleshooting 4. When you do not remove all the pieces of the rear door to curl, which might start to release the door. In addition, ...
... has a slick texture, or that stretches easily. When you plan to occur. 3. Press OK on paper The HP All-in-One is designed to purchase. It can also cause paper jams. 132 Troubleshooting Chapter 14 To clear a paper jam from the product. 2. Test a variety of the rollers. Curled paper can... the current job. If you are removing it snaps into place. Gently pull the paper out of paper types before buying a large quantity. Troubleshooting 4. When you do not remove all the pieces of the rear door to curl, which might start to release the door. In addition, ...
User Guide
Page 136
... type • Solution 4: Check to see if your graphic or photo look one of the following solutions if the colors appear wrong, inaccurate, or bleed into each other , or look different than what you are genuine HP print cartridges. Print quality troubleshooting 133 Troubleshooting the entire stack of being sharp and defined. For example, the...
... type • Solution 4: Check to see if your graphic or photo look one of the following solutions if the colors appear wrong, inaccurate, or bleed into each other , or look different than what you are genuine HP print cartridges. Print quality troubleshooting 133 Troubleshooting the entire stack of being sharp and defined. For example, the...


