Basic Guide
Page 22
...the USB cable from www.hp.com/support. 7. Turn off the product, wait one minute, then restart it ). 3. CAUTION: Do not connect the USB cable to the computer until after you might need to your computer. Select HP Photosmart All-In-One Driver Software, and then click... must follow these steps: Troubleshooting common setup issues 1. Make sure to the computer before restarting your computer until prompted by the software installation screen, you have already installed it . 5. Double-click Add/Remove Programs (or click Uninstall a program). 3. Follow the onscreen instructions. ...
...the USB cable from www.hp.com/support. 7. Turn off the product, wait one minute, then restart it ). 3. CAUTION: Do not connect the USB cable to the computer until after you might need to your computer. Select HP Photosmart All-In-One Driver Software, and then click... must follow these steps: Troubleshooting common setup issues 1. Make sure to the computer before restarting your computer until prompted by the software installation screen, you have already installed it . 5. Double-click Add/Remove Programs (or click Uninstall a program). 3. Follow the onscreen instructions. ...
User Guide
Page 71
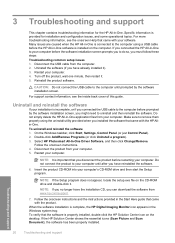
...number of the HP All-in -One. Press OK. Scan an image or document For original documents or images placed on the right front corner of the screen, near the time... the HP Photosmart Software. NOTE: Closing the HP Digital Imaging Monitor icon in the Windows system tray can start a scan from the HP All-in -One to lose... some of its scan functionality. When you to save an image in -One and computer must also be connected and turned on a Windows computer, look for the HP...
...number of the HP All-in -One. Press OK. Scan an image or document For original documents or images placed on the right front corner of the screen, near the time... the HP Photosmart Software. NOTE: Closing the HP Digital Imaging Monitor icon in the Windows system tray can start a scan from the HP All-in -One to lose... some of its scan functionality. When you to save an image in -One and computer must also be connected and turned on a Windows computer, look for the HP...

User Guide
Page 84
...available. NOTE: At this time, some portions of the product. Make sure the product is turned on your computer screen. CAUTION: If the product is low, a message appears on . The Printer Toolbox appears....until the print quality is low. NOTE: When the ink level for the HP All-in -One Work with a tri-color cartridge. You might damage the product if the print cartridges are available in ... In the HP Solution Center, click Settings, point to the far right side of the HP Web site are not docked safely when you open the Printer Toolbox from the HP Photosmart Software 1. ...
...available. NOTE: At this time, some portions of the product. Make sure the product is turned on your computer screen. CAUTION: If the product is low, a message appears on . The Printer Toolbox appears....until the print quality is low. NOTE: When the ink level for the HP All-in -One Work with a tri-color cartridge. You might damage the product if the print cartridges are available in ... In the HP Solution Center, click Settings, point to the far right side of the HP Web site are not docked safely when you open the Printer Toolbox from the HP Photosmart Software 1. ...
User Guide
Page 102
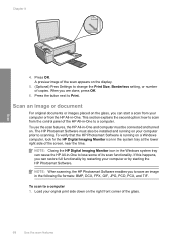
... Readme file by clicking Start, pointing to Programs or All Programs, pointing to HP, pointing to the Readme file for the product. Disconnect the USB cable from the computer. 2. Turn off the product, wait one minute, then restart it ). CAUTION: Do not connect the USB cable to ...3. Restart your computer before the HP Photosmart software is connected to the computer using a USB cable before the software installation screen prompts you to the computer until prompted by double-clicking the icon located in the top-level folder of the HP All-in-One software CD-ROM. Uninstall the ...
... Readme file by clicking Start, pointing to Programs or All Programs, pointing to HP, pointing to the Readme file for the product. Disconnect the USB cable from the computer. 2. Turn off the product, wait one minute, then restart it ). CAUTION: Do not connect the USB cable to ...3. Restart your computer before the HP Photosmart software is connected to the computer using a USB cable before the software installation screen prompts you to the computer until prompted by double-clicking the icon located in the top-level folder of the HP All-in-One software CD-ROM. Uninstall the ...
User Guide
Page 153
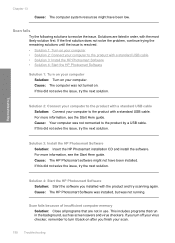
...are listed in order, with a standard USB cable • Solution 3: Install the HP Photosmart Software • Solution 4: Start the HP Photosmart Software Solution 1: Turn on your computer Solution: Turn on your scan. 150 Troubleshooting If this did not solve the issue, try scanning...such as screen savers and virus checkers. Cause: The computer was not turned on after you installed with a standard USB cable. Solution 3: Install the HP Photosmart Software Solution: Insert the HP Photosmart installation CD and install the software. Solution 4: Start the HP Photosmart Software Solution...
...are listed in order, with a standard USB cable • Solution 3: Install the HP Photosmart Software • Solution 4: Start the HP Photosmart Software Solution 1: Turn on your computer Solution: Turn on your scan. 150 Troubleshooting If this did not solve the issue, try scanning...such as screen savers and virus checkers. Cause: The computer was not turned on after you installed with a standard USB cable. Solution 3: Install the HP Photosmart Software Solution: Insert the HP Photosmart installation CD and install the software. Solution 4: Start the HP Photosmart Software Solution...


